This collection of guides will teach you the fundamentals and more complex aspects of playing Hytale, helping you progress in the game. Use the table of contents below to jump to the section you’re looking for. This is a complete guide for beginners!
Beginner’s Guide in Hytale
Pickaxe, Hatchet and Weapon (Rubble, Sticks and Plant Fiber)
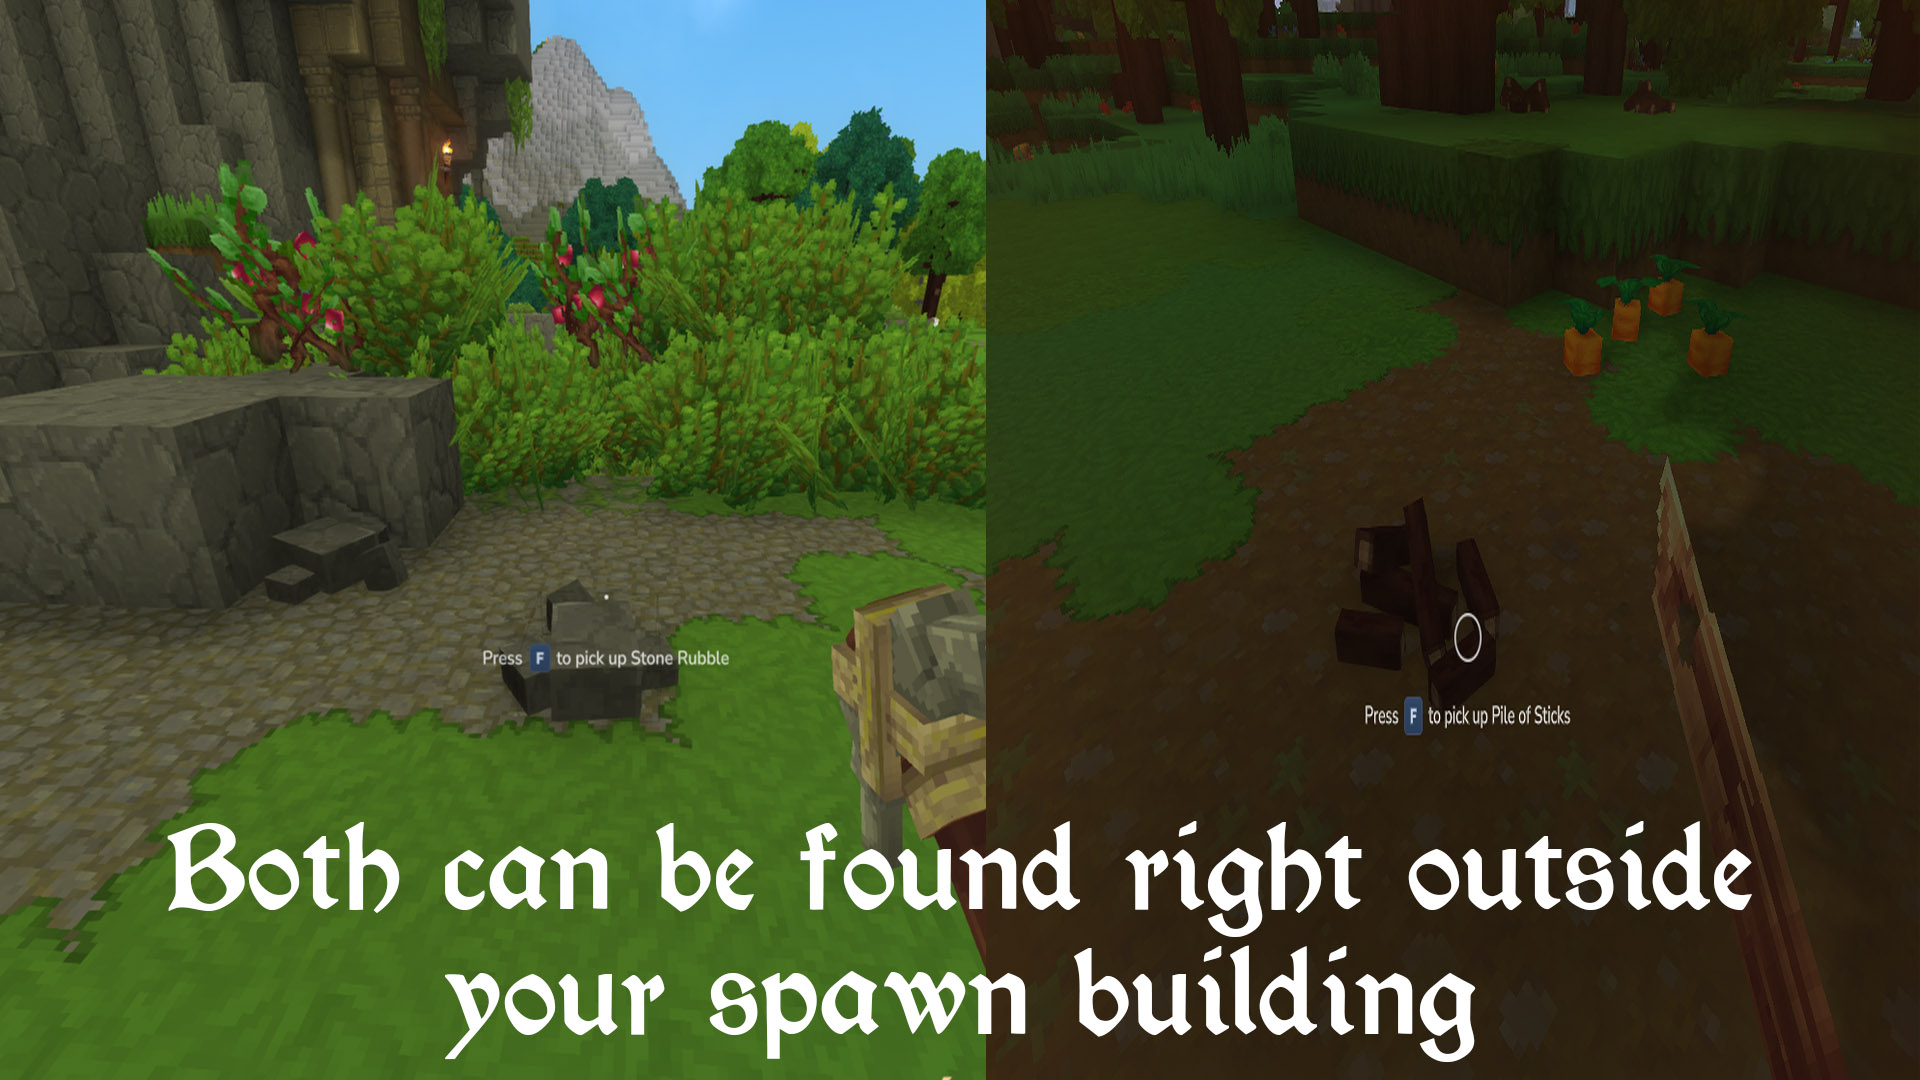
To get started making tools like an Axe for chopping wood, a Pickaxe for mining, and a basic Weapon, just step outside the starting building and gather Sticks and Rubble from the ground. Also, hit some grass to collect Plant Fiber. Open the crafting menu by pressing Tab, then choose the tool you want to make. The menu will show you what materials you need. Once you have everything, click ‘craft’. Finally, put your new tool on your hotbar (the numbers 1-9) and select it to start chopping trees and mining rocks.
The cool thing about Hytale trees is that all tree blocks drop once you cut down the bottom block.
Your First Base and Workbench
To unlock all the recipes in Hytale, start by using your first Pickaxe to mine stone in caves or by digging downwards. Next, use your Hatchet to gather wood by chopping the base of trees. Then, open the crafting menu (by pressing Tab), select the Workbench, and craft it. I suggest placing the Workbench inside your starting building as a temporary base and to protect yourself from nighttime monsters. You can also quickly reinforce the roof of your starting building with dirt or wood. Don’t rush, though – days in Hytale are much longer than in Minecraft, giving you plenty of time.
How to Craft Torches
You can obtain Plant Fiber by gathering it from grass, and Sticks by collecting them from the ground or chopping down trees. When you cut down your first tree, you’ll also receive Tree Sap. To craft Torches, simply press the Tab key – just like in Minecraft – and you’ll create four at a time.
How to Get Copper
You can find copper in naturally generated caves. Use a Workbench to craft torches, a basic sword, and a pickaxe first. Then, search around your starting area for a cave – bringing at least 20 torches is a good idea. As you go down into the cave, place torches regularly to light your way and help you find copper ore. Once you find it, use your pickaxe to mine a couple of veins. After that, it’s best to return to the surface to get better equipment before continuing your exploration.
Don’t dig straight down! You could fall into a hidden cave and die from the fall, lava, or enemies. Instead, dig downwards in a safer pattern, like creating a staircase as you go.
How to Craft Better Tools, Weapons and Armor
After getting Copper Ore blocks, you can make a Furnace using the Workbench’s crafting menu and some wood. Here’s a good order to focus on next:
- Shield: Craft the Armorer’s Workbench in the Crafting Section of the Workshop, place it down, then open it. Look for the last tab with Shields where you can craft your first Copper shield. They are amazing defensive tools for fighting enemies, mini bosses and bosses. You can equip the shield by pressing Tab and clicking the Z slot below your character, then you can access it at any time by pressing Z (RMB to wield it) and it’ll stay equipped alongside any one-handed weapon, block or tool.
- Copper Weapon: Craft the Blacksmith’s Anvil in the Crafting Section of the Workshop, place it down, then open it. I recommend crafting a one-handed Copper sword since it can be used alongside the shield for a great balance of defense and offense. Using weapons charges their skill bar which you can use with Q once full to do a lot of damage.
- Copper Tools: These can be crafted at the Workbench in the second Tools tab with no special station required.
- Get a Bow: Bows are really easy to craft unlike in Minecraft where you need Spiders. Just get some Sticks and Plant Fiber off the ground and craft a Bow and Arrows at the Workbench for some excellent ranged utility. You can shoot and retreat thus kiting back plenty of mobs and bosses.
- Get Armor: Armor is the last thing you should be using Copper on and any advanced material for that matter since higher-tier Weapons and Tools are usually more valuable. Still, Armor drastically boost your survivability so go for Gauntlets/Helm as low-cost options or Chest/Legs as higher-cost options at the Armorer’s Workbench. A good rule of thumb is to have armor from the previous tier and use materials in your current tier for weapons and tools first. For example, once you’re crafting stuff with Iron, have armor from the Copper tier, etc.
Combat Tips
Here’s everything you need to know about basic combat:
- One Handed VS Two Handed: For beginners I recommend crafting a one handed sword and Shield since it’s an easier combat style starting out. You can charge attack and basic attack and then block with the shield to avoid damage while moving back to recharge stamina and HP if necessary. It’s the easiest way to beat the Golem boss at the temple (See below). That said, Two Handed weapons like the Axe and Mace deal more damage, have better AOE attacks for multiple enemies and can still block. They’re just harder to play for beginners since they’re slower, require timing with charge attacks and don’t block the full damage.
- Shield Bash: Besides the Shield being the best for blocking early, you can also M1 while holding a shield up to shield bash which is useful for keeping multiple enemies away from you if you want to retreat.
- Charge Attack: Holding down LMB charges up a higher damage attack that usually moves you forward for some mobility. It’s a great way to range hostile mob attacks and then close the distance for damage then back away.
- Skills: On the bottom right you’ll see your weapon skill charging up and you can release it with Q once the bar is full for massive damage.
- Healing: If you get low on HP, sprint back behind an obstacle or to high ground to eat a Food item (Campfire/Cooked are best) and heal back up. Remember to play around blocks and sprint from blows while you heal up.
- Get Armor: Once you have weapons, shields and food, consider investing into crafting armor at the Armorer’s Workbench. Even if you’re at the Iron tier something like a few Copper Armor pieces go a long way to boost HP and defenses.
- Stealth: You can crouch with Ctrl by default to sneak behind a creature and charge attack it for a strong opening to a fight.
How to Heal
In this game, you recover health by eating food, but cooking it is much more effective than simply picking up items like Carrots. You can build a Campfire by pressing Tab, and use it to cook food such as Carrots and Mushrooms into Cooked Vegetables, or cook meat from animals like Cows, Bears, and Fish. Cooked food heals significantly more than raw food. To fuel your Campfire, you can use Sticks, Wood blocks, or Charcoal – which is created by smelting Ore with Wood.
How to Tame Horses and Travel Faster
Riding horses in Hytale is much simpler than in Minecraft. Just approach an adult horse and press the ‘F’ key to mount it. Sprinting while riding speeds things up considerably, making it great for exploring and quickly reaching places like the Forgotten Temple Gateway. Horses generally stay where you leave them, so you can reliably keep one near your base and find it waiting for you when you return.
Forgotten Temple Gateway – Memories, Life Essence Trading and Progression
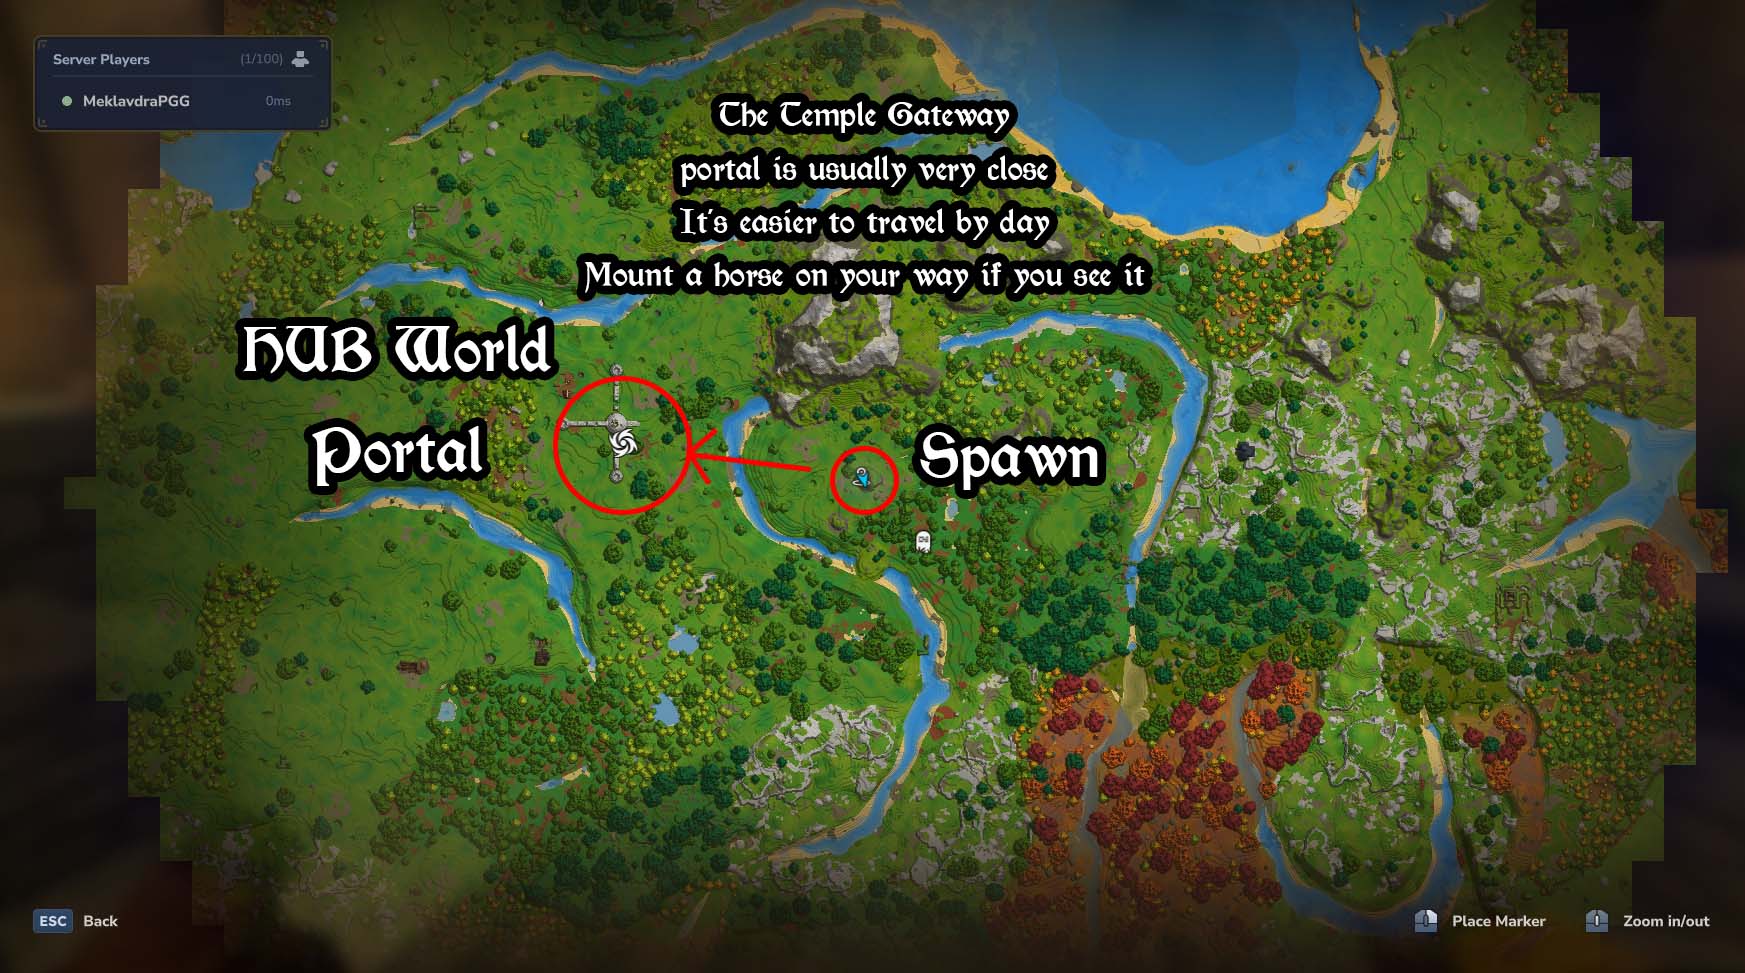
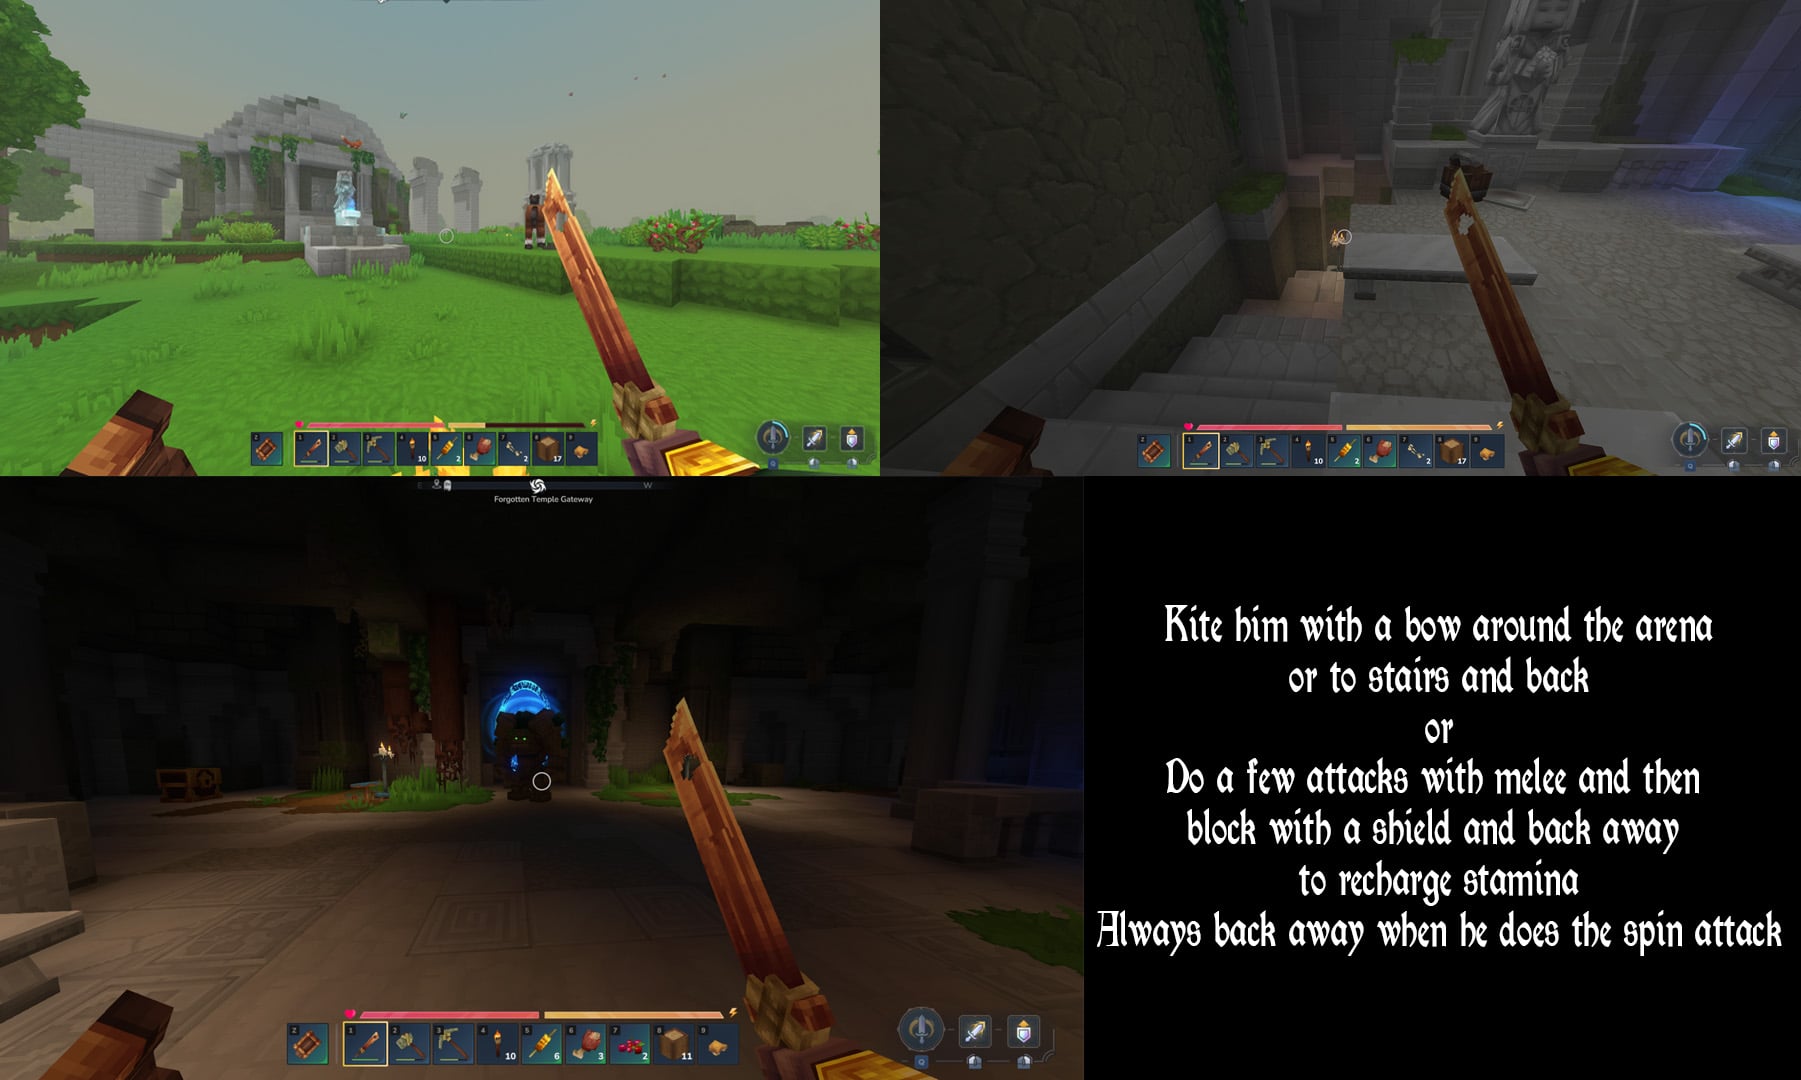
Once you’re equipped with copper weapons, a shield, cooked food, and ideally some armor, I suggest heading to the Forgotten Temple Gateway. This will unlock new features like trading Life Essence and obtaining Memories. Find the spiral-shaped Forgotten Temple Portal icon on your map (press ‘M’ to open it) and travel there. When you arrive, look for a glowing statue, go around it, and enter the temple by going down the stairs. You’ll then face your first mini-boss: a golem.
- The easiest way to beat it is either spamming it with arrows from a bow and backing away or using a one handed Copper sword and Shield.
- For the melee strategy, do a couple of M1 swings or a single charged attack and then block with your shield or move away depending on how close the golem is. Do a Q special attack once it’s charged.
- You can repeat this pattern to kill it but the most important part to know is that when you see the golem charging up his spin attack, don’t block it and instead sprint away keeping your distance as it finishes.
- Once you beat the golem, loot the chests in the room and enter the portal.
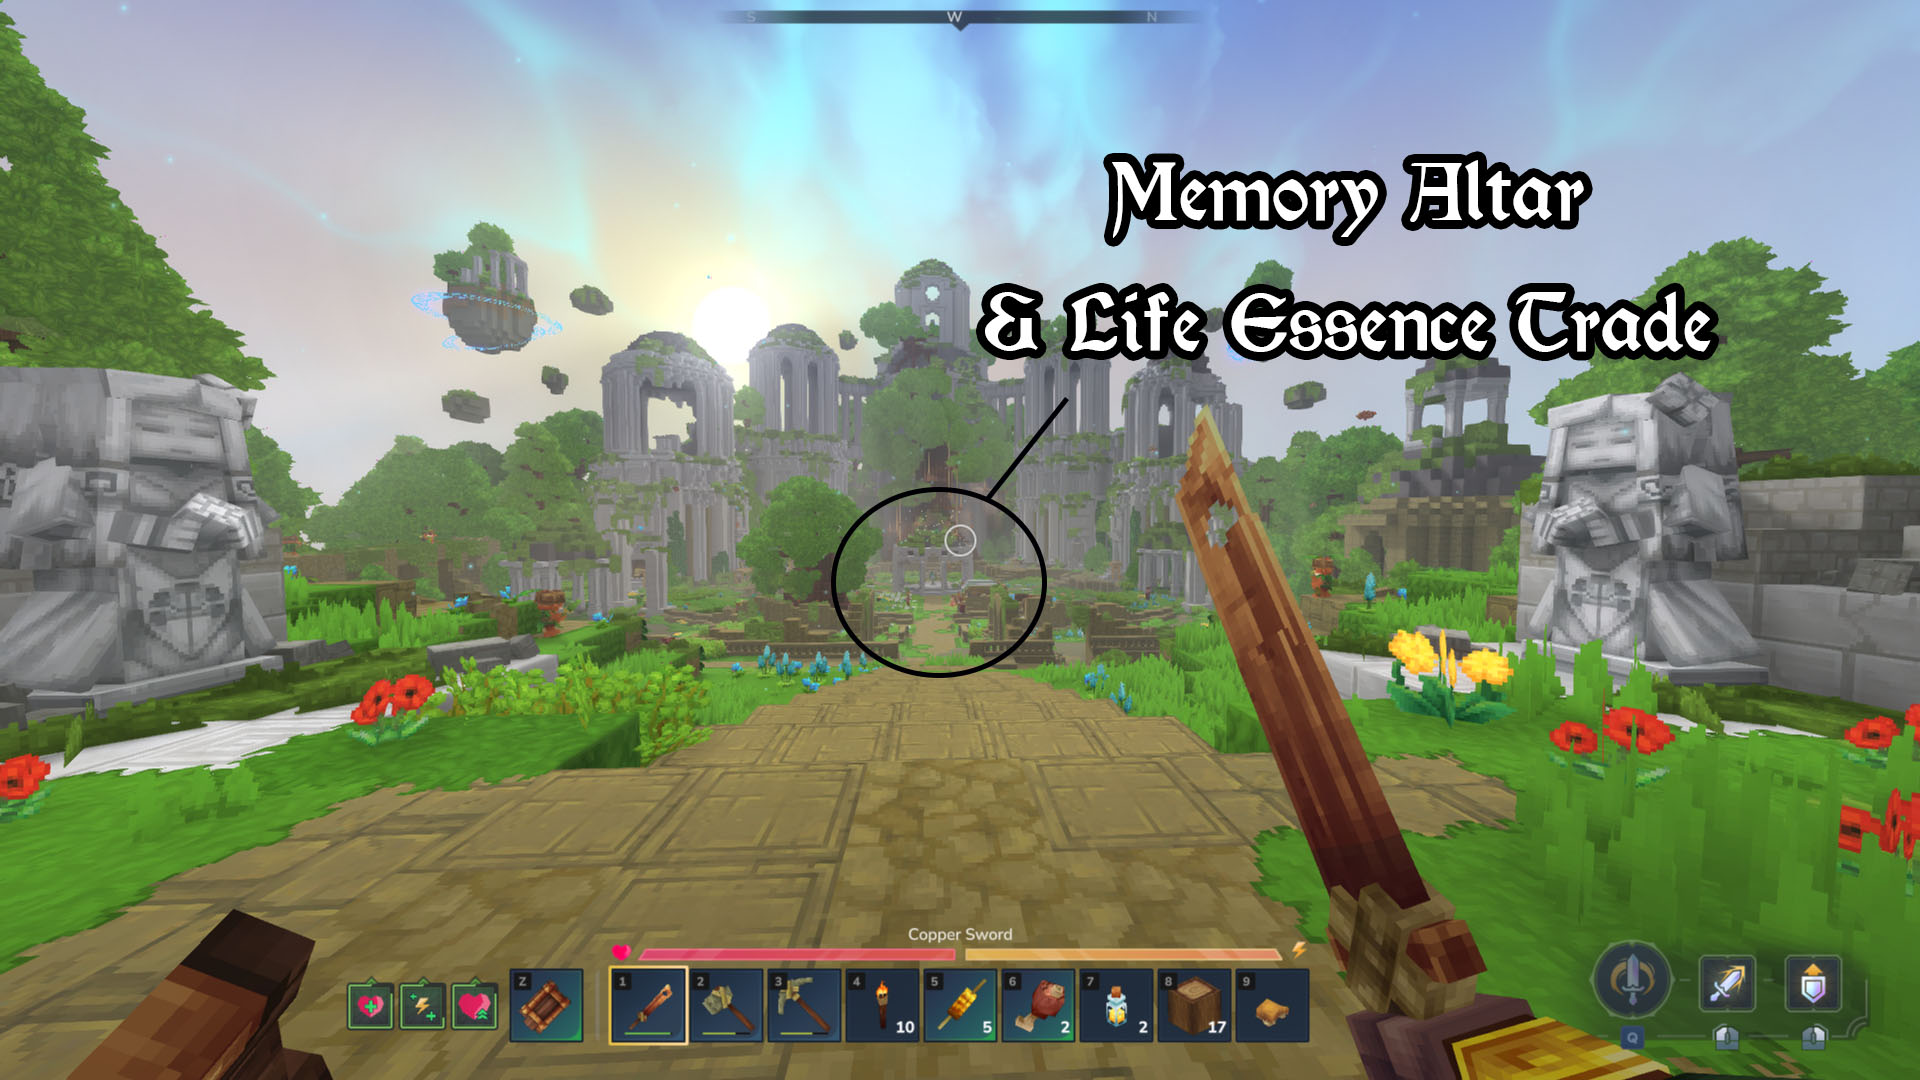
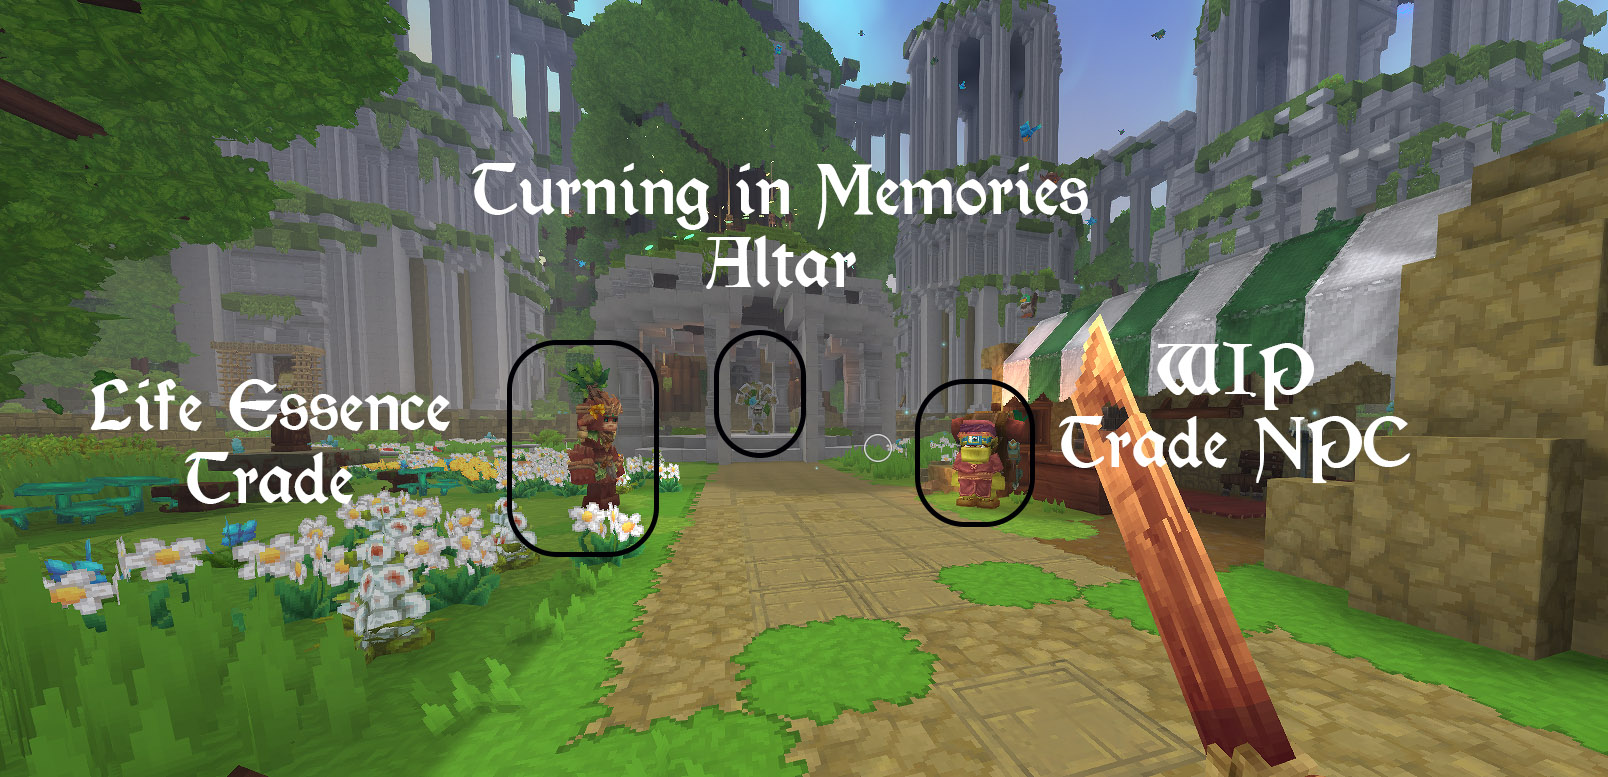
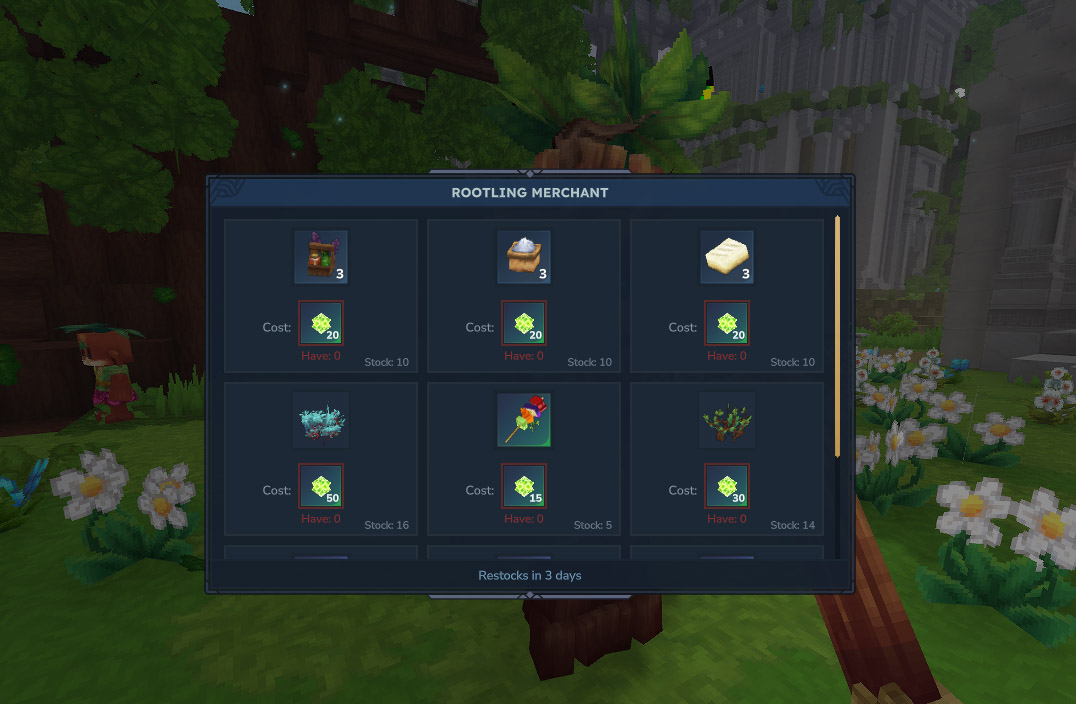
The portal leads to the Hytale HUB, a welcoming world with helpful characters. Head to the center to find an altar and trading NPCs. The altar lets you record memories of creatures simply by looking at them. You can then return to the HUB and trade those memories at the altar for rewards listed below. You can also exchange Life Essence with the NPCs near the altar.
How to Get and Use Essence of Life, Essence of Void and Voidheart
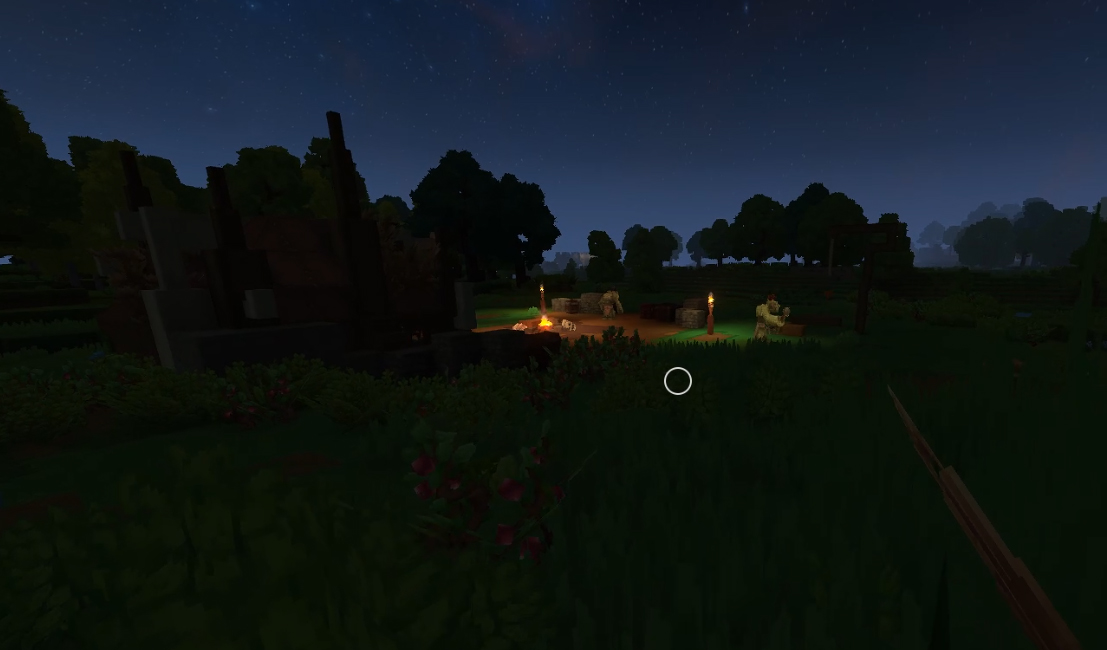
In Hytale, you mainly gather Essence of Life from plants and animals during the daytime. At night, you’ll find Essence of Void and Voidheart from the demonic creatures that appear. Here’s how to put these three resources to use:
- Essence of Life: Check out how to reach the Forgotten Temple Gateway HUB section above since you can use the Essence of Life to trade with the friendly NPC in the Gateway HUB world who is located near the altar at the center of the HUB world.
- Essence of Void: You can use this resources to craft the Arcanist’s Workbench at the Workbench as well as other recipes like the highest-tier armor at the Armorer’s Workbench.
- Voidheart: You can use the Voidheart to craft the highest-tier weapon at the Blacksmith’s Anvil.
How to Get Light, Medium and Heavy Leather – Advanced Weapons and Armor
You’ll need hide from animals to create better weapons and armor. First, gather hide by hunting. Then, use a Tanning Rack – which you can build at a Workbench – to turn the hide into leather. Simply place the hide in the rack to get the corresponding leather item.
- Light Hide: You can get it from rabbits and other smaller animals.
- Medium Hide: You can get it from from Cows, Horses and other animals larger than rabbits.
- Heavy Hide: You can get it from Bears and other large animals.
At the Tanning Rack, you can turn Light Hide into Light Leather, Medium Hide into Medium Leather, and Heavy Hide into Heavy Leather.
When to Upgrade Crafting Station Tiers
It’s best to upgrade your crafting stations only when you have the materials needed for higher-tier gear. For example, don’t upgrade your Armorer’s Workbench or Blacksmith’s Anvil to Tier 2 until you’ve found Iron, or to Tier 3 until you have Thorium. Similarly, wait to upgrade the Workbench to Tier 2 until you’ve collected at least 20 Void Essence (from nighttime or Void creatures) for the Arcanist’s Workbench, or 20 Venom Sacks (from Spiders) for the Alchemist’s Workbench. Upgrading before you have the materials is pointless, as you won’t be able to use the upgraded station anyway.
How to Check Death Location
When you die, a gravestone will appear on your map (press M) marking the spot and date of your death. This is the easiest way to find any items you dropped. If you died in a cave, you can try to follow your path, but if you’re lost, just go to the gravestone on your map and dig straight down. It’s best to dig in a spiral or using steps to avoid falling and taking damage – or worse!
How to Repair Equipment
You can make a Repair Kit using the Workbench – just switch to the second crafting tab. It requires Light Leather, which you get by processing Leather Hide from animals like rabbits. Once you have a Repair Kit, you can use it to fix the durability of any item that can wear down.
How to Find Enemy Camps

Open your map by pressing ‘M’ and look for marked locations. These spots are enemy camps where you can fight monsters and find valuable items. Defeat the enemies, then search chests, crates, boxes, and pots for loot – it’s a fantastic way to gather extra resources.
Read More
- United Airlines can now kick passengers off flights and ban them for not using headphones
- Crimson Desert: Disconnected Truth Puzzle Guide
- All 9 Coalition Heroes In Invincible Season 4 & Their Powers
- Mewgenics vinyl limited editions now available to pre-order
- Grey’s Anatomy Season 23 Confirmed for 2026-2027 Broadcast Season
- How to Get to the Undercoast in Esoteric Ebb
- The Boys Season 5 Spoilers: Every Major Character Death If the Show Follows the Comics
- NASA astronaut reveals horrifying tentacled alien is actually just a potato
- Viral Letterboxd keychain lets cinephiles show off their favorite movies on the go
- Does Mark survive Invincible vs Conquest 2? Comics reveal fate after S4E5
2026-01-13 22:24