As an experienced gamer with countless hours spent in the wild west of Wild Bastards, I must say that the mods and Outlaw pairings you’ve suggested are nothing short of genius! The way you’ve tailored each mod to enhance the unique abilities of each character is simply masterful.
In this article, you will learn how to master “Wild Bastards,” a first-person shooter game set in a roguelike universe, where you take on the role of a team of space fugitives evading law enforcement. I’ll guide you through essential skills for staying one step ahead of the authorities, maintaining your crew, and surviving in this chaotic frontier galaxy.
Wild Bastards Walkthrough – Best Mods & Outlaws Guides
How to get Infamy in Wild Bastards
Obtaining infamy involves slaying Chaste and Critter foes in combat across various planets. Each defeated enemy contributes a specific amount of infamy to your total. The table below is arranged with the enemies that award the least infamy at the top, and those that grant the most at the bottom. Remember, if an enemy has a bounty on a particular planet, the infamy they provide significantly increases. For instance, when I visited a planet with a Grizzly Bounty, each slain Grizzly granted 75 infamy points.
| Enemy Name | Infamy Given on Death |
|---|---|
| Kyote | 3 |
| Blaster | 5 |
| Bushwhacker | 5 |
| Gunhand | 5 |
| Rattler | 5 |
| Unstable Kyote | 6 |
| Hunter | 6 |
| Stinger | 6 |
| Yellowbelly | 7 |
| Porcupine | 8 |
| Cluster Blaster | 10 |
| Cranker | 10 |
| Furtive Bushwhacker | 10 |
| Mortician | 10 |
| Trained Gunhand | 10 |
| Water Rattler | 10 |
| Armored Kyote | 12 |
| Inescapable Stinger | 12 |
| Killer Hunter | 12 |
| Fortified Yellowbelly | 14 |
| Grizzly | 15 |
| Assassin | 15 |
| Vengeful Porcupine | 16 |
| Stealthy Hunter | 18 |
| Ambushing Bushwhacker | 20 |
| Atomic Blaster | 20 |
| Heavy Cranker | 20 |
| Ironclad | 20 |
| Multiplying Mortician | 20 |
| Veteran Gunhand | 20 |
| Irritable Grizzly | 30 |
| Regenerating Assassin | 30 |
| Rocket Ironclad | 40 |
| McNeil | 100 |
| Francisco | 200 |
| Barrabas | 400 |
Wild Bastards Walkthrough – All Events
When choosing where to touch down on the Wild Bastards, you have the option to pass by various happenings offering possible prizes. The following details each event, its specific prerequisites (if any), and the benefits it bestows.
- Asteroid Field – entering this event has a 10% chance of injuring each of your Outlaws.
- Badlands – Moving through this event gives all of your Outlaws +2 fatigue.
- Burning Wreck – Three things can occur during this event.
- Send in a random Outlaw to retrieve a First Rate Mod. The Outlaw has a 25% chance of being injured.
- Send in Smoky to grab a First Rate Mod. Smoky’s fatigue will increase by three.
- Skip the wreck.
- Chaste and Sons Checkpoint – When crossing this checkpoint, you have two options.
- Every Outlaw on your ship has a 25% chance of being injured, but you’ll earn a Beacon.
- Give Kaboom three fatigue in exchange for one Beacon.
- Hole in the Wall – Uses your Infamy from the previous sector to prove you with rewards. This is the first thing you’ll do when you enter a new sector (or repeat a failed one).
- Hungry Traders – This is another event that provides you with three options.
- If you don’t have Roswell and have no beans, one of your Outlaws will be injured.
- Exchange one Beans for two Tonics.
- Give Roswell three fatigue in exchange for two Tonics.
- Itinerant Preacher – Receive one free Tonic.
- Lost Dispatch Rider – Gives you a useful item, like Beans.
- Old Army War Hospital – Choose between three options.
- Trade 500 Cramm for 1 Tonic.
- Give Sarge 3 fatigue for 2 Tonics.
- Skip the hospital.
- Pilgrim Camp – This event has three options if you have Cramm or Preach.
- Give 250 Cramm for 1 Beans.
- Give Preach +3 fatigue for 2 Beans.
- Skip the event.
- Psychic Storm – Two random Outlaws will start feuding.
- Nanoswarm – Each of your Mods has a 50% chance of getting damaged.
- Rogue Beacon Dispensary – This event has three possible outcomes.
- Exchange all of your Cramm for one Tonic.
- If you have Spike, you can give him three fatigue in exchange for two Beacons.
- You can skip the event and continue on.
- Saddlebag – Get 500 Cramms from the bag.
- Traveling Infirmary – Has a fixed chance of healing any Outlaw’s injuries.
How to swap Outlaws between Bunches
Upon arriving at any planet, your Outlaws will naturally group together (with exceptions for those who might roam individually). If the grouping of your Outlaws doesn’t suit your preference, here are some steps to help you adjust their pairings.
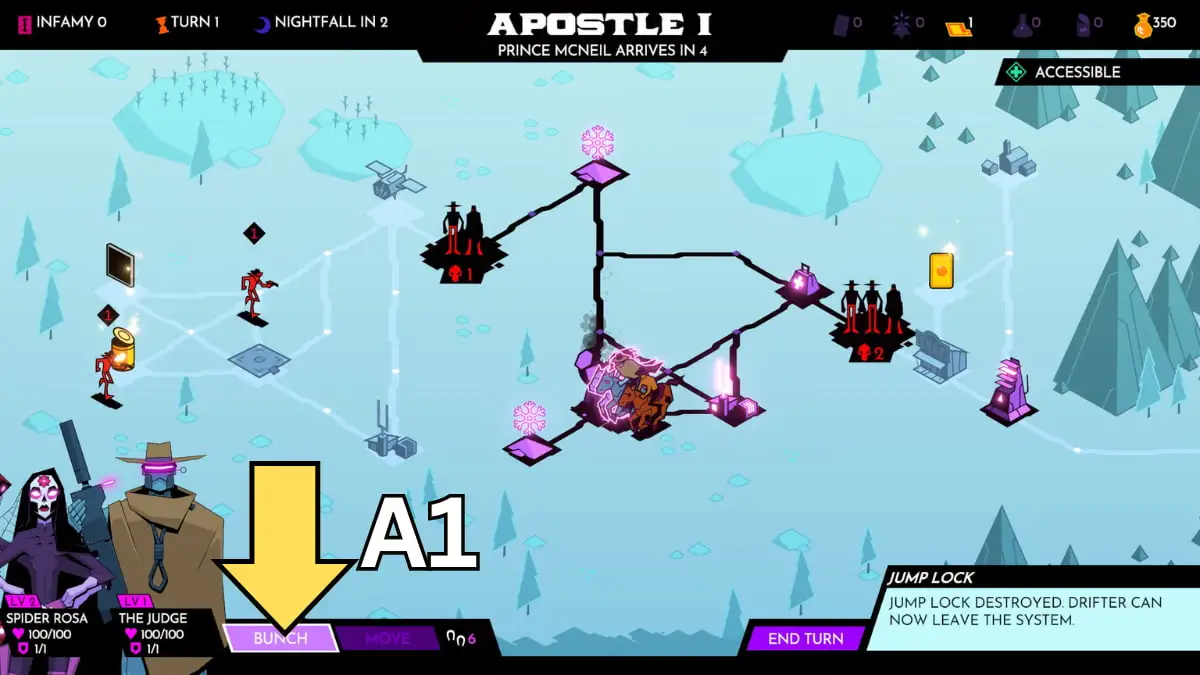
- First, move the Bunches you want to swap onto the same tile. This can be done as soon as you land on any planet since they will spawn in the same space.
- Next, click on the Bunch button in the lower left section of the screen (A1).
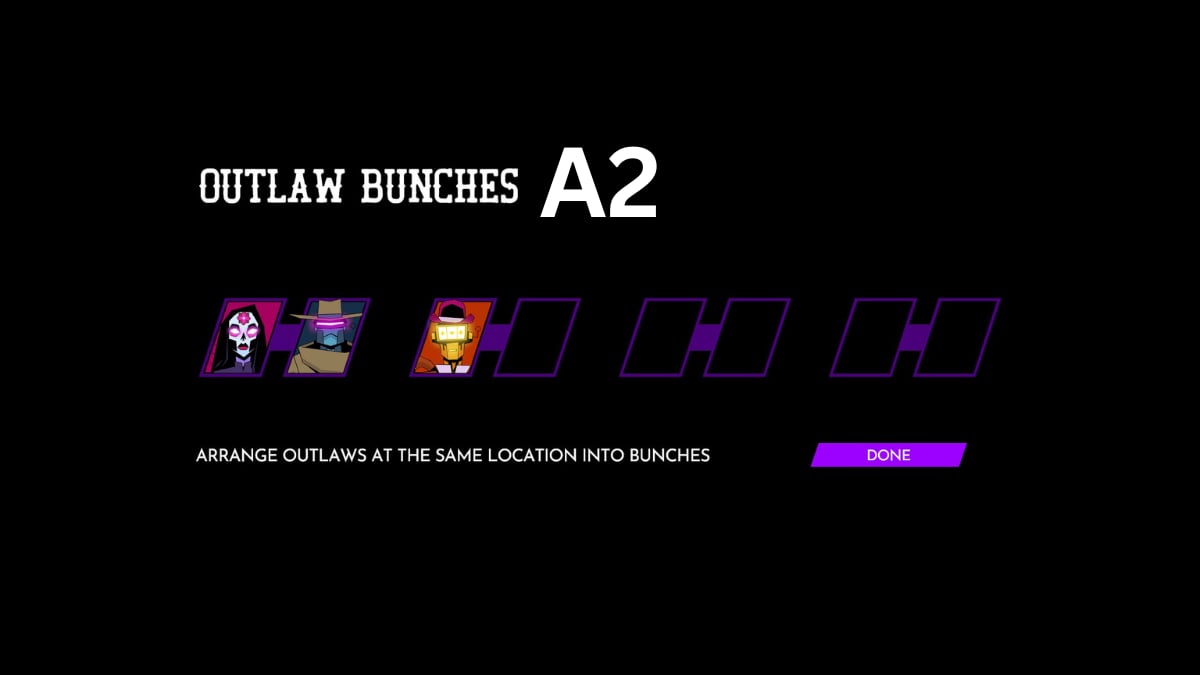
- This will take you to the Outlaw Bunch screen (A2). You should see all of the bunches on the tile here.
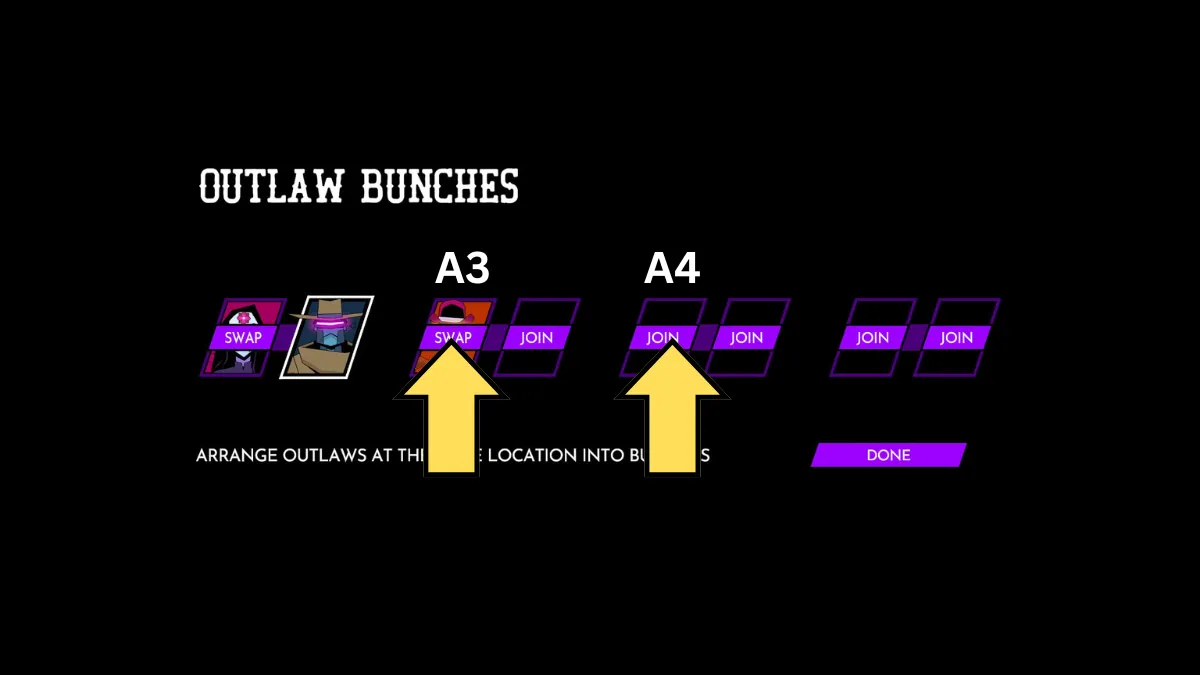
- Now select the Outlaw you want to move. You can swap them with another Outlaw by clicking on the Swap button on top of that Outlaw. Additionally, you can move them to an unfilled space in another bunch by tapping on Join. You can move them to either an empty bunch or one with a single Outlaw.
How to stop Outlaw feuds
Feuds among outlaws are troublesome as they prohibit the simultaneous presence of two outlaws on a single planet. Moreover, it’s quite simple for these feuds to ignite. To resolve them effectively, you need a character named Smoky and at least one can of beans on hand.
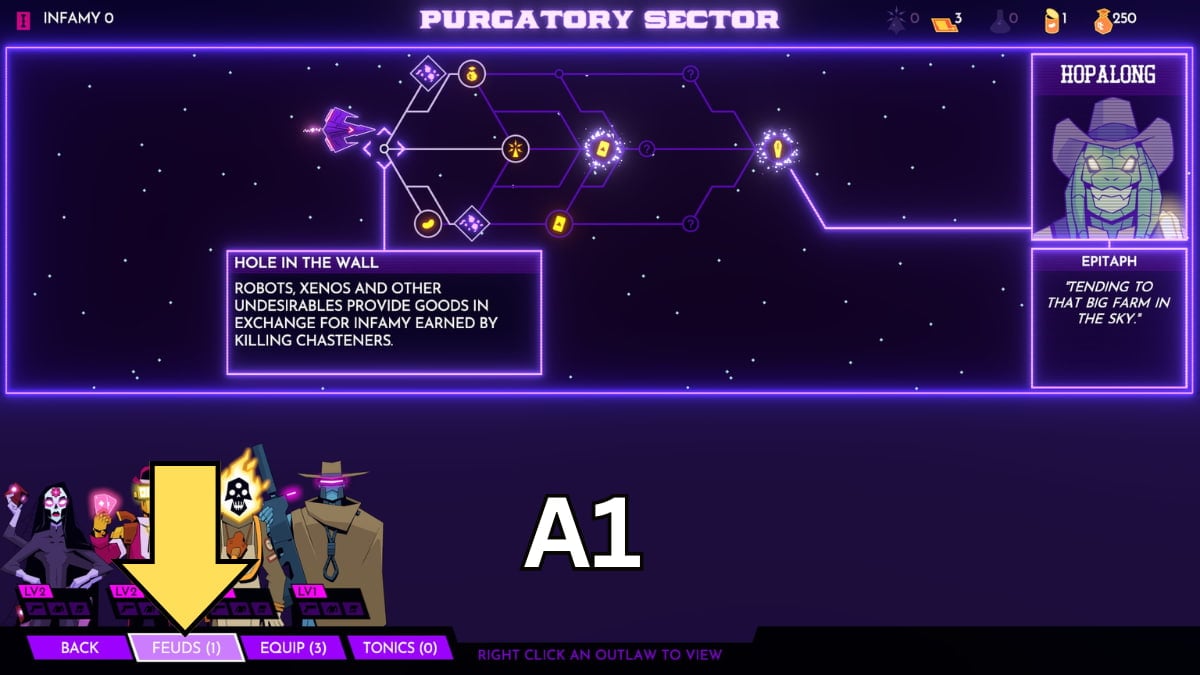
- Once you have a can of beans, select the Feuds menu while navigating the ship (A1).
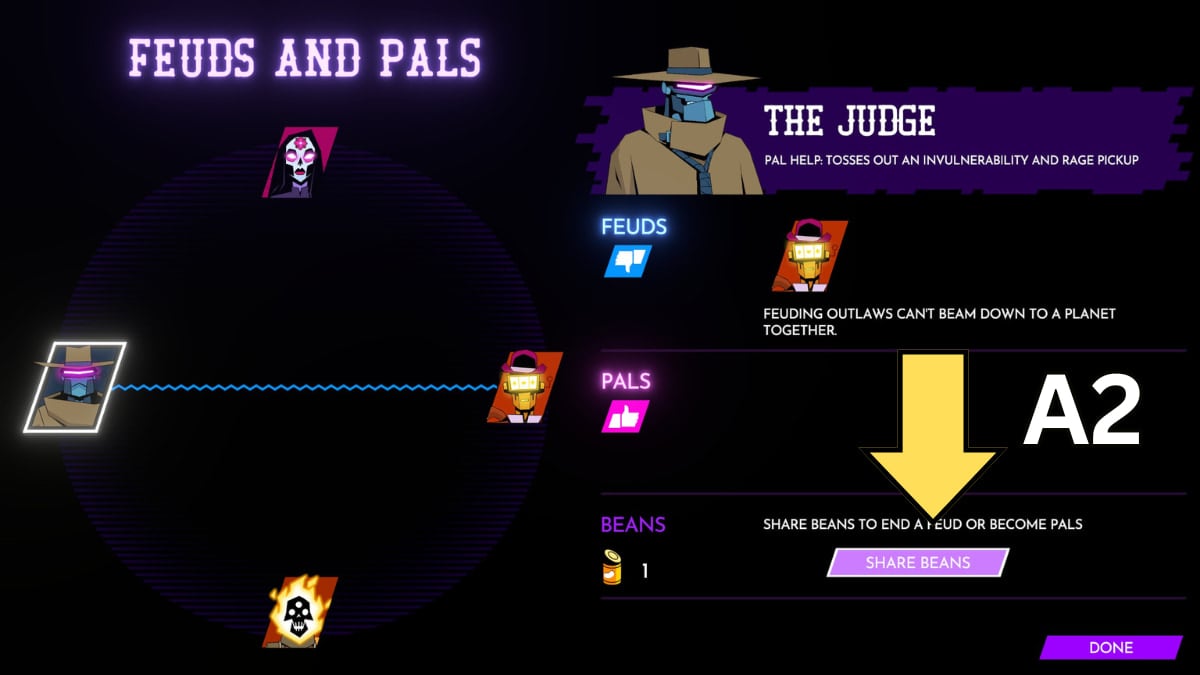
- This takes you to the Feuds and Pals menu. All of your Outlaws will be shown on the left. Outlaws that are feuding will have a wavy blue line connecting them while Outlaws who are Pals will have a straight pink line. To end a Feud, select one of the feuding outlaws and click the Share Beans button in the lower right corner of the screen (A2).
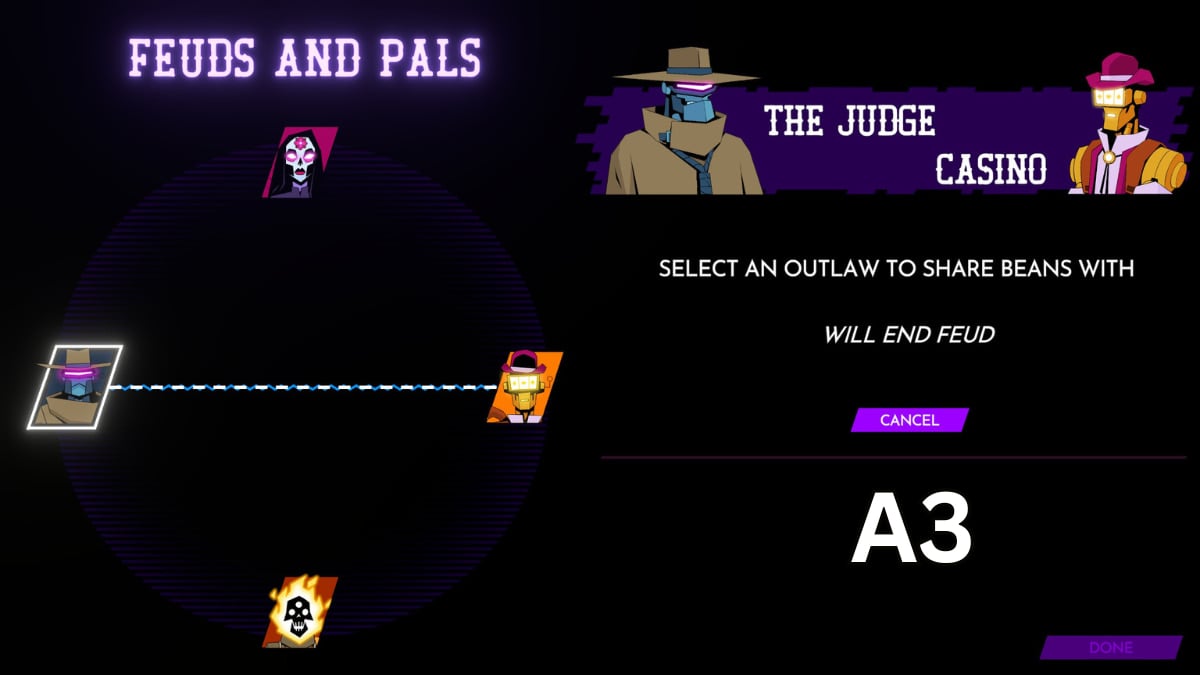
- Next, click on the Outlaw they have a feud with (A3).
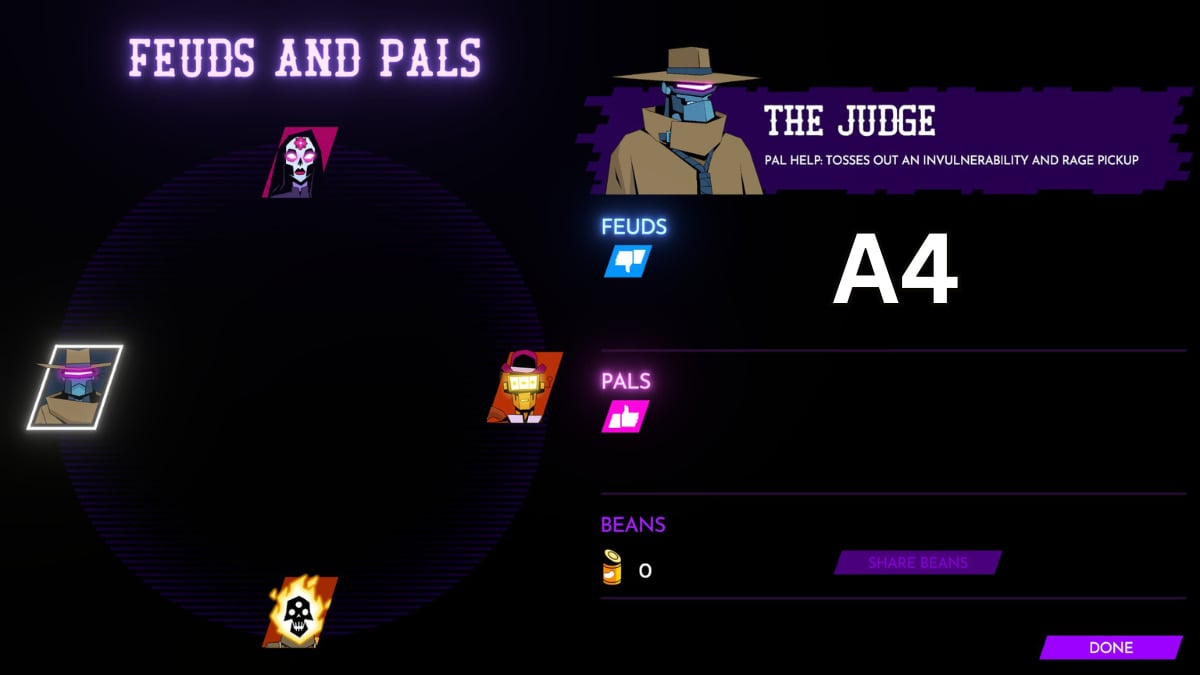
- They will share the Beans, ending their feud (A4). The blue line connecting them will disappear.
How to make Outlaws pals
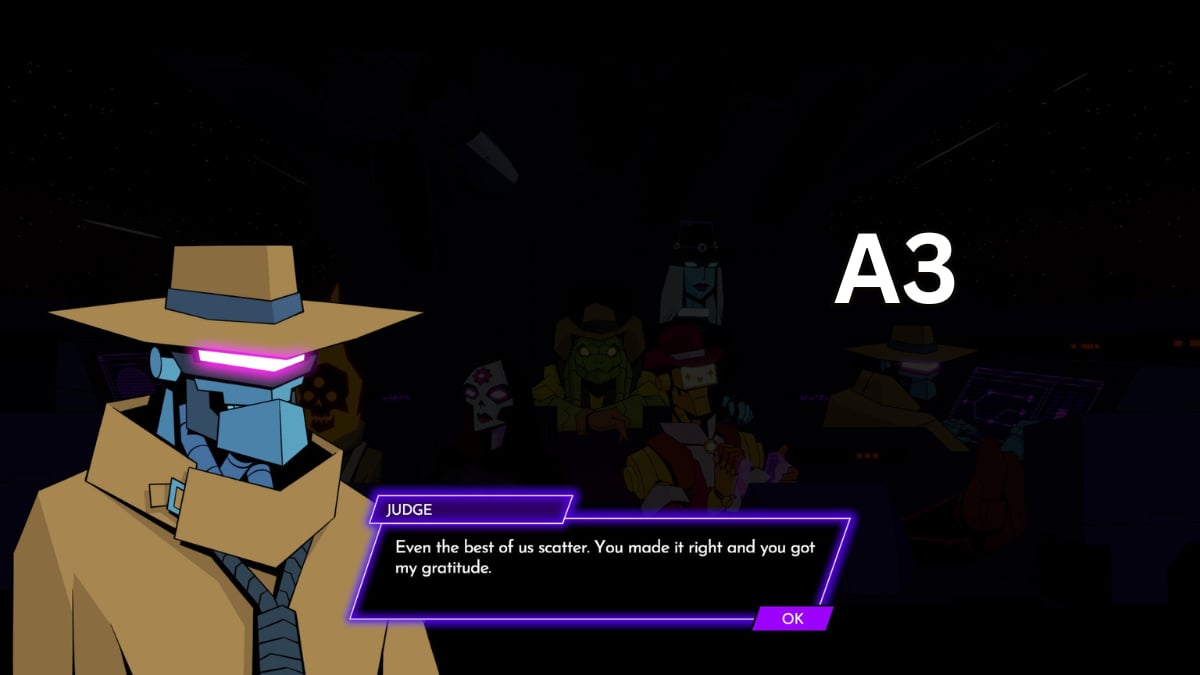
There are two easy ways to intentionally make Outlaws pals. The first way is by having two Outlaws who are not feuding share beans (A1). They’ll become friendly afterward and a pink line will be created between them on the Feuds and Pals screen (A2). The second way is by having one Outlaw rescue a Scattered Outlaw companion. After you leave the planet, the rescued Outlaw will express their gratitude and the two will become pals (A3). This will also occur after rescuing a fellow Outlaw from Jail.
How to use Tonics
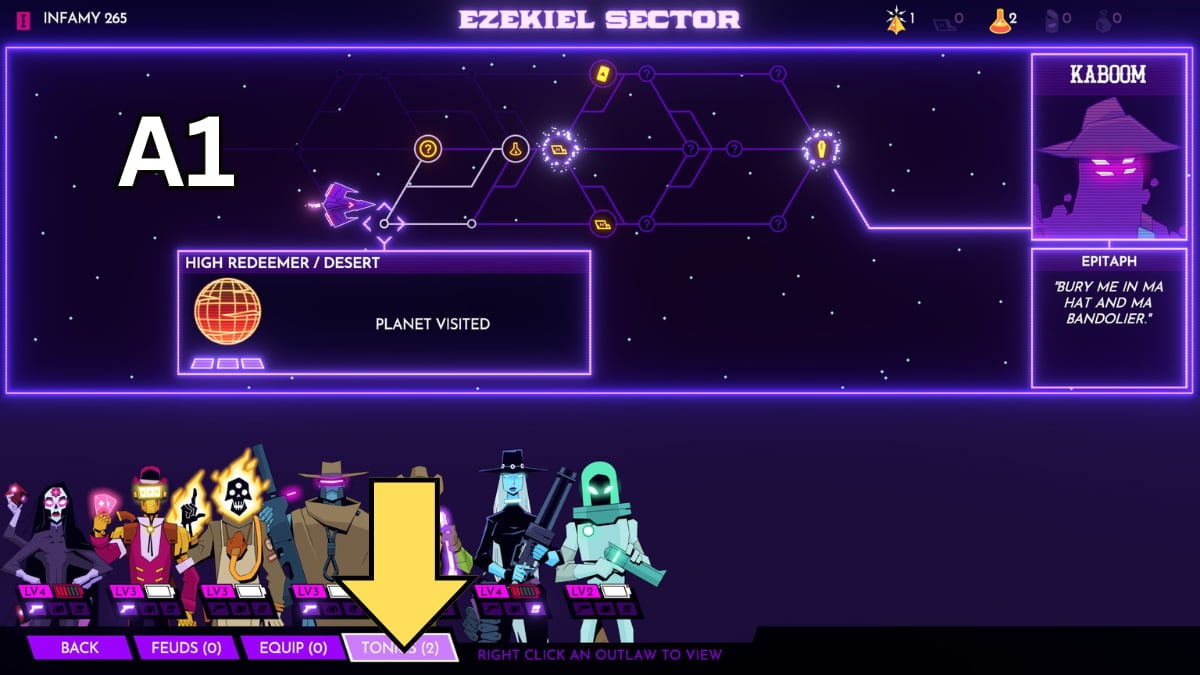
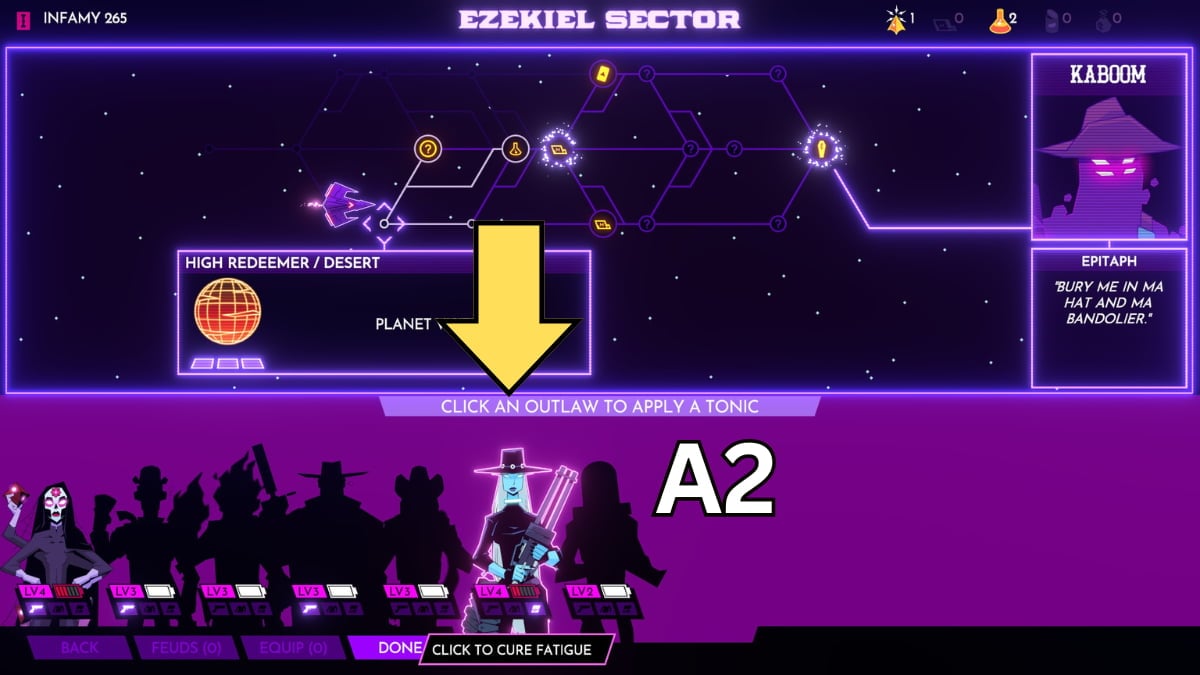
Tonics allow you to revive teammates injured in combat and heal the fatigue of fatigued Outlaws so they can use their Charged Aces again. To heal an Outlaw, you have to be in space in the navigation menu. Here, press the Tonics button in the lower left corner (A1). All of your Outlaws will be shown against a purple background. Outlaws who aren’t injured or fatigued will appear as black outlines. To heal an Outlaw or cure their fatigue, click on them while in the menu (A2).
Wild Bastards Walkthrough – How to beat the Princes (McNeil, Francisco, Barrabas)
The three Princes act as mini-bosses in Wild Bastards. They are much stronger than the other enemies in the game, but still easily beatable with the right tools. If you’re wanting to fight them head on and win, there’s a few things you need to keep in mind.
- Every Prince roams the showdown on a horse. They cannot climb ladders, so you can take advantage of the situation and claim the higher areas for yourself.
- Always take out the enemies accompanying the Prince first.
- Position yourself near or in front of a set of obstacles. You’ll need to use the environment to block the Prince’s shots since they do a lot of damage.
It’s quite surprising to know that you can bypass quite a few battles with the Princes in various ways. Two of these methods won’t increase your Infamy level at all, making them ideal when you’re pressed for time or prefer not to engage in combat.
- The Princes are classified as mobile units. Because of this, you can use the Bounty Hunter to wipe them off the map instantaneously. It’s a handy method if you’re rushing to beam off of the planet with a Helix and McNeil is in your way.
- If Fletcher has the Mind Modifier Ace, she can subvert the Princes and make them fight for her. This method will win you the battle at the cost of the Infamy rewards.
- Don’t underestimate Casino’s Stunt. It works on the Princes like any other enemy, giving you a pretty easy way to end the fight.
- Hopalong’s lasso can be used to leave the Princes unable to attack while he is damaging them. If the rest of the enemies are taken out first, you can pretty much just sit there attacking the Princes without them being able to do anything.
McNeil
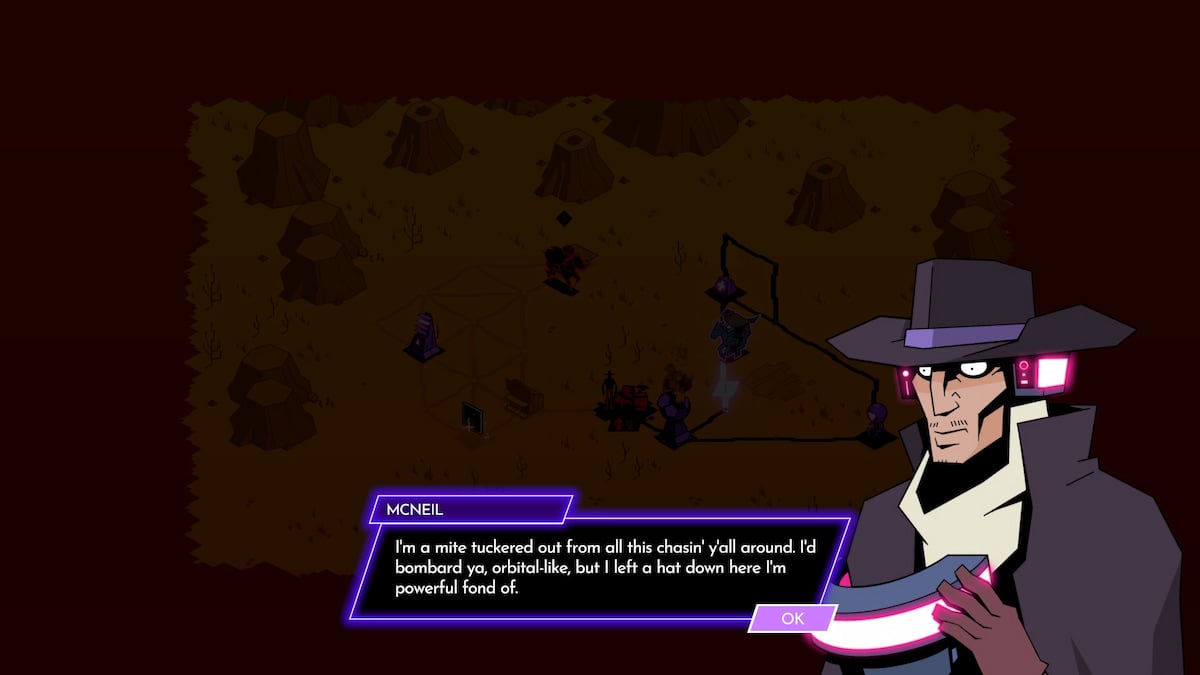

You’ll initially meet Prince McNeil within Wild Bastards, who’s swift in movement and fires homing laser projectiles at your Outlaw character. Occasionally, he’ll let off a rapid-fire sequence that temporarily incapacitates him.
To overcome McNeil effectively, engage him using a character named Judge. Judge’s special move, Judgement Time Stunt, temporarily slows down time, giving you ample opportunity to land critical strikes on McNeil’s allies’ heads. This strategy will gradually charge up Judge’s powerful single-use attack. Since McNeil lacks any shields, this attack will take him out in a single strike.
Francisco
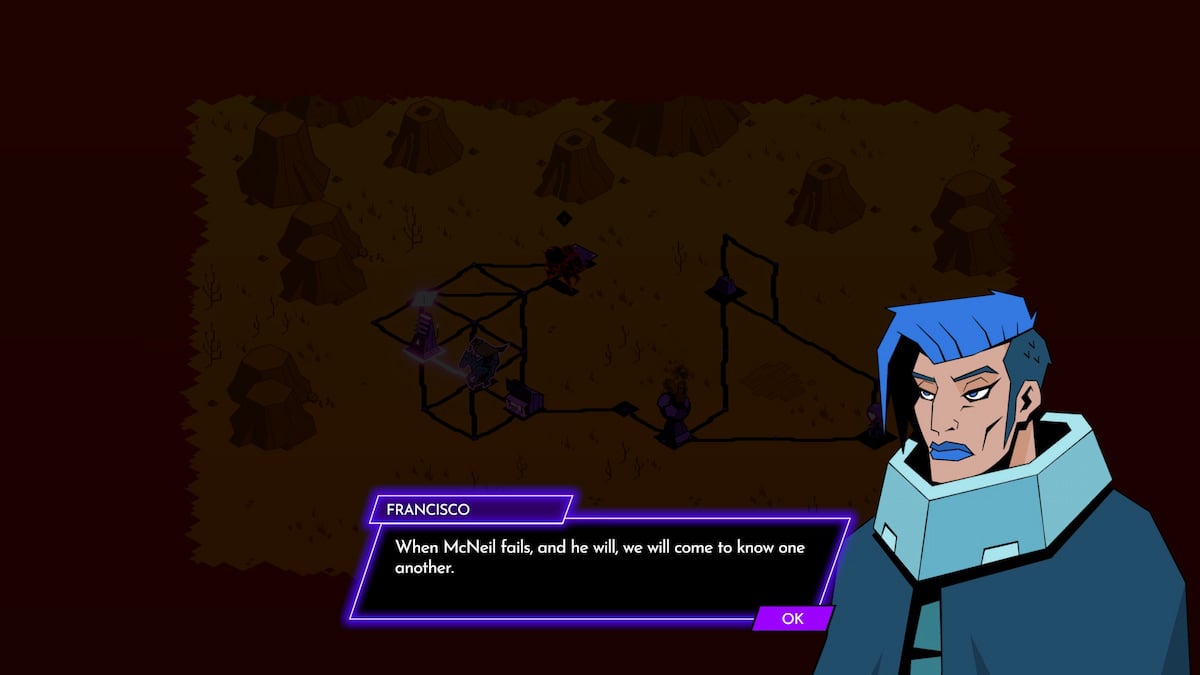
In the gaming world I inhabit, you’ll come across Francisco, the second royal character you’ll meet. Compared to McNeil, she stands out as a powerhouse. Just like McNeil, she unleashes laser-like projectiles that zero in on your location. However, her shots pack a heavier punch than McNeil’s, but she takes a bit longer to fire them off. What sets her apart is her robust armor – five layers of it, making her quite the challenge to defeat!
I’ve found tremendous success employing Preach against Francisco in a fair skirmish. Rapidly discharging ammunition swiftly depletes her shield, enhancing the infliction of real damage on her. If you trigger Preach’s Damnation Ability, you can even surpass the harm caused by Francisco while shooting at her. I suggest combining Preach with a swift-moving ally to collect some Juice items before retreating to a lofty platform and unleashing a barrage of bullets onto Francisco.
Barrabas
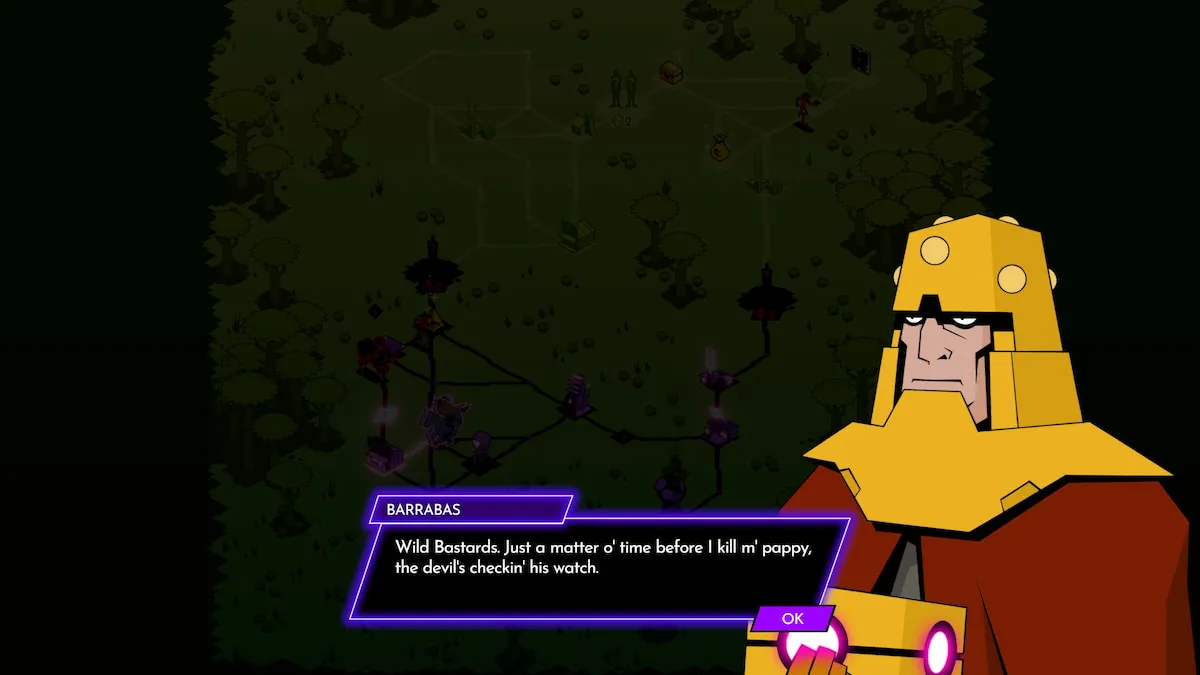
Barrabas, the third and toughest prince to confront, inflicts approximately four times the damage of Prince Francisco, primarily through his deployment of fire-guided projectiles that detonate upon impact. With level 7 Outlaws, I could barely withstand a few blows before my wounds proved fatal. To defeat him, you’ll need to employ strategic thinking.
It appears that hiding inside buildings offers better protection against Barrabas’ gunfire compared to concealing oneself behind a rock outside. However, staying in the same spot for too long will allow him to adjust his aim. Since Barrabas’ bullets detonate, they inflict damage over a larger area than the previous two princes. To dodge these explosive rounds, employ strategic cover, move swiftly with characters like Hopalong, or utilize Kaboom’s Stunt to evade Barrabas’ line of sight. Personally, I prefer using Hopalong to quickly close in on Barrabaras and unleash a barrage of lasso attacks before he can respond effectively.
How to avoid lightning in storms
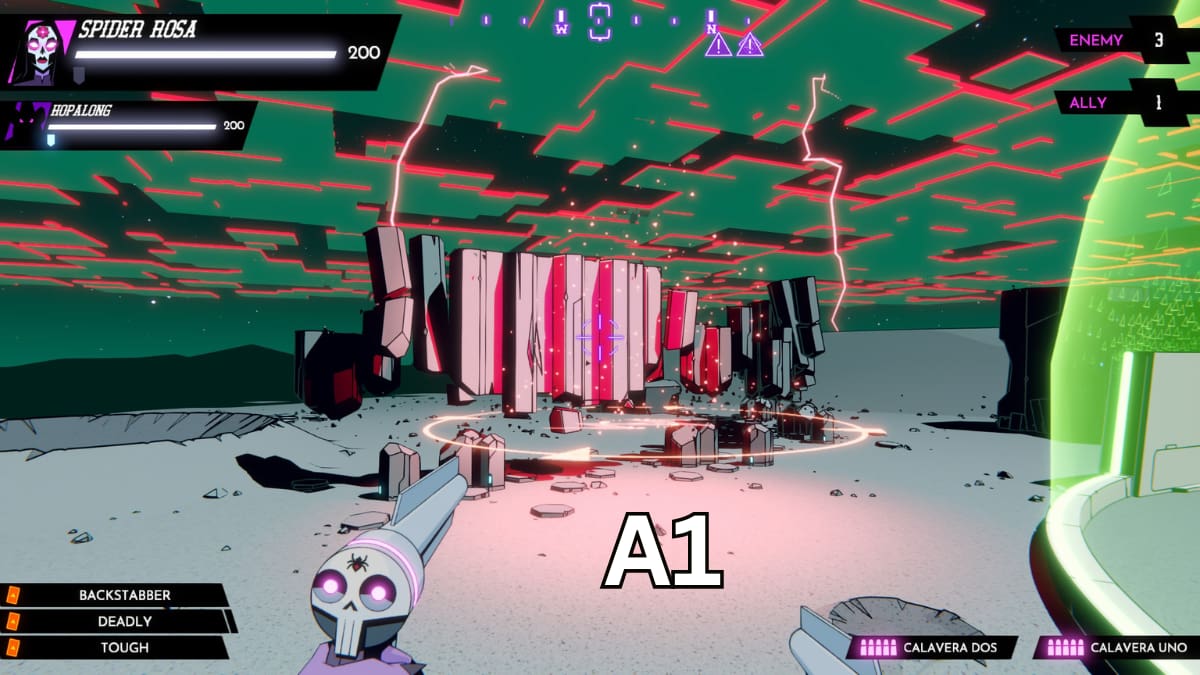

Weather phenomenon known as storms can create lightning that zaps the earth during battles. This is advantageous since it eliminates adversaries in its vicinity, but it’s also disadvantageous because it can do the same to you. To dodge the lightning, watch for a red symbol of lightning inside a circle (A1). Once this symbol shows up, lightning will hit the ground, damaging everything within the area of the circle (A2). Be mindful when leaping onto higher ground as there might be an unseen incoming lightning strike.
Wild Bastards Walkthrough – Best Mods for Each Outlaw
Picking the right combination of 134 available modifications can be quite challenging when deciding which ones suit specific Outlaws best. To help simplify your decision-making process, I’ll provide recommendations on the best mods to use for each Outlaw and some versatile options that work well for everyone.
- While Billy would benefit just by reducing his weapon spread, giving him the Tracking Rounds mod is the better option. It will reduce his damage by 20 in exchange for making his bullets home onto his targets. Since he can quickly fire multiple shots, the accuracy of his weapon should make up for the damage lost due to the mod.
- When choosing Mods for Casino, Lucky Dice is the first thing on my mind. While it gives all Outlaws an extra life, when equipped by Casino it gives him two extra lives. It gives you extra leeway if you make a misstep, which is especially important for close-range fighters like Casino.
- Fletch is an Outlaw that shines when picking off straggling enemies and struggles against larger groups. Use a mod that boosts her damage, like Plutonium Rounds, so she’ll only need one arrow to take out most enemies. If available, use the Bloodsucking Rounds. They give a smaller damage boost in exchange for healing Fletch whenever she inflicts damage. Next, give her a mod from the Black Hole series. They’ll give her a brief period of invulnerability after killing an enemy, making her more viable against grouped enemies. The timer on the invulnerability resets after every kill, which is overpowered in the right hands.
- Hopalong has to get extremely close to enemies to deal damage. He’ll benefit mainly from mods that improve damage resistance, like the Lucky Rabbit Foot, and mods that give him additional armor, damage, and health.
- The Judge is all about powerful, precise shots. The major weaknesses I’ve noticed for him are his slow reload speed and his low magazine size. Make up for these by giving him Speed Reloader to decrease his reload speed by 50% and one that increases the amount of bullets he has, like Hefty Magazine.
- Kaboom moves silently and deals damage by throwing sticks of dynamite at enemies. Like Fletch, he’s a good fit for any mod in the Black Hole series. The invulnerability those mods give is especially important in the moments after he uses his Stunt to get close to enemies and take them out. When his Stunt expires, the extra seconds of invulnerability give time to either back away or finish an enemy off with one last stick of dynamite. For the same reason, he would benefit from a mod that increases his damage resistance.
- I find Preach to be pretty strong on her own in terms of firepower. Give her the Brimstone Bible mod so she’ll heal up after every fight and stay in the game longer. She would also benefit from a mod that decreases weapon spread like Iron Sights.
- If you want to strengthen Rawhide, give them the Outlawed Rounds mod. It will increase their damage by 20, give them an extra two bursts of shots, and give them two extra ammo slots in their magazines. Avoid any mods that increase their weapon spread as they will severely weaken Rawhide’s accuracy to the point of being a nuisance.
- Rosa is a two-handed pistol wielder like Billy. When picking mods for her, focus primarily on increasing her damage and giving her invulnerability after a kill with a mod like Black Hole Badge.
- When it comes to Roswell, I recommend two particular Mods. First, you’ll want the Spacefaring Suit. It gives the Outlaw wearing it +10 armor in exchange for a health debuff that does not apply to Roswell. The second item you’ll need is the Jetpack, which allows Roswell to fly in the air using the jump button. Since Roswell’s Stunt throws him into the air, the Jetpack helps you return to the ground without taking fall damage.
- Sarge is a long-range shooter with a decent bit of firepower. Since he’s already got a decent thing going, I would improve him with either the Deadly Round or Explosive Rounds mods. Deadly Round makes his first shot of every round an instant kill while Explosive Rounds makes all of his shots explode and increases his damage by 30.
- Smoky has fierce firepower that deserves boosting using flame-inspired mods. The first mod, Fiery Deflector, is made for Smoky and gives him +10 damage and +75% fire resistance. I also enjoy giving him Incendiary Rounds to increase his burning damage by 30. This combo works well for me because I mainly use him for his Stunt, but you may need to increase his firepower further if you want to use him as your main Outlaw.
- The main issue I’ve seen with Spike is getting his needles to actually hit their target. Buff him by reducing his weapon spread with Calibrated Sights and giving him a chance to stun enemies using the Blunt Rounds mod. This stun chance will stop enemies in their tracks, making hitting them with his powerful needles a walk in the park.
Best mods in Wild Bastards
Instead of being tailored for particular Outlaws, the upcoming Mods are suitable for everyone.
- Any of the Ally/Companion mods. Being able to summon an ally during a fight will always help draw away enemy attention and get a few extra hits in.
- The Backdoor Hacker makes it so that Backdoors will spawn allies for you.
- Movement mods like Rocket Horseshoes and Alloy Horseshoes will help you finish up planets before any of the Princes have a chance to arrive.
- The Prince Scope is the ideal mod for taking down all three Princes. It increases an Outlaw’s general damage by 20 and raises the damage they do to the three Princes by 300%.
- While the Lucky Dice are best for Casino, any Outlaw would benefit from an extra life.
Best Outlaws to Bunch Together
Combining suitable Outlaws is crucial for triumphing in Wild Bastards battles. A well-matched duo will boast Stunts that complement each other and the capacity to assault foes from varying distances. Conversely, an ill-suited pairing may leave you at a disadvantage when confronting particular enemy types, be it due to range issues, ammo restrictions, or another challenge. Below, we’ve listed some of the top Outlaw pairings in the game.
- Hopalong and Fletcher – Hopalong’s ultimate stuns entire groups of enemies. Using it allows Fletcher to fire off a barrage of arrows without fear of repercussion. This partnership is even more powerful if Fletcher has an Ace with the subvert ability.
- Hopalong and Preach – Generally, Hopalong’s Stunt makes him a great partner for several Outlaws. Combine his Whip Crack with Preach’s Damnation to mow down enemies while healing up.
- Preach and Smoky – Like Hopalong, Smoky’s main benefit is his Stunt. Use him to set fire to trios of enemies at a time, then swap to Preach and mow down every enemy in sight. This is particularly useful at nighttime when enemies are more difficult to see.
- Judge and Rosa – Judge is truly a powerhouse on his own. However, his drawback is that he takes a while to reload and can’t deal with hordes of enemies at once. When the going gets tough, sub in Rosa to fend off enemies that are closing in too quickly. As a bonus, her Stunt will draw enemy attention and give Judge the chance to hit some headshots.
Read More
- ACT PREDICTION. ACT cryptocurrency
- Hades Tier List: Fans Weigh In on the Best Characters and Their Unconventional Love Lives
- Smash or Pass: Analyzing the Hades Character Tier List Fun
- W PREDICTION. W cryptocurrency
- Why Final Fantasy Fans Crave the Return of Overworlds: A Dive into Nostalgia
- Sim Racing Setup Showcase: Community Reactions and Insights
- Understanding Movement Speed in Valorant: Knife vs. Abilities
- Why Destiny 2 Players Find the Pale Heart Lost Sectors Unenjoyable: A Deep Dive
- How to Handle Smurfs in Valorant: A Guide from the Community
- PENDLE PREDICTION. PENDLE cryptocurrency
2024-09-12 16:21