As a seasoned survivor of numerous horror games, I must say that The Casting of Frank Stone has truly outdone itself when it comes to crafting intricate relationships and engaging storylines. Among all the achievements listed here, the one that resonated most with my gaming heart was the Power of Two – maximizing Jaime and Chris’ relationship.
“The Chilling Adventure of Frank Stone” – A Horror Game in the Universe of Dead by Daylight, Developed by Supermassive Games
This guide is under development and will be frequently revised and improved upon until it is fully finished.
The Casting of Frank Stone Walkthrough – All Chapters
To finish this game, you should gather all the hidden items and accomplish all 32 tasks in The Casting of Frank Stone. This walkthrough is divided by chapter, explaining the outcome of each decision, how to ensure every character survives, the various endings, and any additional information required for completion.
Chapter 1: The Burning Maw

This chapter unfolds in the year 1963, at a pivotal mill setting for the narrative that follows. Here, you assume the role of Sam Green, a diligent police officer tasked with thwarting a ruthless serial killer, just moments before he claims his last victim.
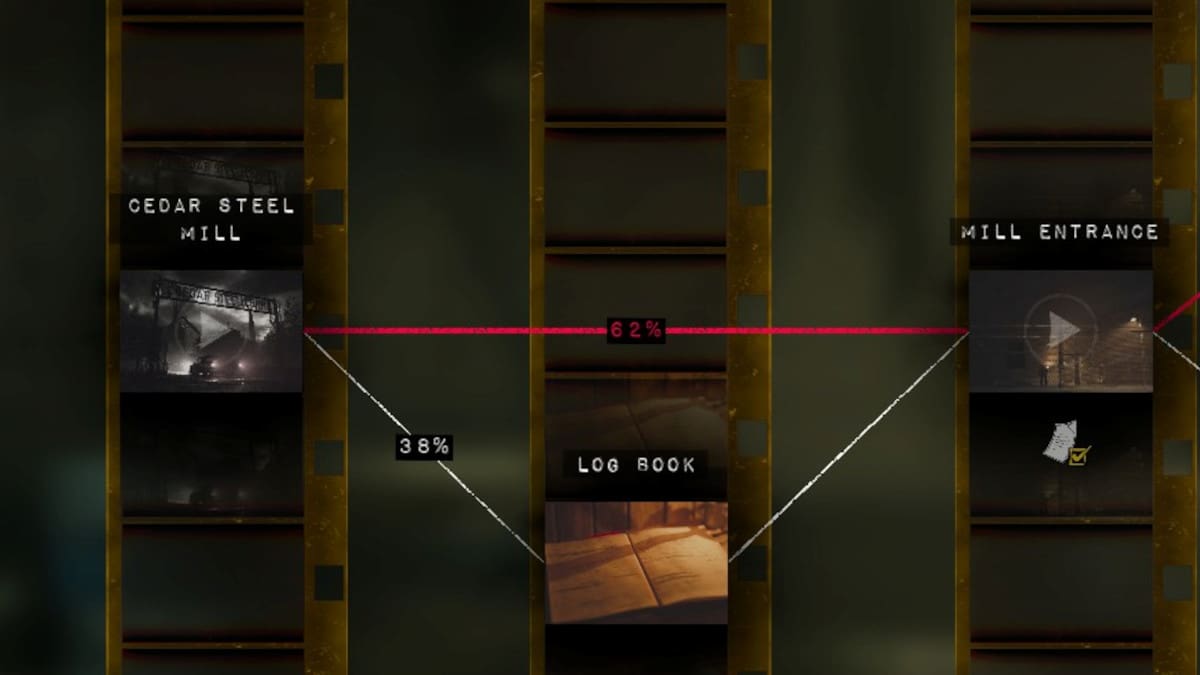
Cedar Steel Mill
As I approach the mill at dusk, there’s Tom, the night watchman on duty. Our dialogue unfolds in various directions, leading to two distinct outcomes. Mostly, we either end up arguing or discussing who has been patrolling the area. But occasionally, by choosing wisely, I can peek into the logbook, uncovering valuable clues and setting myself on a different path. To unlock these divergent storylines, here’s what you need to do:
- Path 1: All decisions that don’t follow the path below will get you the first, most common path.
- Path 2: For choice 1, choose “Serious: I need to ask you a few questions.” After that, pick “Curious: Can I check your records?” You will then gain access to the check in and check out record book.
Mill Entrance
Following my conversation with Tom, let’s venture into the mill now. This place has quite a few valuable trinkets and Sam will have a few paths to choose from.
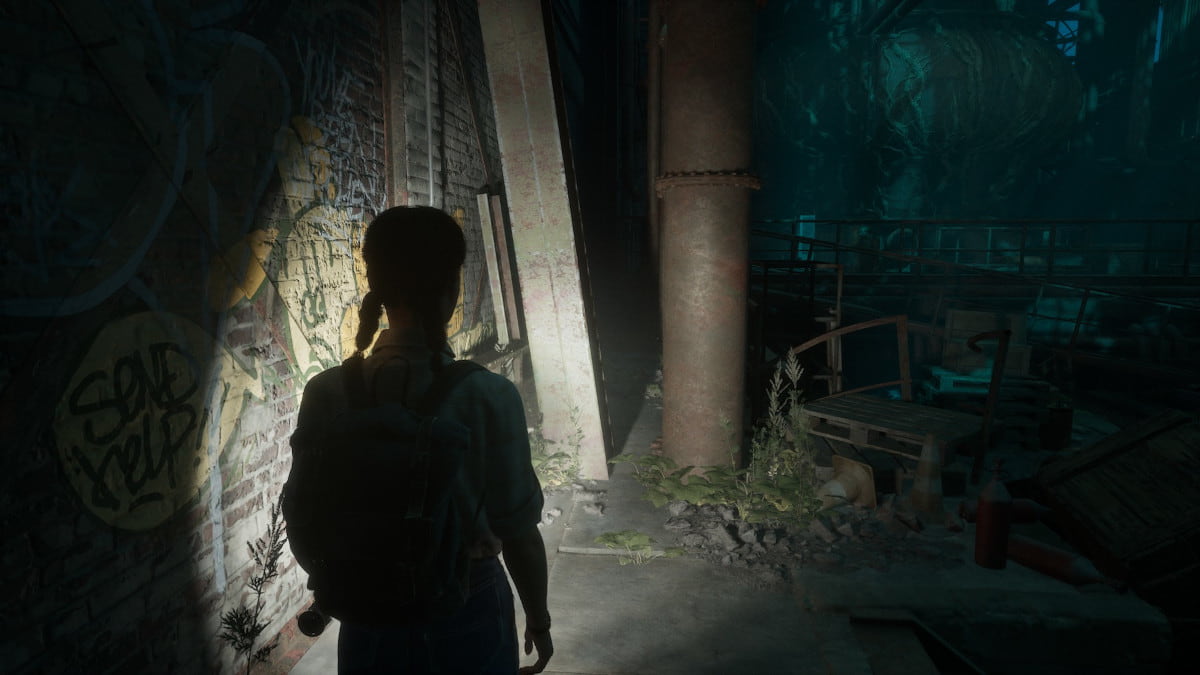
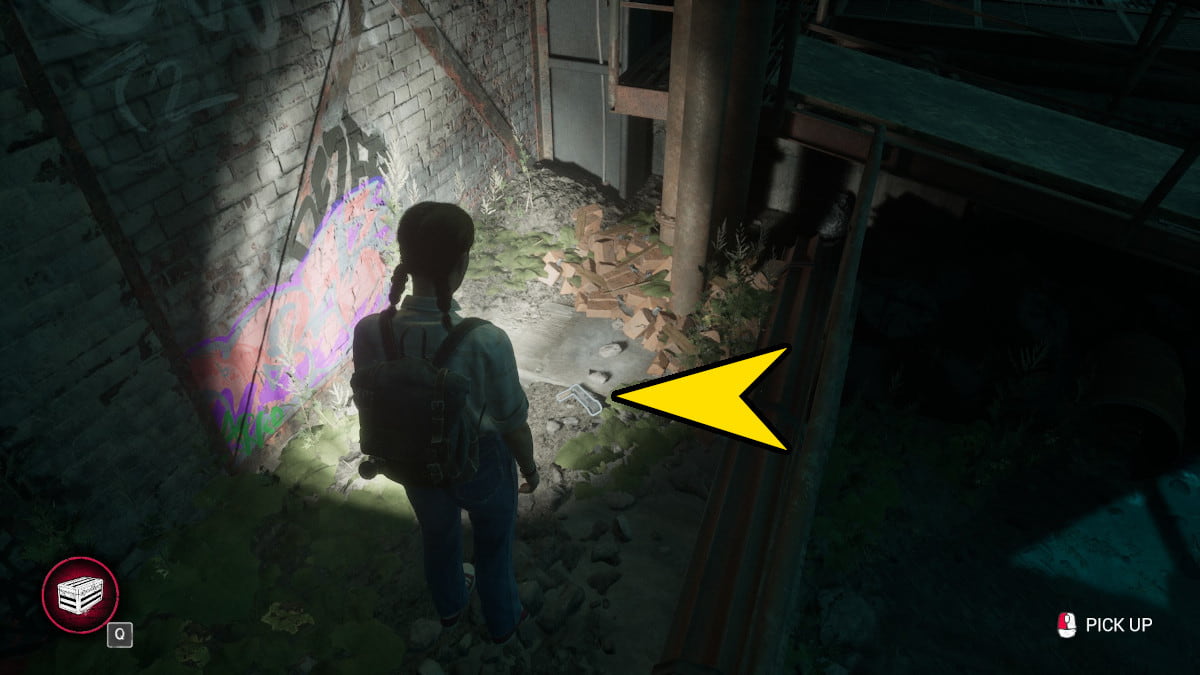
Trinket collectible 1 of 12: Iridescent King
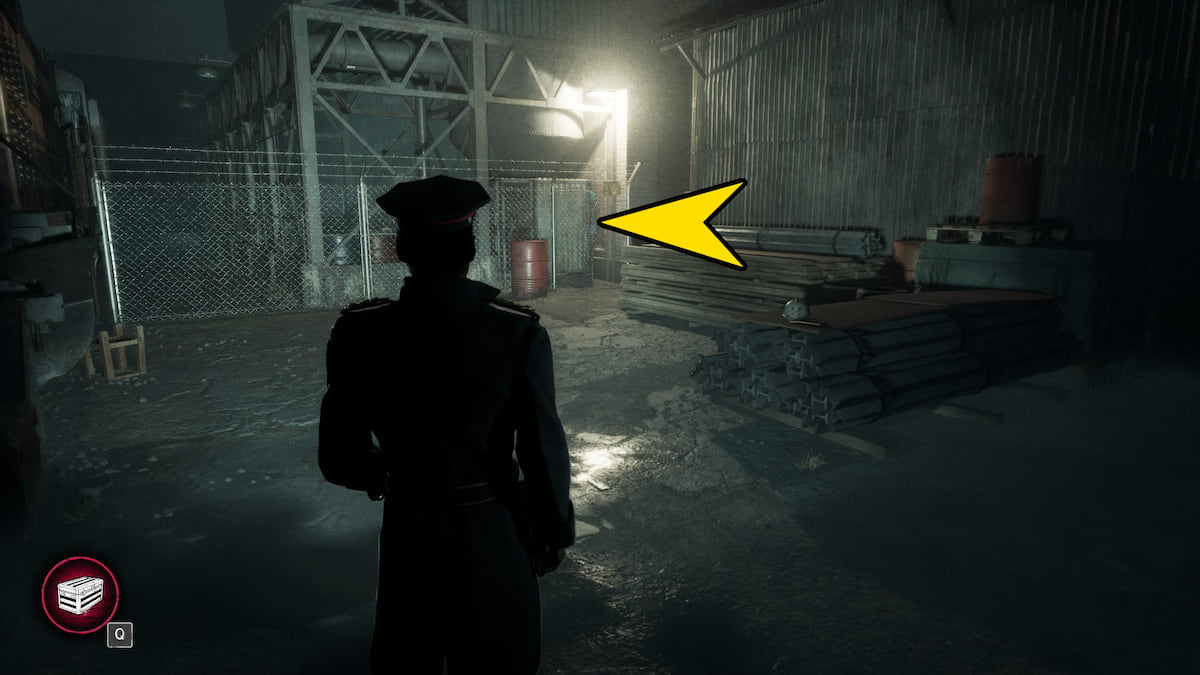
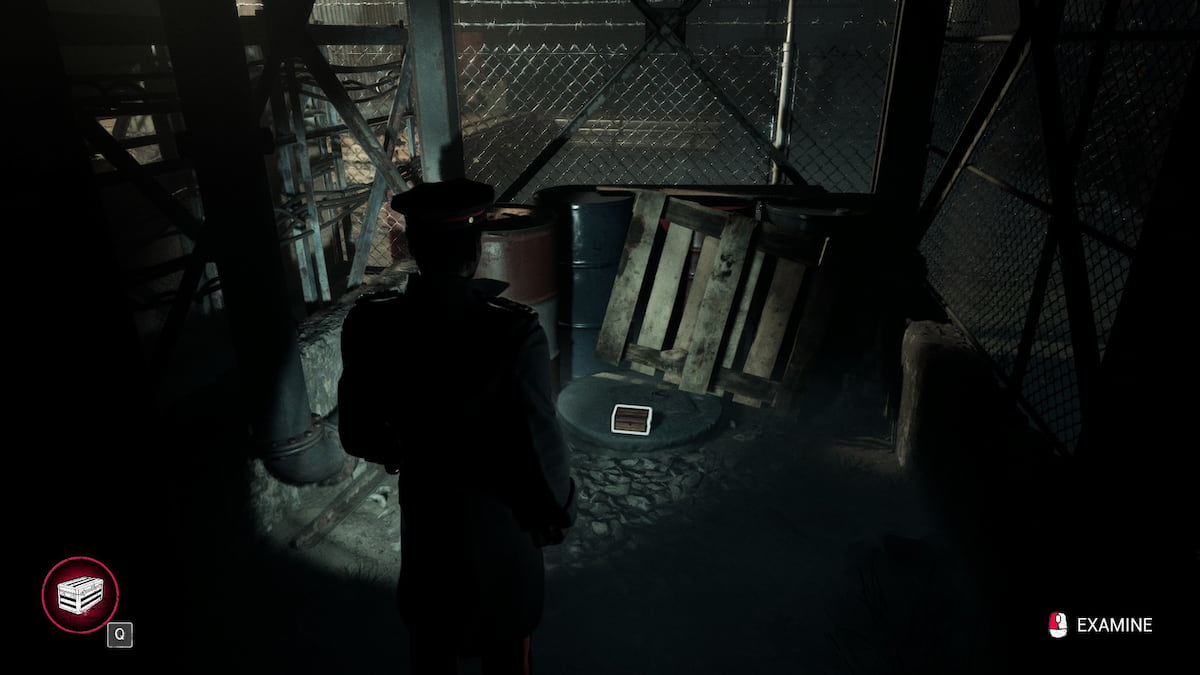
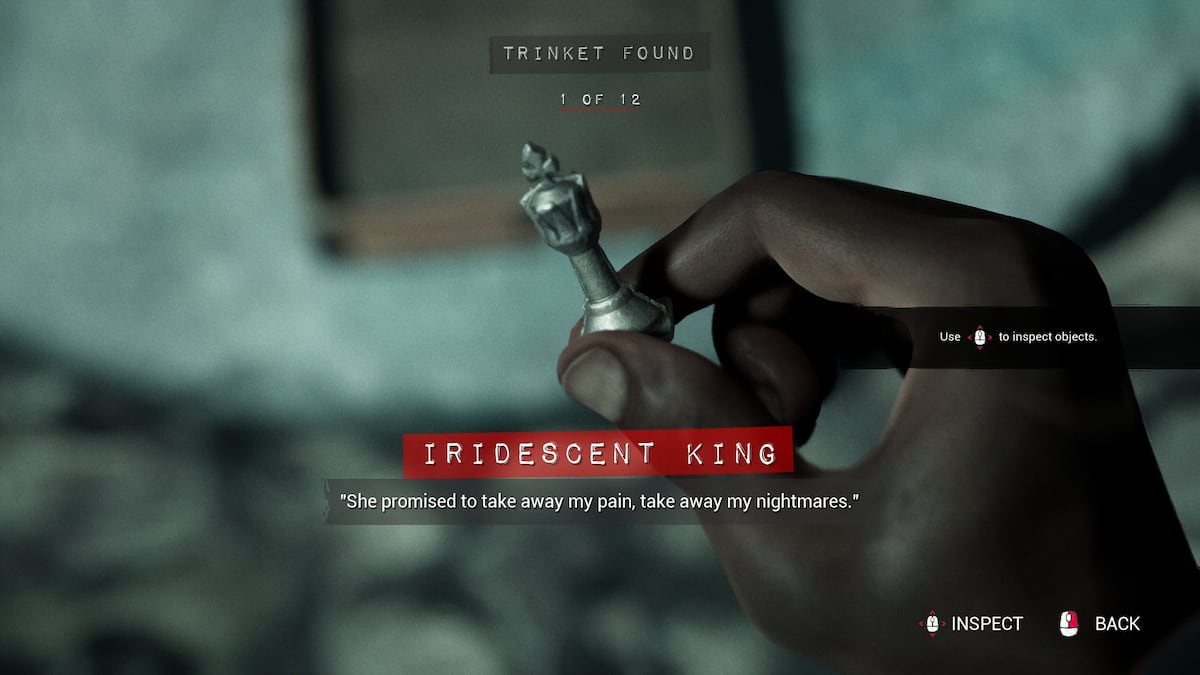
As I step into the shoes of Officer Green for the first time, I stumble upon the first of twelve elusive Trinkets! It’s cleverly concealed behind a section that catches my eye. To locate it, I have to squeeze myself into a narrow gap indicated in a screenshot – once inside, I need to search around carefully on the ground for a small box that’s been left hidden.
The Champion Artifact 1: Staff File
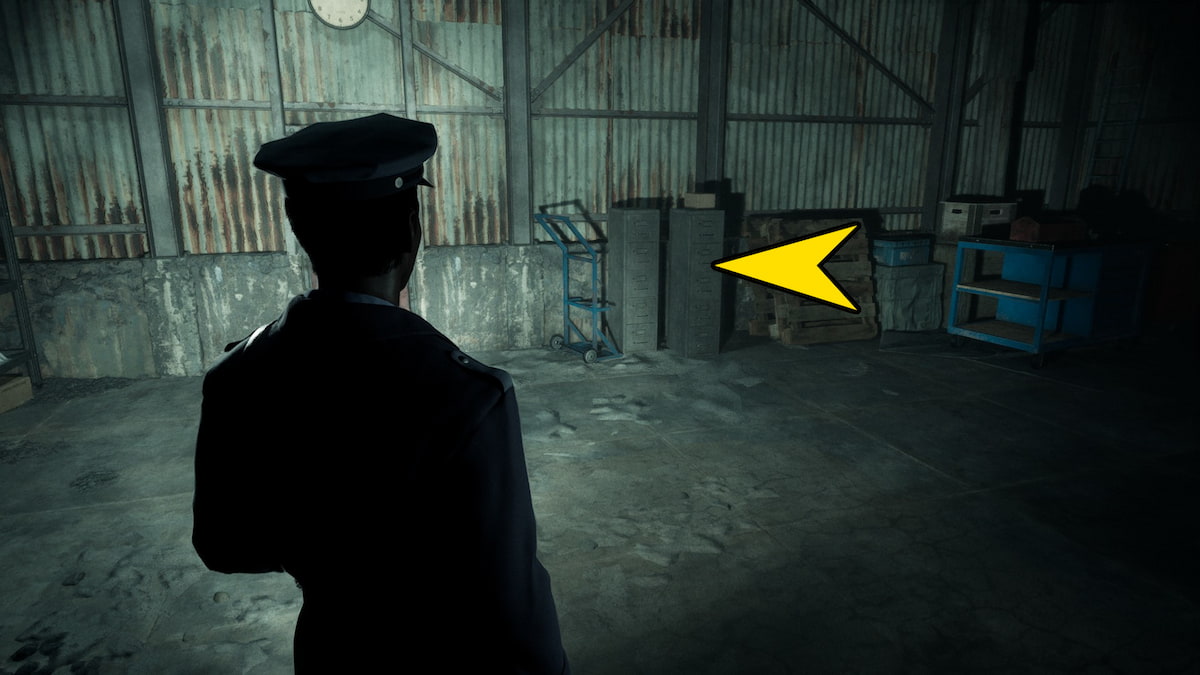
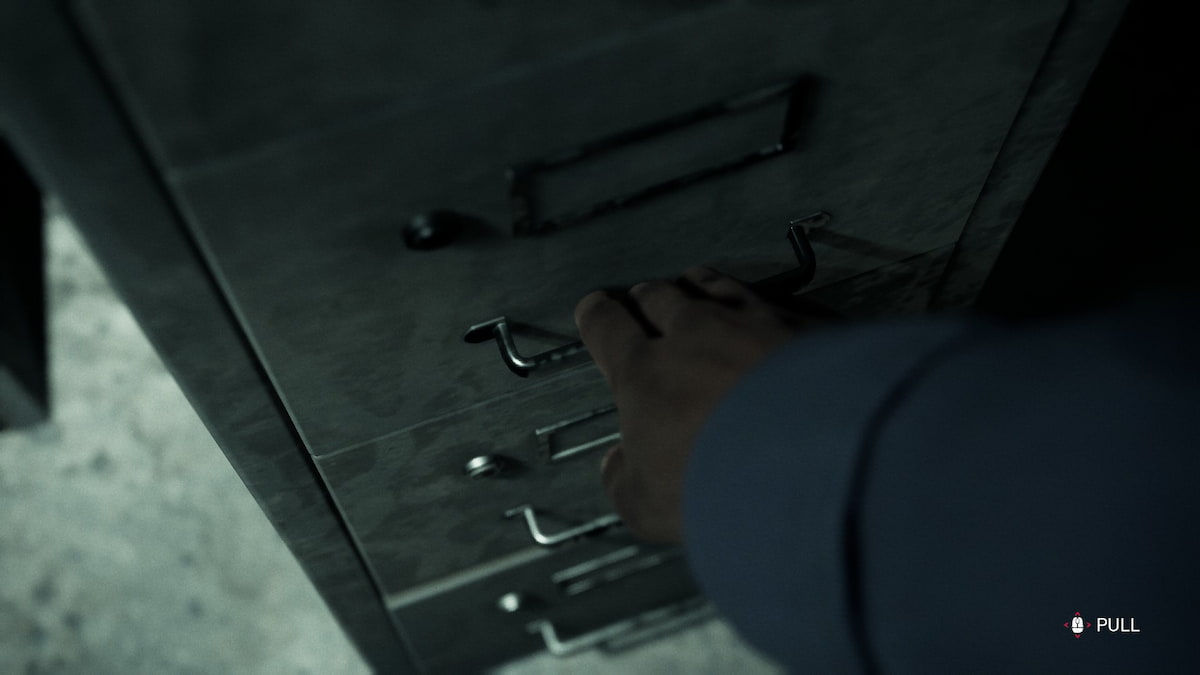
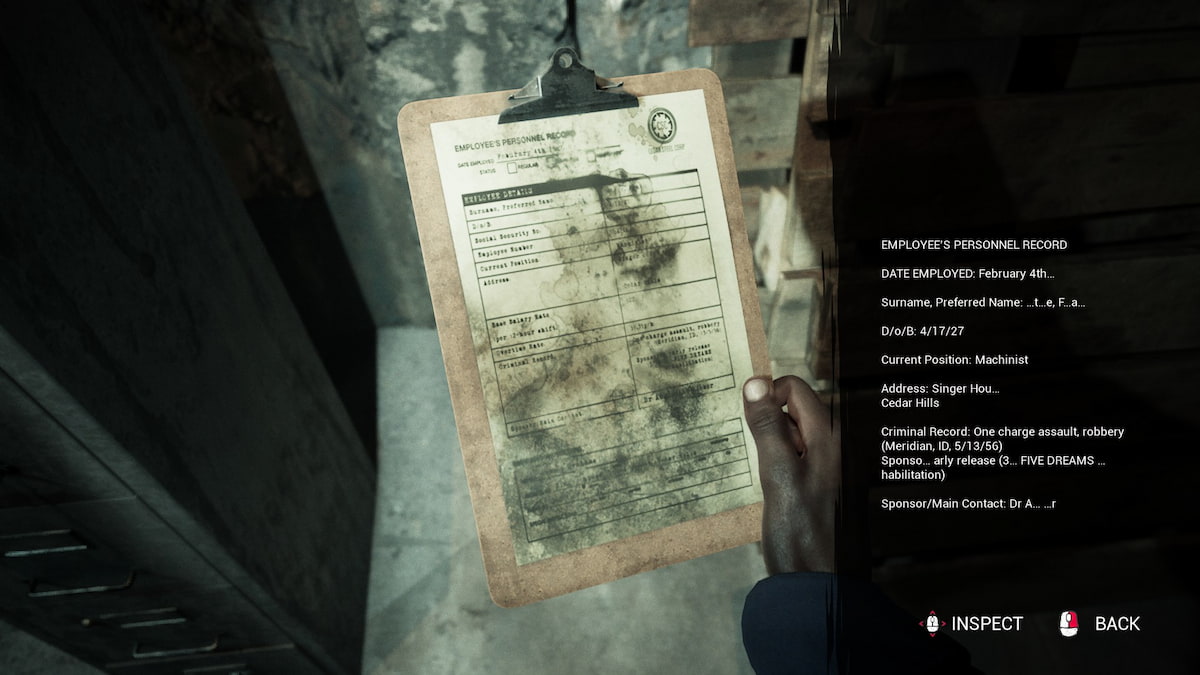
Inside, navigate by squeezing between a pile of metal sheets, followed by a door entry. Once you reach the office, you’ll encounter both a filing cabinet and a sheet of paper for interaction. Shaking the filing cabinet causes a clipboard containing Frank Stone’s Staff File (a vital Artifact) to fall out. Throughout the game, expect multiple such artifacts like this one.
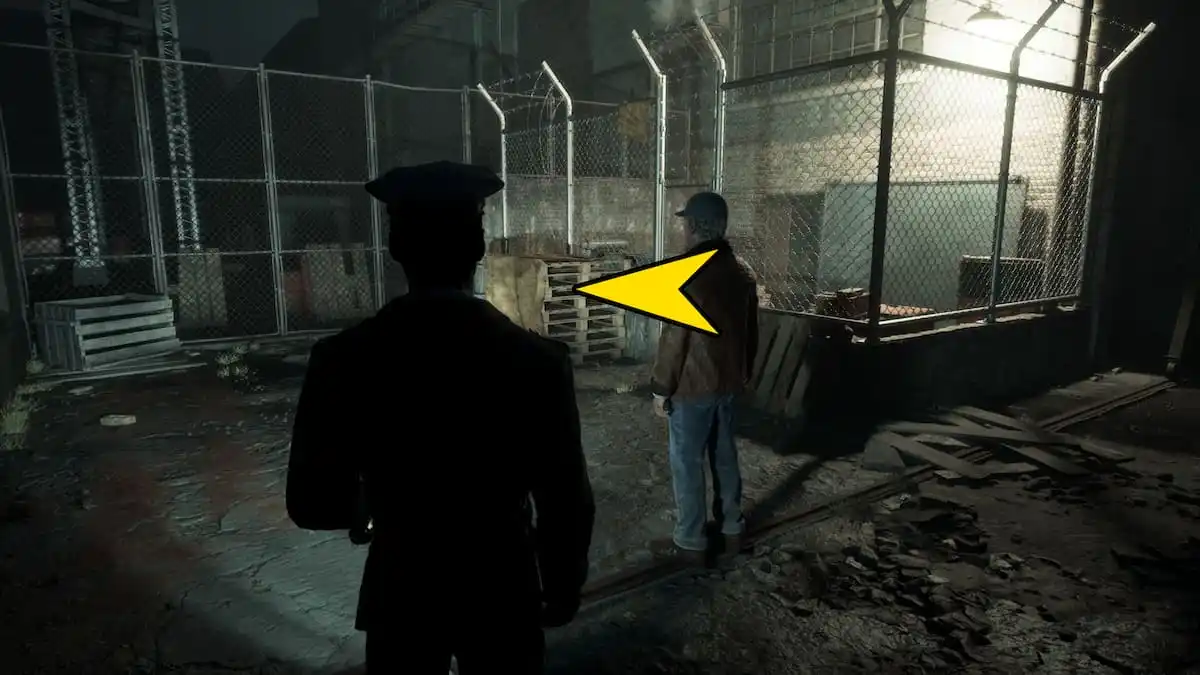
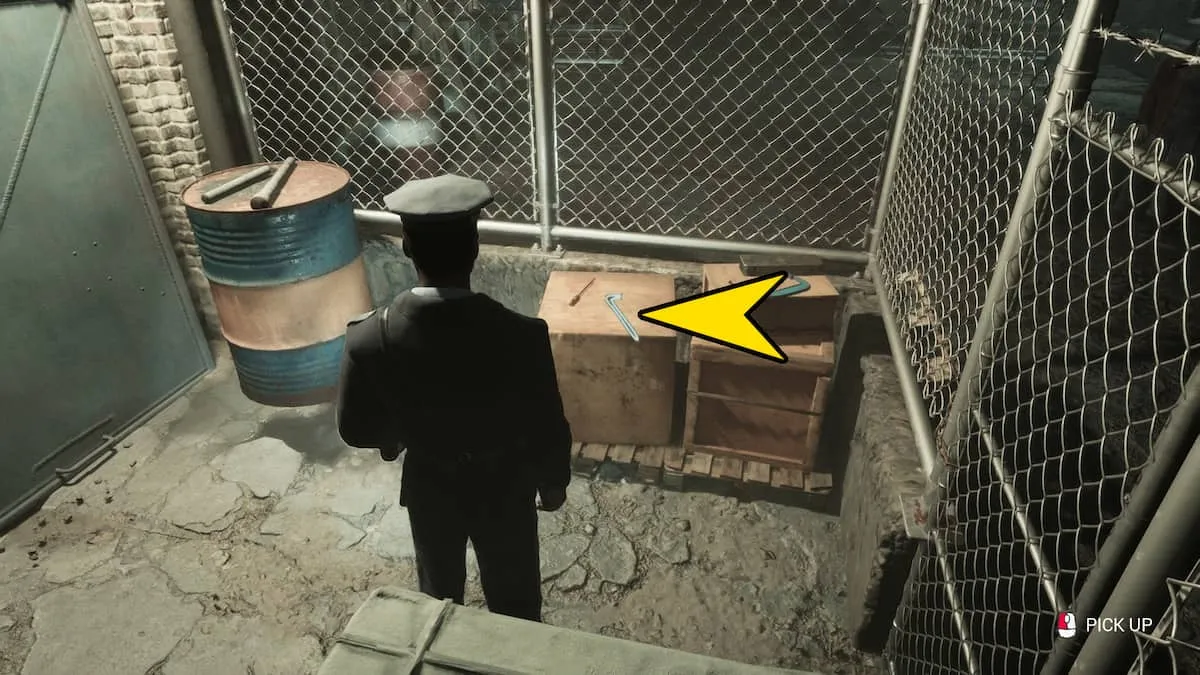
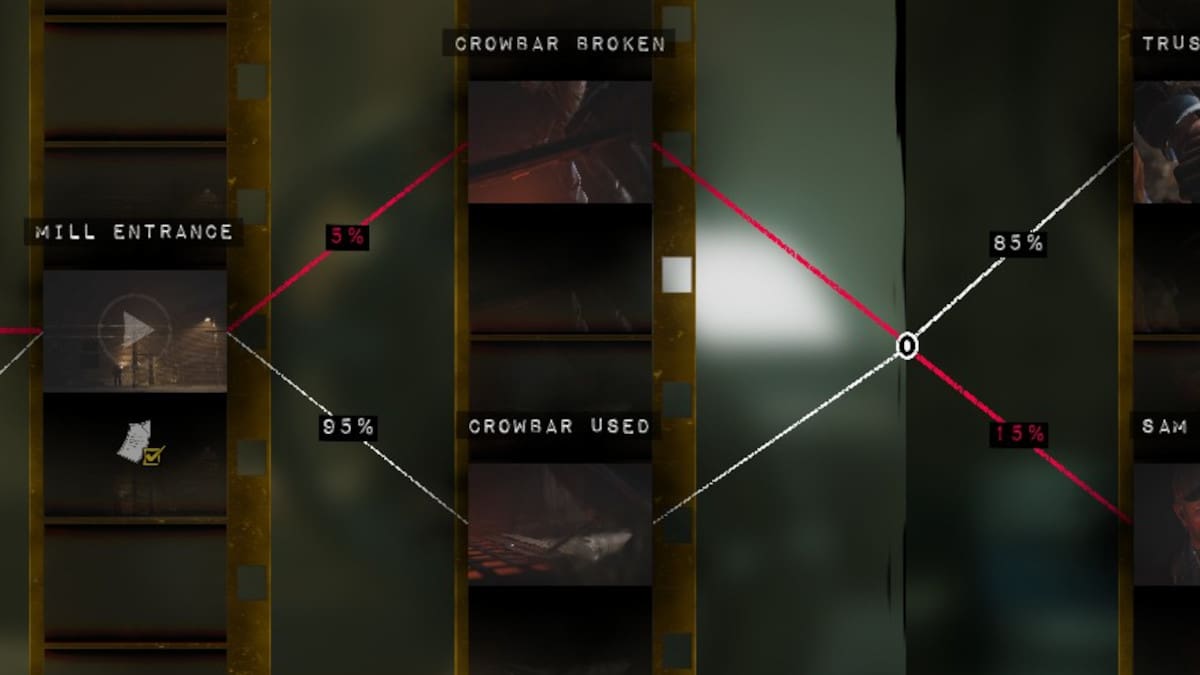
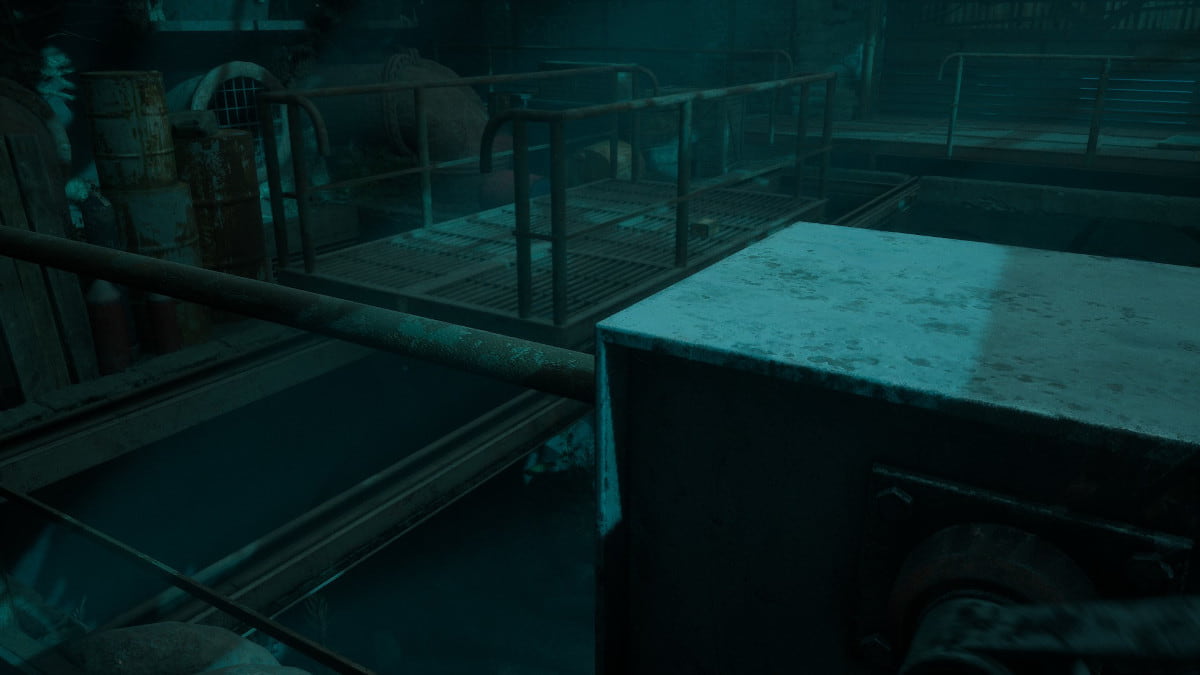
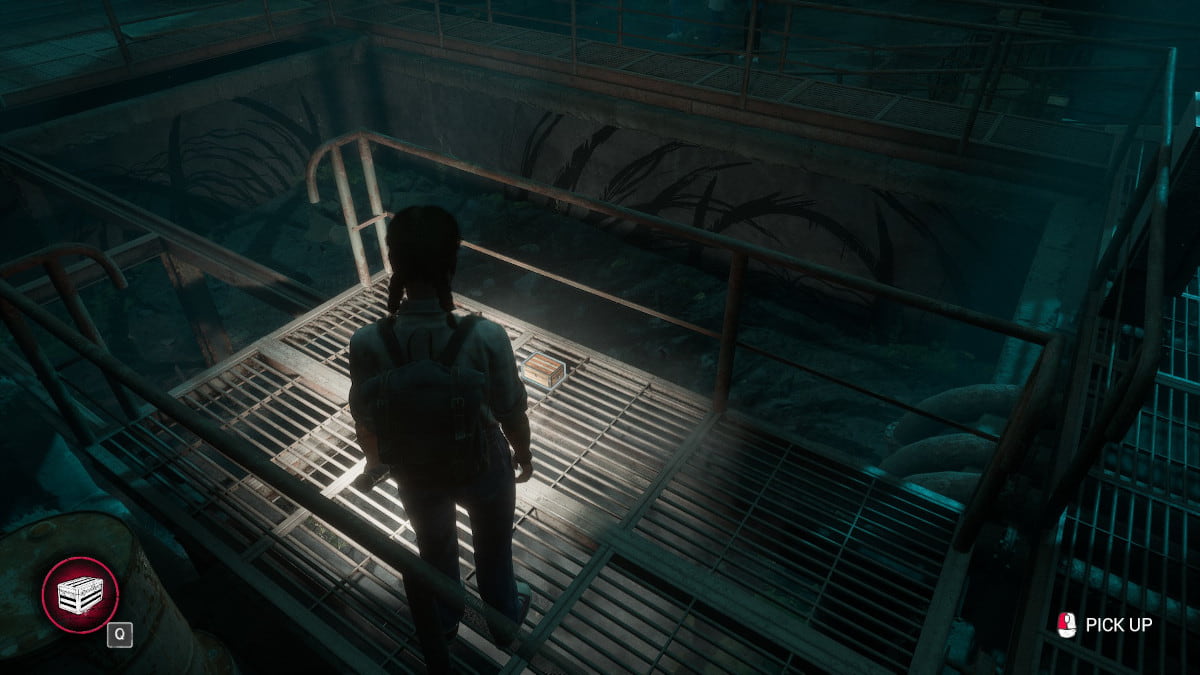
As you proceed through the warehouse, you’ll meet Tom and Merlin the dog again. Exiting the interior area will lead you to a grate that Sam wants to shift. To do so, you’ll need a crowbar. You can find one by hopping over this part of the fence and picking it up.
First, leap across to the opposite side, and afterward, press the crowbar located on the grate to make it open using a Quick Time Event (QTE). This QTE offers yet another choice in the game’s progression.
- Path 1: Fail the QTE and have Tom help you open the grate instead.
- Path 2: Pass the QTE with the crowbar.
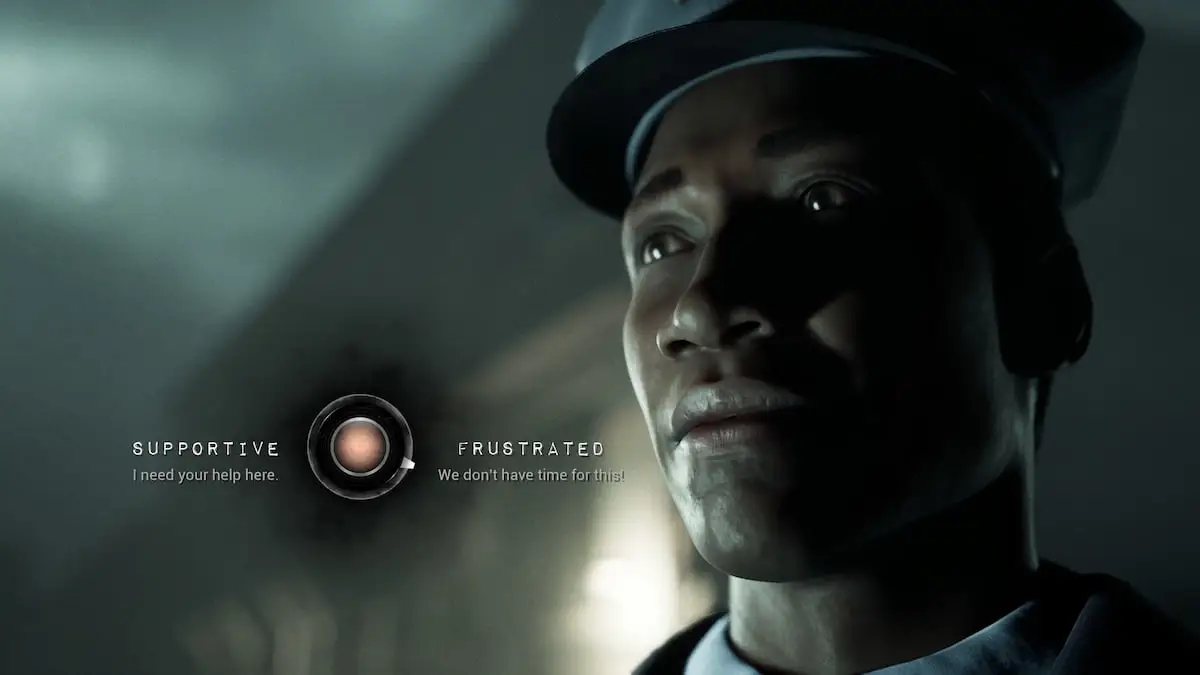
Finishing this action initiates another conversation with Tom. You have the option to act either kindly or rudely, thereby forking the road once more.
- Path 1: Supportive: I need your help here. (Trusted Tom)
- Path 2: Frustrated: We don’t have time for this! (Sam snapped)
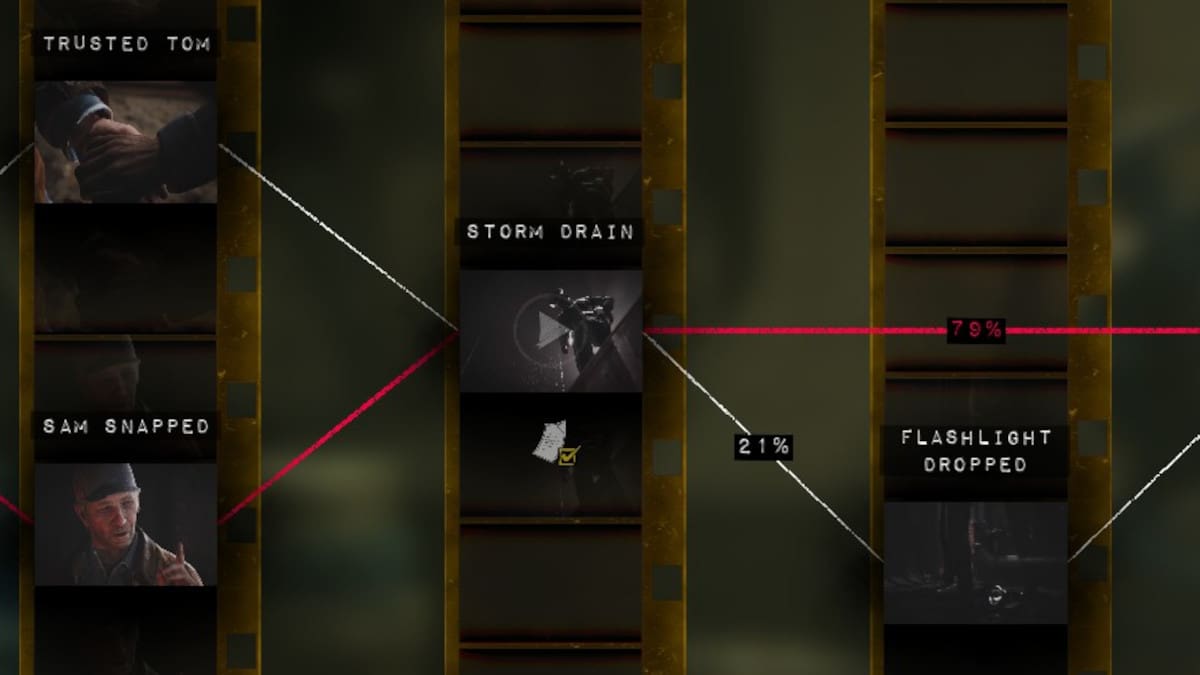
Storm Drain
Instead of descending the storm drain, you should brace yourself for going deep into its dark depths. The ladder supporting your ascent is precarious and likely to break, rendering the ascent impossible from below. Consequently, your only option becomes venturing further into the storm drain’s bowels, which can be likened to entering the heart of a furnace itself.
Trinket collectible 2 of 12: Wooden Horse
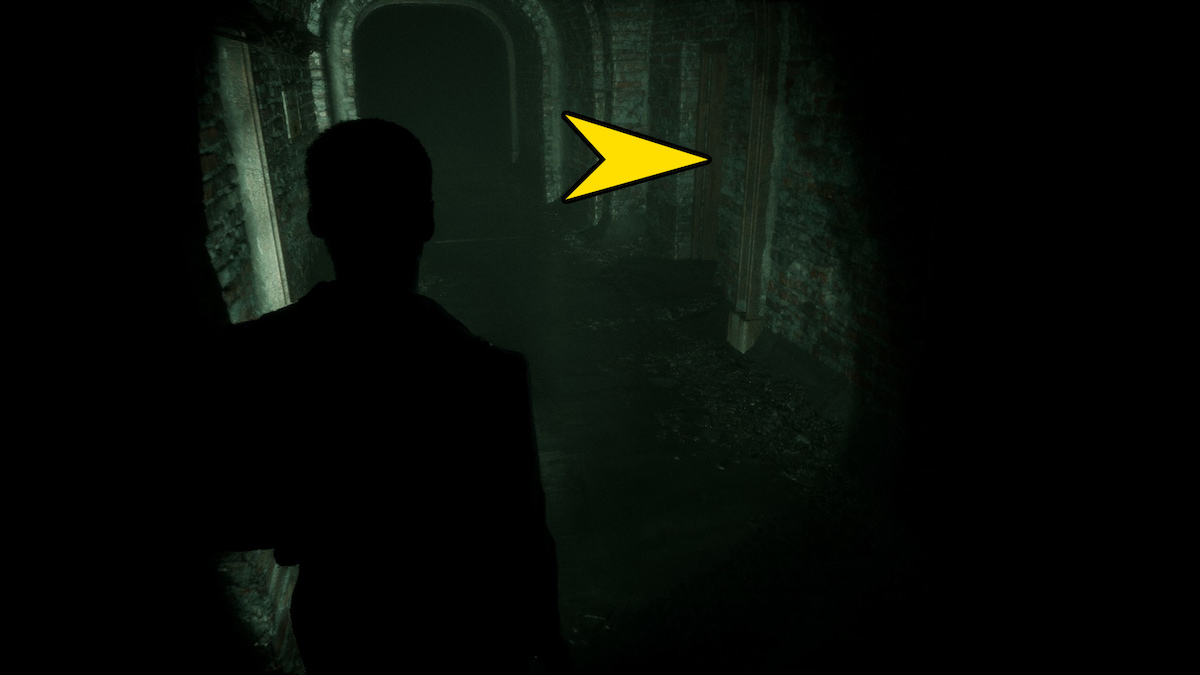
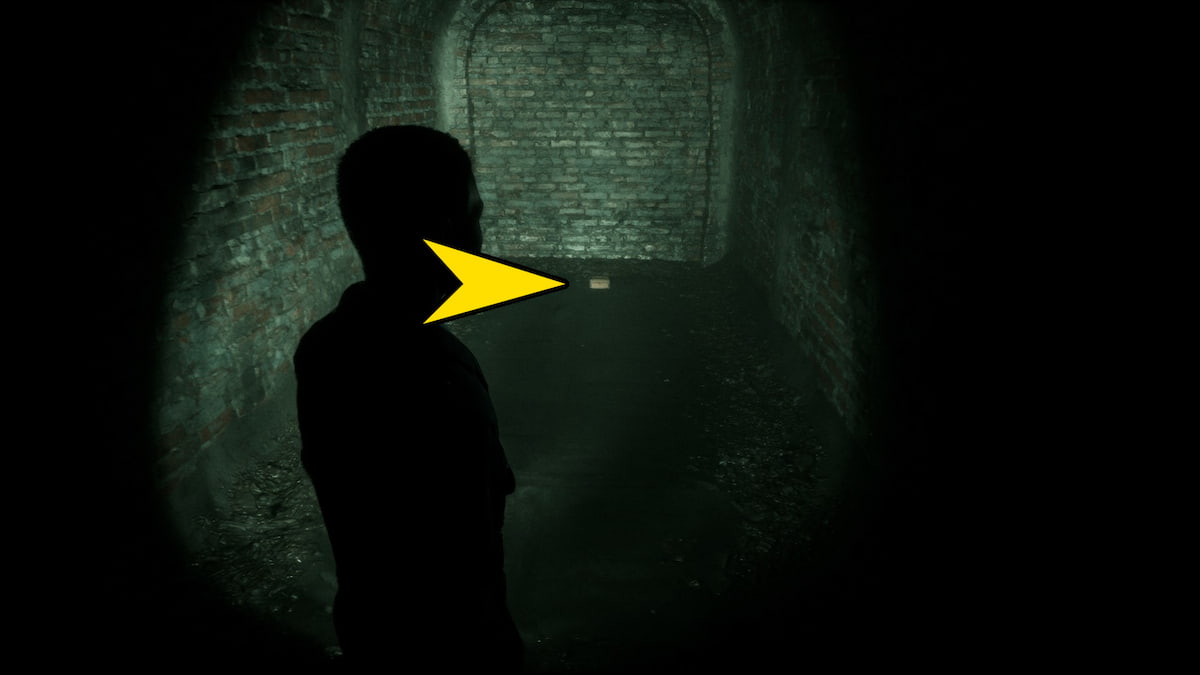
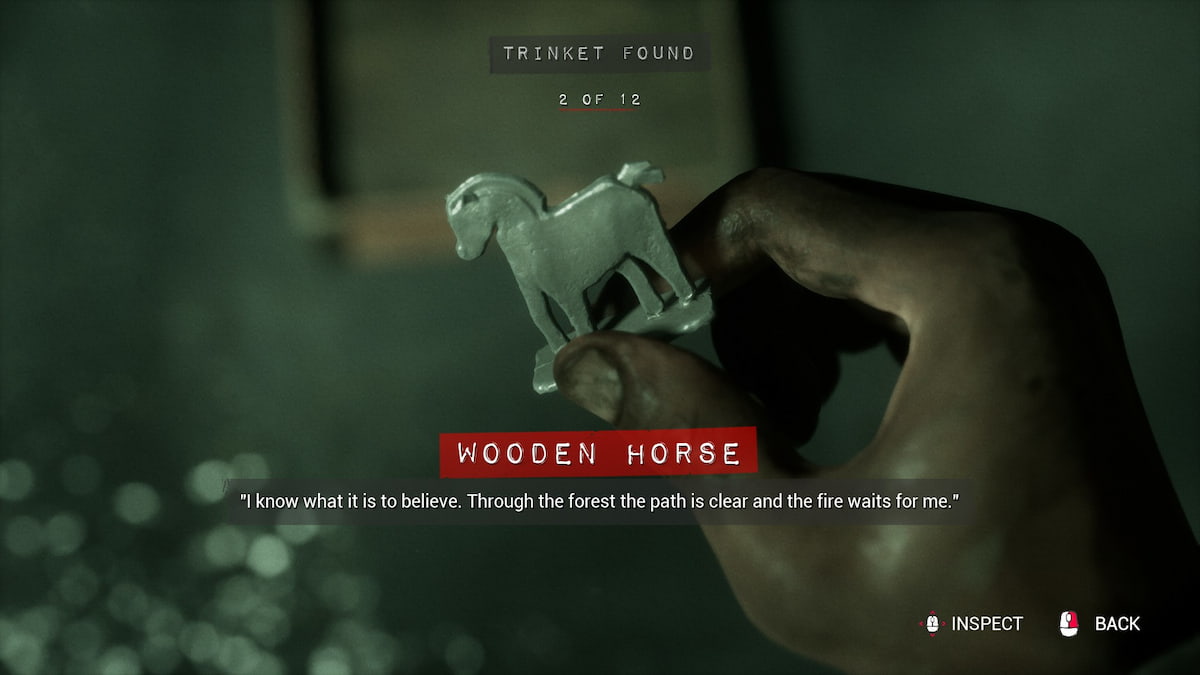
After descending into the subterranean forge passageways, you’ll accidentally lose your hat behind you. Initially, you’ll find yourself oriented towards the forge zone, but the item we seek will be in a different direction. Consequently, turn around from your starting spot and take the first left along the tunnel. On the right-hand wall of this passageway, you’ll encounter an open door. Inside that room, on the floor, there’s another wooden crate housing the horse Trinket.
The Champion Artifact 2: Symbols
Heading towards the furnace, I find myself veering right into a brightly lit tunnel, clearly labeled “Furnace Access” with a yellow sign. Catching my eye on the wall near this sign is an intriguing symbol of a rudimentary weapon, painted in bold strokes – that’s the Champion Artifact 2! There are several of these scattered around, but interacting with the first one you come across is what matters in the game.
Relliks 1 of 12: The Hillbilly
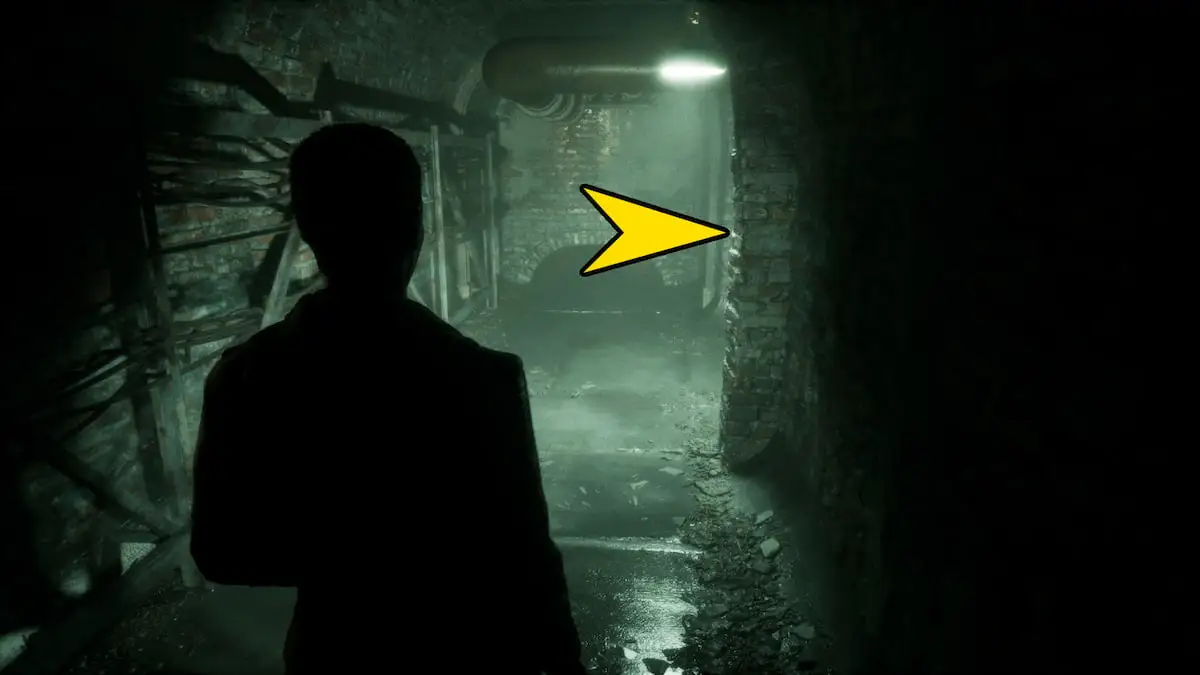
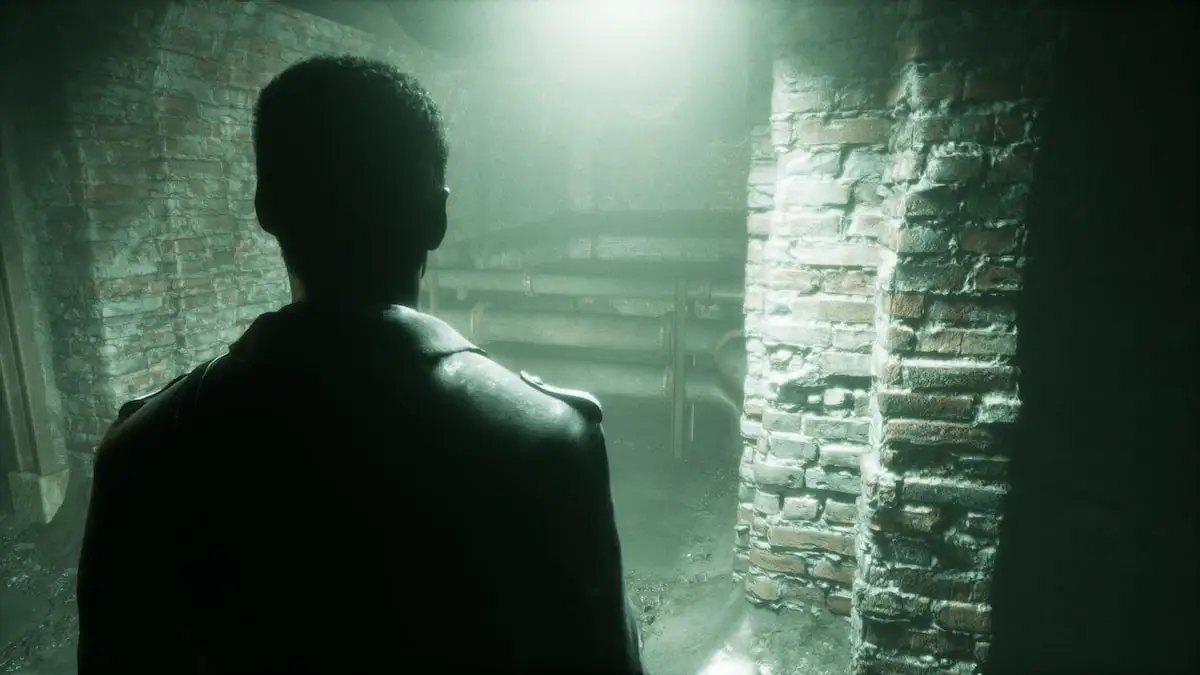
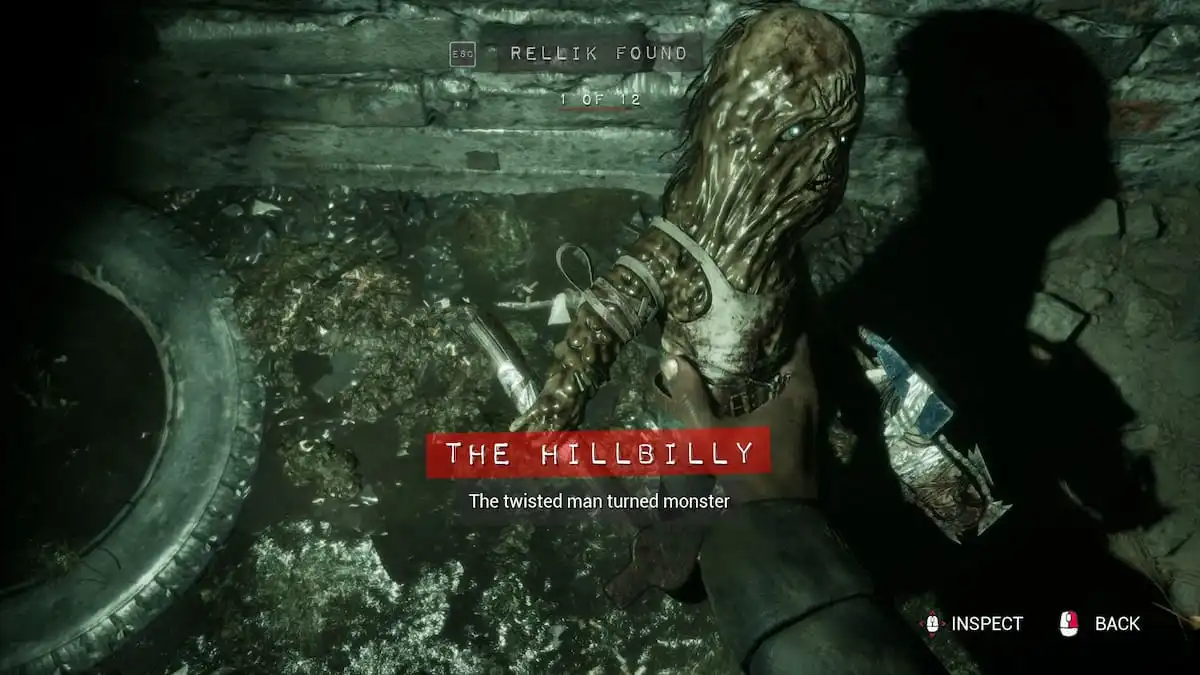
Moments before Sam reaches the spot where he needs to crawl, cast your gaze to the right. You’ll find some pipes there, at a height suitable for jumping over. The Hillbilly Rellik will be lying on the ground on the opposite side of these pipes. Once you’ve successfully navigated through the crawl space, there will be a narrow spot where you’ll need to squeeze past a part of the wall. Following this, there will be another Quick Time Event (QTE); for this one, you’ll either:
- Path 1: Cut your hand and break your flashlight.
- Path 2: Pass the QTE and keep your flashlight.
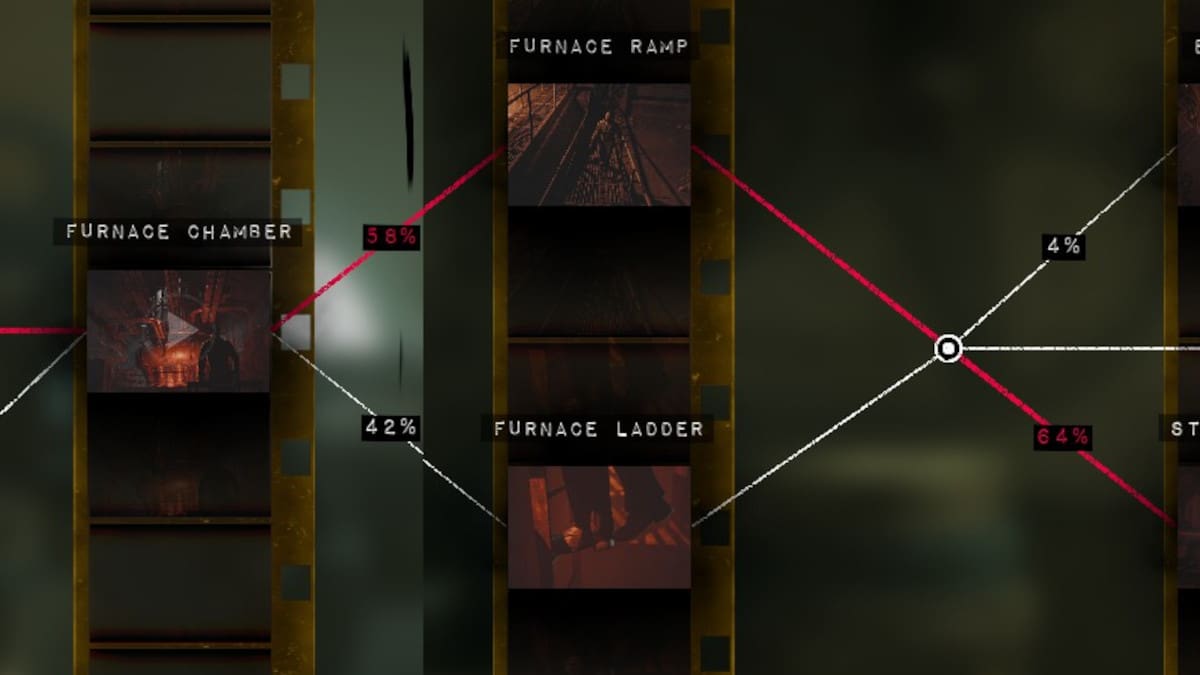
Furnace Chamber
Upon entering the fiery forge and laying eyes on the tiny being, I’d be faced with a decision: should I grab either the…
- Path 1: Furnace Ramp.
- Path 2: Furnace Ladder.
In both instances, a Quick Time Event (QTE) follows. If you don’t succeed in the first one, you’ll take a fall and encounter another QTE. Regardless of the outcome, once you engage in combat with Frank Stone, you’ll rise to continue on a new path.
- Path 1: Fail the hand-to-hand battle QTE and get your eye gouged out.
- Path 2: Pass the QTE checks, but don’t have the flashlight or fail the flashlight QTE.
- Path 3: Blind Frank Stone with the flashlight by passing all QTEs while still having the flashlight.
The next path come with the QTE when you need to react to getting hung up on the wall.
- Path 1: You fail the pipe check and permanently injure your shoulder.
- Path 2: You succeed pulling the pipe out of the wall.
Fate Sealed for Chapter 1
In the concluding scenario of Chapter 1, you have two possible outcomes: either allow Frank Stone to continue unchecked, resulting in the baby’s death, or take lethal action against Frank Stone to protect the baby’s life.
- Path 1: Fail all the quick time event, and Frank will kill the baby before you can stop him.
- Path 2: Pass all the QTEs, and you will shoot Frank before he can kill the baby.

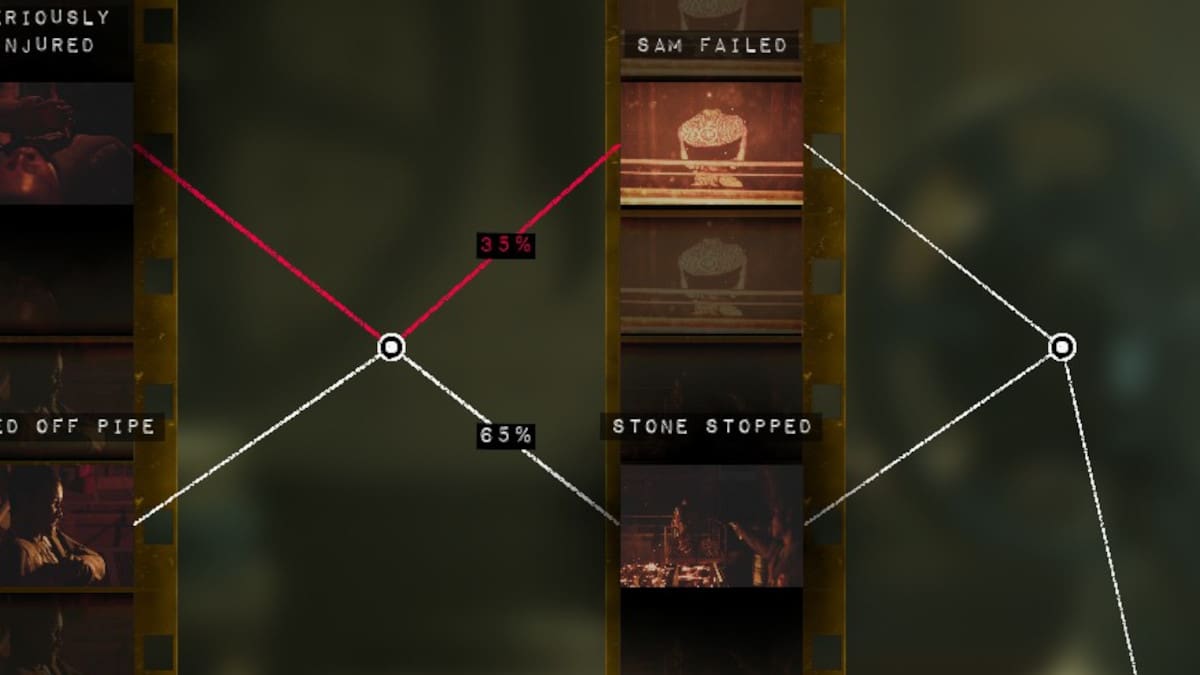
Achievement – Savior: Sam stopped Frank Stone.
Chapter 2: In the House of Darkness
In this rephrased version, the second chapter unfolds in contemporary England. Here, you step into the shoes of Madi, a vibrant college student, who has received a puzzling summons from a woman, urging her to pay a visit to her grand estate: Gerant Manor.
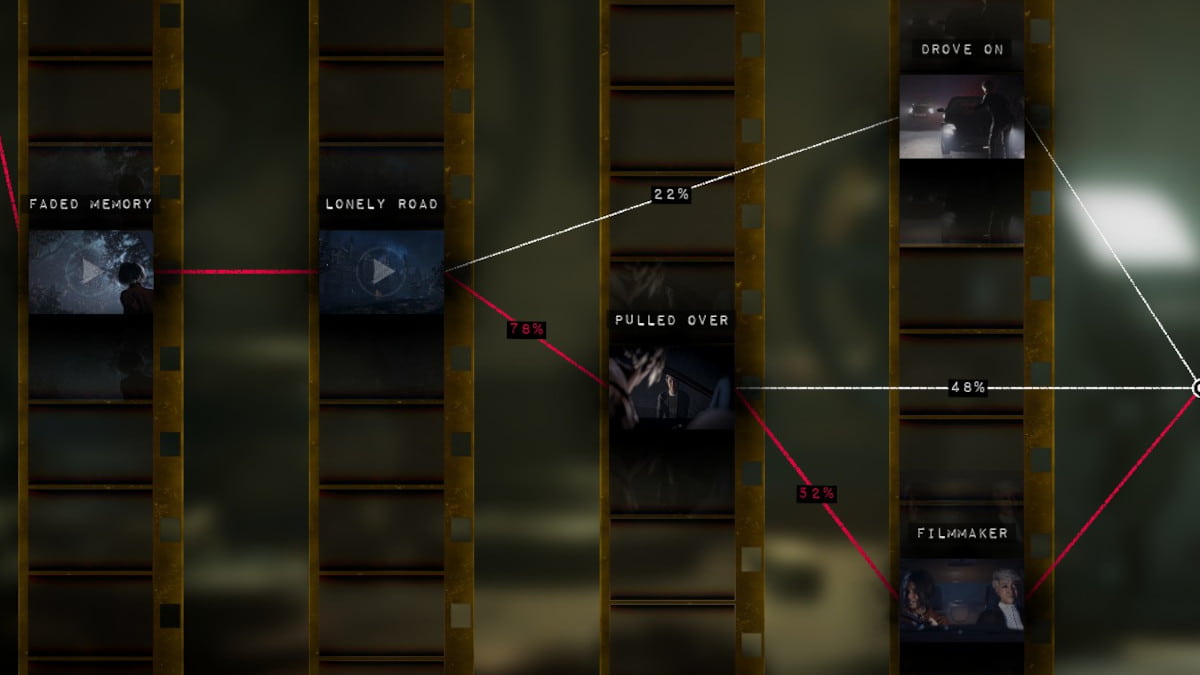
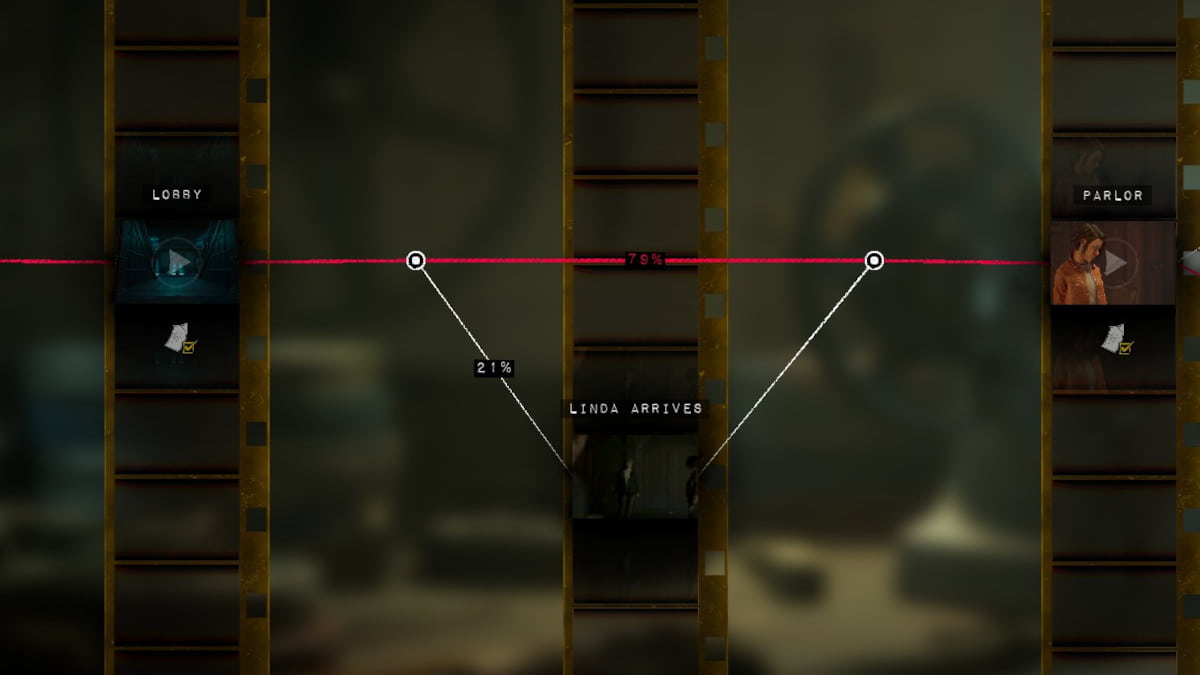
Lonely Road
Following a disturbing dream, you find yourself stirring awake aboard a flight en route from Berlin to England. Subsequently, you find yourself behind the wheel of a rental car, cruising down a barely-used, secluded country road. In a flash, you encounter a stranger whose vehicle has a flat tire, desperately attempting to hitchhike. You have but a brief moment of five seconds to decide whether to offer assistance or continue on your way.
- Path 1: Choose to pick up Linda
- Path 1a: Apprehensive: Ask Linda what she knows about Gerant Manor.
- Path 1b: Don’t ask Linda anything by letting time run out on the question.
- Path 1c: Curious: What do you do for a living?
- Path 2: Refuse to pick up Linda
Achievement – Fellow Traveller: Madi picked up the hitchhiker.
Lobby
Upon stepping into the mansion, you’ll continue to guide Madi. In order to fully complete this segment, there are a few items you might want to inspect. Given its brevity, this chapter should not present significant challenges in obtaining all available options.
The Storyteller Artifact 1: Estate Letter
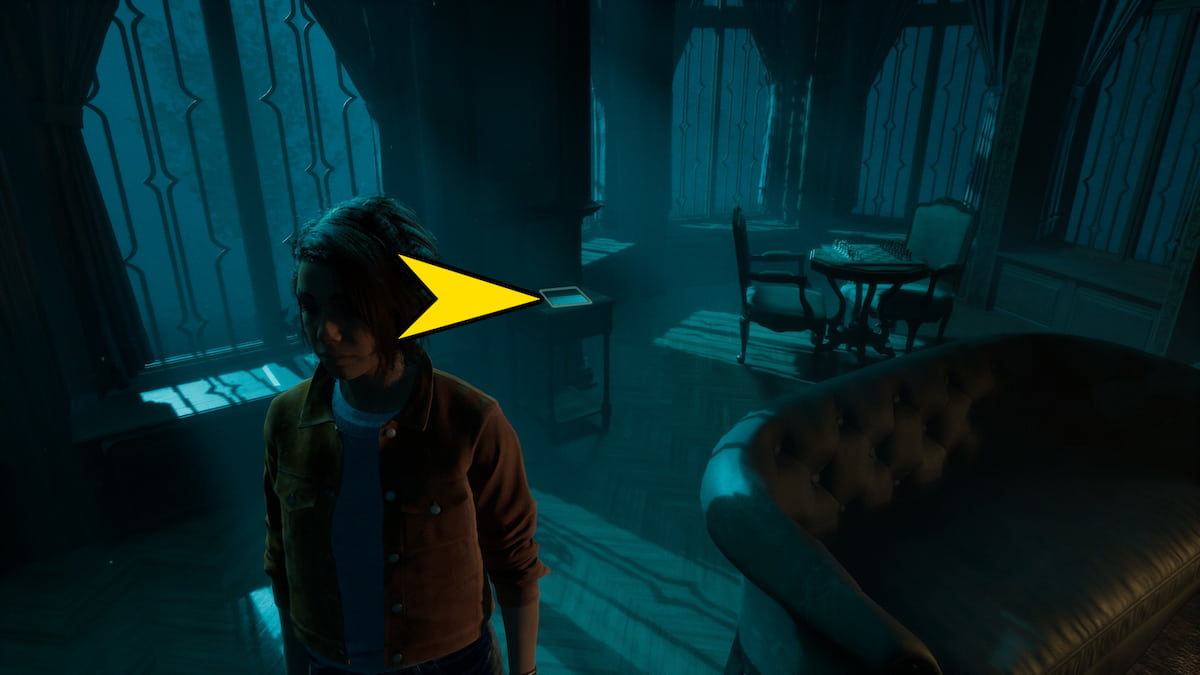
Instead of venturing downstairs initially, make your way upstairs and veer towards the left. You’ll find an unlatched door leading to a cozy living room. In this room, you’ll notice a piano positioned to the right, several sofas arranged around a crackling fireplace in the middle, and two items on tables to the left near the windows. Retrieve the letter from one of these tables to secure your first Storyteller Artifact.
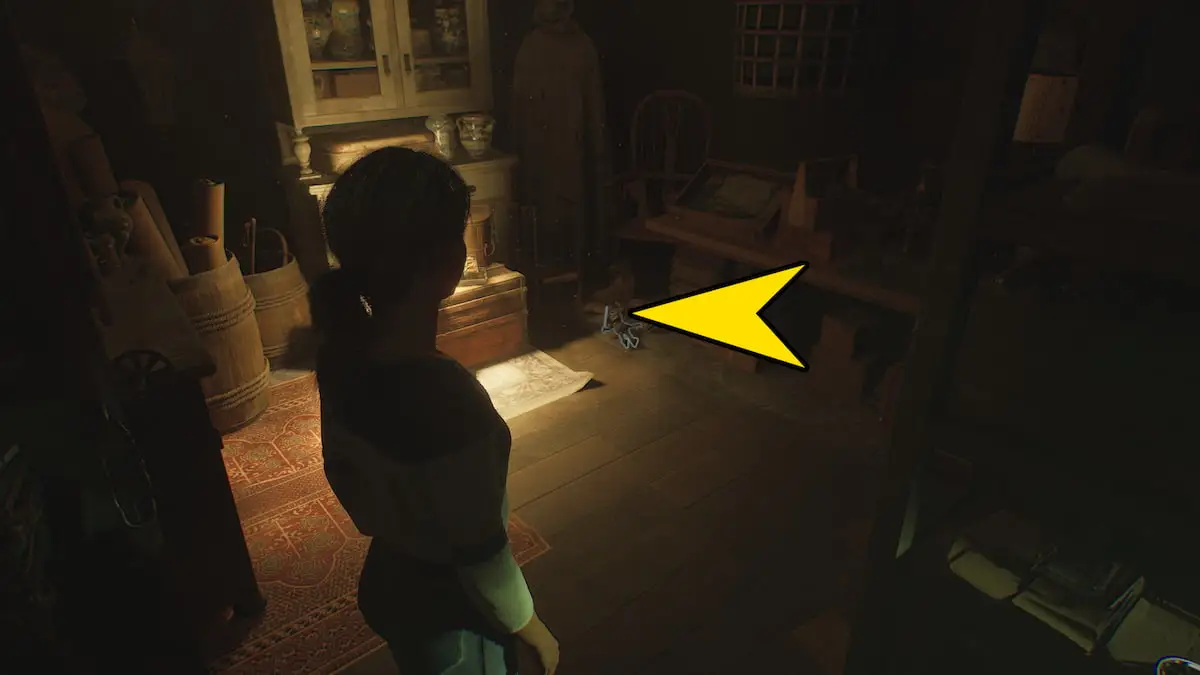
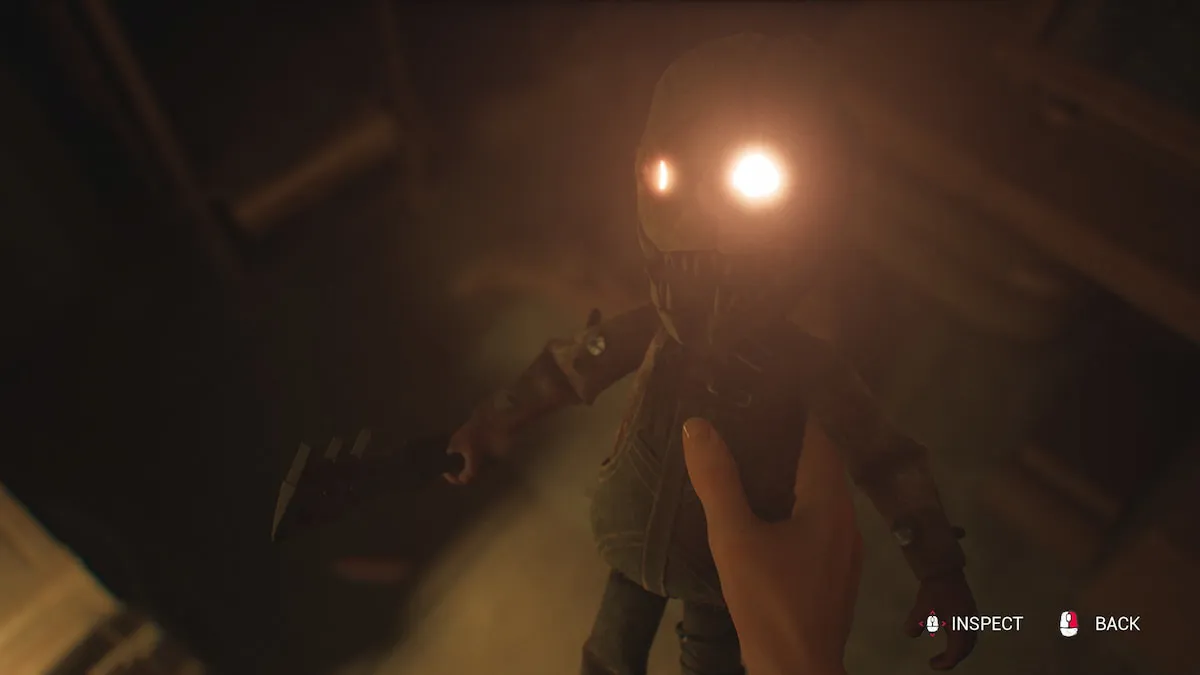
Relliks 2 of 12: The Huntress
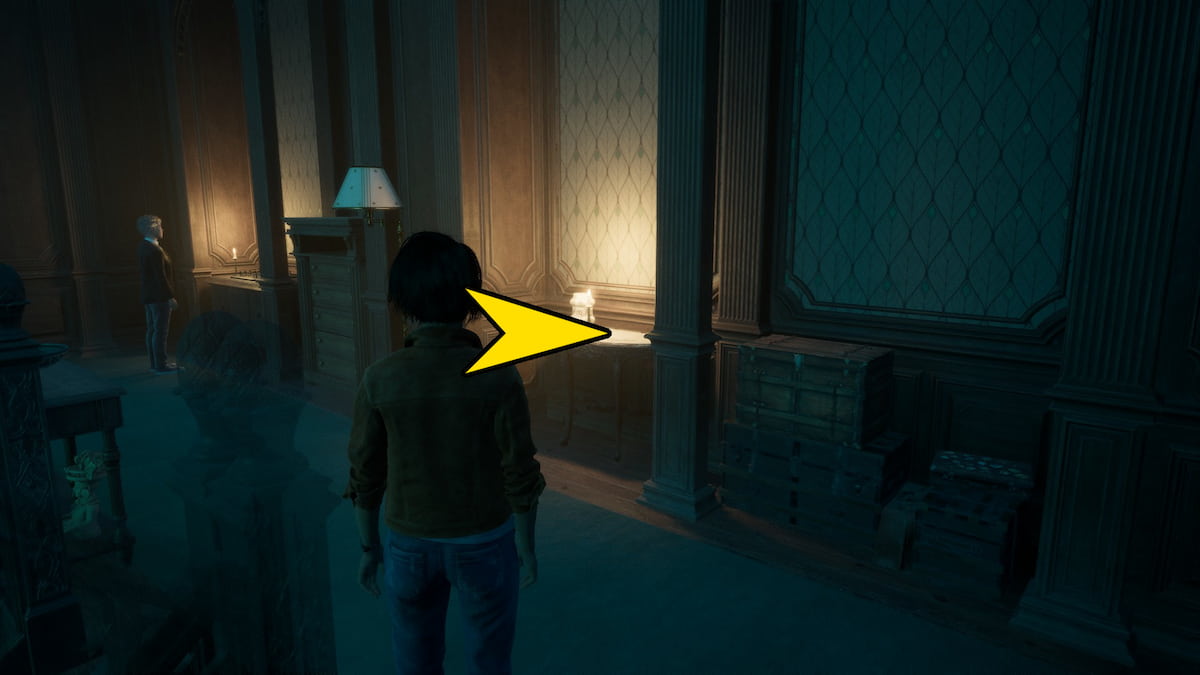
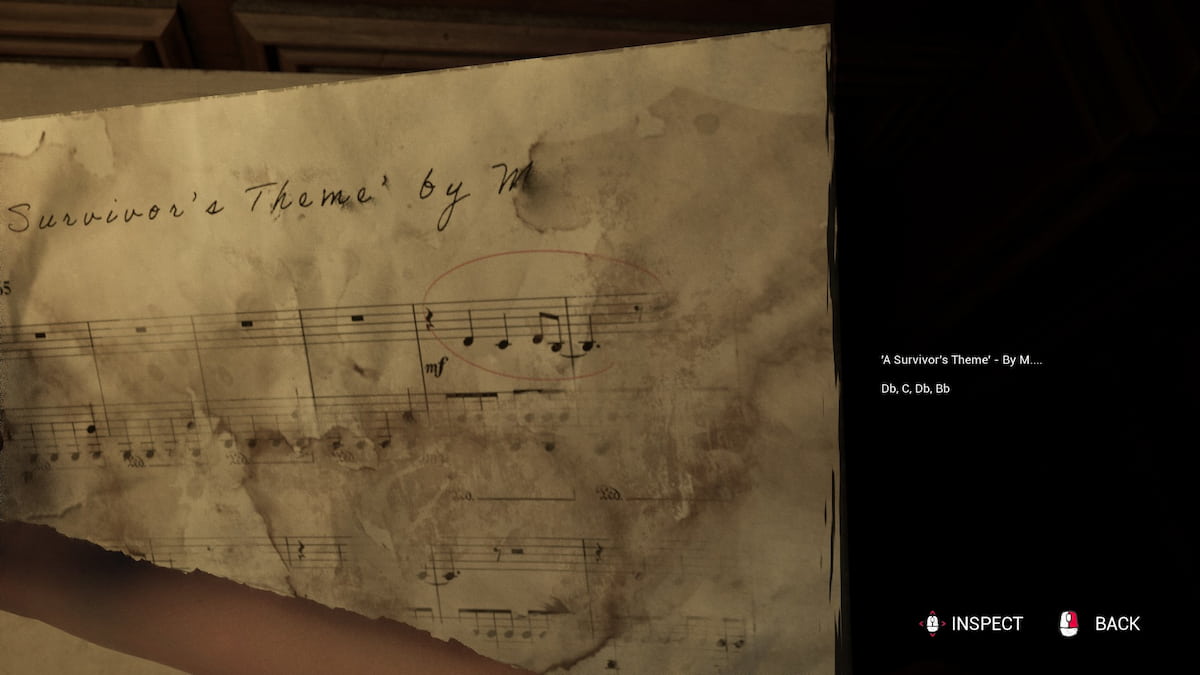
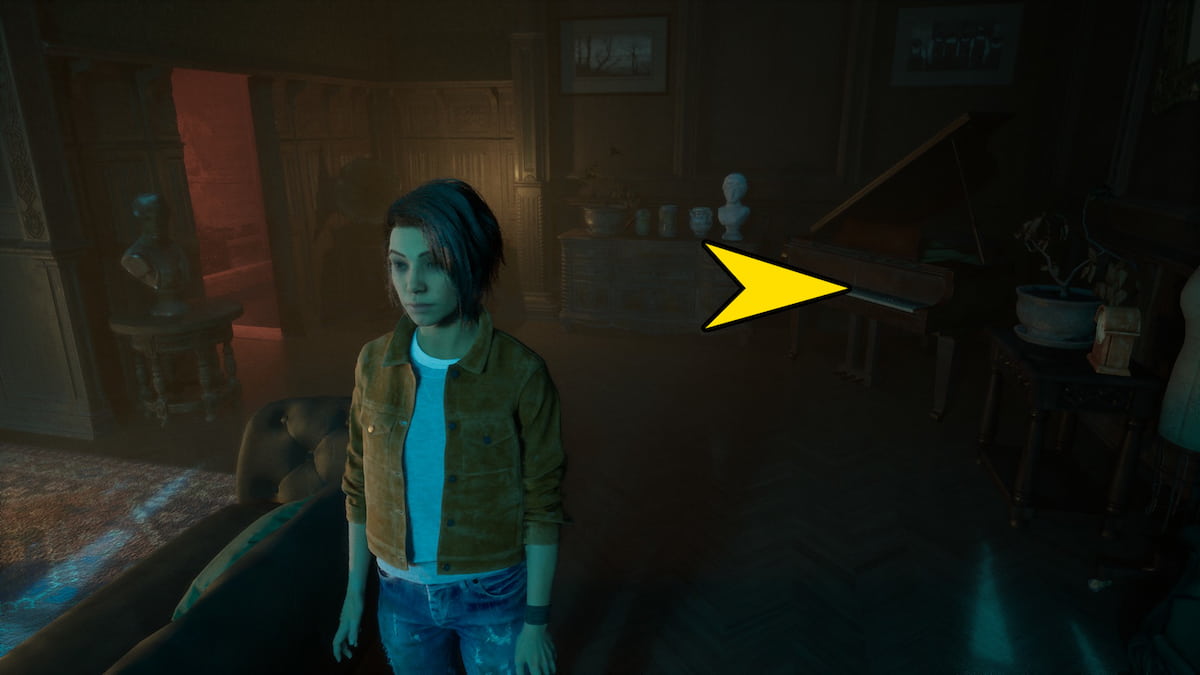
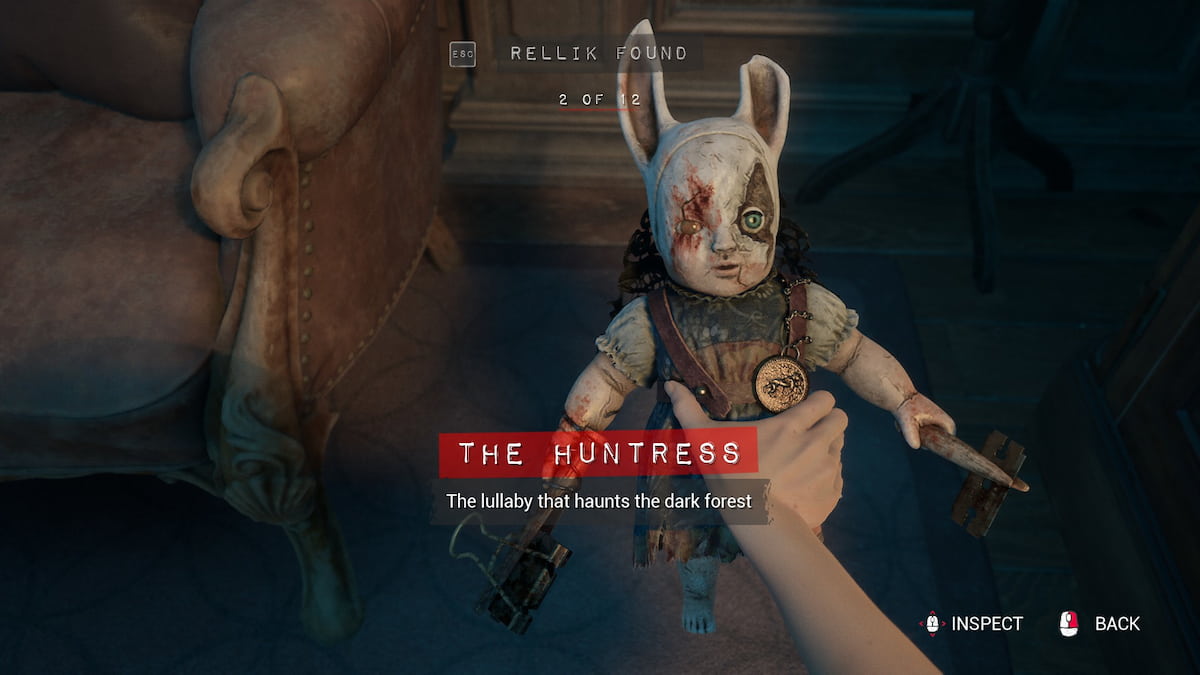
Ascend the staircase located in the lobby, and approach the tables situated at the landing on the first set of steps. You’ll notice a piece of paper with some music scribbled on it there. Have a look at it, then proceed into the sole room accessible on the uppermost floor. Inside, you’ll discover a piano; play the tune from the sheet on the piano. As you do so, a hidden door will swing open, and you’ll find Rellik in the room at the base of the stairs.
Achievement – Motif: Played a familiar theme on the piano.
Parlor
Downstairs, there is a pair of unlatched doors. Stepping through them will lead you to encounter Stan, another guest welcomed to this mansion.
The Champion Artifact 4: Epic of Gilgamesh
At the rear of the room, you’ll spot a book – it’s The Epic of Gilgamesh. Upon opening it, you’ll see various annotations and markings, making this yet another artifact.
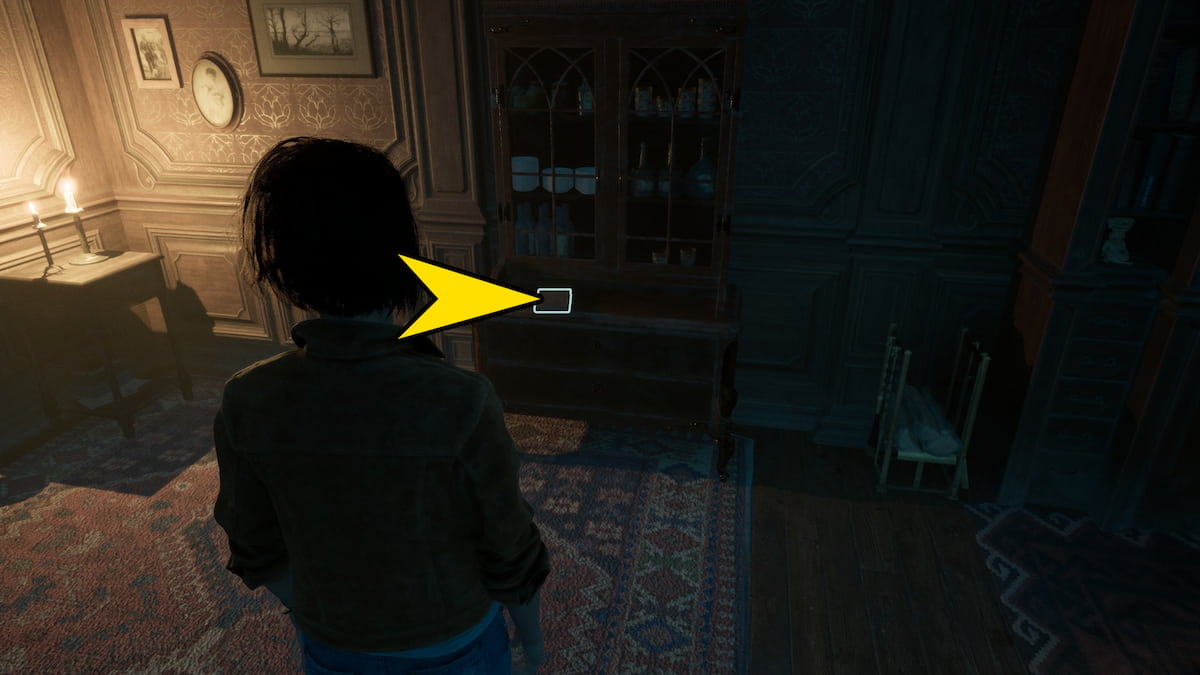
Murder Mill Artifact 1: The Poster
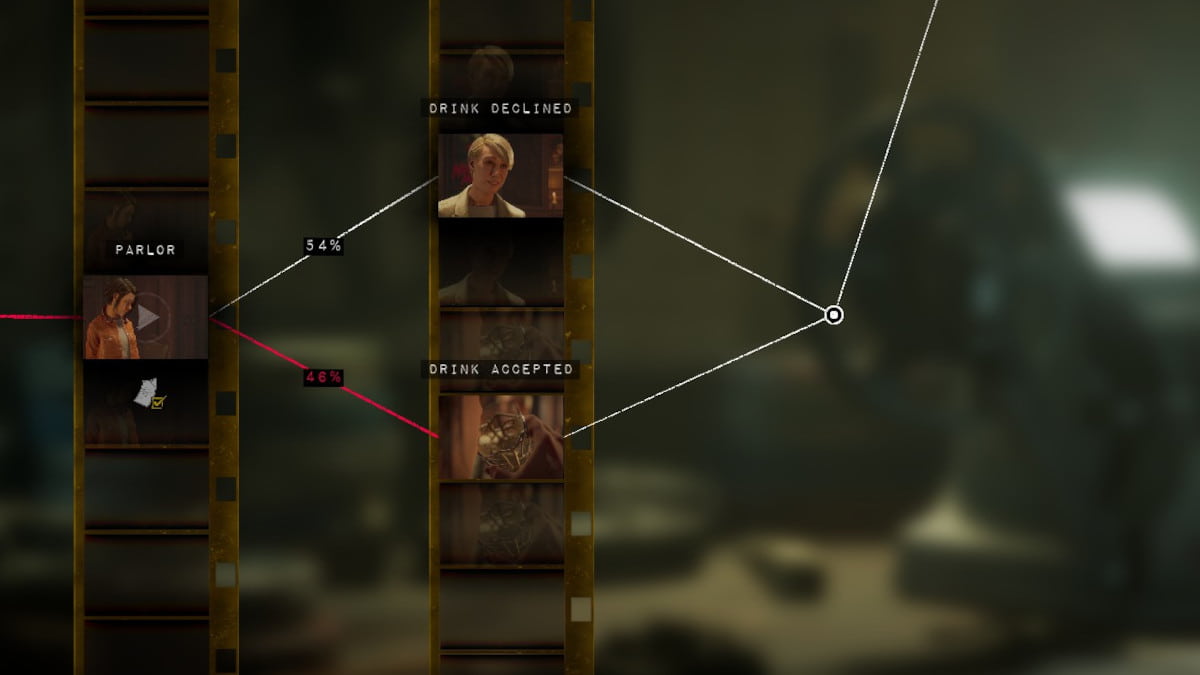
To advance the story, locate the cabinet near the entrance door and open it. Inside, you’ll find the first Murder Mill Artifact. Following this discovery, a lengthy cutscene with your host will play out. During this scene, she may offer you a drink. Either decline or accept her offer, as Madi chooses.
- Path 1: Decline the drink.
- Path 2: Accept the drink.
Fate Sealed for Chapter 2
This will provide you with every potential route for Chapter 2, allowing you to complete this part of The Cutting Room Floor.
Chapter 3: A Curiosity on Main Street
In Chapter 3, you find yourself transported to the year 1980, where a group of young people are shooting a movie within an old, deserted mill. As the scene unfolds, you’ll take on the role of Jamie, who is being captured on camera by his friend Linda and girlfriend Chris during filming.
Storage Shed
During the filming process, you’ll encounter several options or Quick Time Events (these aren’t actual game paths). Later on, following the interruption by Sam Green, you’ll face a few more choices to make.
- Path 1: Jamie apologizes to Sheriff Green.
- Path 2: Jamie defies Sherriff Green
- Path 2a: Refuse the bribe.
- Path 2b: ?
- Path 2c: Accept the bribe.
Achievement – Easy Money: Jaime accepted the bribe from Sam.
Casa Rivera
In the Rivera garage, you encounter Bonnie, Jamie’s elder sibling. If you choose to be courteous towards her, there’s an opportunity for you to request some funds from her.
- Path 1: Ask Bonnie for money after being supportive of her.
- Path 2: ?
- Path 3: Make Bonnie angry by choosing first the “Jovial: Howdy, Partner,” then “Shocked: That’s pretty harsh,” then “Serious: Family comes first.”
- Path 3a: Jamie is honest and calls Bonnie back to give her the purse.
- Path 3b: Do nothing when you have the option to steal or call Bonnie.
- Path 3c: Steal money from Bonnie’s purse.
Achievement – Five Finger Discount: Jaime stole money from Bonnie.

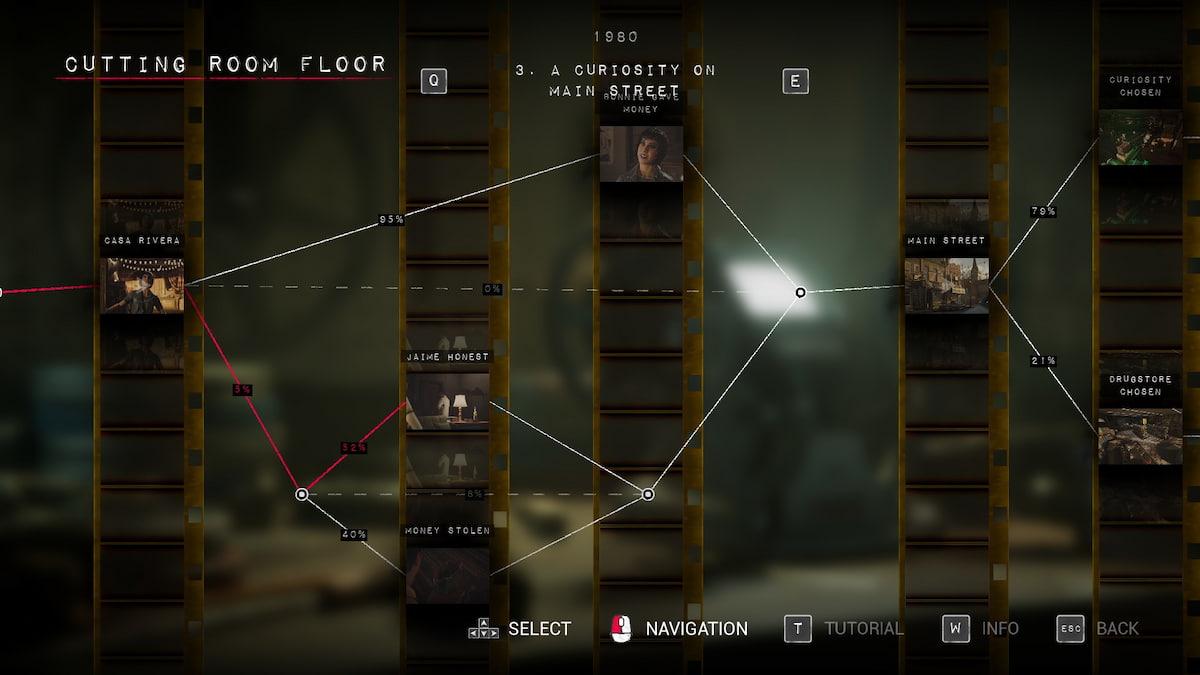
Main Street
- Path 1: Choose the Curiousity shop first.
- Path 1a: Purchase the camera without haggling.
- Path 1b: Haggle the price.
- Path 1b1: Buy the camera without accepting the mirror.
- Path 1b2: Accept the additional gift of the mirror.
- Path 2: Choose the Drugstore first.
- Path 2a: Jamie purchases fireworks.
- Path 2b: If you accepted money from any source but only got $10, Jamie will not buy any fireworks.
- Path 2c: Buy the camera without haggling.
- Path 2d: Haggle the price of the camera.
- Path 2d1: Don’t accept the mirror.
- Path 2d2: Accept the mirror.
Relliks 3 of 12: The Trapper
In my enthusiastic exploration of the antique emporium, I always stumble upon a captivating artifact known as Rellik, regardless if it’s my initial or subsequent visit. Upon entering, face away from the entrance and journey towards the heart of the shop on the right side. Keep walking past the cashier’s counter, straight to the farthest point at the back. There, nestled in the corner of the store’s right-hand rear, you’ll find this intriguing trinket waiting for you on the ground.
Storyteller Artifact 2 of 10: Lawyer Letter
At the local convenience store, you have an opportunity to earn an achievement and grab another collectible trinket. To accomplish this achievement, you must spend some time at the arcade machine situated in the back of the store, known as Fear Trap. This game resembles Space Invaders and requires you to accumulate a score of 5040 points or higher to claim the top position on the leaderboard.
Achievement – 8 Bit Hero: Got the high score on the arcade machine.
Murder Mill Collectible 2: Lost Movie Magazine
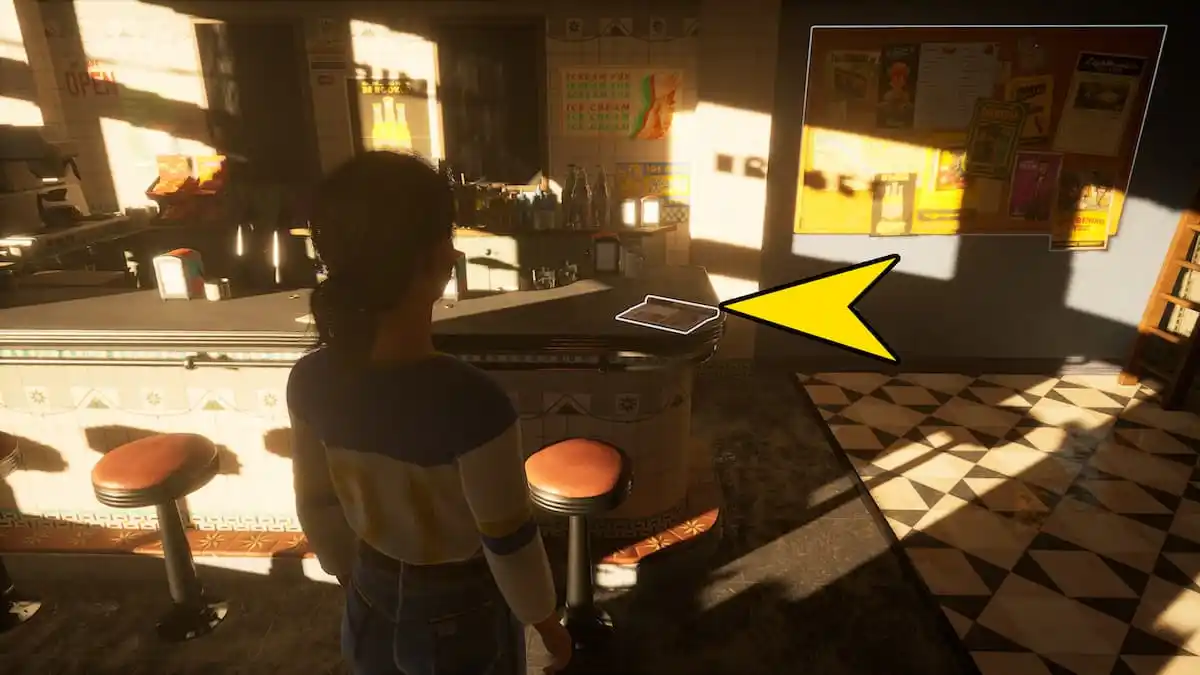
At the soda fountain counter of the pharmacy, you’ll find a magazine with an article discussing forgotten films. This is a collectible item from Murder Mill.
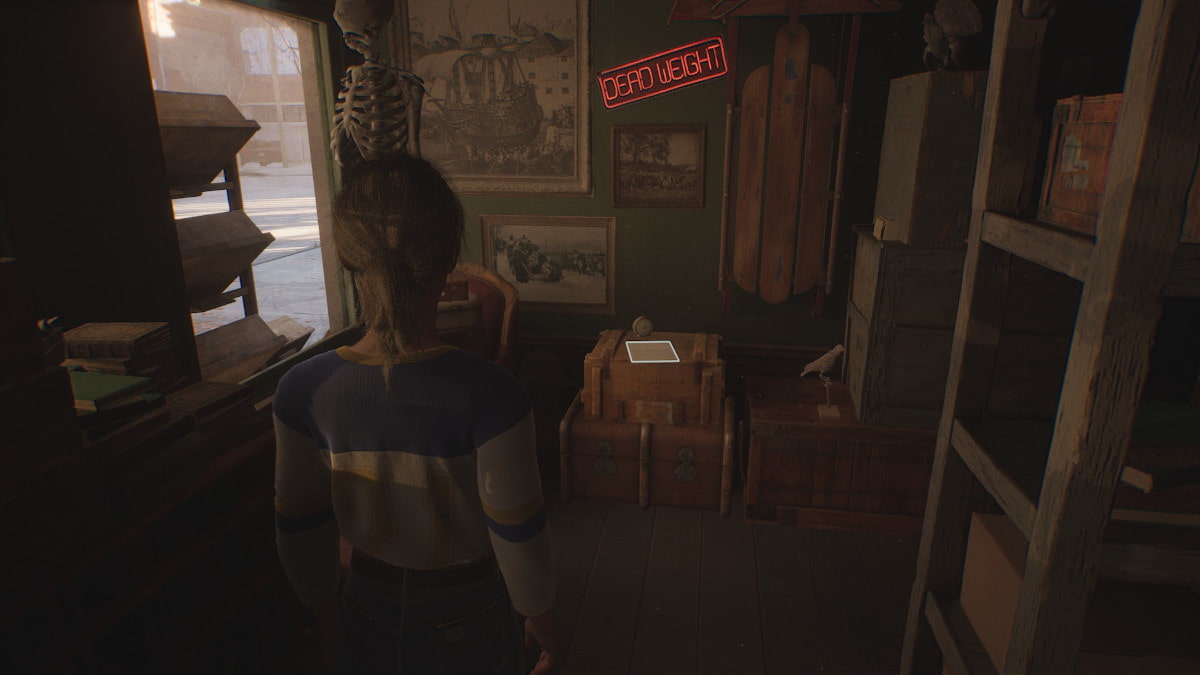
Trinket collectible 3 of 12: Waterlogged Shoe
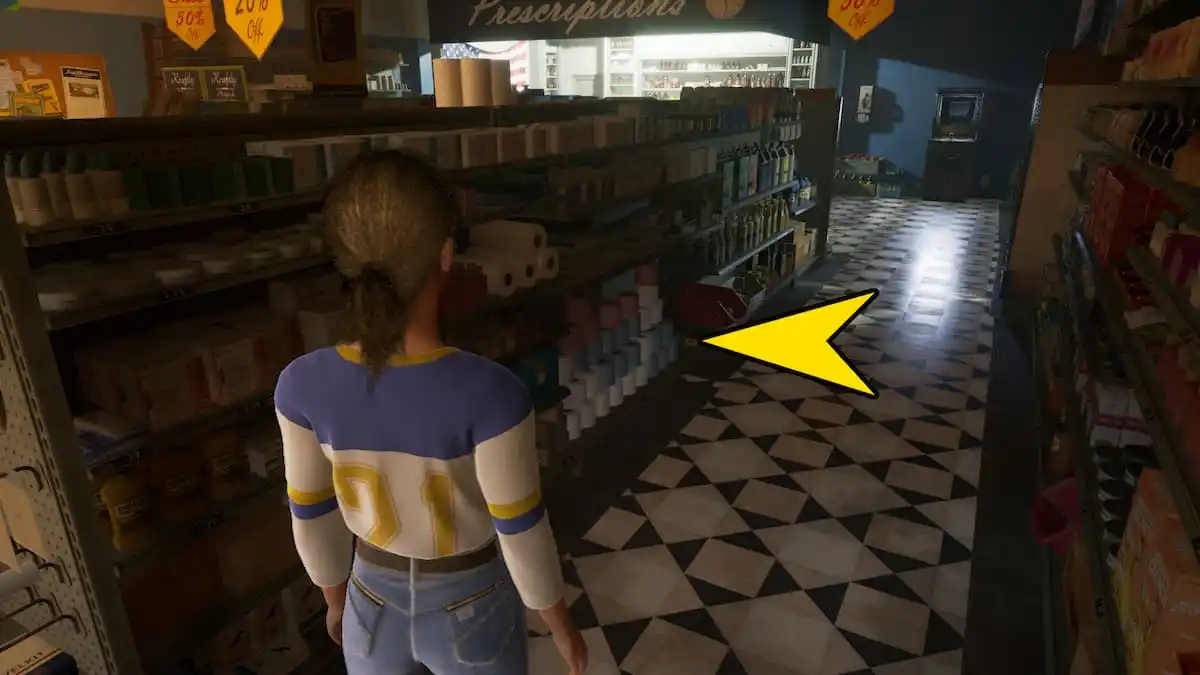
Once inside the Drugstore, if your back is towards the entrance, make your way to the aisle that’s all the way to your right. You’ll spot a small box on the left side of this aisle, located approximately halfway down and on the bottom shelf. In this box, you can find another item, the Waterlogged Shoe, which I believe you are referring to as a trinket.
Fate Sealed for Chapter 3
Here are all the possible timelines and choices from Chapter 3:


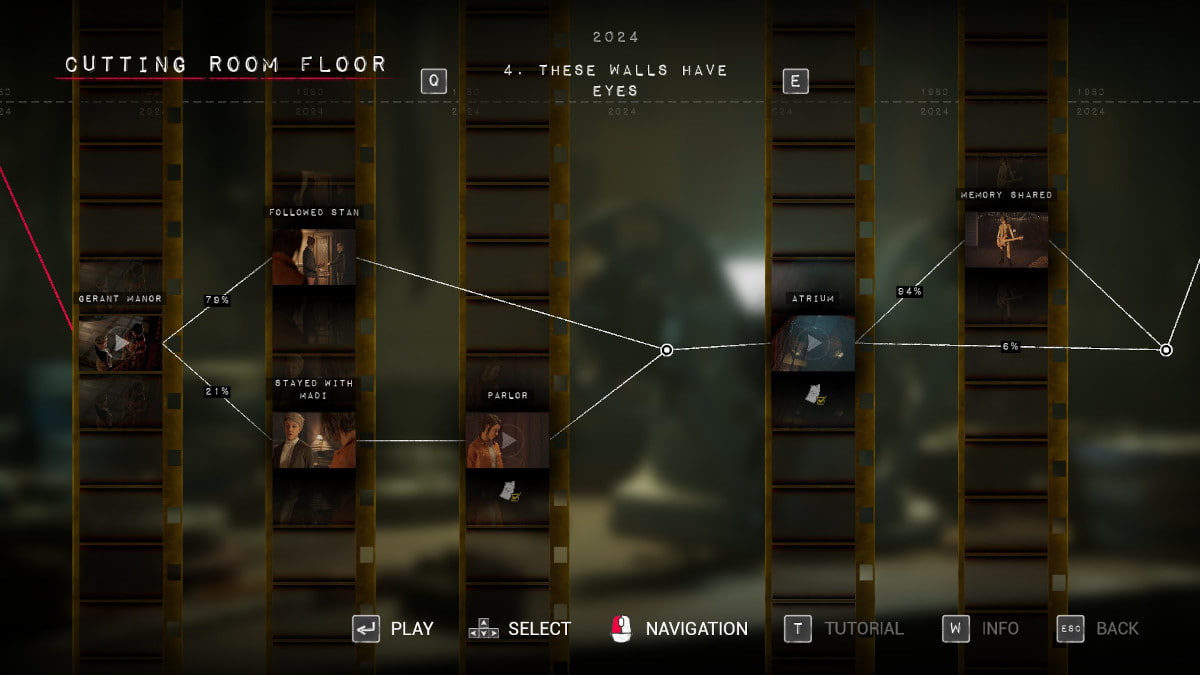
Chapter 4: These Walls Have Eyes
Time calls for a visit with Linda at Gerant Manor. After Augustine departed, you find yourself idle within the manor, hoping for some action. Meanwhile, Madi lies peacefully in slumber.
Gerant Manor
- Path 1: Choose to go outside the room with Stan.
- Path 2: Stay inside the room with Madi.
Should you choose to reside with Madi, there’s an opportunity for you to revisit the Epic of Gilgamesh, which lies on the table, in case you overlooked it during your initial visit.
The Storyteller Artifact 3: Blueprints
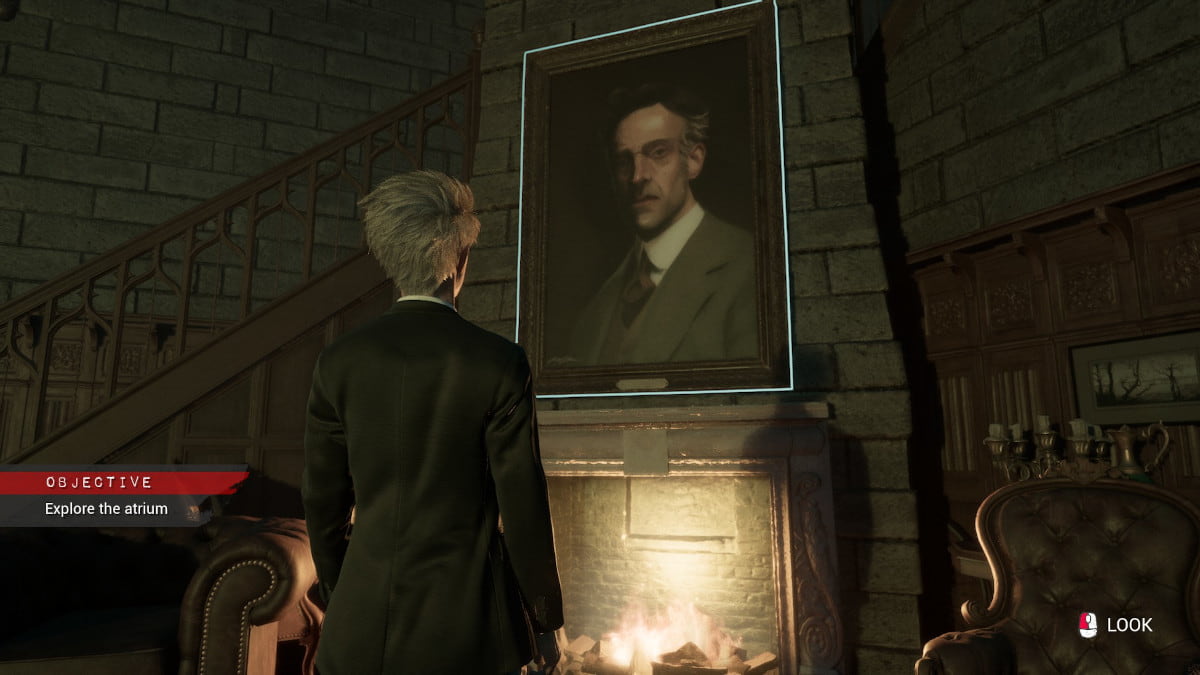
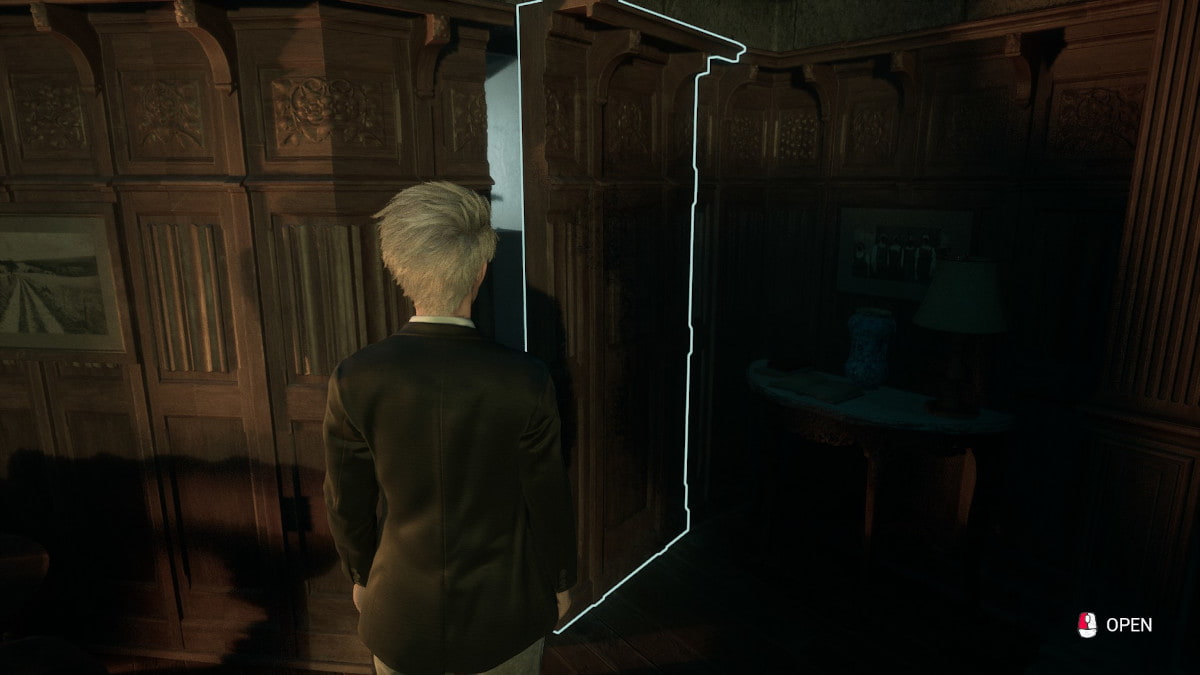
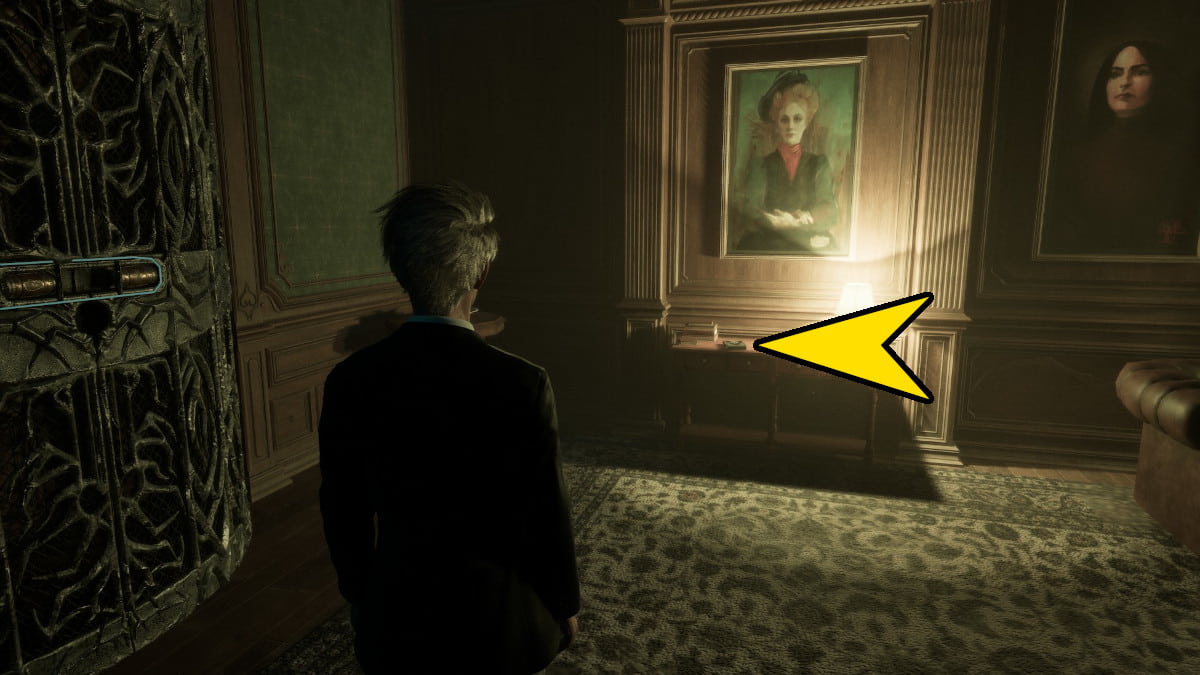
In the parlor, Stan plans to persuade you to film one of your movies at the mansion. Following this discussion, you’ll be free to explore the stairwell. Interact with the painting above the fireplace, and you’ll discover it’s a hidden button that opens a secret door. Venture inside this concealed space, and you’ll uncover a collectible blueprint.
Atrium
Inside the Atrium, there’s just one item to examine, and engaging in a meaningful talk with Madi is crucial. This interaction could alter your bond with her significantly, and it signals the conclusion of Chapter 4.
The Champion Artifact 5: Face of Evil
As you head up the stairs, Linda initiates a discussion with Stan and Madi regarding the origin of their movie props. Once they’ve finished talking, feel free to proceed upstairs. Upon reaching the second floor, look for a book on a table at the back-left corner of the room. It will be a book about Frank Stone; grab this book to acquire the fifth Champion Artifact.
Fate Sealed for Chapter 3
“Once you’ve taken a peek at the book and examined it carefully, shift your gaze towards the metal door situated to the left of the book. Engage in conversation with Madi there, which will lead us to the next scene. She might request a story about her mother from you, but feel free to share one if you wish, or simply continue the dialogue without.
- Path 1: Share a story with Madi about Bonnie.
- Path 2: Refuse to share a story about Bonnie with Madi.
Chapter 5: The Phantom of Cedar Steel
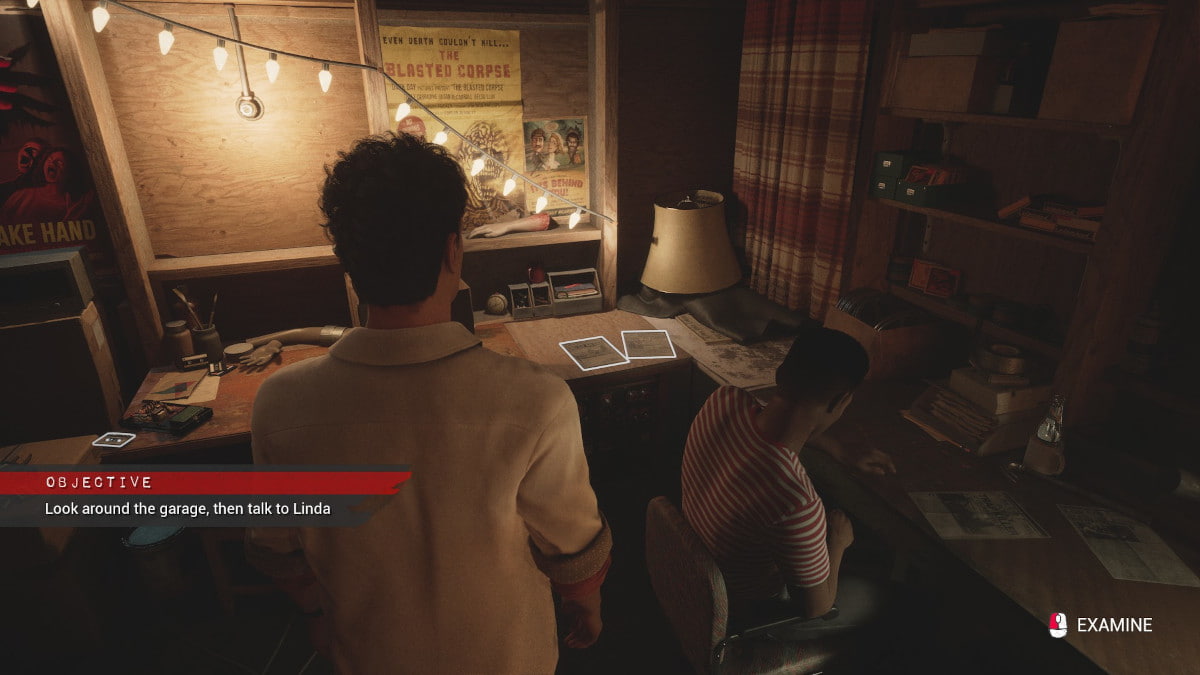
In Chapter 5, the action unfolds in Jaime’s garage during the year 1980. Eager to resume their filmmaking endeavors, the group of young adults are now equipped with a fresh camera, ready to re-enter the mill and capture footage once more.
Jamie’s Garage
At our game development gathering, it’s essential to scan the garage area carefully: You’ll come across three crucial items to collect – a cassette tape, an old newspaper clipping, and a book. The cassette tape will offer you one out of three choices; here are its possible routes:
- Path 1: Don’t listen to the tape at all.
- Path 2: If you chose to be nice to Tom and choose the Supportive option in Chapter 1 when you give Tom the key to Sam’s car, you will get to hear that Tom is doing better and no longer drinking.
- Path 3: If you chose to Snap at Tom in chapter 1, you will hear that Tom was still drinking during the interview and is too drunk to tell the story.
Achievement – Lumpkin and Livin’: Learned that Tom stopped drinking due to Sam’s kindness.
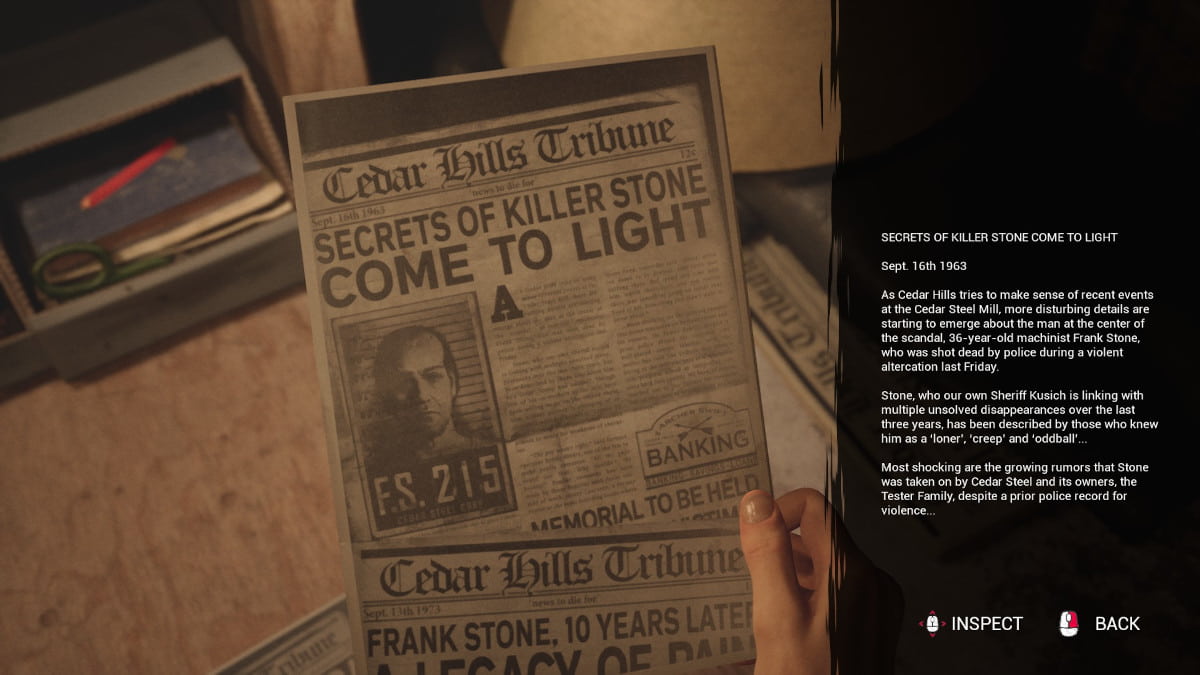
The Champion Artifact 3 of 10: Old Newspaper Article
Once Robert and Chris wrap up their discussion about the Frank Stone research, you’ll have full access to the garage. To obtain the artifact, interact with the articles concerning the murder that are next to Robert on his desk.
Murder Mill Artifact 4 of 10: Oracle of the Omniverse
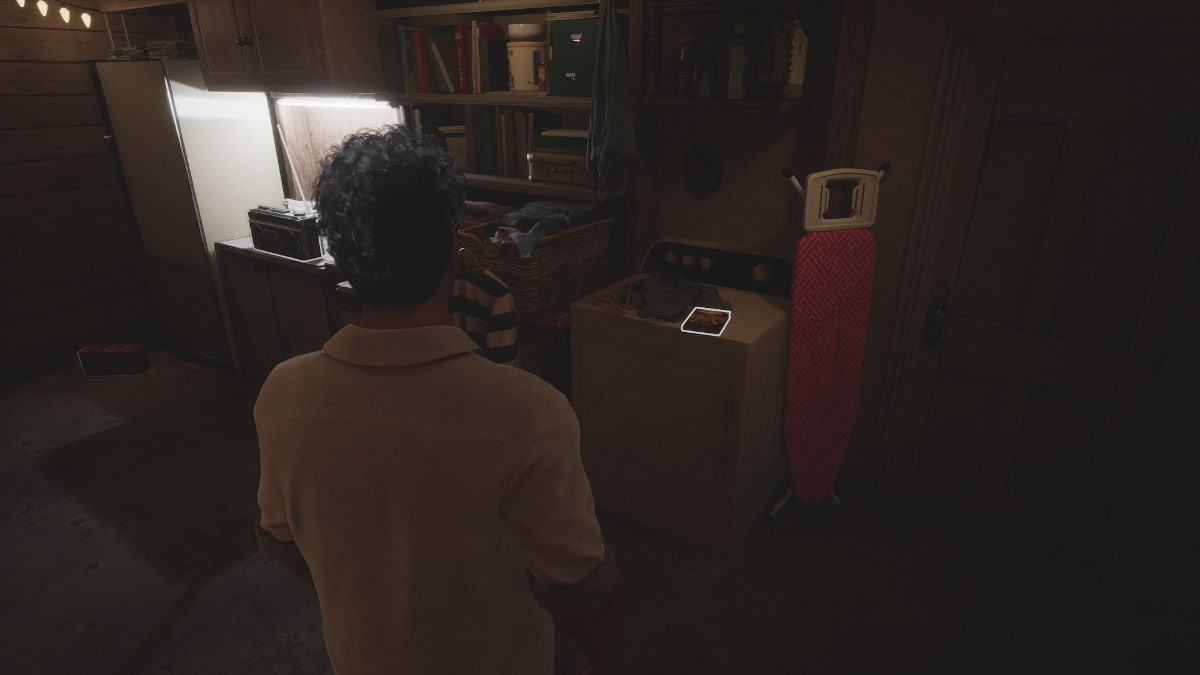
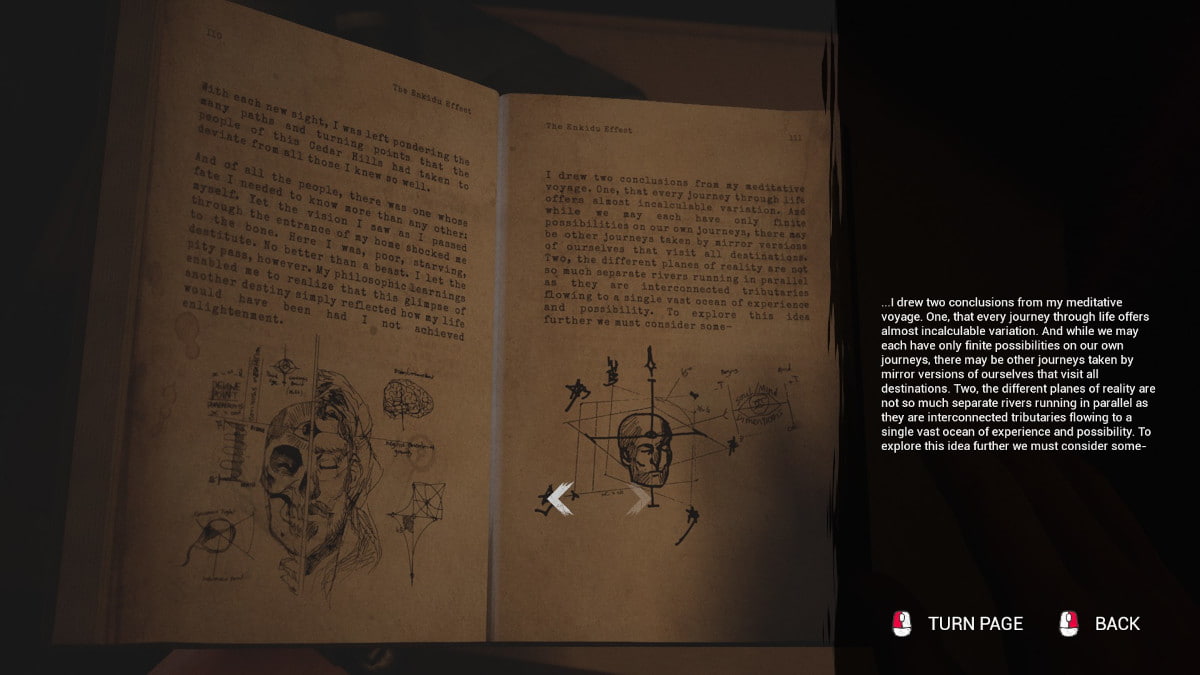
Across the garage from where Chris’s desk is located, there’s a bookshelf housing a particular book – “The Oracle of the Omniverse.” This book offers a unique perspective into the various universes that Augustine is traversing as he journeys.
Stormdrain

Following your conversation with Linda, heading out of the garage will lead you towards the storm drain. You’ll need to decide whether to ascend the nearby fence, moving closer to Sam’s patrol, or leap over the damaged bridge in the opposite direction, keeping more distance from Sam. Either path will ensure your safety and eventually lead you into the storm drain and the mill.
Climb to the Stormdrain
Taking the quicker path directly takes you to the Stormdrain, which then opens up to the Mill’s Passage. On your journey, keep an eye out for a small treasure.
Trinket 6 of 12: The Mother Daughter Ring
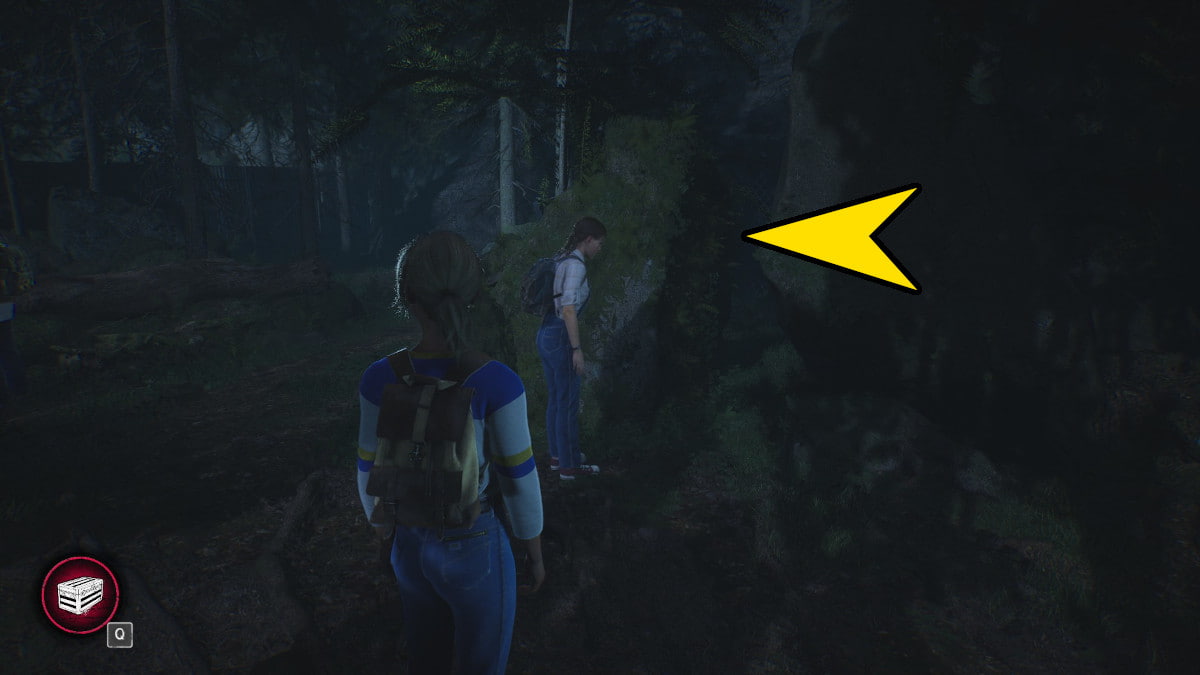
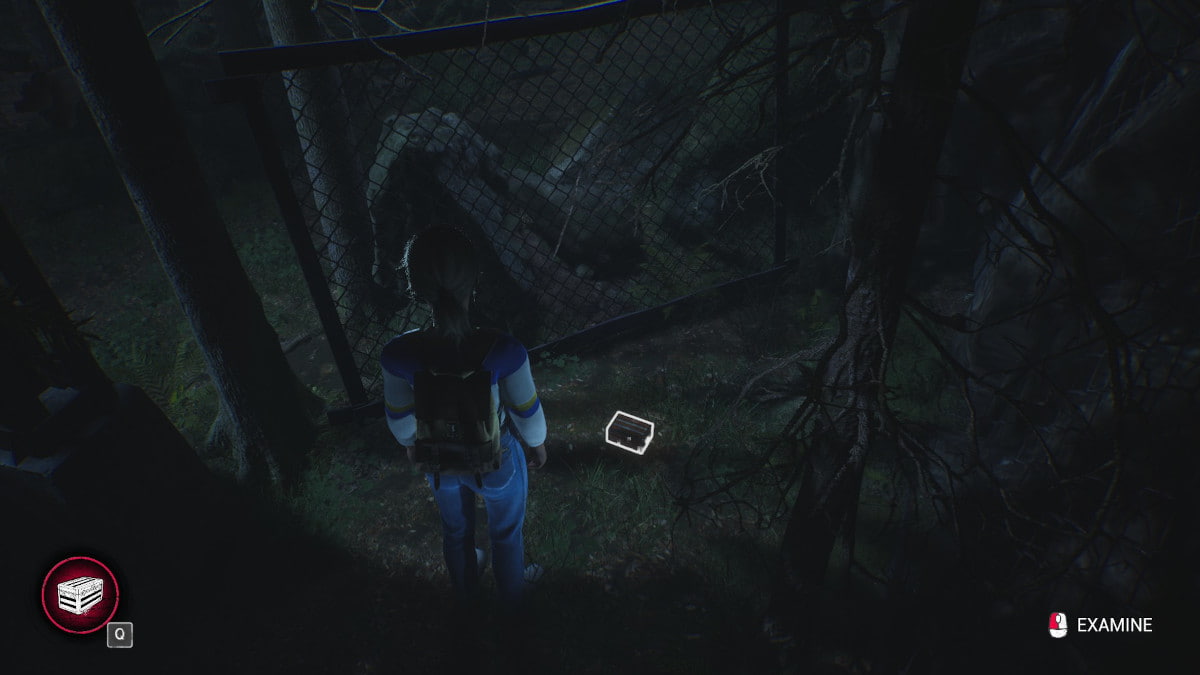
Once you clear the fence, there’s a narrow passage to your left. Stick to the left side and circumnavigate the rocks until you encounter a prompt signaling a squeeze. In the interior, you’ll find a box on the floor containing a ring.
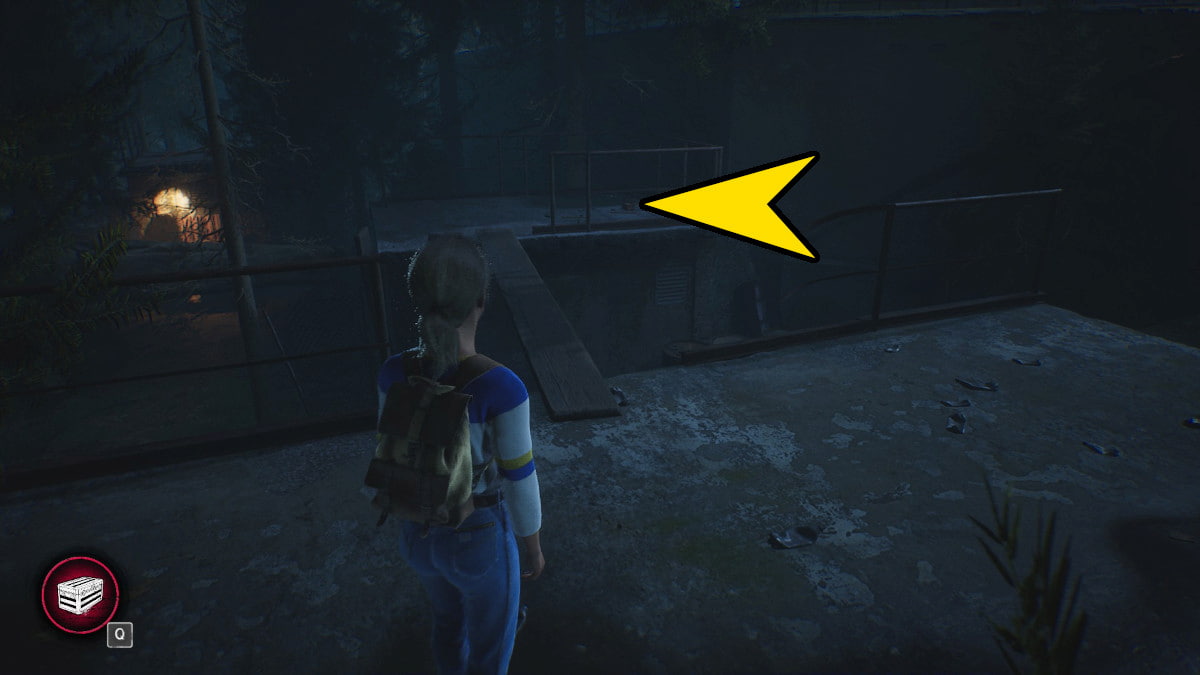
Cross to the Stormdrain
Following this path involves navigating across narrow beams that require regular balance checks. To maintain stability, press the left and right keys whenever your character begins to tilt in either direction, preventing it from falling.
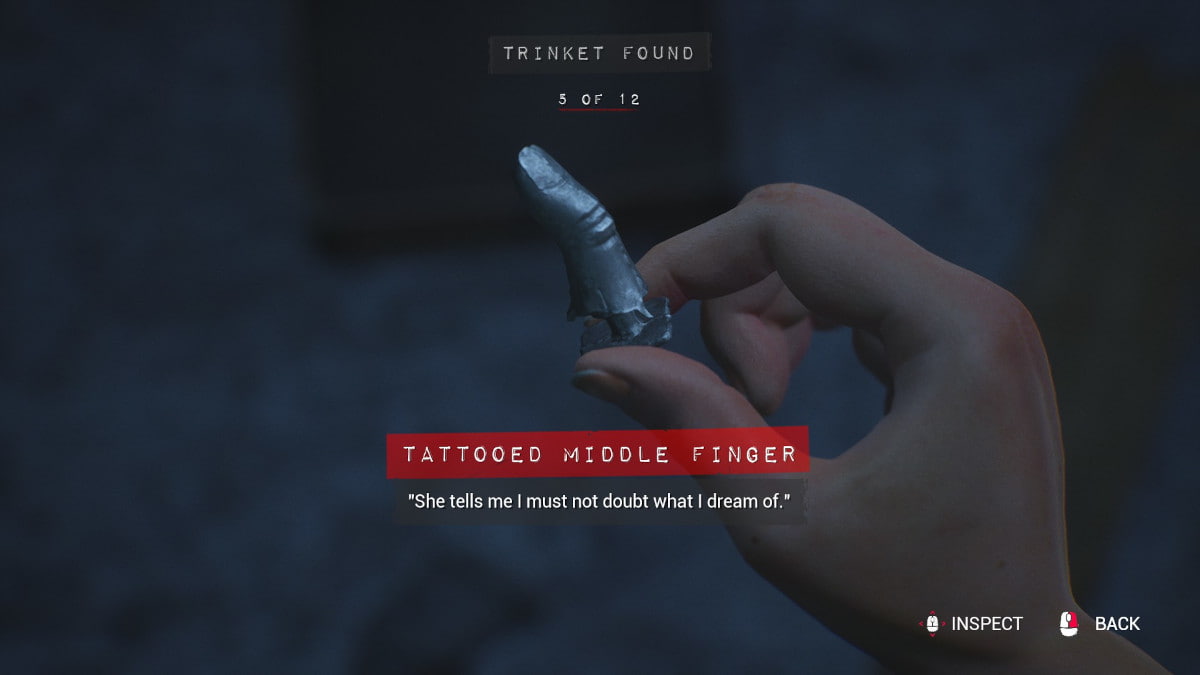
Trinket 5 of 12: Tattooed Middle Finger
Following your initial balance check, you have an option to traverse another balance beam. On the other side, you’ll find a small box containing this trinket.
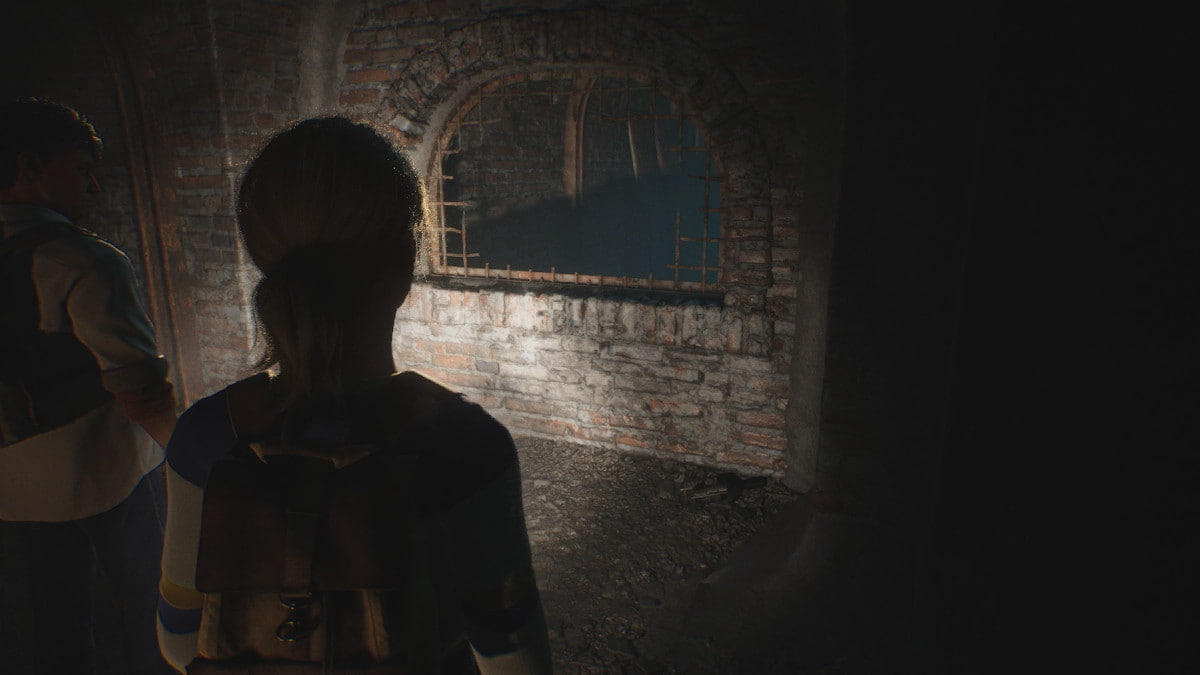
Passageway
As a gamer, I find myself faced with a choice: ascend or traverse, but either way, I’ll wind up at the stormdrain entrance, where I step in. Robert, my companion, passes me some flashlights, and we venture into the drain itself. Inside this subterranean world, I stumble upon an intriguing artifact called Rellik, which catches my eye and piques my curiosity.
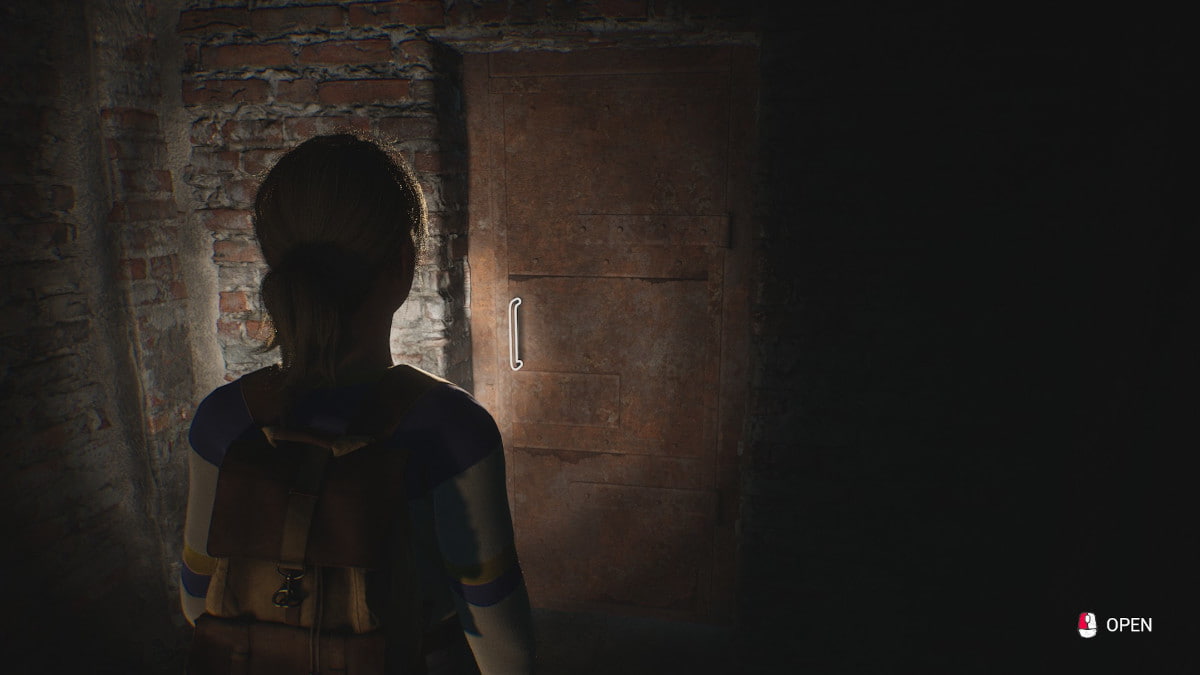
Rellik Location 4 of 12: The Wraith
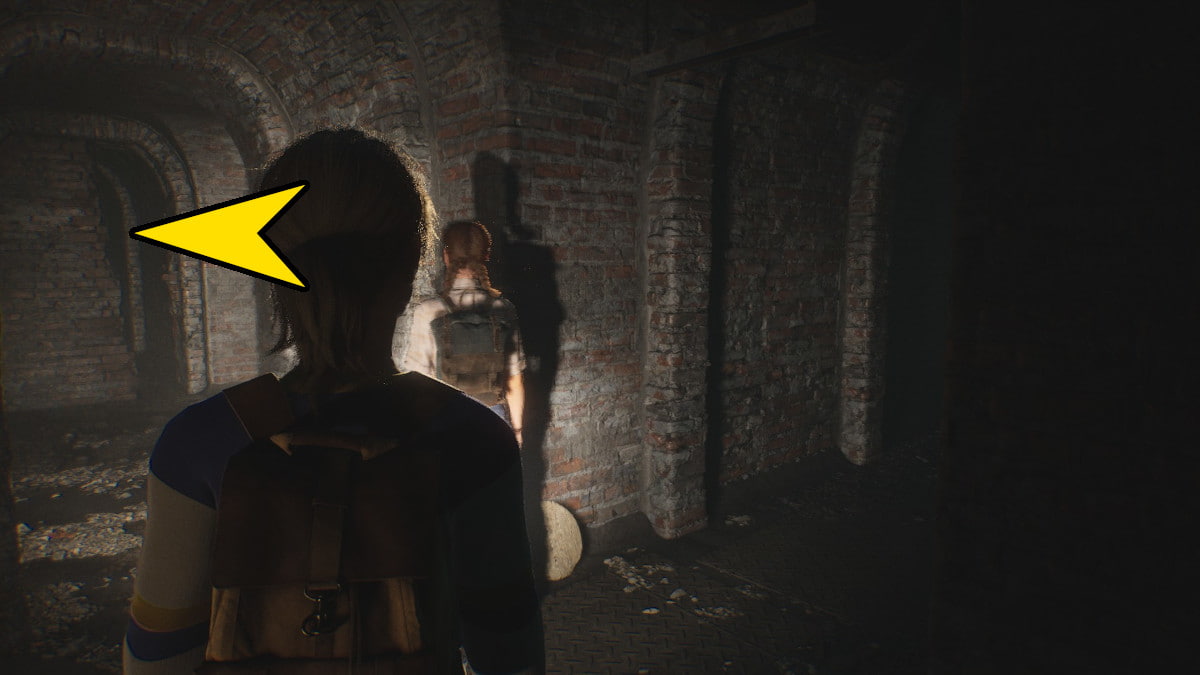
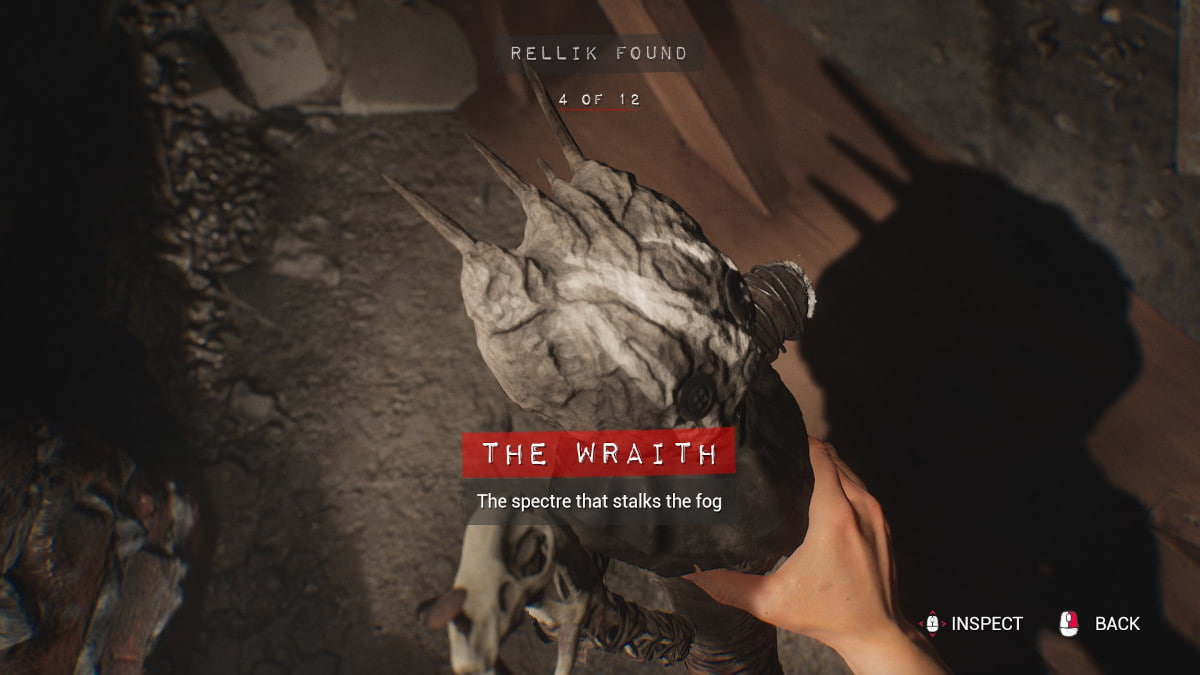
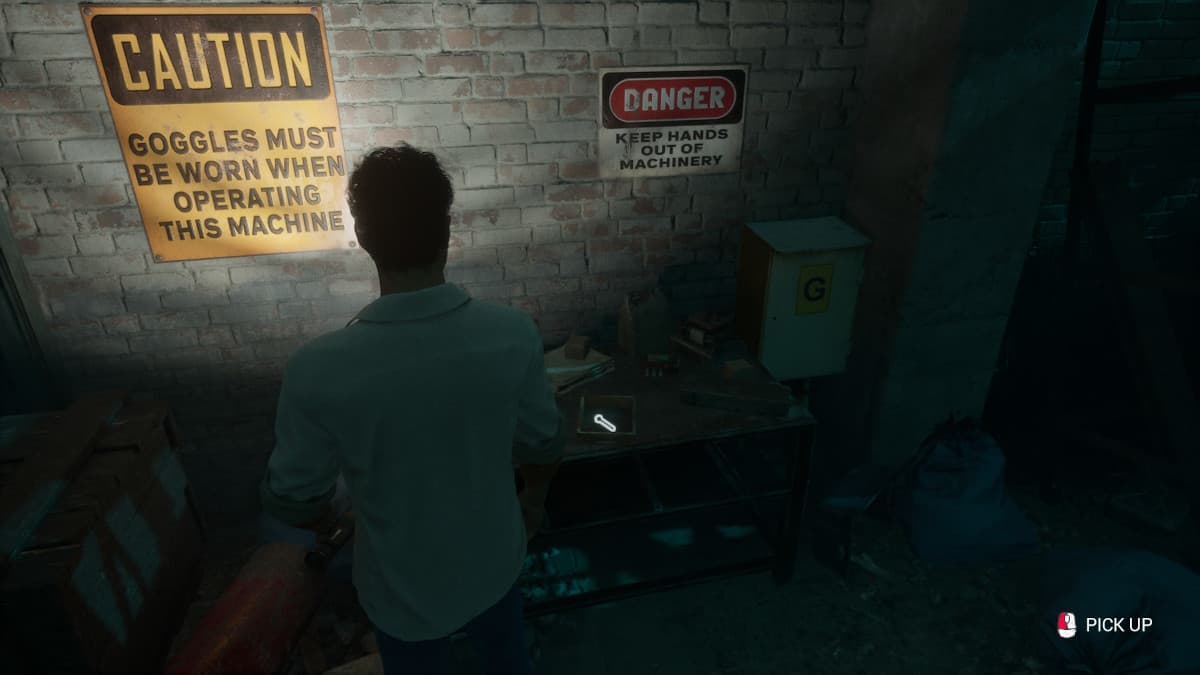
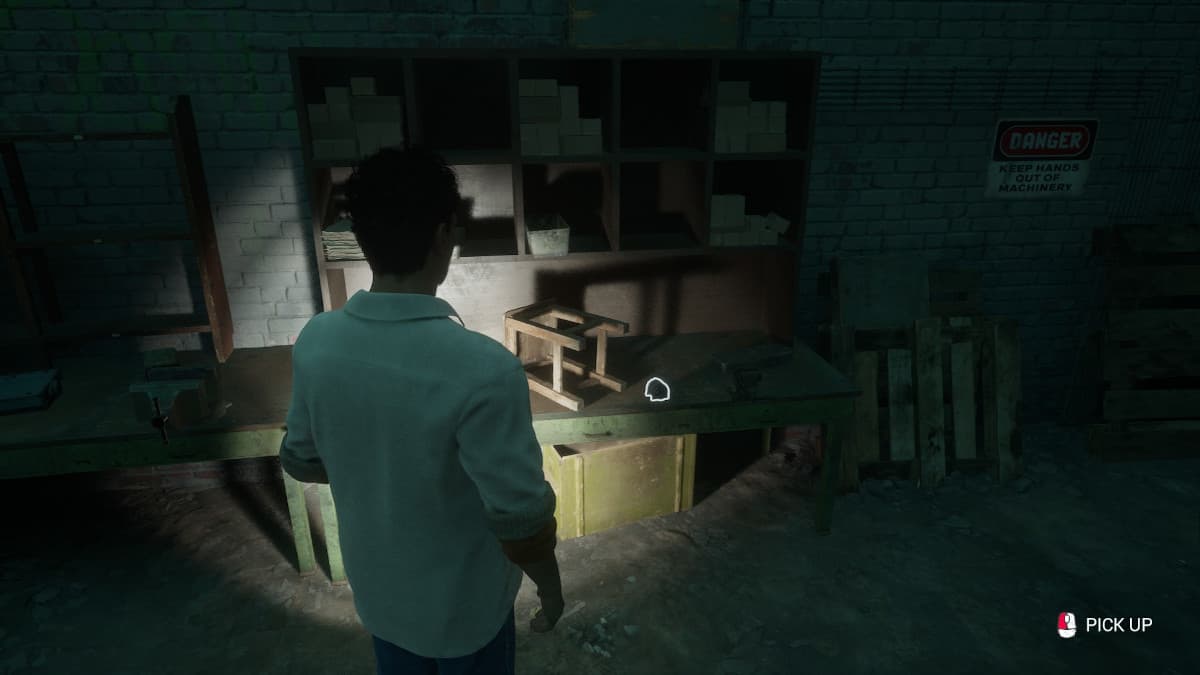
Following your passage through the corroded door made of metal, Robert is expected to comment about being beneath the mill and his search for an escape route. You’ll find yourself back in the tunnels reminiscent of the initial stages; at the first crossroad, take a left turn and maneuver through the gap in the wall. On the opposite side, you’ll discover a Rellik Doll lying on the ground.
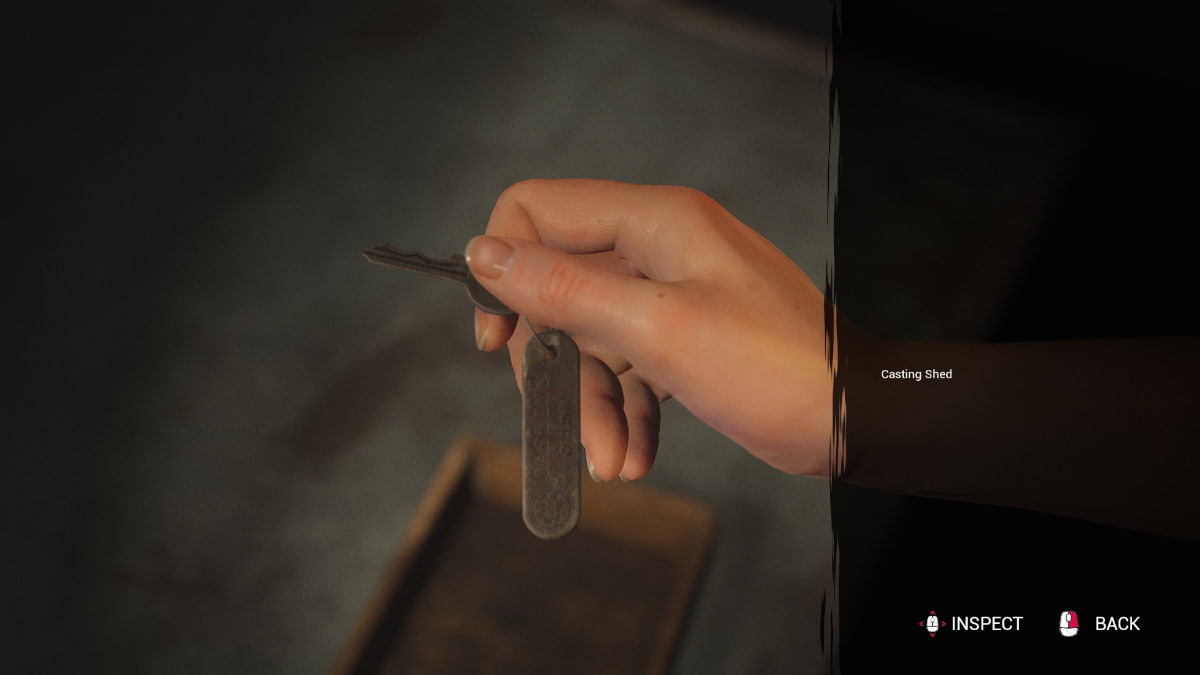
Just a bit further left, you’ll find the path leading to Rellik. Along this path, you’ll encounter a grate you can leap over. Proceed down this corridor, pass through the door at its end, and enter a spacious room. To your right, you’ll spot a table with a box on it. Inside this box, you’ll find a key essential for acquiring the fourth trinket later in the game.

Yard
Just after the scene with Bonnie in the yard by the mill and prior to entering the furnace chamber, you’ll get to play as Linda. Instead of rushing into the furnace chamber right away, take some time to explore the yard instead.
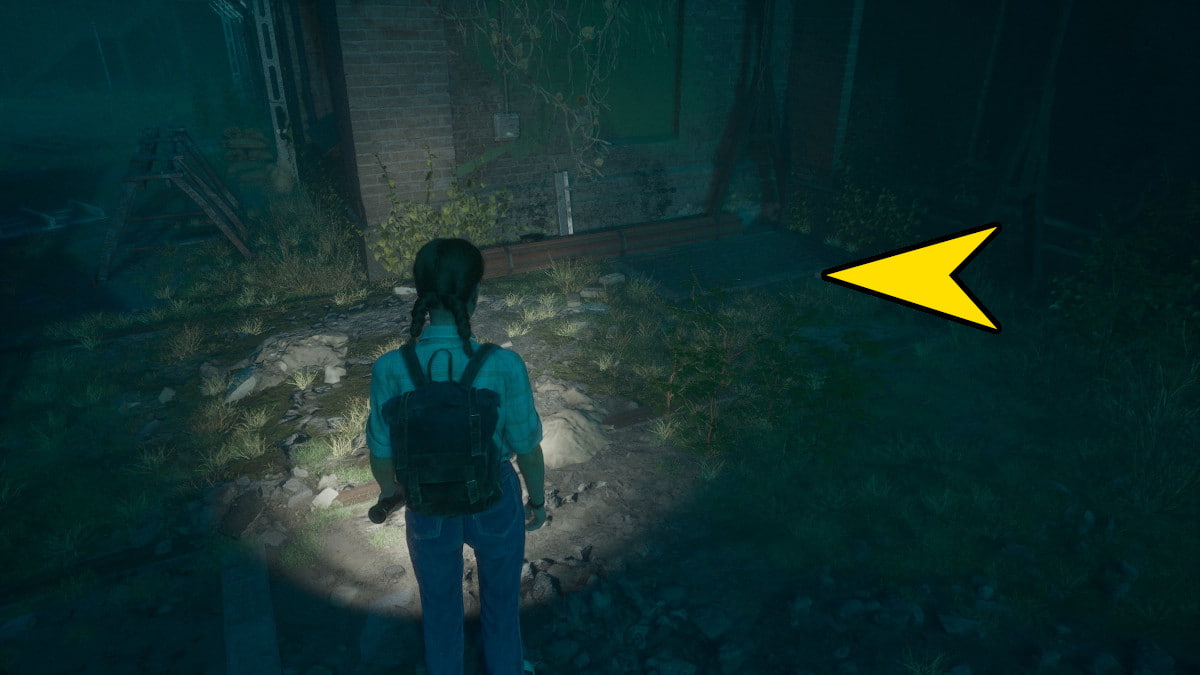
Trinket 7 of 12: Wooden Oni Mask
In the yard, you’ll spot the grate (which Sam pried open with a crowbar in Chapter 1) if it wasn’t damaged. If it was damaged, there won’t be a crowbar here, and you won’t find the Oni Mask Trinket. Use the crowbar on the doors situated deeper in the yard to uncover the Oni Mask Trinket inside a box. Following this, catch up with Linda’s companions again and make your way into the furnace room.

Furnace Chamber
In the heart of the furnace room, navigate your path towards ground-level, and subsequently find an ideal vantage point for filming the upcoming scene. Escort Linda as far as the rear section of this chamber, which features two massive doors. Once there, veer to your right.
Trinket 8 of 12: The Blighted Rat
In the cozy corner at the rear of the forge room, you’ll spot a modest flight of steps. Ascend these steps and veer to your right, and you’ll come across an area where a prompt for a squeeze will pop up. Over yonder, you’ll discover a crank handle.

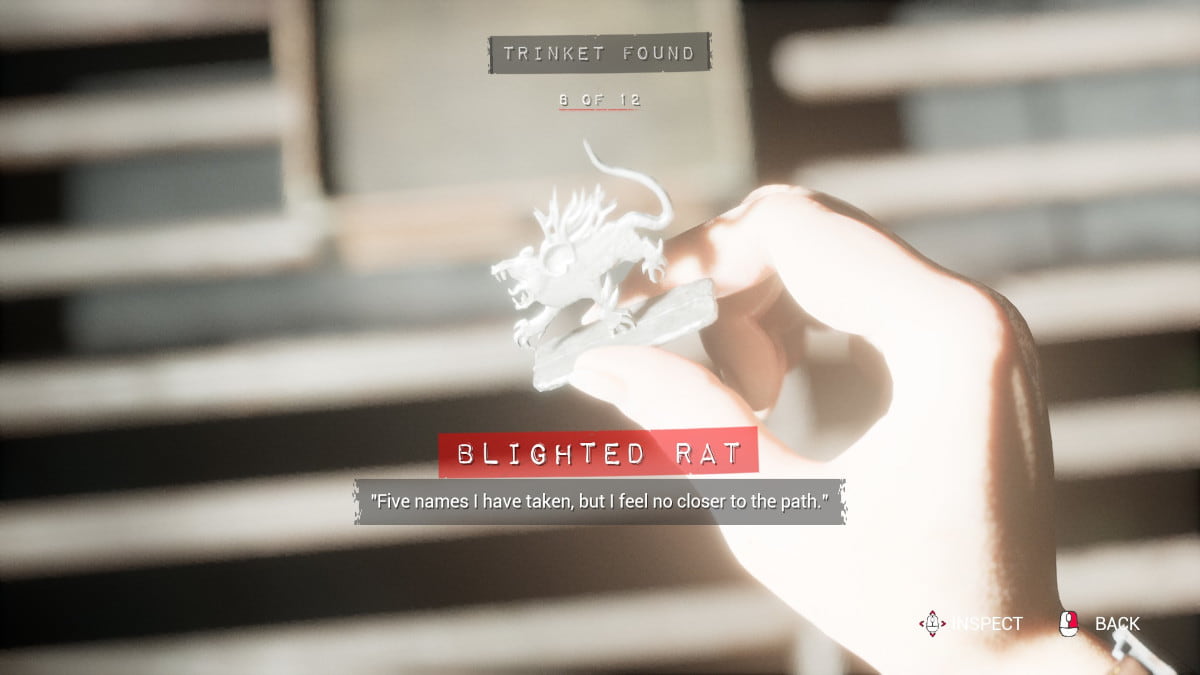
Return to the ramp leading to the location where Frank Stone met his unfortunate end in 1963, and gaze at the small platform situated centrally within the fire pit – it’s the spot where Frank’s body fell. You’ll find a small container there; to retrieve it, simply turn the handle on the box. There are no electrical requirements; you just need to manually rotate the handle to bring the platform towards you. Once you can leap across to it, unlock the box to obtain this memento.
Rellik 5 of 12: The Clown
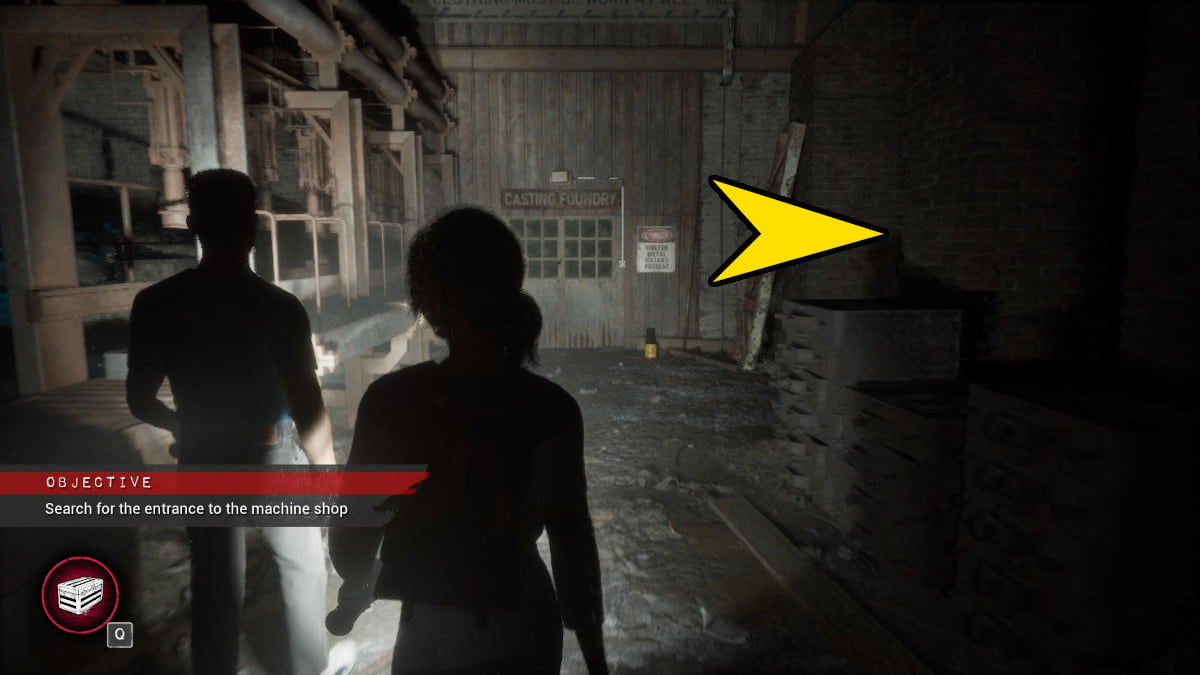
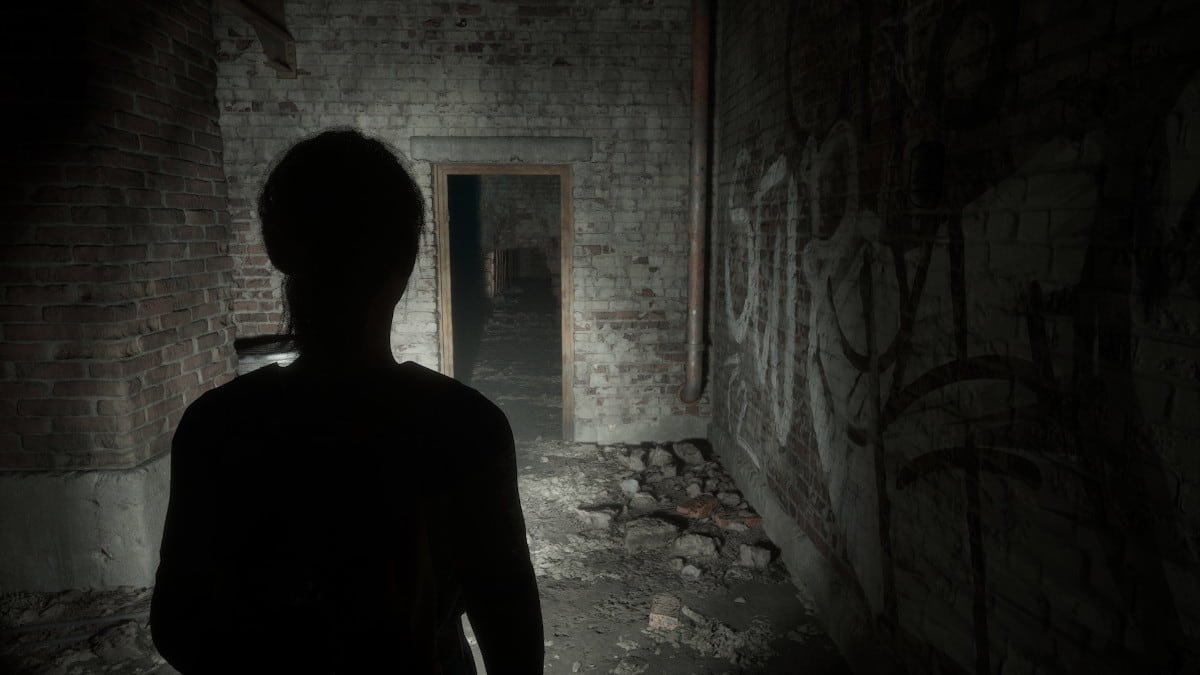
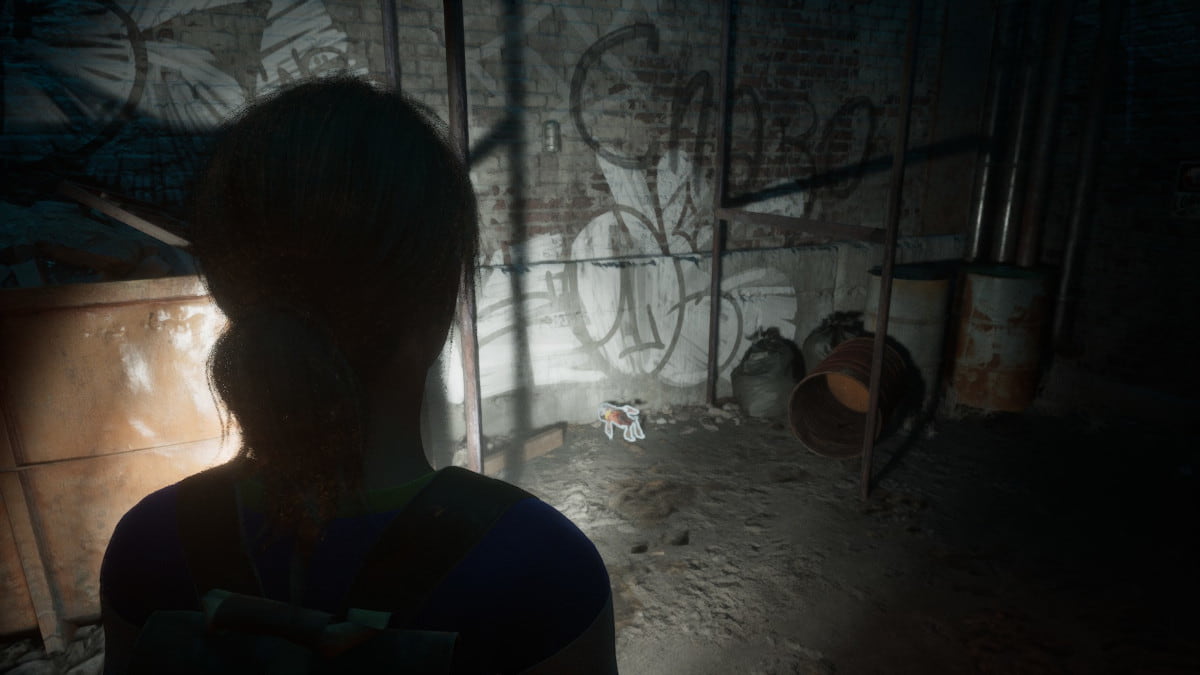
Once Linda and Bonnie depart, you’ll regain control over Chris. After passing through the next doorway, veer to your right and search for a corroded door located in the far-right corner of this room. It’s more towards the right than the Casting Foundry door. Enter it and watch out for some broken bricks you’ll need to crawl under. The clown doll will be found on the left side, past the dumpster.
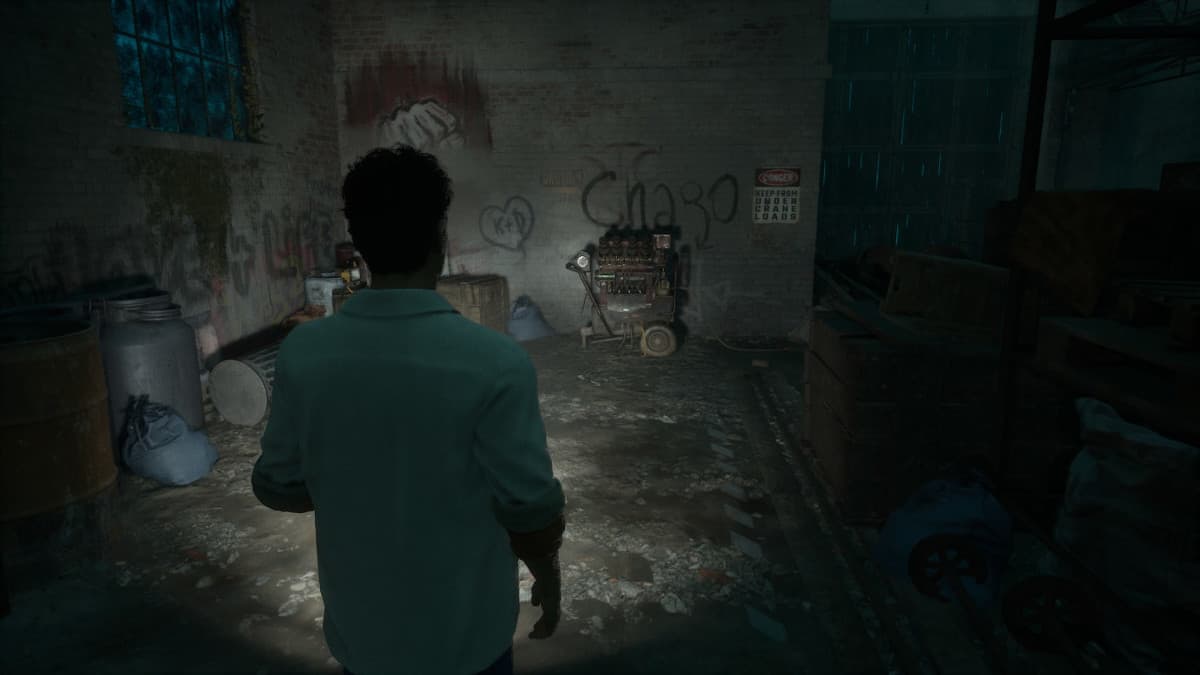
Machine Shop
To advance, you’ll need to repair the generator. There are two parts required for this; locate them first. After that, you’ll encounter a few Quick Time Event (QTE) challenges before you can successfully finish it. Approach Robert near the generator initially, then collect the two components scattered around the room to complete the task. The initial piece is situated on the same side of the room as the generator, but closer to the hanging train cars. The second part is tucked away in the back corner of the room, on the other side of the train car.
Frank Stone’s Lair
As you approach the Lair, you’ll encounter a brief Quick Time Event (QTE) to help Robert regain his footing if he stumbles. If you miss, Robert won’t meet his end, but Chris will be there to save him instead.
- Path 1: Fail the QTE, and Chris will save Robert.
- Path 2: Pass the QTE, and Jamie will catch Robert.
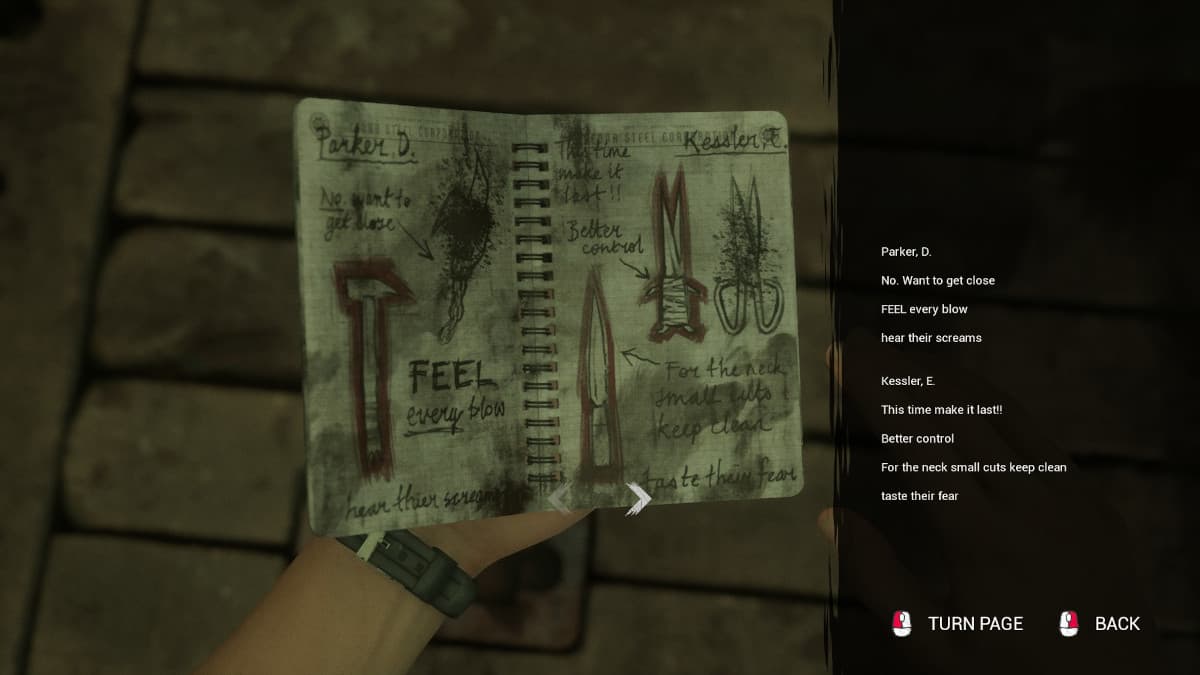
The Champion Artifacts: 5 of 10: Weapon Designs
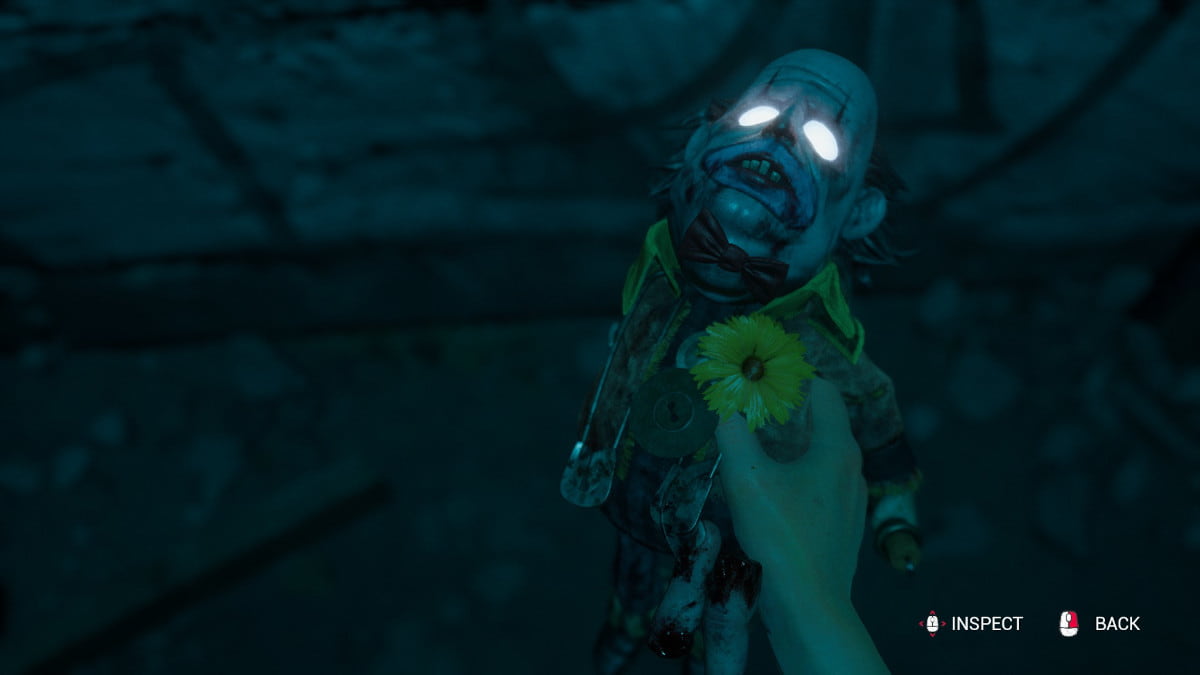
In the hideout of Frank Stone, you’ll find a table positioned centrally. Atop this table sits a personal notebook belonging to Frank, which contains some gruesome particulars.
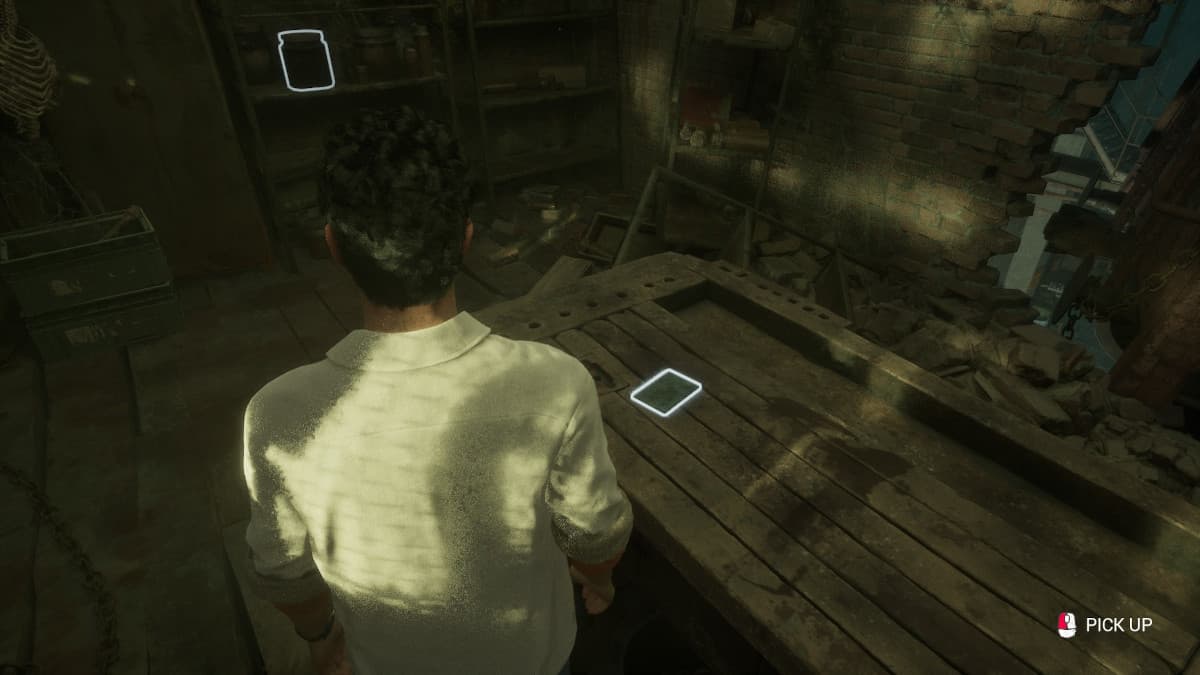
Engage with the head inside the jar to proceed through this part. After that, you’ll be faced with two choices for your next move.
- Path 1: If you agree with Chris about talking about it later, the scene will move on.
- Path 2: If you say there won’t be time after this, Chris will ask if you are breaking up.
- Path 2a: You break up with Chris.
- Path 2b: ?
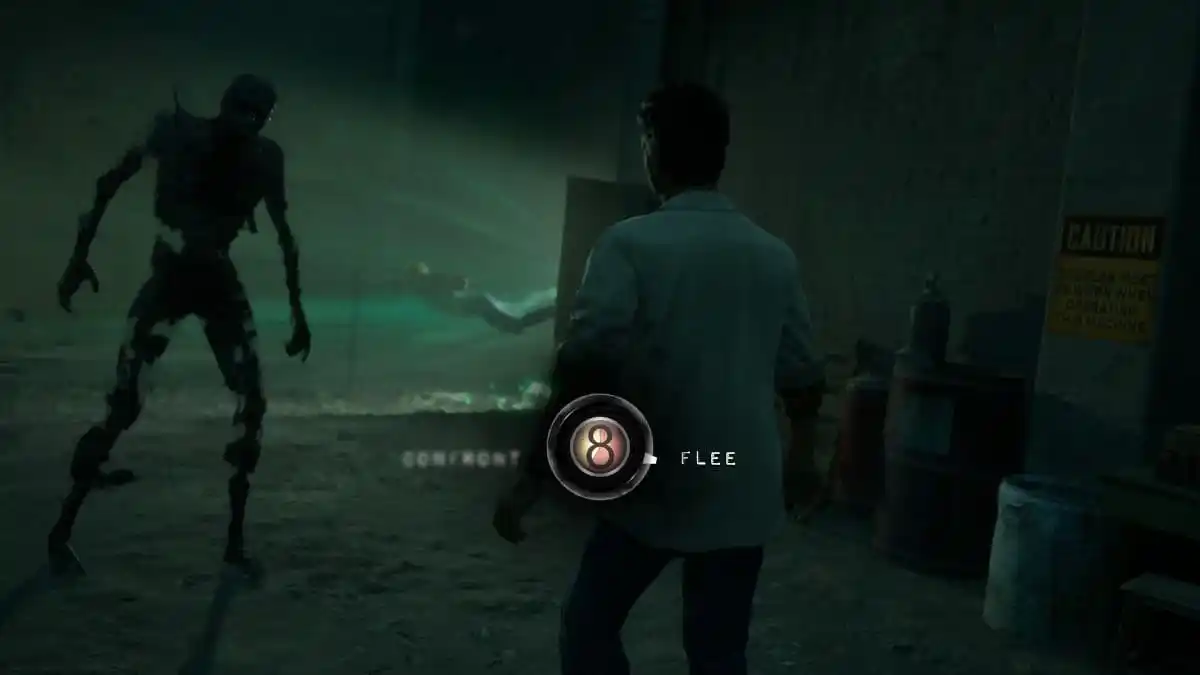
When Frank Stone shows up, you can flee or you can try to save Chris.
- Path 1: Jamie stays.
- Path 1a: ? Jamie lives.
- Path 1b: ? Jamie dies.
- Path 1c: ? Jamie dies.
- Path 2: Jamie doesn’t do anything before the time is up, and he dies.
- Path 3: Jamie flees and lives.
Chapter 6: Beyond the Gate
Coming Soon!
Chapter 7: A Perilous Place
Coming Soon!
Chapter 8: Mystery Manor
Coming Soon!
Chapter 9: Decent of the Damned / Hunting Ground
Coming Soon!
Chapter 10: In the House of Madness
Coming Soon!
Chapter 11: All Paths Must Cross
Coming Soon!
Chapter 12: Closing the Noose
Coming Soon!
Chapter 13: Murder Mill
Coming Soon!
Chapter 14: The Massacre at Gerant Manor
Coming Soon!
Relationship choices in The Casting of Frank Stone
The Shaping of Frank Stone: Nearly every decision you make significantly impacts your connections with those around you. To reach a particular achievement by optimizing relationships, let me walk you through the available options and their effects on character emotions.
- Chapter 2: You play as Madi
- If you choose to pick up Linda when she is hitchhiking, you will raise your relationship with her.
- If you pick up Linda in the car and then what she does for work, you will raise your relationship with her.
- Not picking up Linda will lower your relationship.
- However, if you don’t pick up Linda but tell her you were wary of picking up a stranger, it will raise your relationship.
- Chapter 3: You play as Jamie, then Chris
- As Jamie, pass the QTE during filming, then choose not to give up your sister to raise your relationship with Chris.
- As Jamie, when you need to choose between defending Linda or defending Chris, defend Linda to raise your relationship with Linda.
- As Jamie, when you need to choose between defending Linda or defending Chris, defend Chris to raise your relationship with Chris.
- As Chris, if you suggest you want to steal a camera from the curiosity shop, Jamie’s relationship with Chris will lower.
- As Chris, if you say you were kidding about stealing from the shop, you will raise her relationship with Jamie.
- Chapter 4: You play as Linda
- Ask Madi when she wakes if she’s okay. This will raise Madi and Linda’s relationship.
- When you are alone with Madi in the room after Stan leaves, if you chat with Madi, you have the choice between a Cynical and a Dubious reply. The Cynical reply will lower your relationship with Madi.
- Comfort Madi when she talks about how her mom recently passed away, and it will raise their relationship.
- Instead of comforting Madi after she tells about where she got her film, ask Stan about his piece of the film to lower your relationship with Madi.
- Have Linda tell the story of Bonnie instead of the curt answer to raise their relationship.
- Give the curt answer about forgetting about the past to lower Linda and Madi’s relationship.
- When Stan notices someone out the window, if you choose the options worrying about them stealing the films or the option where you accuse Augustine of knowing about the stranger, you will lower your relationship with Madi.
Achievement – Power of Two: Maximized Jaime and Chris’ relationship.
All Achievements in The Casting of Frank Stone
list of all the accomplishments in the game, which we’ve also highlighted along the way in the walkthrough provided earlier for your convenience.
- Savior: Sam stopped Frank Stone.
- Easy Money: Jaime accepted the bribe from Sam.
- Fellow Traveller: Madi picked up the hitchhiker.
- Motif: Played a familiar theme on the piano.
- 8 Bit Hero: Got the high score on the arcade machine.
- Five Finger Discount: Jaime stole money from Bonnie.
- Lumpkin and Livin’: Learned that Tom stopped drinking due to Sam’s kindness.
- Power of Two: Maximized Jaime and Chris’ relationship.
- Open Sesame: Solved the gate puzzle.
- Stan of Cleaves: Stan was cut into pieces in the horologium.
- Back to the… Past: Chris was successfully sent back to 1980.
- Tsap …eht ot Kcab: Chris was sent to 1980, though something went wrong.
- Bad Dog: Found Merlin’s collar.
- Escape Artist: Freed Jaime from the hook.
- Memento Mori: Jaime’s jaw was removed by Frank Stone.
- Tinkerer: Repaired all generators.
- Nothing Personal: Shot Augustine.
- Friendly Fire: Sam shot Madi.
- Phagocytosis: Madi was hypnotized and absorbed by Frank Stone.
- Plunderer’s Instinct: Collected all Trinkets.
- That Belongs in a Museum: Collected all Artifacts.
- Entity Displeased: Everyone survived.
- Merciless Killer: Madison, Jaime, Chris, Sam and Linda were killed.
- The Campfire: Completed the story.
- Plangonologist: Collected all Relliks.
- The Champion: Collected all The Champion artifacts.
- The Storyteller: Collected all The Storyteller artifacts.
- Murder Mill: Collected all Murder Mill artifacts.
- Skills? Check!: Succeeded 5 Skill Checks in a row.
- It’s All in the Reflexes: Succeeded 10 Great Skill Checks.
- Camera Shy: Warded off the Killer with the 8mm camera.
- All Seeing: Unlocked every branch in the Cutting Room Floor.
For more Supermassive Games info, check out What is House of Ashes Based On? on GamerTop.
Read More
- Smash or Pass: Analyzing the Hades Character Tier List Fun
- Hades Tier List: Fans Weigh In on the Best Characters and Their Unconventional Love Lives
- W PREDICTION. W cryptocurrency
- Why Final Fantasy Fans Crave the Return of Overworlds: A Dive into Nostalgia
- Sim Racing Setup Showcase: Community Reactions and Insights
- Understanding Movement Speed in Valorant: Knife vs. Abilities
- Why Destiny 2 Players Find the Pale Heart Lost Sectors Unenjoyable: A Deep Dive
- PENDLE PREDICTION. PENDLE cryptocurrency
- How to Handle Smurfs in Valorant: A Guide from the Community
- Valorant Survey Insights: What Players Really Think
2024-09-10 22:23