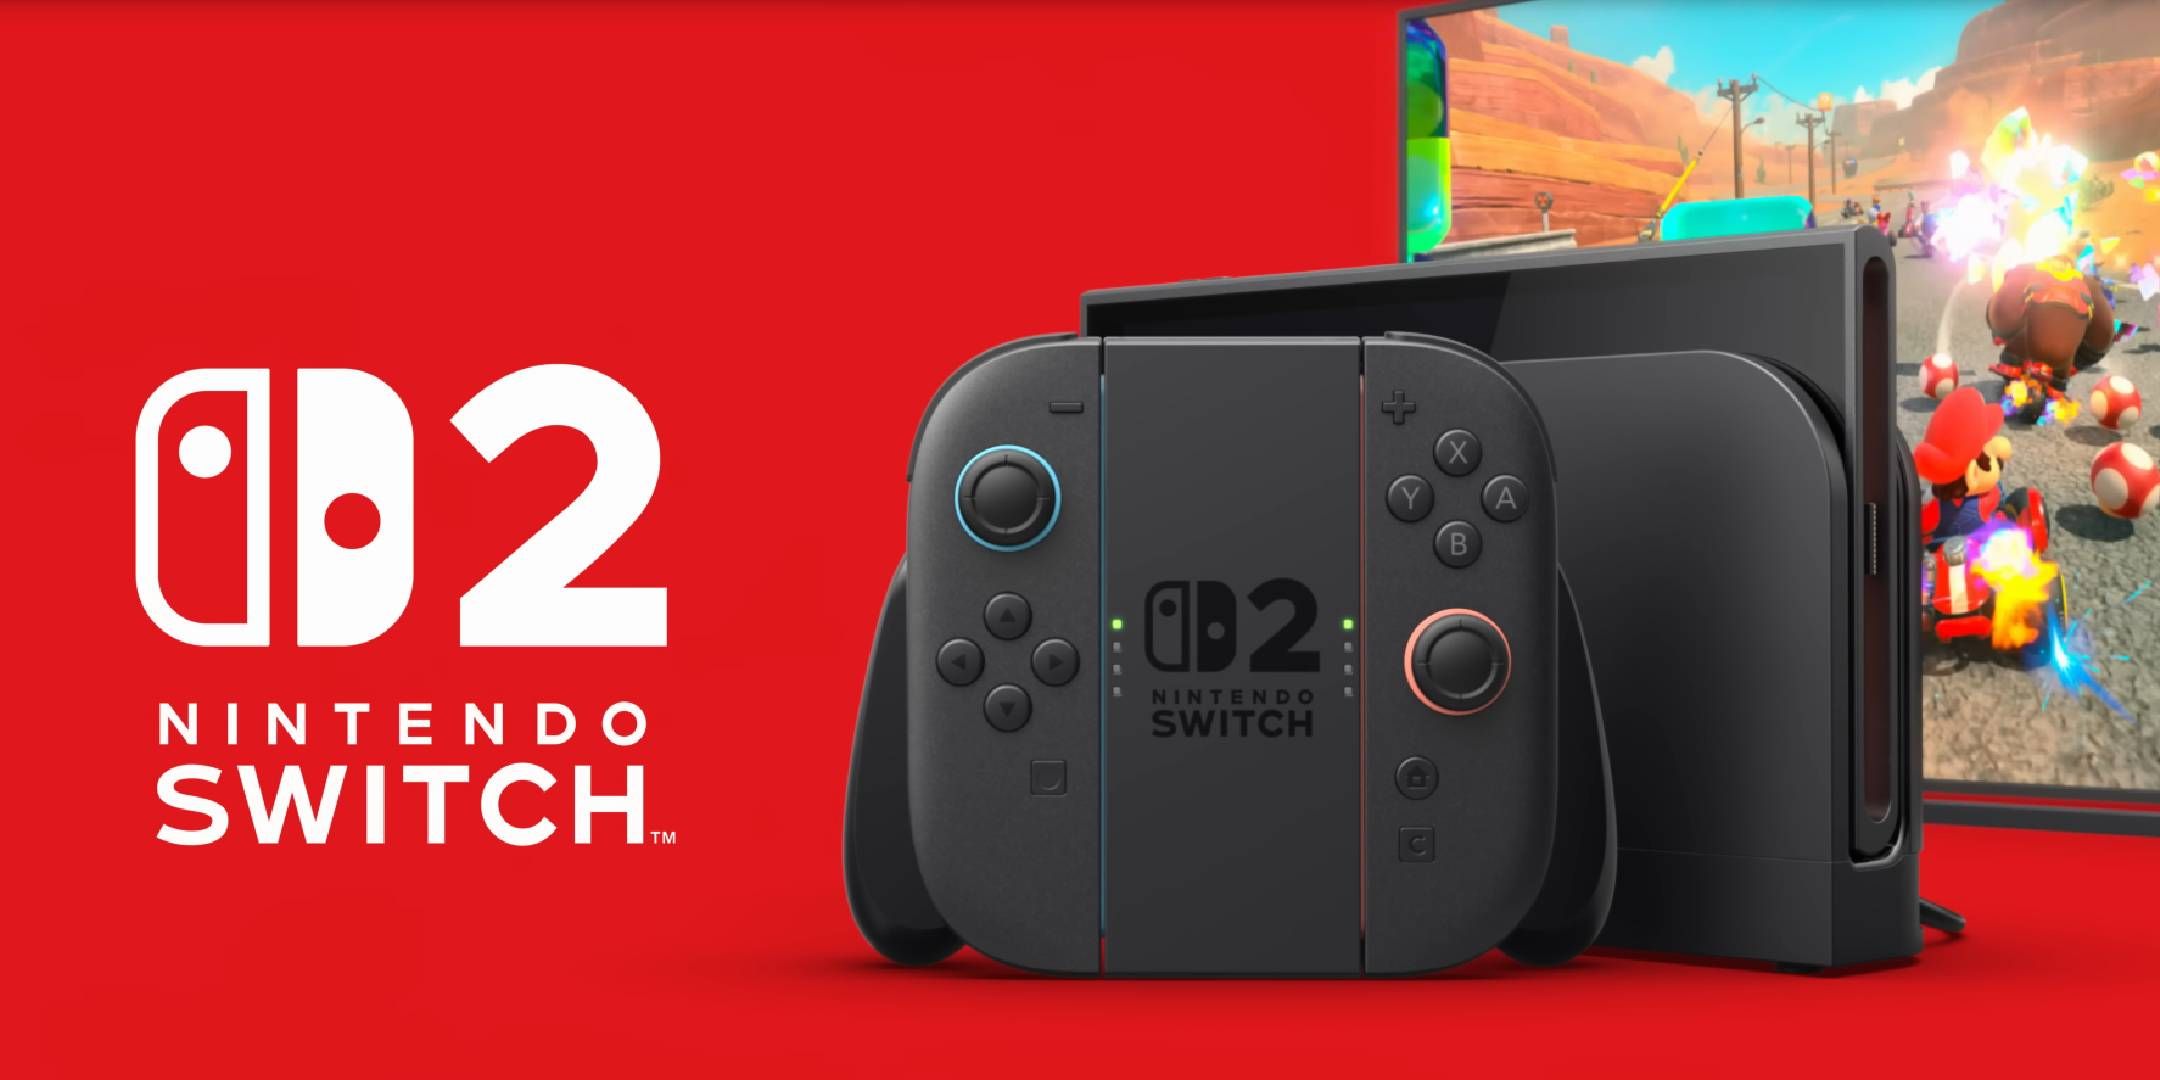
The upcoming Nintendo Switch 2 gaming system offers methods for moving data from your existing Switch, such as game save files, software downloads, screenshots, videos, and more. Many of the features in the new Switch 2 are compatible with the initial Switch, resulting in a high level of compatibility between the two handheld devices. You’ll have several methods available for transferring content due to these two distinct sharing options.
Once you’ve installed the Day 1 update for the new Switch 2, you’ll find it simple to gather information from your old Switch without any hassle. One of the major advantages of this data transfer is that it allows you to download digital games which you previously owned on the original Switch. This process preserves your save data, enabling you to pick up from where you left off, taking advantage of the hardware improvements in the new Switch 2.
How Switch 2 Wireless System Transfer Works
Have Both Consoles Close To One Another For Sharing Data
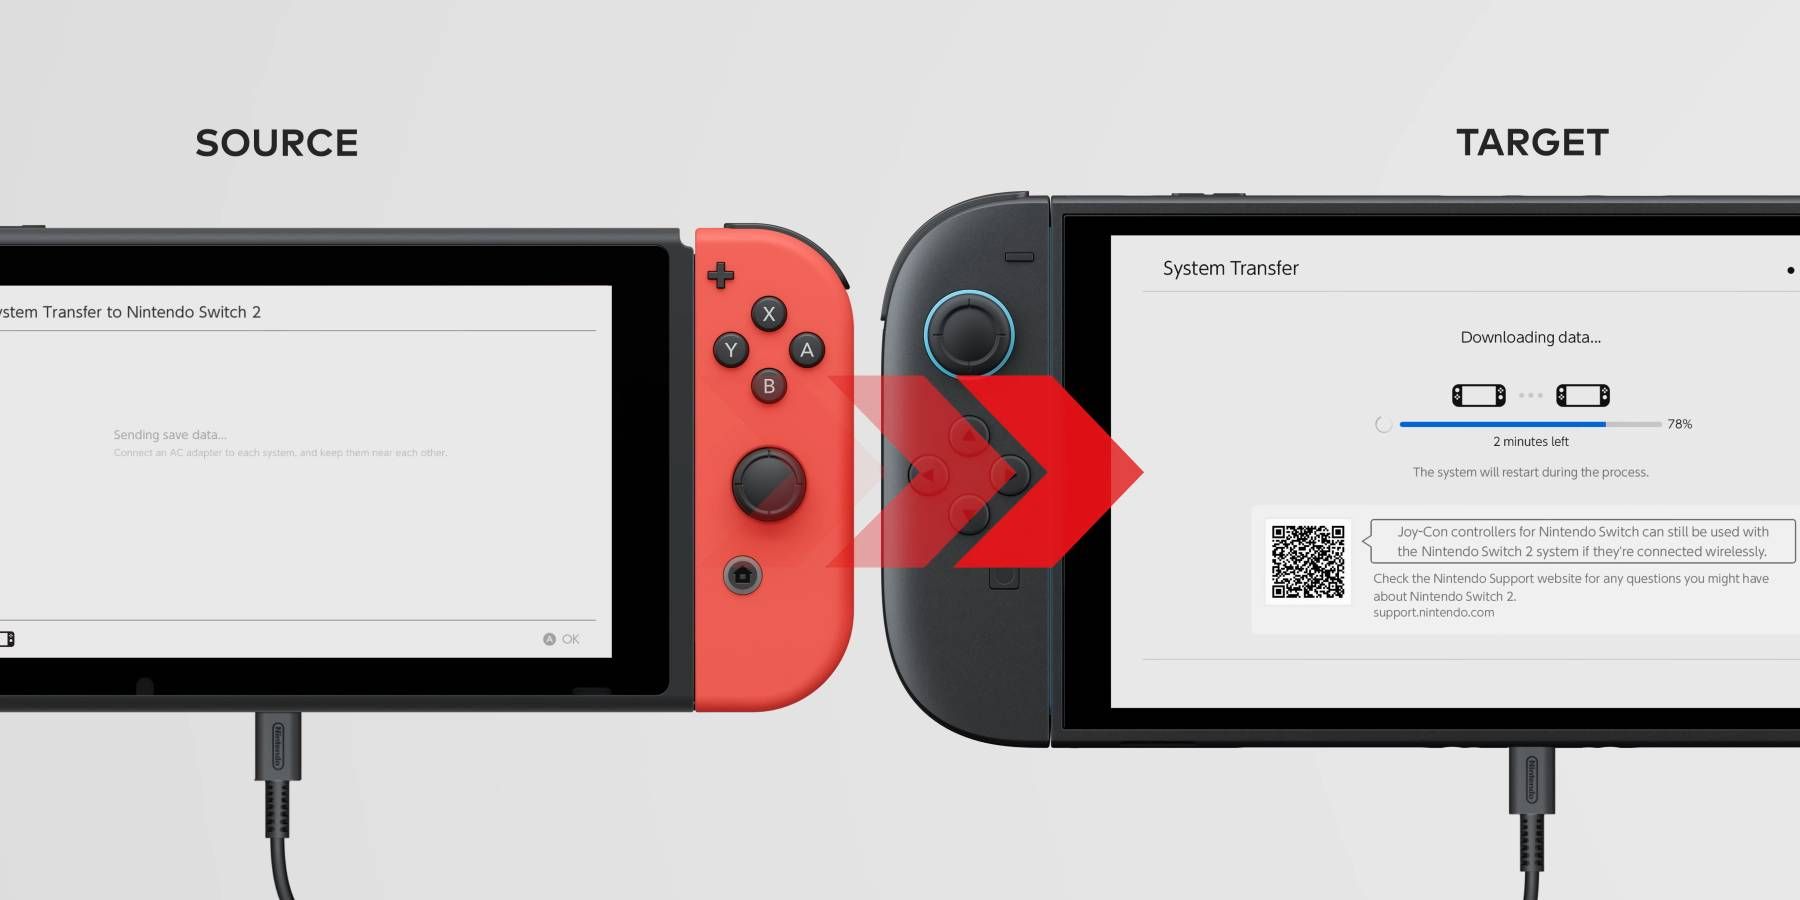
One approach for moving data between two devices is by placing your Switch and Switch 2 systems close together to start a wireless data transfer system. Within the settings of the Switch 2, there’s an option to perform a full “System Transfer” once both consoles are properly set up. This procedure may take approximately 10 minutes to finish, but it requires keeping both devices near and activated during the process.
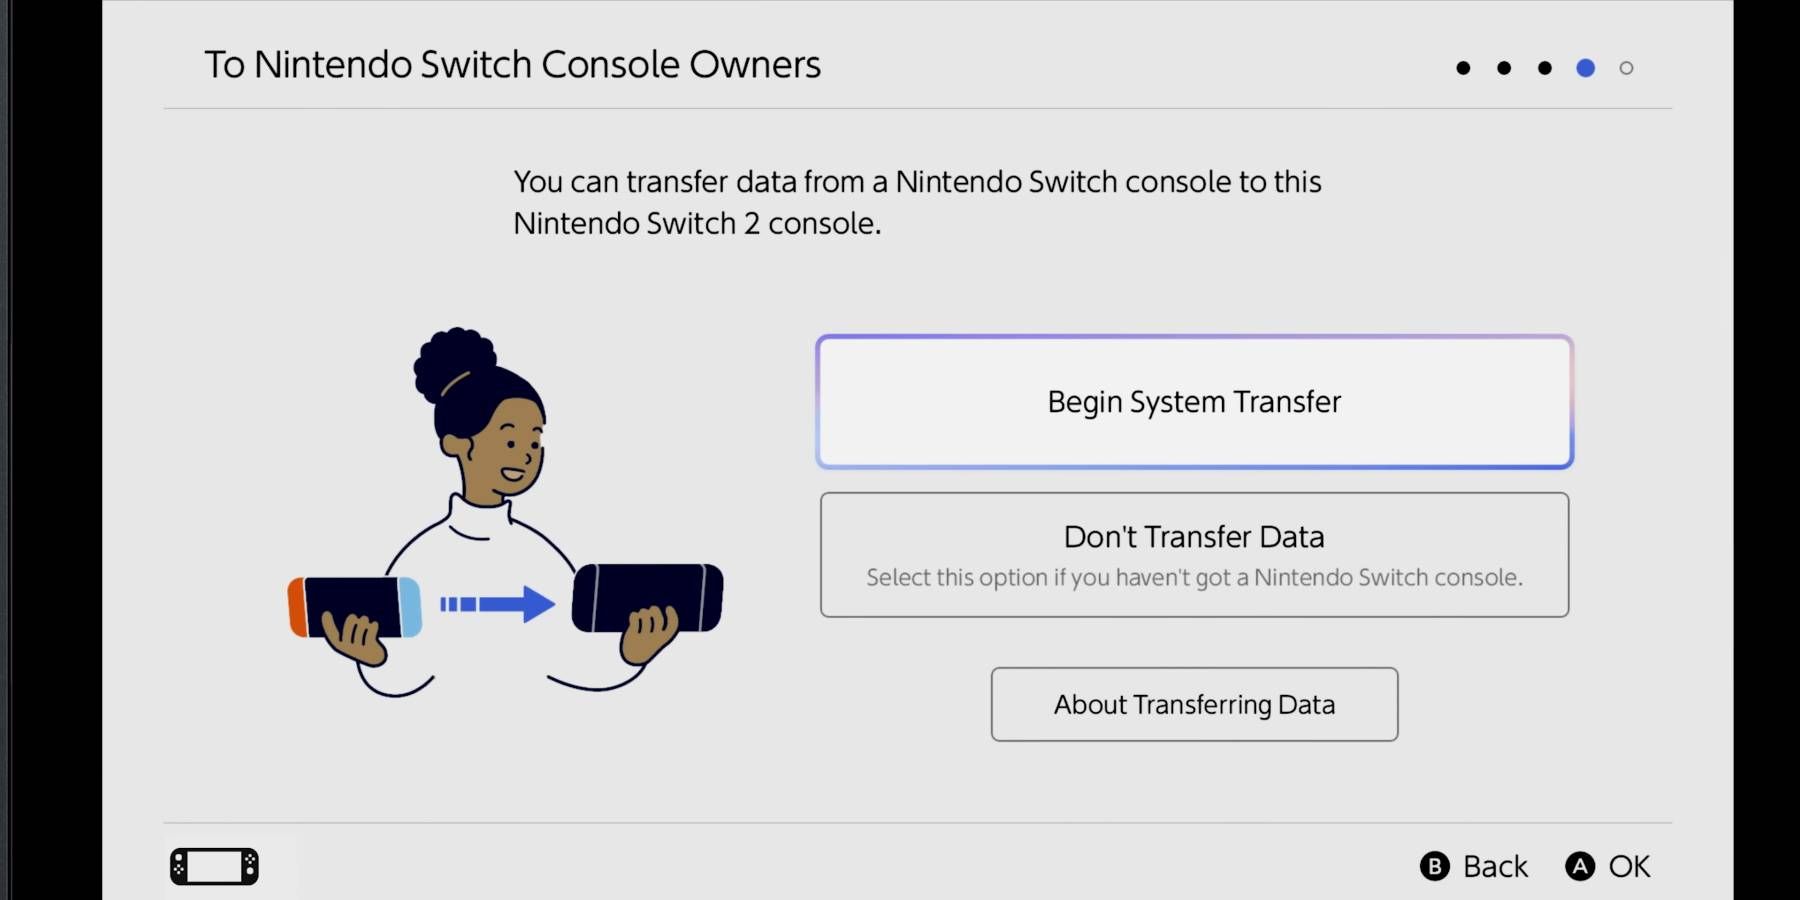
As I’m getting my new Switch 2 all set up, I come across an exciting feature called “‘System Transfer’“. After filling in essential details like region and Wi-Fi, as well as any software updates, you’ll see the option to press “‘Start System Transfer’.” However, it’s crucial to ensure that both your Switch 2 and original Switch are connected to a power source before initiating this process. This way, you can avoid losing precious data due to either device running out of battery power during the transfer.
After setting up your two Switch consoles, here’s how to wirelessly transfer data from one system to the other:
1. Turn on both consoles and make sure they are connected to the internet.
2. On the source console (the one you want to send data from), navigate to the system settings.
3. Scroll down to the ‘Users’ section, select your user profile, and then choose ‘Transfer Your User Data’.
4. Choose ‘Send Data via Internet’, then confirm the action on the subsequent screen.
5. Now switch to the destination console (the one you want to send data to). On its home screen, it should display a QR code.
6. Scan the QR code on the destination console using the source console’s camera.
7. Once the scan is successful, both consoles will exchange the necessary information wirelessly.
8. Wait for the transfer process to complete. You can monitor its progress by checking the status on either console.
9. After the transfer is done, you can restart your destination console if desired. Your user data should now be available on both systems!
- Log into your Nintendo Account on your Switch 2 (this can be done by manually entering information or using the QR code provided).
- Keep both your Switch and Switch 2 consoles near each other.
- Go into the “Settings” menu from your original Switch by selecting the gear icon.
- Scroll down to “System” at the bottom of the Settings menu.
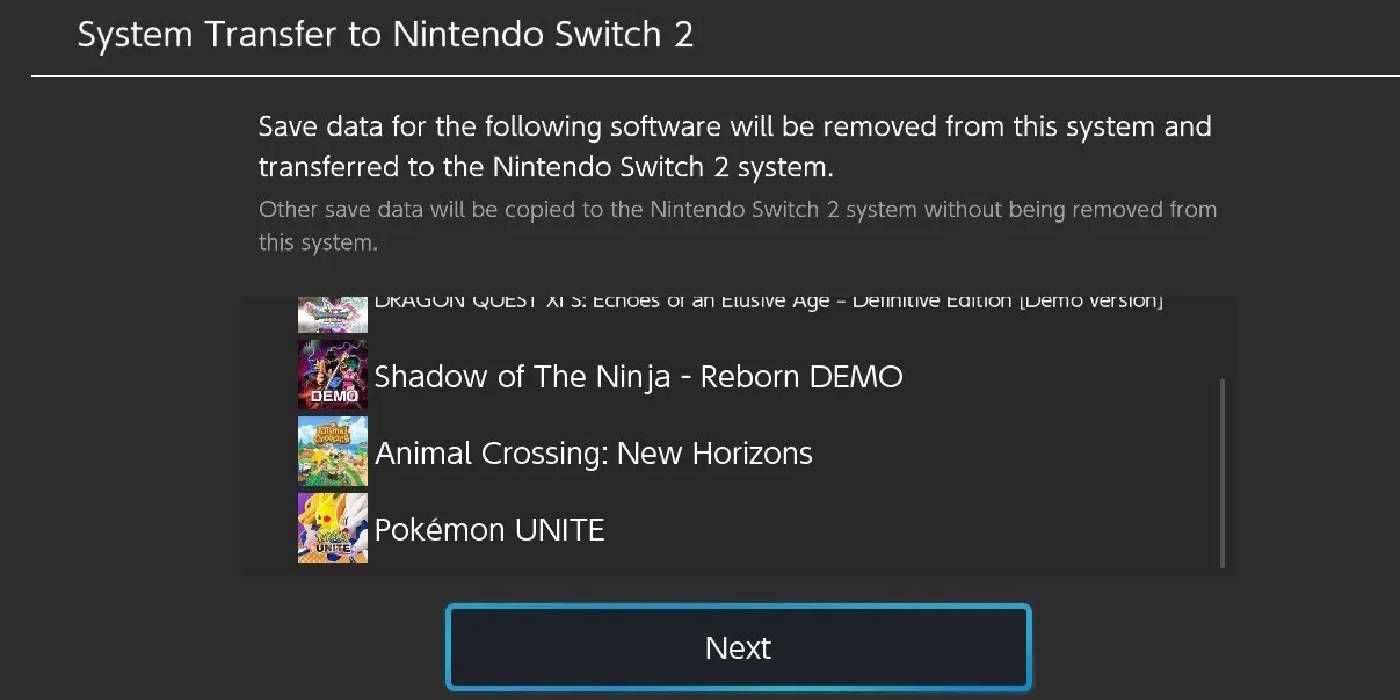
- Scroll down again to the “System Transfer to Nintendo Switch 2” at the bottom of the next menu.
- Confirm the option to bring up a list of game save data.
- Select which content you want to transfer to your Switch 2.
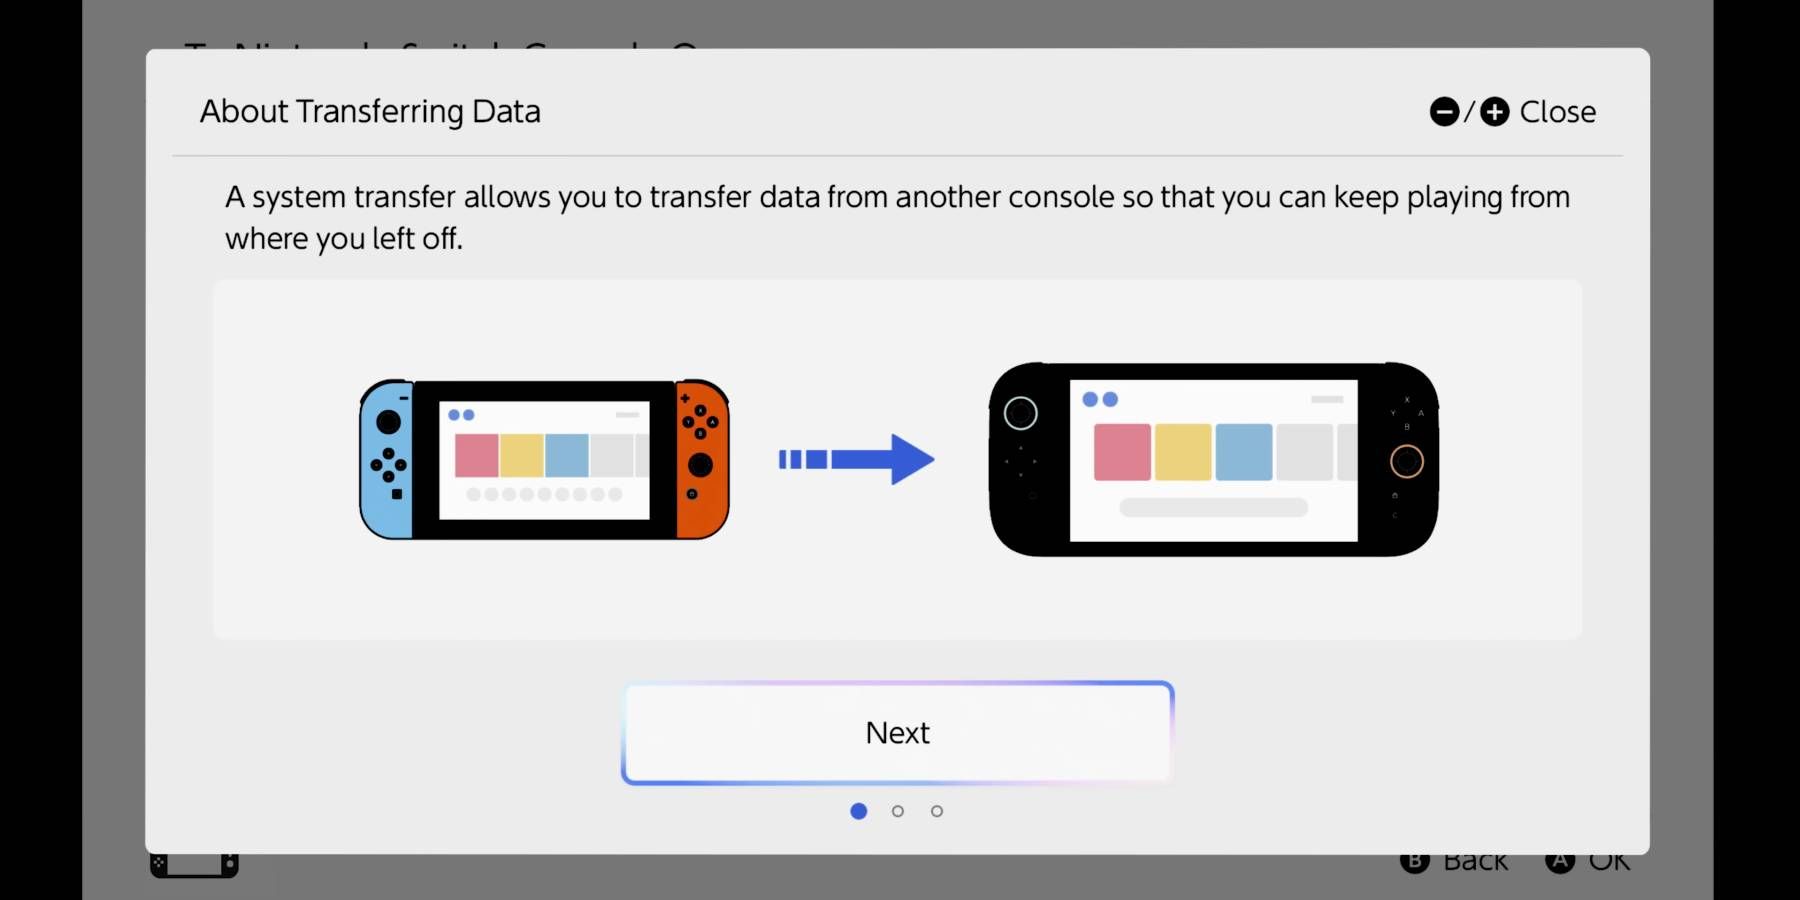
When moving profiles to your new Switch device, remember that certain saved profiles may be deleted from your original Switch. Make sure to select carefully what you want to transfer. Most data will be moved using local communication, though it won’t become visible until you restart your Switch 2 following the transfer. During the System Transfer process, the console will alert you about which games will be removed from the original Switch in order to complete the procedure, and you’ll need to confirm this action.
How Uploading Switch System Data Works
Use Secure Servers To Transfer Data
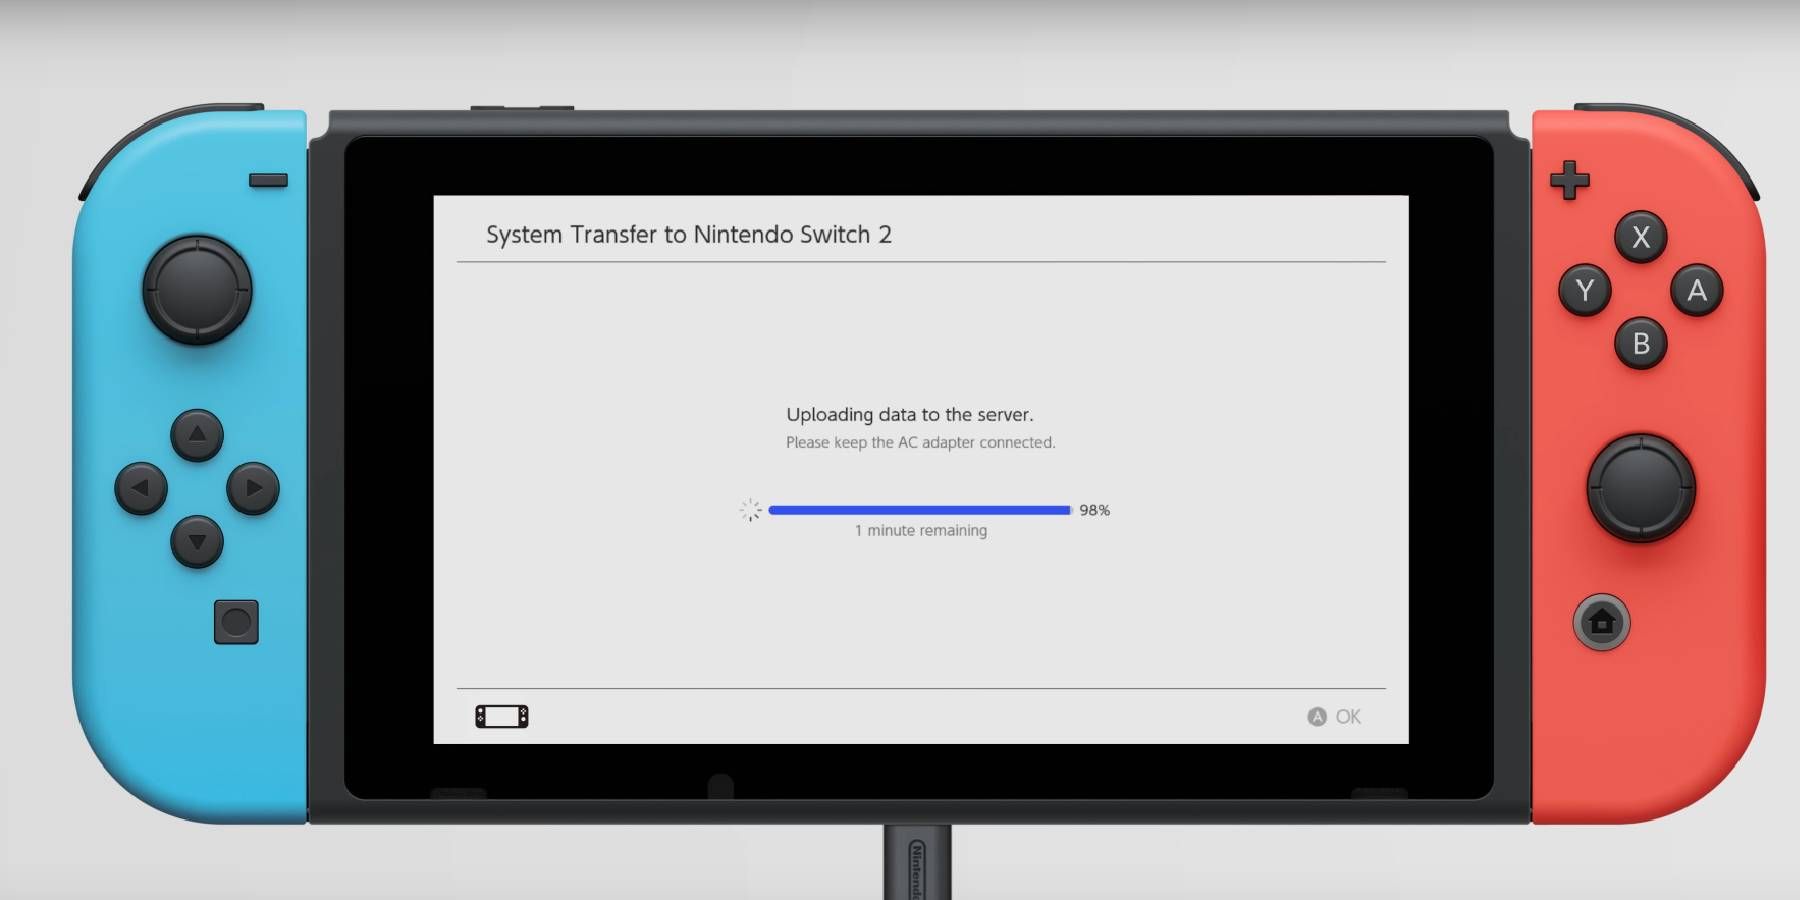
If you find yourself without your actual Nintendo Switch console for wireless data transfer, there’s another method available for sharing its information. Instead, you can opt to upload Switch data onto a specialized server for storage, allowing the data to be downloaded at a later time. This action will trigger an “initialization” or factory reset of your original Nintendo Switch, erasing all other stored data in the process.
This method involves some risk since any data not uploaded onto the server will be deleted permanently if your device is ever reset. It’s much like wireless transfer, requiring an active Internet Connection and access to your Nintendo Account for the process to work. Luckily, you won’t need a Switch Online subscription for the new Switch 2 to perform this kind of data transfer.
When your data is stored on an online server, you have the flexibility to move its contents to your “Switch 2” whenever it suits you, within a given timeframe. Furthermore, you can elect to halt the transfer process at any moment, thereby keeping the data on your current device, which can be particularly useful if you’re having trouble locating your “Switch.” This approach can serve as an effective method for temporary data storage before wireless transmission, especially when you’re unsure of where your “Switch” might be.
Everything That Carries Over To Switch 2
Move Over Account Profiles And Important Game Data
Multiple types of data are transmitted between your original Switch and the new Switch 2, not exclusively game save data. When employing any System Transfer function, the following items can be moved between consoles:
Diverse data, including but not limited to game save data, is transferred from one Switch to another when you utilize a System Transfer feature. The following are the items that can be migrated:
- (Secondary) User Profiles
- Purchased Digital Games
- Game Save Data (with compatible games only)
- Screenshots
- Videos
- Parental Controls
Games that are compatible with both physical and digital platforms can transfer their save data smoothly from one console to its successor. Interestingly, certain Switch games can be elevated to their Switch 2 variants following migration. The Switch 2 offers enhanced visuals, smoother gameplay, or extra features and modes for these upgraded games, but you’ll need to purchase upgrade packs to convert your transferred data into the enhanced versions.
The existing Nintendo Switch Online subscriptions will transfer to your upcoming Switch 2 device, including the innovative GameChat feature designed exclusively for the new console. The Parental Controls function from the smartphone app operates quite similarly to its counterpart on the original Switch, enabling you to monitor a child’s playtime, their communication with others, and so forth. Additionally, the enhanced settings on the Switch 2 provide more options for Parental Controls, offering greater flexibility in shaping your child’s gaming experience.
Games that are compatible with the system will continue to function using the original Nintendo Switch Joy Cons and Pro Controllers. This means you can still play your favorite titles without having to transfer data or make adjustments when transitioning to a potential Nintendo Switch 2 console. In fact, older controllers can be used for games on the new console as well, making its game library even more accessible.
Read More
- Who Is Harley Wallace? The Heartbreaking Truth Behind Bring Her Back’s Dedication
- Basketball Zero Boombox & Music ID Codes – Roblox
- 50 Ankle Break & Score Sound ID Codes for Basketball Zero
- 50 Goal Sound ID Codes for Blue Lock Rivals
- LINK PREDICTION. LINK cryptocurrency
- Ultimate AI Limit Beginner’s Guide [Best Stats, Gear, Weapons & More]
- TikToker goes viral with world’s “most expensive” 24k gold Labubu
- 100 Most-Watched TV Series of 2024-25 Across Streaming, Broadcast and Cable: ‘Squid Game’ Leads This Season’s Rankers
- League of Legends MSI 2025: Full schedule, qualified teams & more
- All Songs in Superman’s Soundtrack Listed
2025-06-07 05:58