
Step into the streamlined guide for the Lunar: Silver Star Story Complete on RPG Site, which initiates the Lunar Remastered Collection. This vintage role-playing game follows a relatively simple path compared to contemporary ones – advancement relies on conversing with essential characters and reaching story locations, unlike many modern games that provide objective markers for guidance (this guide comes in handy here). In combat against bosses, effectively managing Magic Points (MP) is crucial for victory. Beginning a boss fight with ample MP ensures you’ll encounter minimal problems. For trophy collectors, beware of two infamous challenges: “collect every red treasure chest” achievement, and the elusive set of Bromides (these items can only be obtained by talking to NPCs or examining objects at specific instances).
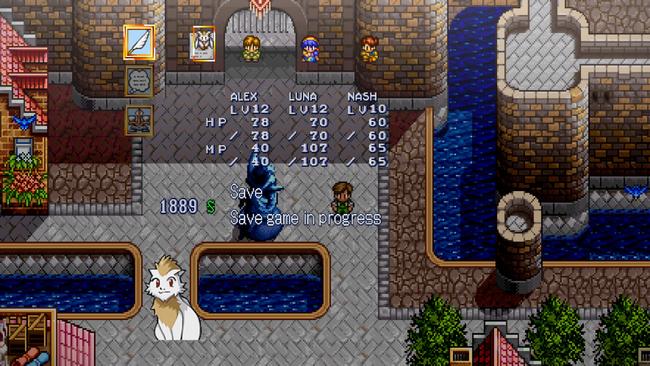
Keep in mind that this game doesn’t have an automatic save function. It’s essential to save manually whenever possible and maintain several backup saves. In case you reach a ‘Game Over’, you’ll return to your most recent saved version.
Remark: The principles outlined here are applicable to the initial PlayStation edition as well. Just be aware that the original version by Working Designs features certain gameplay adjustments, like varying boss sizes and less silver contained within treasure chests.
Burg
- Objective
- After regaining control, leave and head to the springs to see a movie scene.
- Head to the house located northwest of town. Talk to Alex’s father to receive a Dagger, Sling, and Flame Ring.
- Head to the basement and grab all the treasures.
- Talk to Ramus by the town entrance.
- Leave town and take the northeast path, and it will lead to a cave.
- Tip 1: Unlike most RPGs, Lunar doesn’t feature traditional inns for healing. Instead, you can fully restore your party’s HP and MP by examining the statue of Athena found in towns.
- Tip 2: You’ll notice a distinctive red chest in Ramus’ house early on—but don’t waste time trying to open it yet! These treasures require a key you won’t obtain until much later.
- Treasure and Items: Dagger, Sling, Flame Ring, Dragonfly Wing, Herb, Star Light, Angel’s Tear, Garbage Lid (Red Chest)
White Dragon Cave
- Objective
- Head to the center part of the cave to find the dragon.
- Proceed to the left room where you’ll encounter ice pillars blocking your path. To clear the way, lure the gorilla-type enemies into charging at the pillars – their attacks will shatter the ice. Continue deeper into the chamber until you reach the final treasure containing the Dragon Ring.
- Show the ring to the dragon.
- You can leave by looking for the exit or use the Dragonfly Wing to warp out instantly.
- Return to Burg and examine the Athena statue.
- Head to the general store and talk to the shopkeeper.
- Return to the path to Alex’s house, Ramus will start a conversation.
- Before going anywhere else, head to the weapon shop. Then talk to the guy upstairs to help Ramus. Doing this is required to get some of the bromides at the end of the game. Collecting all of the bromides is needed to complete all the trophies/achievements.
- Then leave town and head to the forest to the west.
- Tip 1: There is a trophy for winning a battle without a weapon equipped. Once you have acquired this, equip the weapons Alex’s father gave you.
- Tip 2: Use AI battle to acquire another trophy. Then hold down the trigger buttons to adjust the battle speed for another trophy. (You will not get this trophy if you have already earned it in Lunar Eternal Blue).
- Tip 3: When a party member falls in battle, there’s a small chance Nall will swoop in to revive them. This not only saves you in a pinch but also unlocks a trophy when it occurs.
- Trivia: Ramus does not gain any other stats but HP whenever he levels up.
- Treasure: Herb x4, Star Light, Dragon Ring, 500 Silver, Dragon Diamond (Story Item)
- Bromide Step: Talk to the man upstairs in the weapon shop and pay him back the money Ramus owes him. This is required to get some bromides for later.
- About Bromides: Bromides are usually found by talking to specific NPCs or examining objects at a specific time; they’re easily missable.
Weird Woods
- Objective
- Navigate through the forest until Ramus leaves.
- Return to Burg and then head to the path to Alex’s house for an event.
- Talk to Luna in Alex’s house.
- Talk to Alex’s parents, Alex’s mom will give you 1000 silver.
- Talk to Luna again.
- Talk to Alex’s parents to end the night.
- Leave Burg to the weird woods.
- Navigate through the woods until you’re surrounded by monsters.
- When the mysterious stranger offers assistance, be sure to accept his help. Refusing will trigger an extremely difficult battle that doesn’t advance the story – Even if you win without his assistance, you will be forced to beg for his help again.
- Exit out to the world’s map, head south until you find the town of Saith.
- Treasure: Antidote x6, Herb x4, Wrath Ring (Red Chest)
Saith
- Objective
- Head to the pier and talk to the shopkeeper. Then the people around the building. They will mention that Brett has the Sea Chart.
- Go to the Pub and talk to Brett in the back corner. Bet several rounds with him.
- After the event, talk to Brett again to get the Fortune Cane.
- Leave town and go to the northwest path to the Old Hag’s Forest.
- Try to grind and save up at least 2000 to 3000 Silver.
- Treasure and Items: Protection Ring (Red Chest), Fortune Cane (Event)
Old Hag’s Forest
- Objective
- Navigate through the forest, there are empty treasure chest here that lures monsters. Opening them will unlock a trophy.
- At the north end, you will find the Sea Hag’s House.
- Talk to the sea hag and trade the cane for the sea chart.
- Return to Saith and talk to the Sea Captain at the pier.
- Agree to slay the monster for him to engage in a boss fight.
- After defeating the boss, talk to Luna.
- While inside the ship, use the 2000 to 3000 Silver to buy 2 to 3 bars of soap. You will need them to unlock a cutscene for later. You can also get by with 2000 Silver, as there is an event that will give you a bar of soap and a red chest later in the game that contains another bar of soap.
- Talk to Ramus and Nash on the ship.
- If you talk to Luna twice, it will advance the story.
- Head to the deck to view another event.
- The following day, head to the ship’s bow to land in Meribia.
- Treasure: Herb x3, Monster Chest x4, Star Light, 800 Silver
- Boss Tip 1: Buffing characters is key to victory and can be applied twice before diminishing returns set in. If Luna is at level 9, she gains access to Cascade Song, which boosts a party member’s attack. Using it on Alex can make his Sword Dance deal massive damage.
- Boss Tip 2: Bosses have different starting animations for their attacks. You can use this gimmick to anticipate some of their attacks.
- Bromide (1/13): Mia’s Bromide 1 – Automatically when the 4th party member joins.
Meribia
- Objective
- Head to the main castle and talk to Master Mel.
- Winning or losing is entirely optional and will not affect the story.
- Make sure you buy the best available gear. There are several weapon and armor shops, but the ones in the main city sell the latest equipment.
- Exit out of the west part of town. Then look for the fortune teller’s house at the very left end of Meriba.
- Head back to the main city. Then look for the shop next to the armor shop.
- Agree to the offer, then head to the backroom to the sewers.
- Treasure: 4000 Silver (Red Chest), Silver Light (Red Chest)
Meribian Sewers
- Objective
- Purchase a Dragonfly Wing from the General Store.
- Navigate through the dungeon, you can lower bridges by examining the blue switch on the walls.
- When you reach the basement level, approaching the thief will start a boss fight.
- Before you move another step, take off the stuff you have equipped on Ramus.
- Note (The treasure you see near the end can be reached through Mel’s Castle.)
- Exit out of the dungeon using a Dragonfly Wing.
- Talk to Dross.
- Leave Meribia and travel south to find the spring of transmission.
- Talk to the man guarding the springs.
- Leave and head to the Shrine of Athena, and head to the depths of the temple for an event.
- After meeting Phacia, talk to the girl beside her. This step is required to get a bromide for later.

- Bring the application form to the man working at the springs.
- Treasure: Star Light x4, 250 Silver x2, Herb x2, Antidote x2
- Bromide Step: Phacia Bromide – Talk to the woman next to Phacia, this step is required to get her bromide later.
Cave of Trials
- Objective
- Navigate through the Cave of Trials. This dungeon has prohibited items, so be careful when navigating through. The examiners at the end of each floor will offer a full heal to your party once.
- There is a boss waiting at the end, since items are prohibited, make sure you have a decent amount of MP to win.
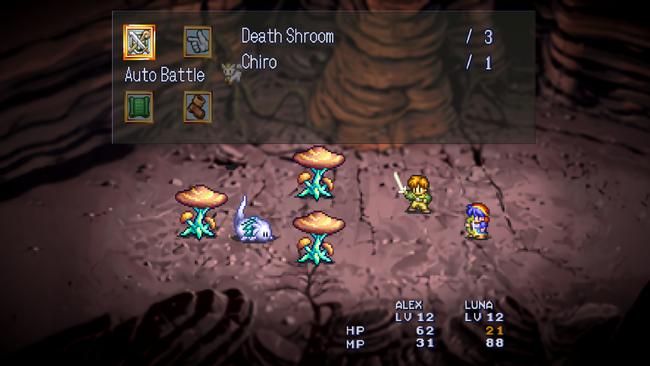
- Note: This dungeon has an enemy called Chiro – Lunar’s equivalent of the ‘Metal Slime’ from Dragon Quest. These elusive foes will typically flee from battle immediately, but if you’re quick enough to defeat one, you’ll be rewarded with massive silver and EXP gains. As a bonus, taking down a Chiro for the first time also unlocks a trophy. This trophy can also be earned in Lunar Eternal Blue.
- Treasure: 500 Silver x3, Healing Ring
Vane
- Objective
- Head inside the magic guild building for an event. (North building)
- Find Mia’s room for an event (Stairs northwest.)
- Find Luna in the hallway on the northeast stairs.
- After you meet with Ghaleon, leave Vane with the transmission sigil.
- On the world’s map, head to the mountain pass located southwest.
- Treasure: Soap (Red Chest)
Nanza Pass
- Objective
- Make your way through the pass. Some of the treasure chests here are trapped and can inflict confusion on your party, which can be especially dangerous
- Navigate through the pass until you reach the fort.
- Treasure: Confusion Chest (Trap) x2, Herb x2, 100 Silver x2
Nanza
- Objective
- Talk to the guard standing by the gate to get into the fort.
- Talk to the guard standing by the west gate.
- Now you must talk to several people to find clues about Kyle.
- Start heading to the tower in the middle to the top part of the fort, and talk to the guy with blue hair at the northeast corner.
- Then enter the tower to the southeast and talk to the girl upstairs.
- Head to the basement and in the cafeteria, talk to the girl at the first table.
- Check the room to the north and talk to the guy with blue hair.
- Check the center prison cell to the left for an event.
- After meeting Kyle, leave by talking to the guard on the west side.
- Navigate through the passage until you exit to the world’s map.
- Look for the town northwest.
- Treasure (Barrier): Diamond Necklace (Red Chest)
- Treasure (Pass): Confusion Chest, Star Light
Lann
- Objective
- Purchase a Dragonfly Wing from the General Store.
- Head to the house in the center, approach the girl with robes to see an event.
- Talk to the man by the pier to use the boat.
- Treasure: Silver Light (Red Chest)
Lann Island
- Objective
- When you reach the island, immediately return to Lann and talk to the man you borrowed the boat from. You will have to return later again and talk to him to get one of Jessica’s bromides.
- Then return to Lann Island.
- Reach the end of the island and approach the man by the tent to engage in a boss fight.
- Use the Dragonfly Wing to instantly leave the island.
- Navigate through Nanza Pass so you can return to Vane.
- Head to the throne room in the magic guild.
- Talk to Ghaleon and Mia multiple times until an event appears.
- Wait for an event scene.
- Talk to the woman with the mask in the prison cell.
- Leave the prison and look for a blue door to the Crystal Tower.
- Treasure: 600 Silver x3, Confusion Chest x5, 1000 Silver, Fresh Ring
- Bromide Step: Jessica’s Bromide 2 – Talk to the man who loaned you the boat. You will need to talk to this guy much later in the game to get Jessica’s Bromide, but this is a critical first step.
Crystal Tower
- Objective
- Unequip your weapons to proceed with the tower.
- Reach the top of the tower for a boss fight.
- Afterwards, leave Vane.
- Head to Althena’s Shrine and talk to the girl in the back, she will give you Phacia’s Bromide.
- Talk to Master Mel.
- Talk to Ghaleon by the port.
- Treasure: 1000 Silver, 1500 Silver, Star Light, 500 Silver, Angel Ring
- Bromide (2/13): Phacia’s Bromide – Talk to the girl in the back of Althena’s Shrine.
Location Revisit
- Objective
- Head to the White Dragon Cave in Burg.
- Move to where Quark is for an event.
- When you regain control, head to the basement and examine the shelves to get Luna’s Bromide.
- Head to Dyne’s Monument and talk to Laike.
- Laike will hand over the White Dragon Wings, you can use this to fast travel to locations you have visit before and also as a tool to escape dungeons.
- Fast travel to Meribia.
- Defeat the monsters around you and then head to the castle.
- Go to the arena side for an event.
- Check Black Rose Street (The west part of Meribia). There is a man you can talk to get Royce’s Bromide.
- Fast travel to Vane, and a boss fight will ensue.
- Then go to Nanza and head to the center to trigger another boss fight.
- DO NOT TALK TO KYLE. Instead, look for Kyle’s bed; examining it will give you one of Jessica’s Bromides.
- Talk to Kyle to recruit him, then warp back to Althena’s Shrine, where there is a girl you can talk to get one of Jessica’s Bromides.
- Return to Nanza and take the southeast exit to the world’s map.
- Head to the nearby town of Reza.
- Bromide (3/13): Luna’s Bromide 2 – Examine the shelves by the treasure chest in the basement.
- Bromide (4/13): Royce’s Bromide – Talk to the man at Black Rose Street.
- Bromide (5/13): Jessica’s Bromide 4 – Examine Kyle’s Bed before recruiting him.
- Bromide (6/13): Jessica’s Bromide 1 – After recruiting Kyle, head back to Althena’s Shrine and talk to one of the girls twice.
Reza
- Objective
- Head to the town center for an event. You will temporarily lose the function to fast travel.
- Head to the pub north and talk to the bartender working there.
- Head out to the world’s map. Check the town located south of Reza, doing so will add this spot as a fast travel point for later.
- Continue the story by going northeast, just before the forest, to the east is a hot spring.
- Hot Springs requires a bar of soap to use; this one is for males only and has two movie scenes. Watch the two scenes by using two bars of soap.
- Then head to the forest.
- Treasure: Silver Light (Red Chest)
Meryod Woods
- Objective
- Navigate through the forest until you reach the north exit to the world’s map.
- Head to the village north.
- Treasure: 1000 Silver x2, Fortune Ring (Red Chest)
Meryod
- Objective
- Go past the bridge northeast for an event.
- Find all your friends and talk to them, Nash, Jessica, and Mia.
- Then talk to Kyle at the pub for an event.
- Go through the forest again, there is a boss fight right at the south exit.
- Once you exit the forest, go to the tower southeast.
- Treasure: Silver Light (Red Chest)
Damon Spire
- Objective
- Navigating through the spire requires you to step on the red glass switches to open the gate around.
- At the end of each floor, Damon will ask you a series of questions. Usually, your friends will answer them for you.
- The last one requires picking the right choices to advance the story. Even if you pick the wrong one, the game will just force you to pick the right one before the story can go forward.
- When you talk to Damon at the top of the tower, he will hand over the Thieves’ Guide.
- Leave the tower, you can use Jessica’s Escape Litany to warp out.
- Head to Reza and talk to the bartender. You will also get the Thieves’ Crest. This will let you open all the red chests that were locked.
- Head to their secret hideout in the back.
- Talk to Lily three times, she’s the girl in the room just before the hideout. Doing this step will get you a powerful accessory for later.
- Talk to the thief who took the White Dragon Staff. He will also give you a bar of Soap.
- The hideout also sells new equipment.
- Leave the hideout to view another event.
- Treasure: Empty Chest x4, Star Light x4, Sage’s Clothes, Spirit Bandana, Ice Pendant
Red Chest
This section covers backtracking to earlier areas to unlock those red chests you may have noticed. Opening every one rewards you with valuable loot—and unlocks a platform-specific trophy/achievement on both Steam and PlayStation
- Red Chest 1 (Pot Lid): Burg – Check the 2nd Floor of the Mayor’s House (Ramus’ Room).
- Red Chest 2 (Wrath Ring): Weird Woods – Northeast of the area where you were rescued by Laike.
- Red Chest 3 (Silver Light): Old Hag’s House – Check the basement of the hag’s house.
- Red Chest 4 (Protection Ring): Saith – Check the house located in the southeast corner. It is located upstairs.
- Red Chest 5 (4000 Silver): Merbia – head to the house behind Ramus’ store.
- Red Chest 6 (Silver Light): Merbia Sewers – Found by going through the sewer passage in Mel’s Castle.
- Red Chest 7 (Soap): Vane’s Cave of Trial – Found on the second floor.
- Red Chest 8 (Devil Ring): Vane – Northwest corner by the Althena Statue.
- Red Chest 9 (Silver Light): Nanza Pass – This is found in the southeast pass on the route to Reza.
- Red Chest 10 (Silver Light): Lann – Behind the first house you come across.
- Red Chest 11 (Silver Light): Reza – West part of town.
- Red Chest 12 (Fortune Ring): Meyrod Forest – Northwest part of the forest.
- Red Chest 13 (Silver Light): Meyrod – Southwest corner of the map, located behind a house.
Iluk and Iluk Field
- Objective
- To proceed with the story, fast travel to Iluk. If this location is not on your list, it is the town just south of Reza.
- Head to the large house at the north end to find an inventor. Talk to him and hand over the blueprints.
- Go outside and find the stairs to go down. Talk to the man there and he will tell you can find Fluffy Bugs in the fields.
- Head out through the north exit to Iluk Field.
- Navigate through the fields, there will be a forced enemy encounter at the end.
- Afterwards, return to Iluk. Heal up using the Althena Statue.
- Head to the inventor’s house, talking to him will bring you to the Red Dragon Cave.
- Treasure (Field): Crystal Bracelet, Healing Ring, Spook Hairpin, 3000 Silver
Red Dragon Cave
- Objective
- In the Red Dragon Cave, many enemies are weak towards ice. Don’t switch to fire attribute equipment until you leave the dungeon.
- Navigate through the dungeon until you reach the end, and you will encounter a boss fight.
- Leave the dungeon and examine the balloon.
- You will end up in Reza.
- Approach Laike for an event.
- Teleport to Meyrod. You can now cross the bridge northeast.
- On the world’s map, to the east is another hot spring, this one is for girls. However, the monsters here are extremely strong (They’re as strong as enemies in the final dungeon), and you can get through the forest by constantly fleeing. It is recommended that you come here a little bit stronger. If you manage to get through, you can view two cutscenes if you have two bars of soap.
- Head north until you find the village of Lyton.
- Treasure: Star Light x8, Barrier Ring, Rainbow Tiara, Angel Ring, Flame Sword, 2000 Silver, 10000 Silver
Lyton
- Objective
- Go to the house in the very north and talk to the elder.
- Enter through the small shrine to the east.
- Navigate through the dungeon until you reach a puzzle to fix the music.
- Push a stone to block the very left hole and another rock to block the far right hole.
- Return to town and talk to the Elder.
- Head to the north exit to access the Blue Dragon Shrine.
- Treasure (Shrine): Wisdom Robe, Star Light, 5000 Silver
Blue Dragon Shrine
- Objective
- Navigate through the dungeon, enemies here are weak to fire, so you can start using the Flame Sword you found in the Red Dragon Cave.
- At the end of the dungeon, talk to the Blue Dragon for an event scene. Then grab the treasure in the last room.
- Leave the room for another event.
- Exit the dungeon and leave Lyton.
- Head east to Tamur Pass.
- Treasure: Angel’s Tear, 10000 Silver, Ruby Tiara, Angel Ring, Jewel Bracelet, Chira’s Tail, Dragon Armlet
Tamur Pass and Tamur
- Objective
- Navigate through the valley, there is an enemy encounter at the end.
- Once you’re at Tamur, stock up on new equipment.
- Talk to Laike at the north exit.
- Leave, on the world’s map, go to the tower northeast.
- Treasure: Star Light, Shira’s Tail, Wind Cane, Angel’s Tear, Healing Nut, Dark Helmet
Myght’s Tower
- Objective
- For most encounters, Laike’s physical attacks will easily dispatch enemies. However, some foes have high physical resistance, you can try using some of Alex’s elemental attacks or just flee from combat.
- On the first floor, the solution to the puzzle is to go through the doors in this order (Planet, Star, Sun, Moon).
- Navigate through the dungeon until you reach the top. Talk to Myght and Laike will leave your party.
- Return to Tamur.
- Find your friends at the pub.
- Go to the north part of town for an event battle.
- Take the north exit to the world map and go to the forest southeast.
- Treasure: Silver Light, Barrier Ring, 1000 Silver, Healing Nut, Crystal Sword
Lost Woods
- Objective
- Navigate through the forest. As you reach the south end, you will see an event scene.
- When you arrive at the campsite, head to the southern camp to find Tempest and talk to him.
- Look for the biggest camp to talk to the clan’s elder.
- Head to the northeast exit.
- Treasure: Chira’s Tail, Holy Hairpin, Healing Nut x2, Silver Light, Dark Shield, Star Bracelet
Black Dragon Cave
- Objective
- Navigate through the cave, and at the halfway point, Tempest will temporarily join you.
- As you go higher, you will get another event scene to receive the last Dragon item.
- Head to the top for a boss encounter.
- After defeating the boss, leave the cave and reunite with your friends at Tempest’s tent.
- Fast Travel to Lann and talk to the man that you borrowed the boat from. If you remember to talk to him immediately after borrowing his boat, he will give you one of Jessica’s Bromides.
- Talk to the village chief, doing so will get an accessory for later.
- Treasure: Dragonfly Wings, Healing Nut, Dragon Bandanna, Dream Bow, Angel Ring, Trap Chest (MP Drain) x3, Silver Light x2, Dark Armor, Dark Sword
- Bromide (7/13): Jessica’s Bromide 2 – Talk to the man you borrow the boat from in Lann. Will only give you the bromide if you remember to talk to him right after borrowing the boat.
Forbidden Forest
- Objective
- This step is required to get two more anime scenes. Remember the forest right after leaving Meyrod. Going to that dangerous forest should be much easier, with Alex’s final ability, you can use it to remove enemies from the screen to avoid combat. Of course, you can also flee from combat.
- Engaging in fights with the monsters here is pretty pointless as they’re ridiculously strong and provide hardly any EXP and silver.
- If you reach the end, you will find another one of Althena’s springs. Just remember, you will need a bar of soap to use the springs, and there are two scenes.
- Treasure: 10000 Silver
Myght’s Tower Revisit
- Objective
- To continue the story, fast travel to Myght’s Tower and speak to Myght.
- Afterwards, talk to all your friends and then go upstairs for an event.
- After this event, you can get another bromide. Fast travel to Iluk and look for the house in the top right corner. Talk to the man there about a magazine, and you will get one of Mia’s Bromides.
- Then fast travel to Reza. Head to the thieves’ hideout.
- Talk to the woman with the witch hat.
- Then talk to the guy next to the hot air balloon.
- Return to Myght’s Tower and speak to Myght.
- Then talk to Laike.
- Talk to Kyle and Jessica.
- Take off with the airship.
- On the world’s map, head to the gate to the east.
- Bromide (8/13): Mia’s Bromide 4 – After the event at the top of Myght’s Tower, head to Iluk and talk to the man in the top right house.
Talon
- Objective
- Talon is composed of a town and a mine. There isn’t any Althena statue here to restore your health. However, the guy who works at the inn can heal you.
- Navigate through Talon until you go into the mine. The mine will be a dungeon so there are treasures and enemies placed around.
- Once you reach the event, where you need to rescue one of the miners, a forced enemy battle will occur. Remember this miner for later.
- When you find the Althena Statue, there is an event, and taking the north exit will lead to a series of boss battles.
- After the boss battle, navigate through the mines until you come across another event with a different Althena statue.
- Find the exit to the world’s map. Head to the giant tank-looking fortress.
- Treasure (Mine): Healing Nut x3, Silver Light x2, Star Light x2, Hell Armlet, Holy Robe, Devil Pendant, Refresher Ring, Angel’s Tear, Fire Tiara, Protection Ring
Ruid
- Objective
- Navigate through the fortress, this entire town is basically a dungeon.
- Once you get to the top, there will be a boss fight.
- Head upstairs to view a cinematic. After the event scene, you will need to manually walk out of the dungeon.
- On the world map, make Talon your first destination. The miner you rescued earlier will now reward you with Xenobia’s Bromide.
- Once you’re done with the Frontier, head to your airship for an event.
- When you regain control in Vane, all your party members will be separated. During this part, DO NOT talk to Nash. Instead, go to the Magic Guild and look for a classmate in the bottom right room. Talking to him multiple times should give you Mia’s Bromide.
- Once you have collected the bromide, go to talk to Nash by the entrance.
- Then meet Mia at the Magic Guild.
- After the event scene, make your final preparations, such as stocking items.
- Talk to the Chief in Lann and select the first option. You will get the Ghaleon’s Tear accessory from him. This will only work if you remember to visit him when you become a Dragonmaster for the first time.
- Talk to Lily in Reza. If you remember to talk to her three times when you first visit the Thieves Guild, she will give you the Gale Ring.
- Visit Damon in Damon Spire, talk to him, and he will give you the Hell Ring.
- When all your preparations are done, visit the Grindery that is parked right next to Vane.
- Treasure: Silver Light x 2, Star Light, Fortune Ring, Dark Mace, Healing Nut, Fire Armlet, Fortune Ring, Tri-Ring
- Bromide (9/13): Xenobia’s Bromide – After the Grindery leaves, return to Talon and talk to the Miner you have rescued to get the bromide.
- Bromide (10/13): Mia’s Bromide 2 – When you regain control in Vane, do not talk to Nash. Instead, go to the Magic’s Guild and talk to the classmate in the bottom right room to get the bromide from him.
Grindery
- Objective
- Grindery is a massive dungeon with a lot of items. There are several layers to the dungeon and several event scenes in each layer.
- When you reach the top, there will be a boss fight.
- After defeating the boss, talk to Luna for an event.
- Afterwards, you will return to Meribia. This is the final section to stock up. There are no healing spots in the final dungeon, so bring a hefty amount of Star Light to restore MP.
- During this part, if you talk to Ramus, he will sell you all his stuff for free. There is a trophy for reaching a 100,000 silver. You should just buy all the Star Light and resell them until you reach 100,000 silver to get the trophy.
- To move on with the story, go to the pub. Talk to Nash and Kyle.
- Then talk to Mia and Jessica in Mel’s Room.
- Bring Mia and Jessica with you. Then talk to Nash and Kyle for an event.
- Talk to Laike to go to the final dungeon.
- Treasure: Healing Nut x 2, Saint Clothes, Silver Light x 2, Angel Ring, Stone Bracelet, Insane Shield, Healing Ring, Holy Bandana, Insane Helmet, Phantom Ribbon, Star Light
Althena’s Fortress
- Objective
- Navigate through the final dungeon, there are three distinctive layers to the final dungeon.
- At the end of each layer, there is a boss fight awaiting.
- As mentioned earlier, there are no healing spots, so make sure you have Star Light to restore MP.
- PS1 Version Only: Once you have defeated the final boss and regained control, go to your inventory and use Alex’s Ocarina.
- Move to the top for an event.
- Treasure: Silver Light x3, Holy Mace, Dragon Cane, Starlight Bow, Insane Armor, Aegis Robe, Holy Clothes, Insane Sword, Detonator Armlet, Sage’s Robe, Spook Armlet, Spirit Talisman
Epilogue
- Objective
- During the epilogue, you can wander around Meribia to speak to familiar faces.
- If you help Ramus repay his debt early in Burg, he’ll sell the last two Bromides needed for the “A Bromider’s Journey” trophy. Also, remember to buy the Rememberizer from him: this item lets you rewatch all animated cutscenes, and viewing every one unlocks a separate trophy.
- If you want to see the ending, talk to Laike at the port.
- Bromide (11/13): Luna’s Bromide 1 – Talk to Ramus at his store, and he will give you Bromide.
- Bromide (12/13): Jessia’s Bromide 3 – If you help Ramus in repaying his debt to the guy at the weapon shop in Burg, he will have two bromides available at his store.
- Bromide (13/13): Mia’s Bromide 3 – Read above.
Read More
- Who Is Harley Wallace? The Heartbreaking Truth Behind Bring Her Back’s Dedication
- Basketball Zero Boombox & Music ID Codes – Roblox
- 50 Ankle Break & Score Sound ID Codes for Basketball Zero
- TikToker goes viral with world’s “most expensive” 24k gold Labubu
- 100 Most-Watched TV Series of 2024-25 Across Streaming, Broadcast and Cable: ‘Squid Game’ Leads This Season’s Rankers
- Revisiting Peter Jackson’s Epic Monster Masterpiece: King Kong’s Lasting Impact on Cinema
- 50 Goal Sound ID Codes for Blue Lock Rivals
- League of Legends MSI 2025: Full schedule, qualified teams & more
- How to watch the South Park Donald Trump PSA free online
- KFC launches “Kentucky Fried Comeback” with free chicken and new menu item
2025-04-17 13:42