As a seasoned gamer with countless hours spent building digital empires and constructing architectural wonders in various sandbox games, I must say that Tiny Glade has truly captured my heart with its whimsical charm and almost effortless bridge-building options.
In the captivating world of Tiny Glade’s fantasy sandbox, building a charming medieval village becomes as simple as your dreams. With almost effortless controls, even crafting essentials such as bridges is made easy. If you’re curious about the process, here’s our step-by-step guide on creating bridges in Tiny Glade.
How to create a bridge in Tiny Glade
In Tiny Glade, you’ve got plenty of building choices at your disposal. Yet, if you’re looking for a pre-set bridge option, you won’t find one currently. But don’t worry! There are still fun and innovative ways to construct your own bridge until that feature is (hopefully) implemented in the game.
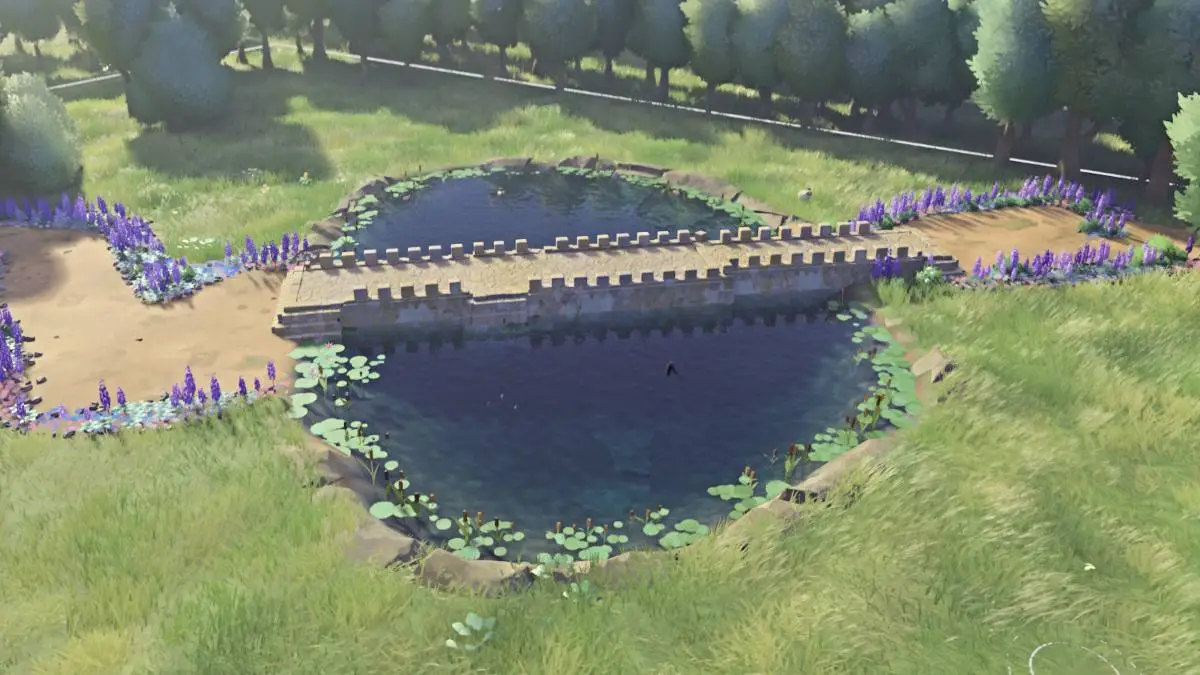
For example, if there’s a body of water like a pond or a stream within your clearing, you might consider building a bridge that spans over it and links up with the rest of your small settlement.
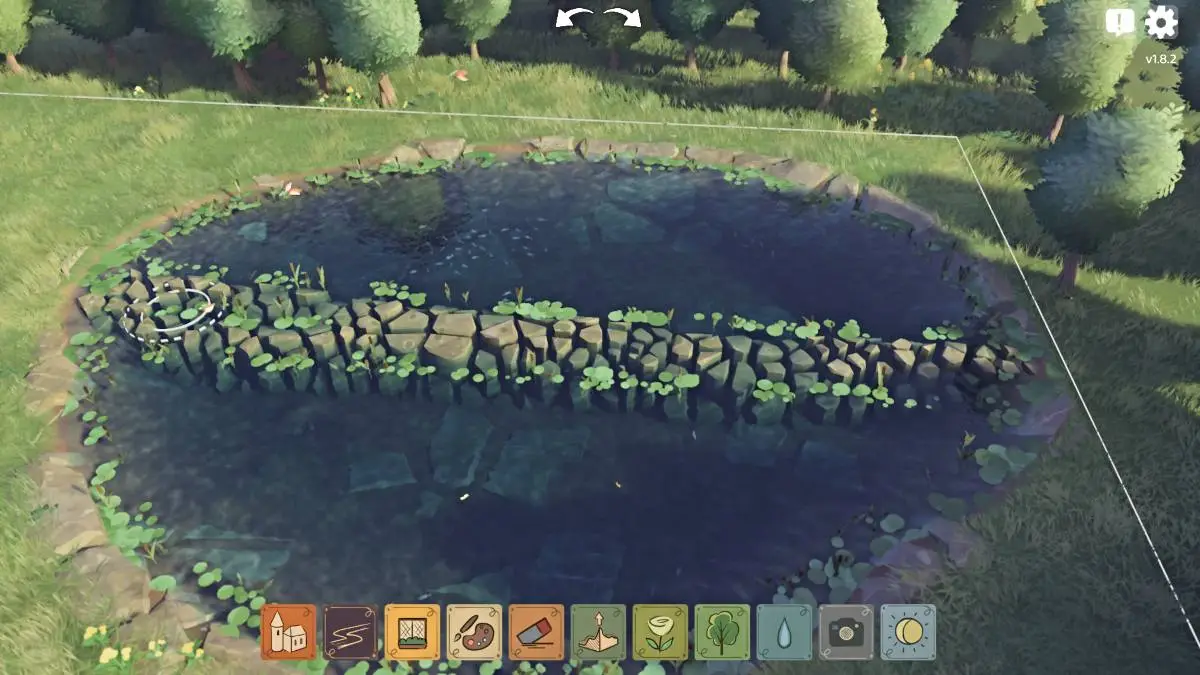
An effortless method to accomplish this task is by opting for the ‘pathway’ construction block, which is located second from the left. Adjust the width of your path builder by moving the slider bar either left or right as per your preference. Subsequently, move the circular cursor to the desired spot to establish a path. Keep in mind that this method can be applied not only to land but also to bodies of water. Simply drag it over the water to create a stepstone path, similar to the one shown above.
If you’re aiming for a sturdy wooden bridge, you’ll need a bit of creativity this time around. To set it up, click on the first button (the one on the left) which is orange. Then, from the pop-up menu that appears, select the second building option. Arrange it horizontally over the water, aligning it in the direction you want the bridge to stretch across the body of water.
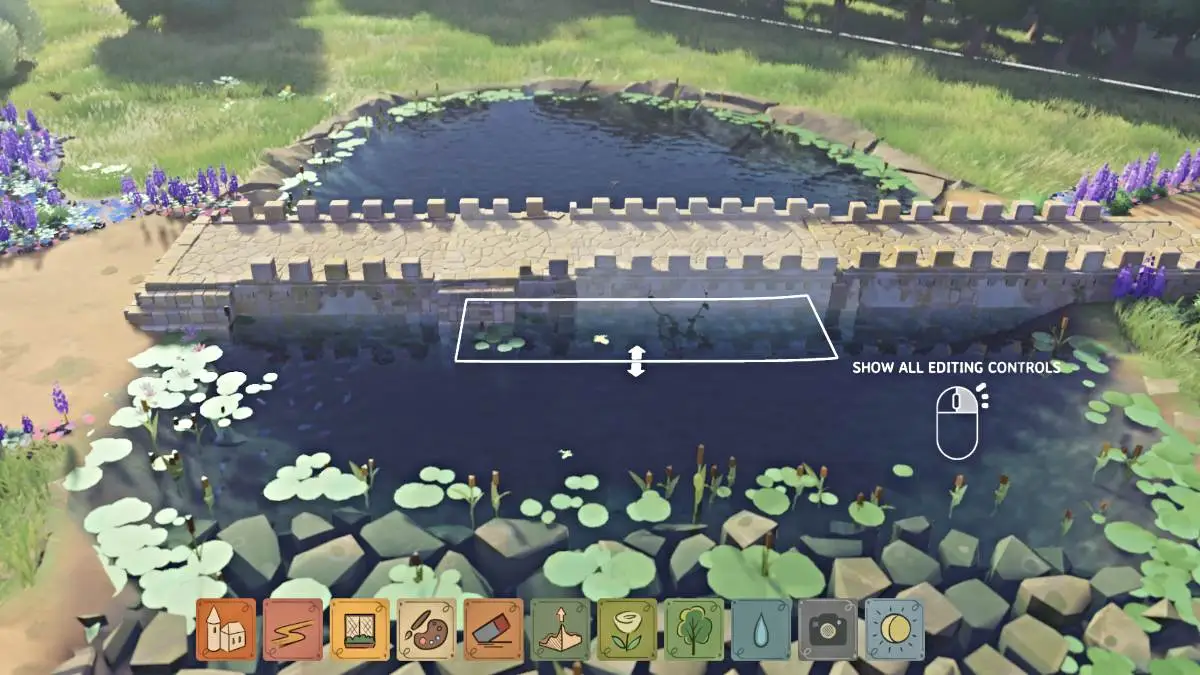
Your task is to reduce the height of that structure as much as feasible. Utilize the editing tools to lower the rooftop entirely. Subsequently, from the base of the edifice, manipulate the controls to elevate the foundation to your preferred height above the water level. If you prefer, you could maintain the bottom part in the water, which would facilitate a smooth connection of the bridge.
First, reduce the initial building to resemble a bridge-like structure, and then duplicate this process by adding more building structures on both sides of it. Continue this process until the bridge is long enough. Next, flatten these additions so they are level and evenly spaced. To blend the bridge with its surroundings, you can use the pathway builder option at either end to create stairs, although remember that the bridge should not be too high above the ground for this feature to work effectively.

If you prefer your bridge to be higher up, you can opt for the “hill builder” feature (represented by the dark green button in the center). This will construct a gradual, natural incline leading to your bridge, as demonstrated previously. While it might not be as sleek in appearance, it remains a practical solution.
Make sure to explore all the fresh gaming tips and updates available right here on GamerTop, including the different endings for Frostpunk 2.
We have upgraded our commenting platform! Existing comments will be imported over the next few weeks.
Read More
- ACT PREDICTION. ACT cryptocurrency
- W PREDICTION. W cryptocurrency
- PENDLE PREDICTION. PENDLE cryptocurrency
- Hades Tier List: Fans Weigh In on the Best Characters and Their Unconventional Love Lives
- Smash or Pass: Analyzing the Hades Character Tier List Fun
- Sim Racing Setup Showcase: Community Reactions and Insights
- Understanding Movement Speed in Valorant: Knife vs. Abilities
- Why Destiny 2 Players Find the Pale Heart Lost Sectors Unenjoyable: A Deep Dive
- How to Handle Smurfs in Valorant: A Guide from the Community
- ESO Werewolf Build: The Ultimate Guide
2024-09-27 11:51