In the realm of horror mascot games, the Garden of Banban series has garnered significant popularity, even amidst ongoing discussions about the quality of its numerous episodes. If, like me, you were pleasantly taken aback by its origin story, here’s a walkthrough for Garden of Banban 0 to guide you through solving all puzzles, collecting every item, and earning all achievements.
Full Walkthrough for Garten of Banban 0
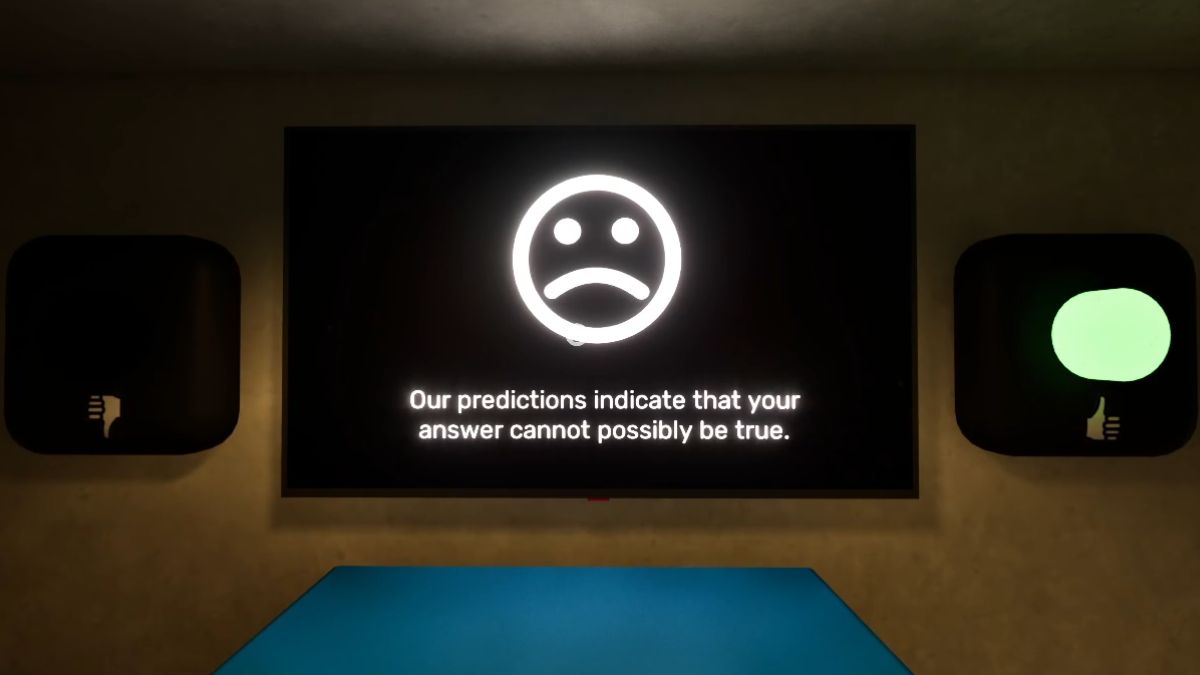
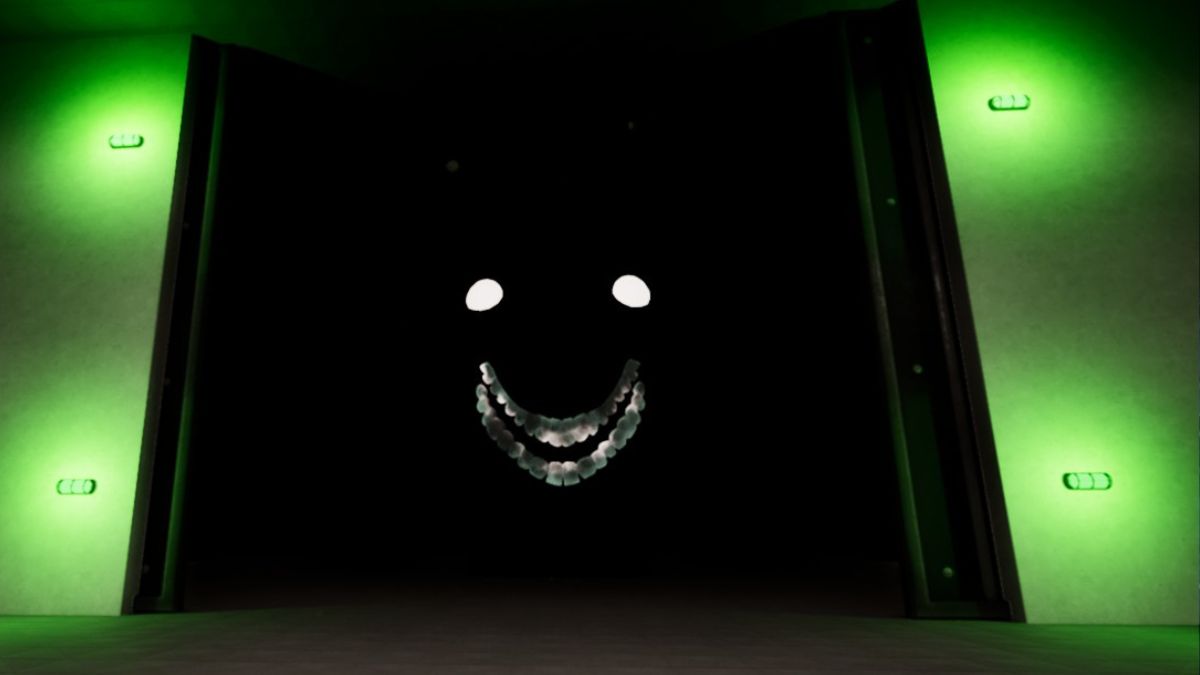
The game begins in a Kindergarten room, and you’ll find yourself answering questions displayed on a screen. Regardless of the answers you give, it’s not significant in terms of the game’s progression. However, if you wish to provoke whoever is managing the screen, feel free to select options that contradict your feelings or common sense facts like recognizing your name and knowing where you are.
Once you complete all the tasks, you’ll receive a Blue Access Card. Those who have played previous episodes of Garden of Banban might recognize these, but for newcomers to the games, these cards open doors with matching colors when they are illuminated.
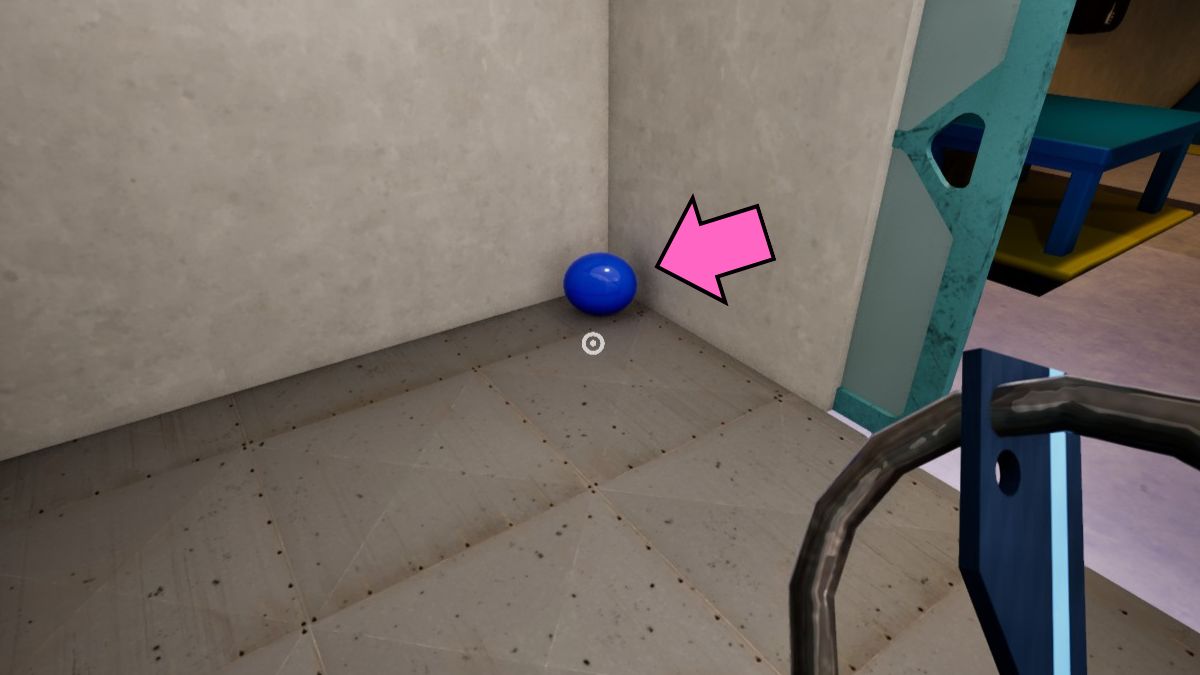
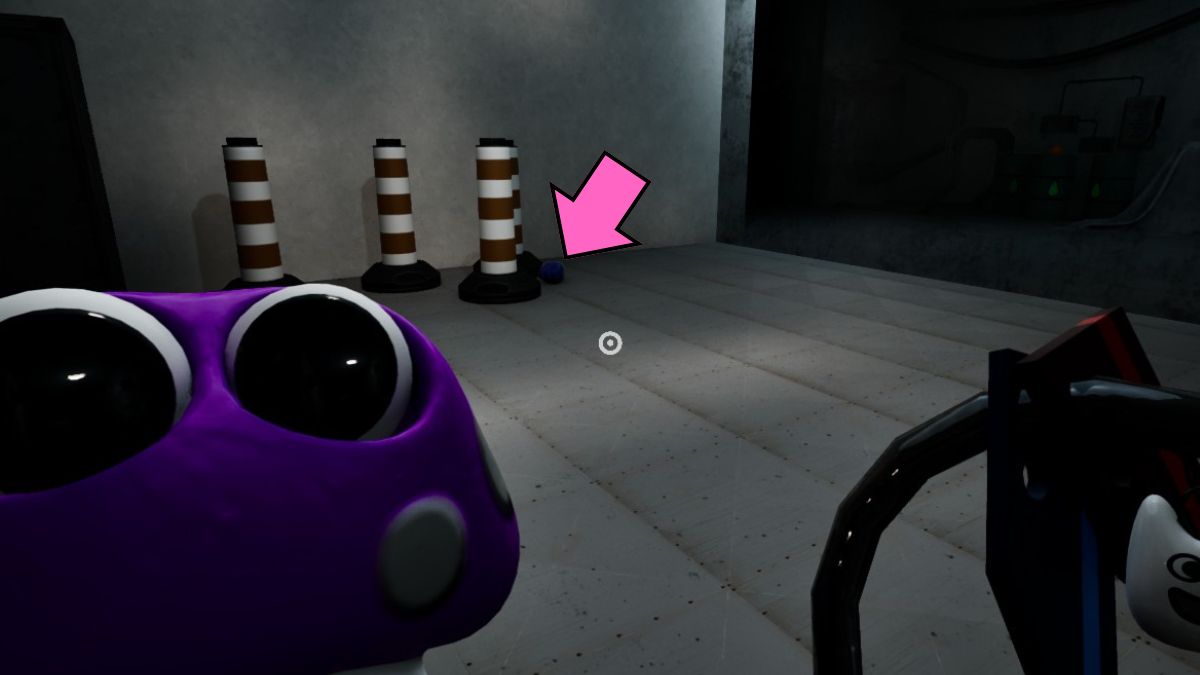
Holding your keycard, a companion known as Case 6, or more familiarly as Banban, will enter your room. He’ll pass you a keyring and encourage you to visit the common area. For now, resist the urge to follow him and instead take a right turn in the hallway. You’ll spot a round, blue trinket on the ground there. This is one of nine collectible keychains available in the game, specifically the first one. Grab it before returning back to where you were.
In the communal space, Banban encourages you to form connections with others beyond himself. Specifically, you are allowed to establish up to five friendships in this area, and here’s a guide on how to go about it effectively.
How to make friends in Garten of Banban 0
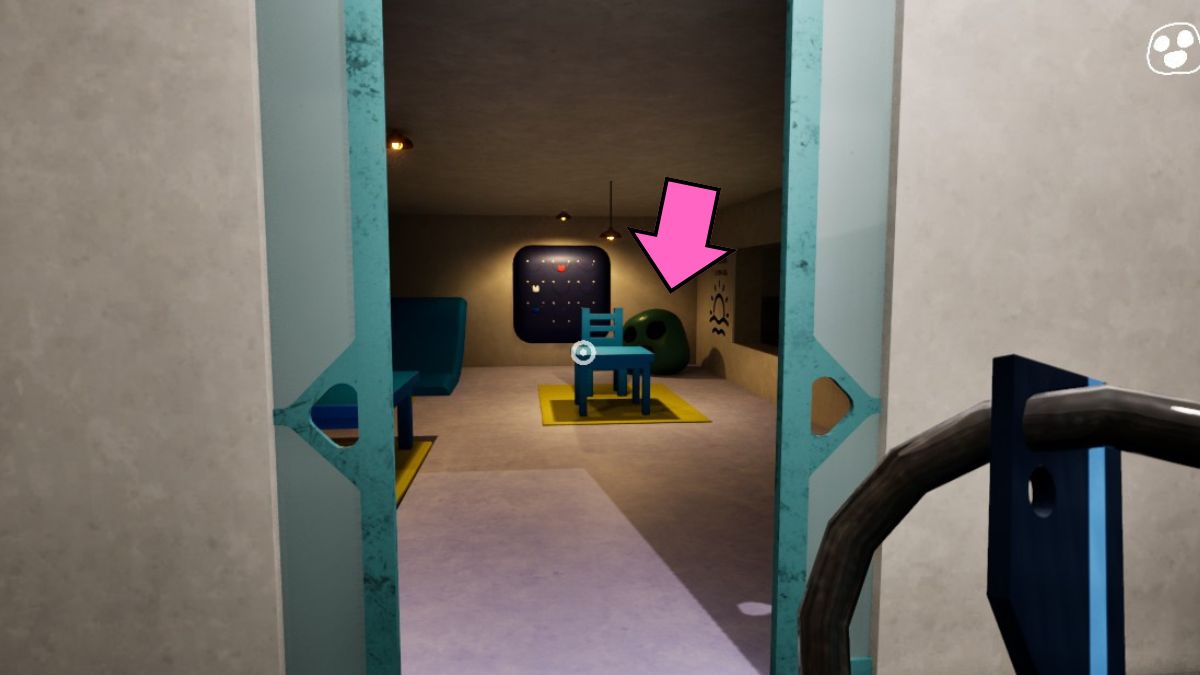
Initially, engage in conversation with Case 7, known as Banbalena, who won’t want to befriend you. Alternatively, proceed towards the Exam Pod. To establish a friendship with the Exam Pod Blob, it requires you to successfully complete a sliding puzzle.
How to solve the Slider Puzzle
The slider moves smoothly from left to right, yet the lines and circles for ball placement are spread out haphazardly. To traverse the balls successfully, it’s essential that the slider does so in order of smallest to largest. The answers to all four tests can be found in the images provided below.
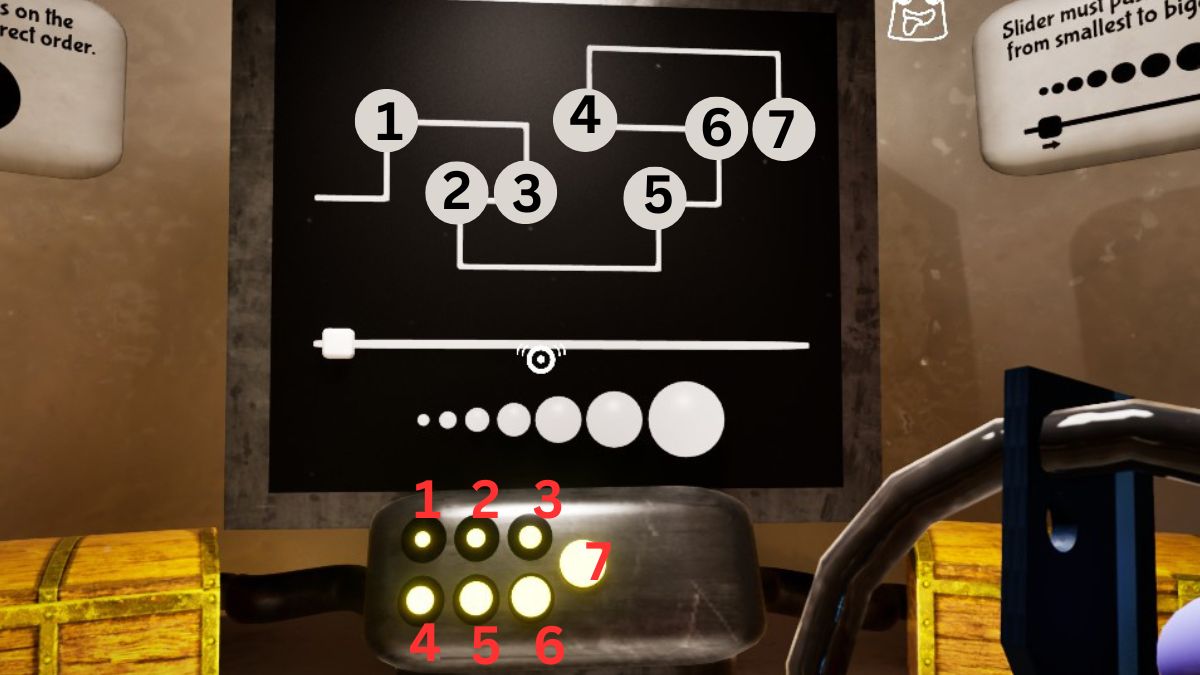

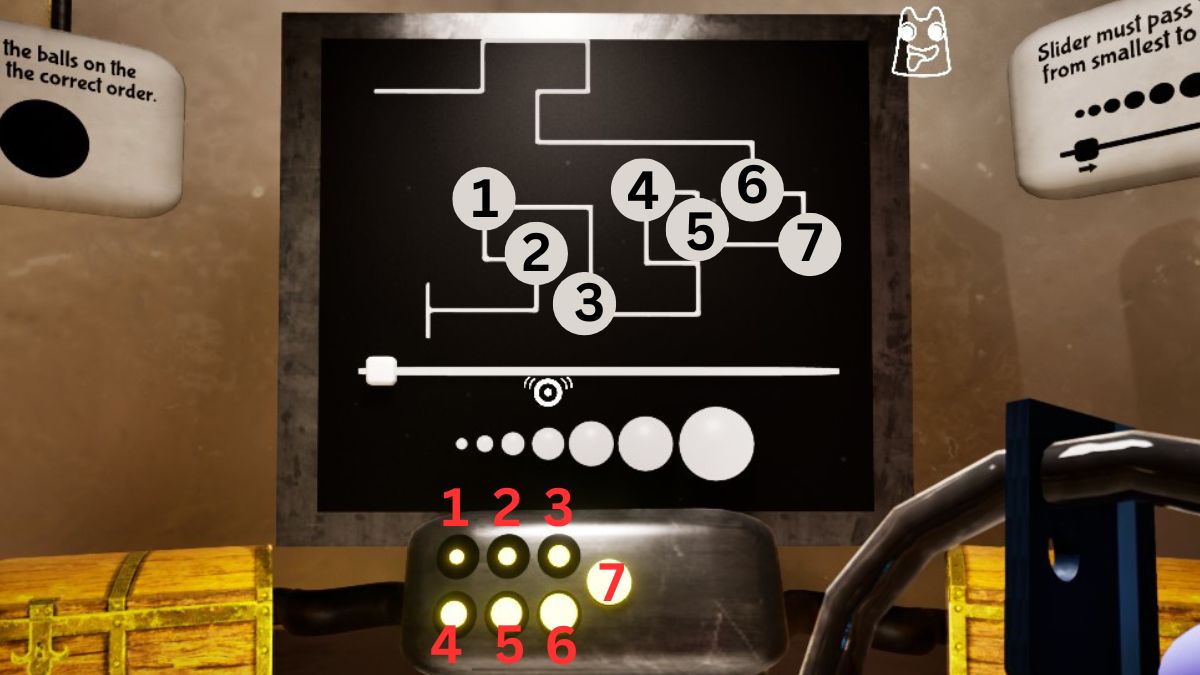

Finishing the initial three tests grants access to a left-side chest containing an A+ graded document, whereas the hidden test opens a chest on the right yielding a purple keycard and a keychain number two.
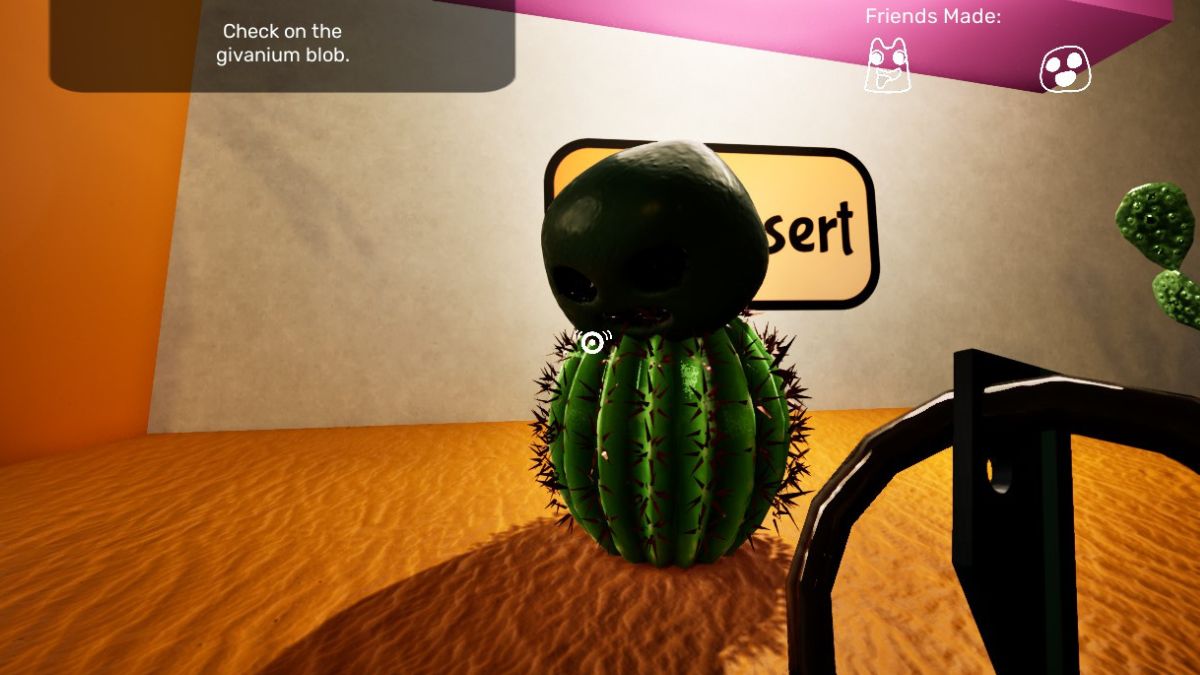
As you proceed beyond the Exam Pod to your right, you’ll encounter a peculiar sight – a Cactus Blob. I affectionately named it because when it falls, Banban allows it to impale itself on a cactus. For now, take a look at it, but don’t intervene just yet; continue moving forward instead.
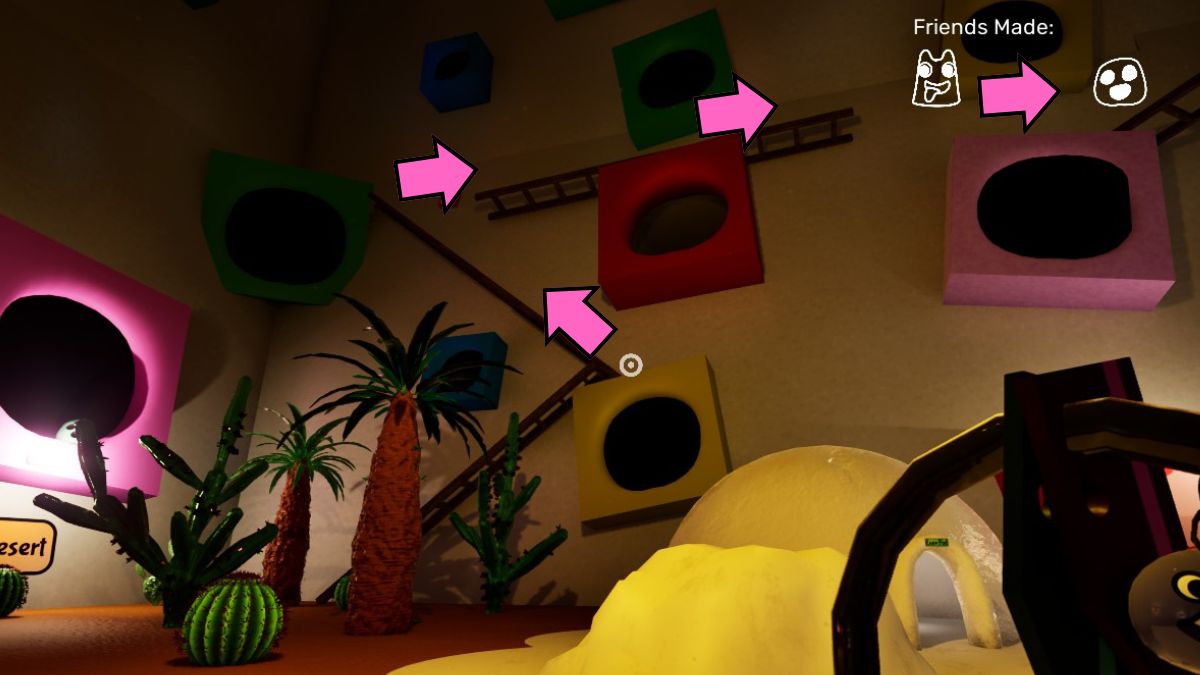
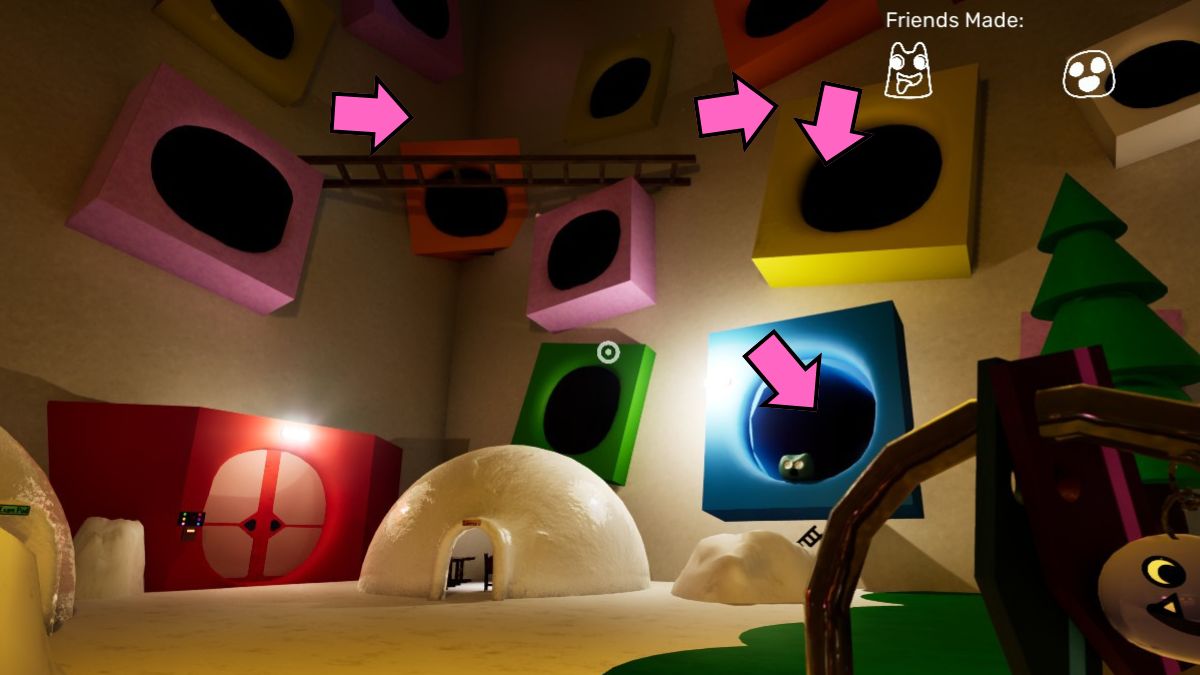
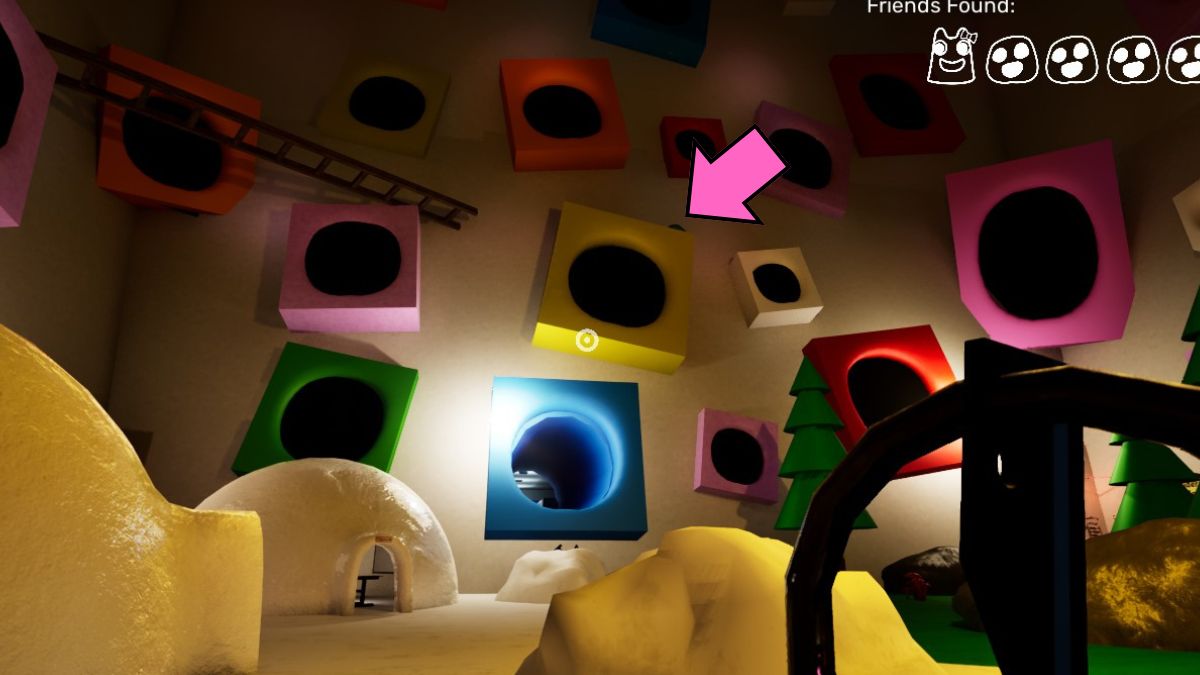
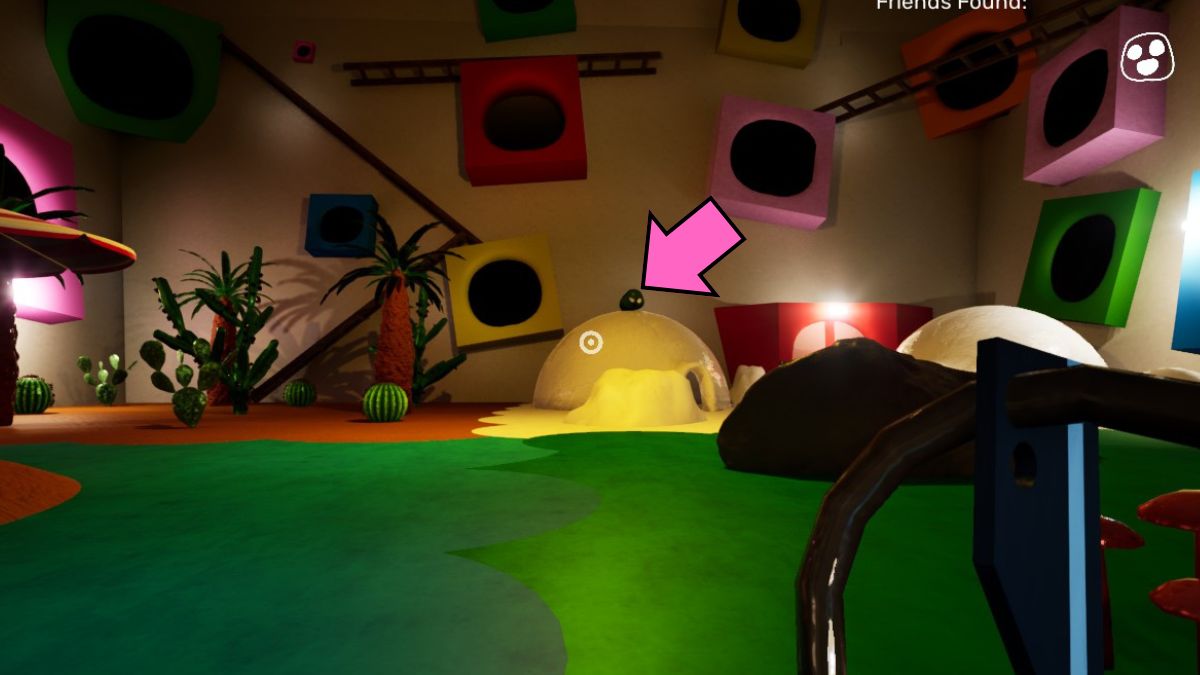
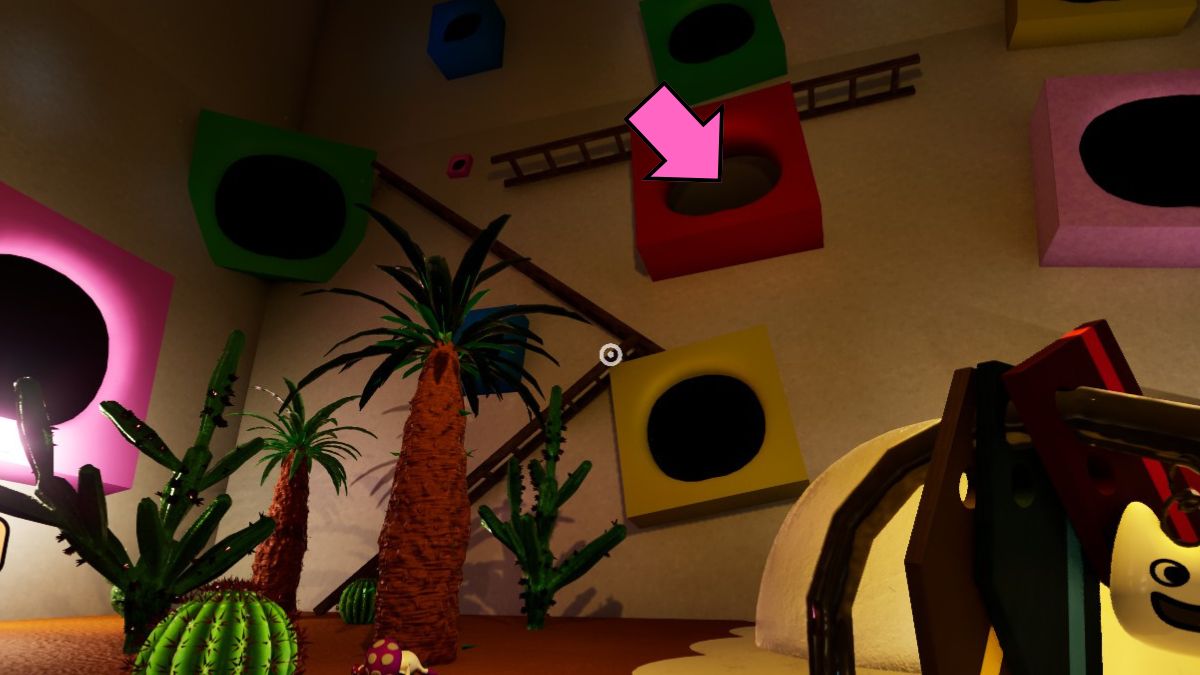
Moving to your left past the Exam Pod, you’ll spot the “Ladder Blob”. The name gives a clue that you’ll need to utilize the ladders to reach it, which can be somewhat challenging. Your objective is to leap onto the yellow section above the blue area, then purposefully fall down. While falling, aim for the blue tunnel where the blob previously was.
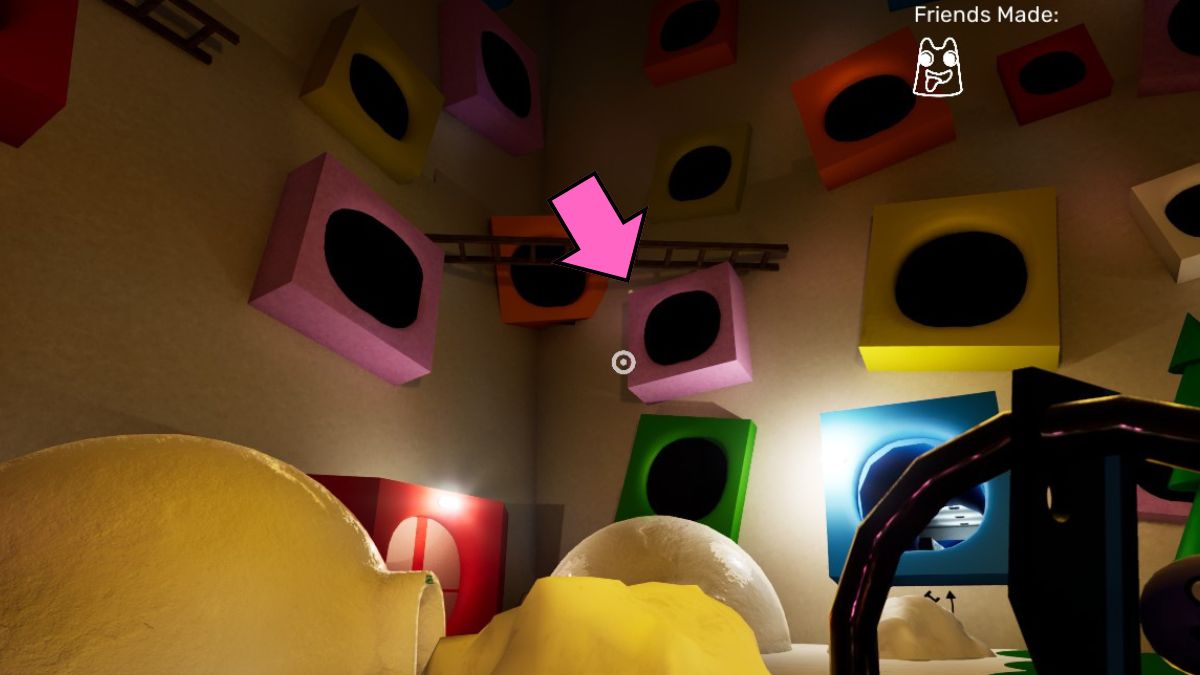
1. Before entering the tunnel, remember to grab Keychain 3 from the pink square first.
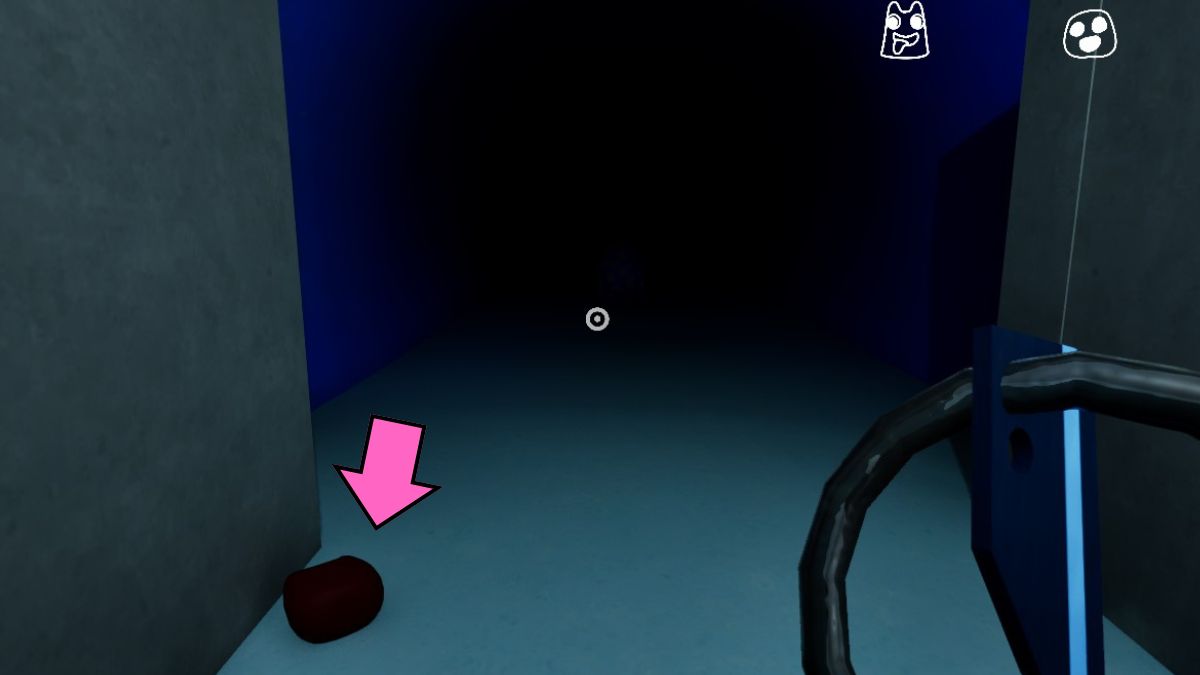
2. Once inside the blue tunnel, notice a small creature darting back into the shadows, but don’t try to chase it. Instead, continue your journey as far as possible.
3. Your goal is to reach a point where you can pick up Keychain 4.
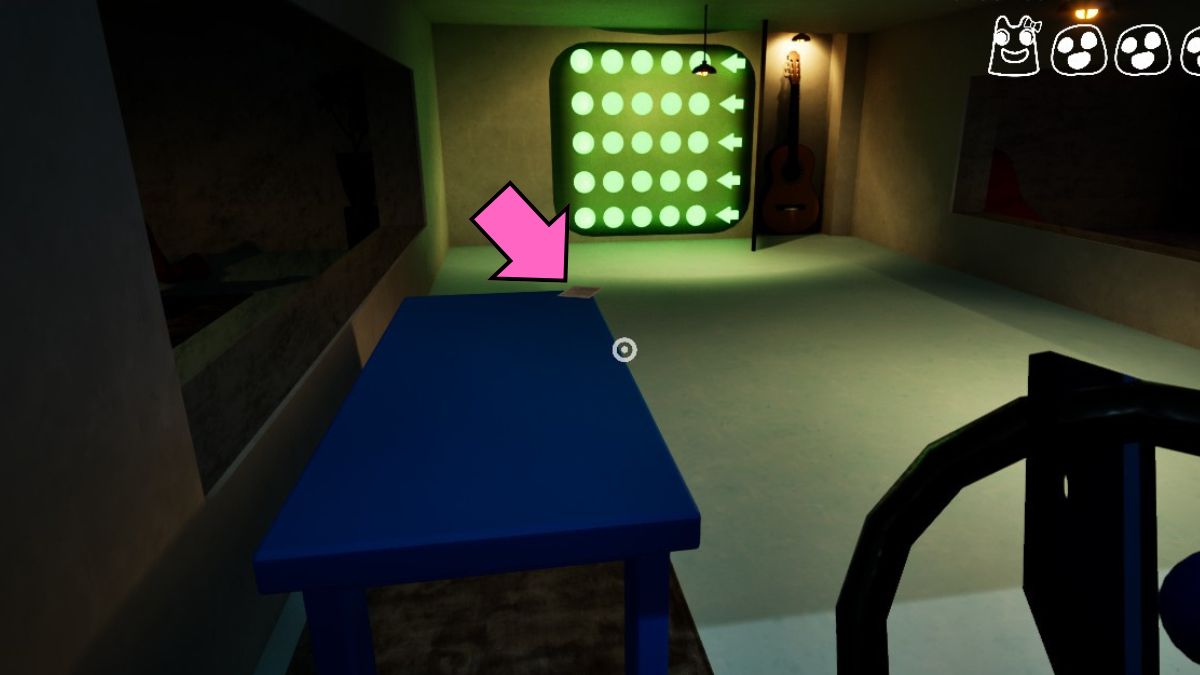
Head into the room where the Ladder Blob resides and let’s take on that Speed Challenge! You’ll need to strike the right moment by pressing the arrow key when the light is about to bump the bulb in hand. As it gets faster, it becomes trickier, but don’t worry, if you mess up, it doesn’t reset, giving you multiple attempts to succeed!
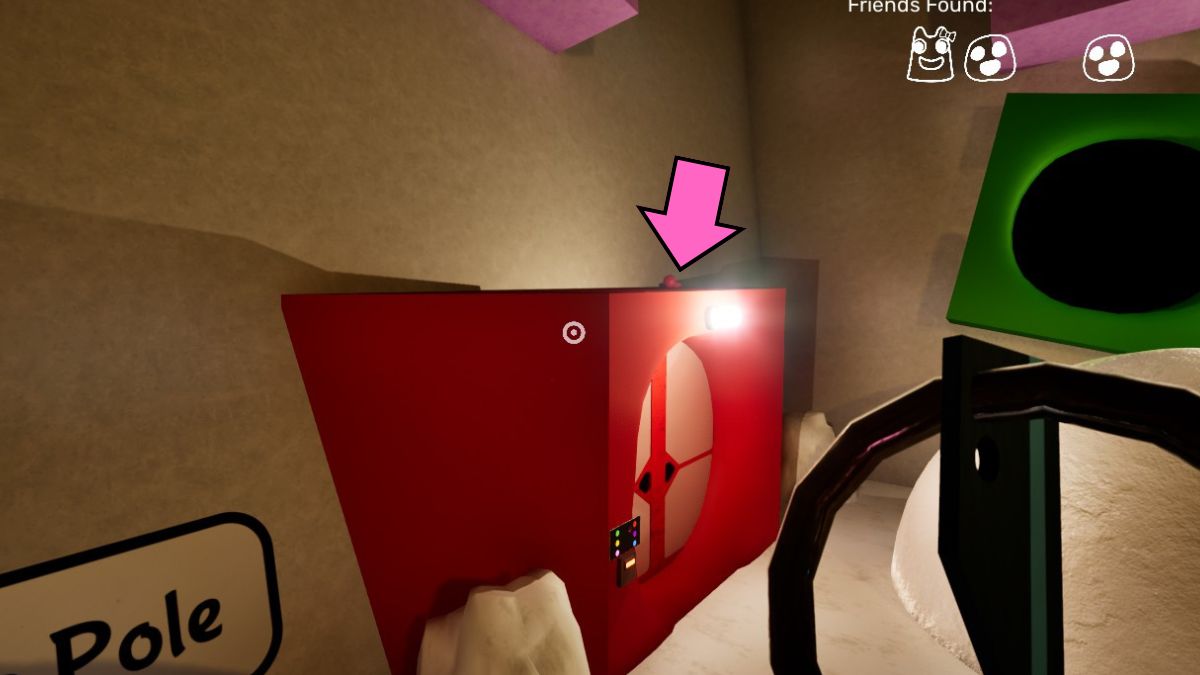
First, open the guitar, and the Ladder Blob will allow you to grab its tires. Then, move towards the left corner where two blobs are squabbling over a prize. Before proceeding any further, retrace your steps up the ladder and navigate to the top of the red entrance, where you’ll discover Keychain 5.
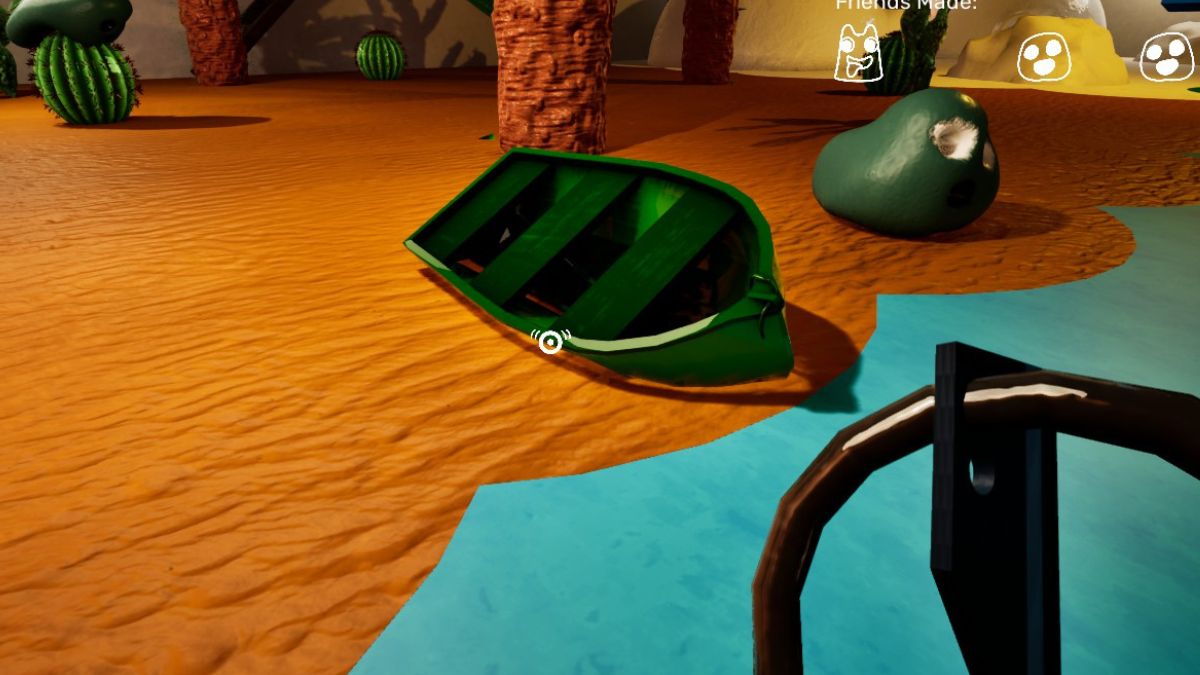
Head over to the “Boat Blob,” place some tires onto its watercraft, and then observe as it sets off to defeat the other vessel. Upon recognizing its actions, the Boat Blob will reward you with a valuable artifact – a “Bow.
First, pay a visit to Cactus Blob and assist it in coming down from the cactus. Afterward, proceed to Banbalena and deliver her the Bow and A+ graded paper. By doing so, you will finish the ‘Making Friends Challenge’. Now let’s move on to playing!
How to Play Hide and Seek in Garten of Banban 0
Please proceed to the shared area and turn on the “Counting Nook.” After that, make your way back to where the conversations among the characters are taking place. Once they’ve concluded their discussion, return to the Counting Nook and locate where your newly found companions have hidden themselves.

- Banban – in a room in the blue tunnel.
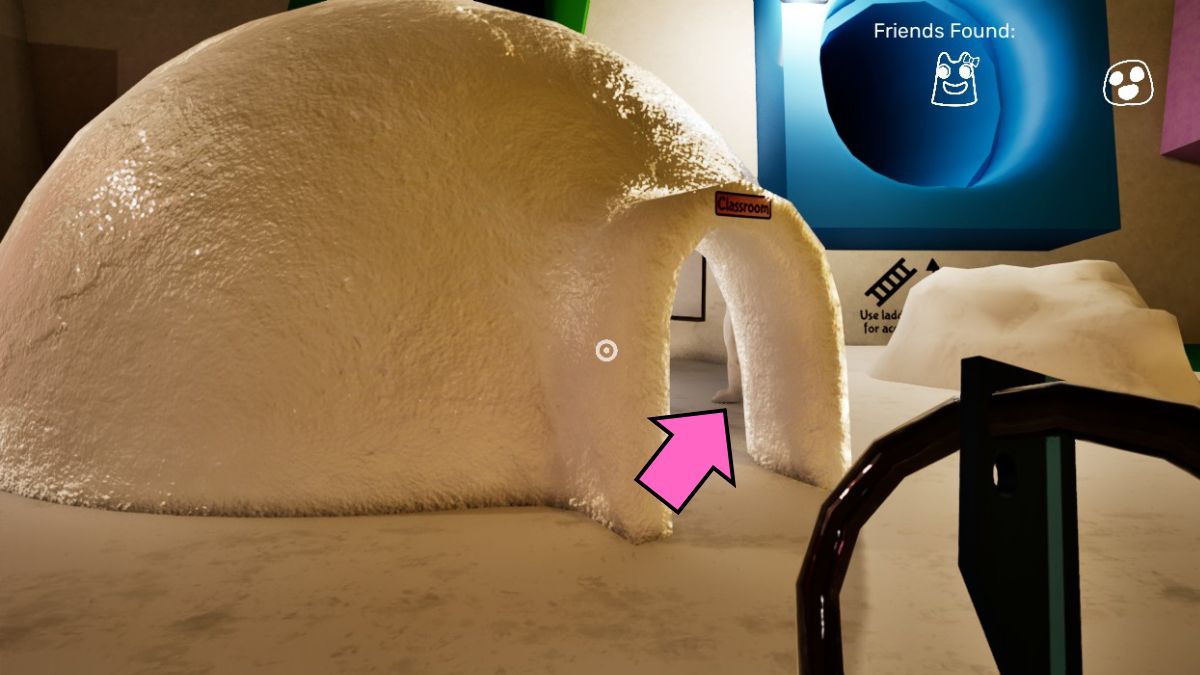
- Banbalena – Classroom (unsurprisingly).
- Ladder Blob – behind the treasure in the common room.
- Exam Pod Blob – on top of the yellow square above the blue tunnel.
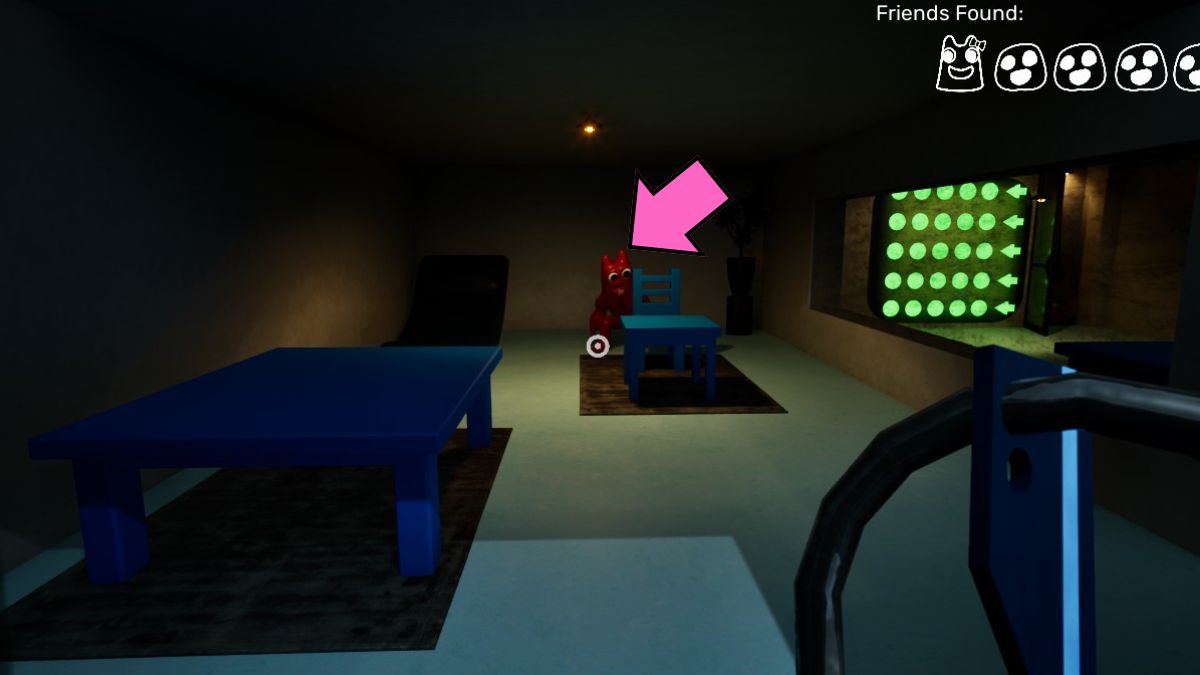
- Cactus Blob – in your room.
- Boat Blob – on top of the Exam Pod, can be reached by climbing the ladders and jumping across.
If all are gathered, Banban might propose another round of hide-and-seek (pointing out what he believes to be the least stealthy spots), but the game is interrupted when Syringeon enters and snatches one of the Blobs. Rather than resuming the game, you decide to go back to sleep.
How to Open the Door in Garten of Banban 0
At midnight, Banban is going to fetch you and lead the way to the communal area. Unfortunately, he has misplaced the Red Keycard. You’ll be assisting him in searching for it along with Truffletoot, a glowing mushroom creature that emits light and seems to have an eerie ability to peer into your innermost thoughts, guiding your path as you search.
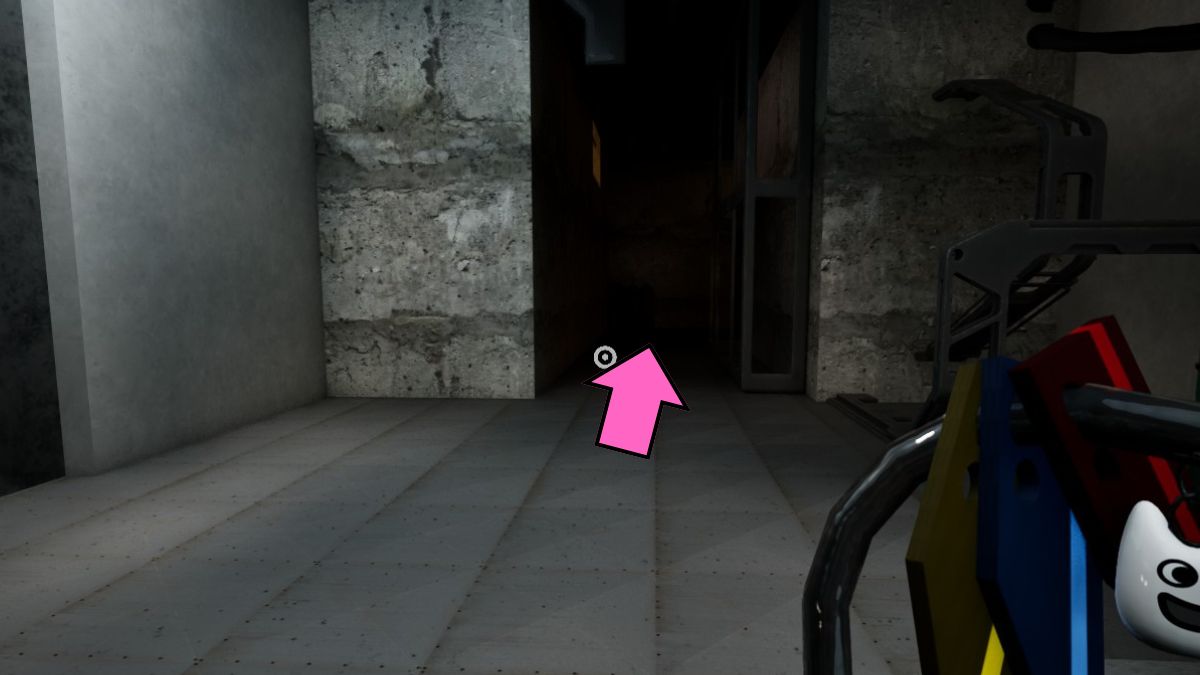
The Red Keycard is positioned near some ladders that are resting on the floor. Retrieve it, then return to Banban. Unfortunately, this keycard won’t unlock anything yet, but once Case 8, Nabnab, arrives, they can open the door for you.
- Follow the two and once you see a bunch of cones in the hallway, go over there to get another Keychain 6.
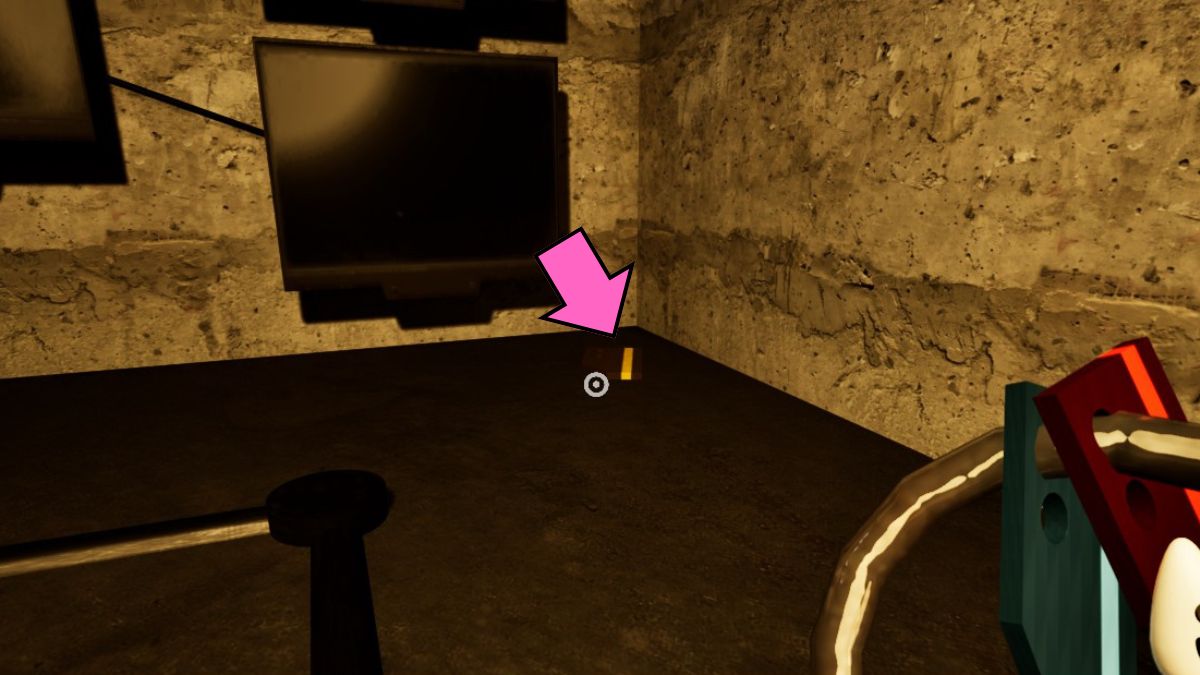
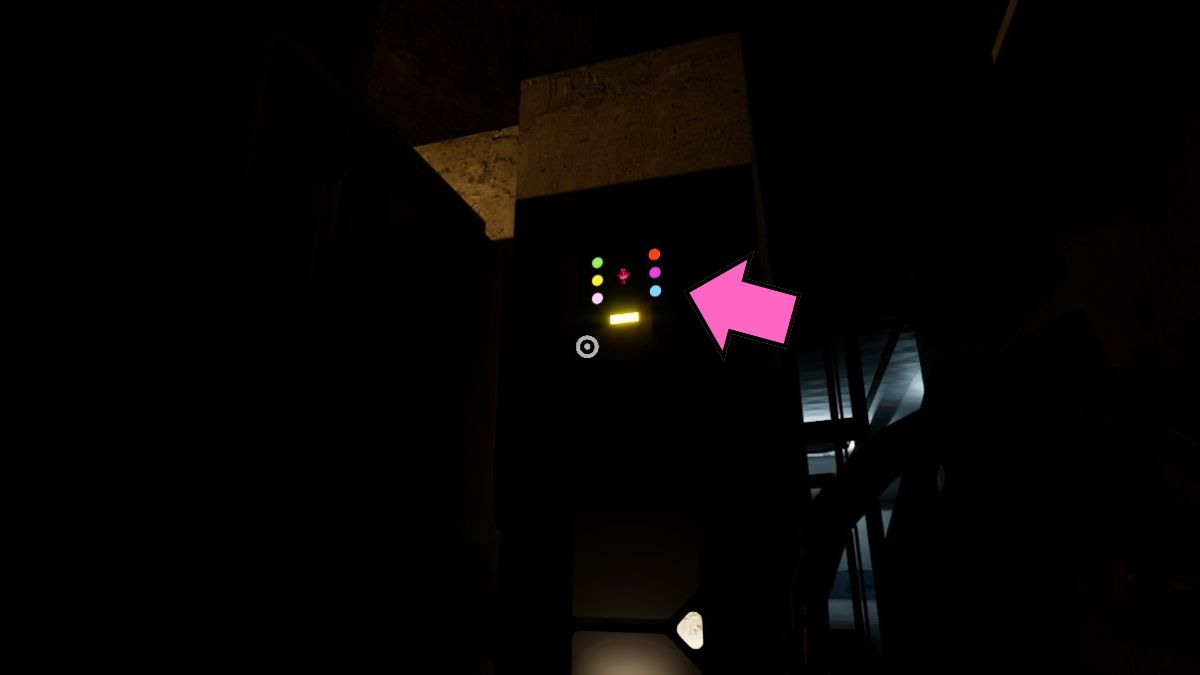
- Keep going until you reach a room with a large door. You need to activate the lights with a keycard on the two card readers to the left and right of the room you enter.
- You’ll also see a Keychain 7 on the floor next to the walls.
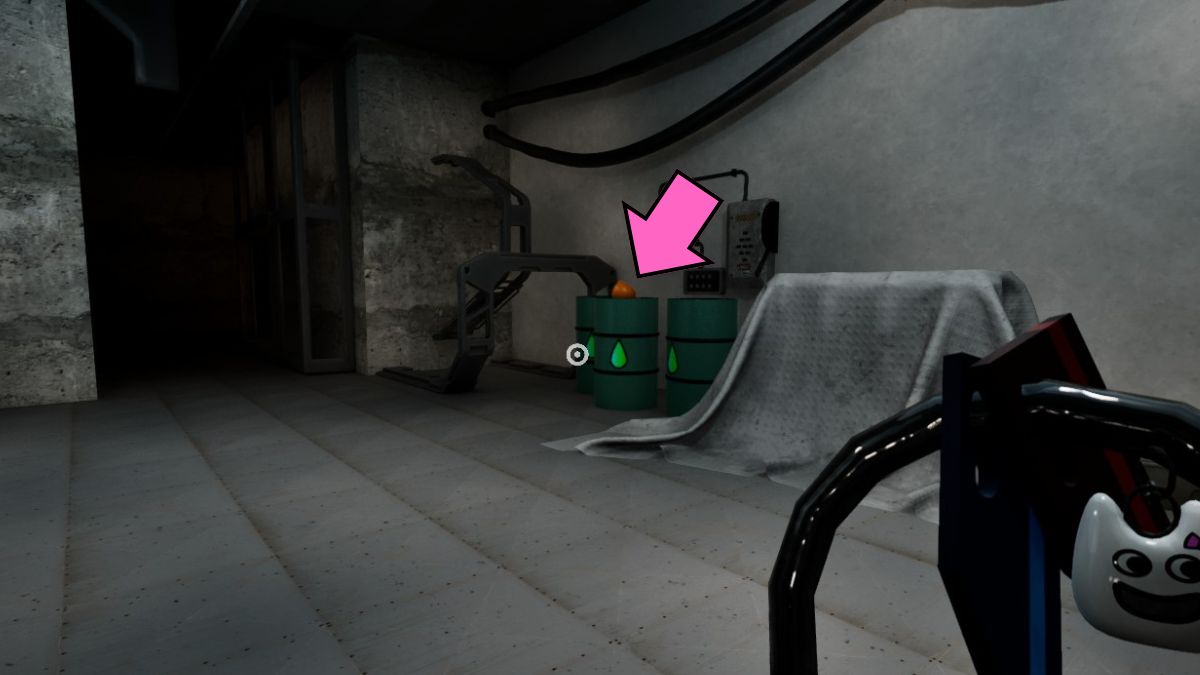
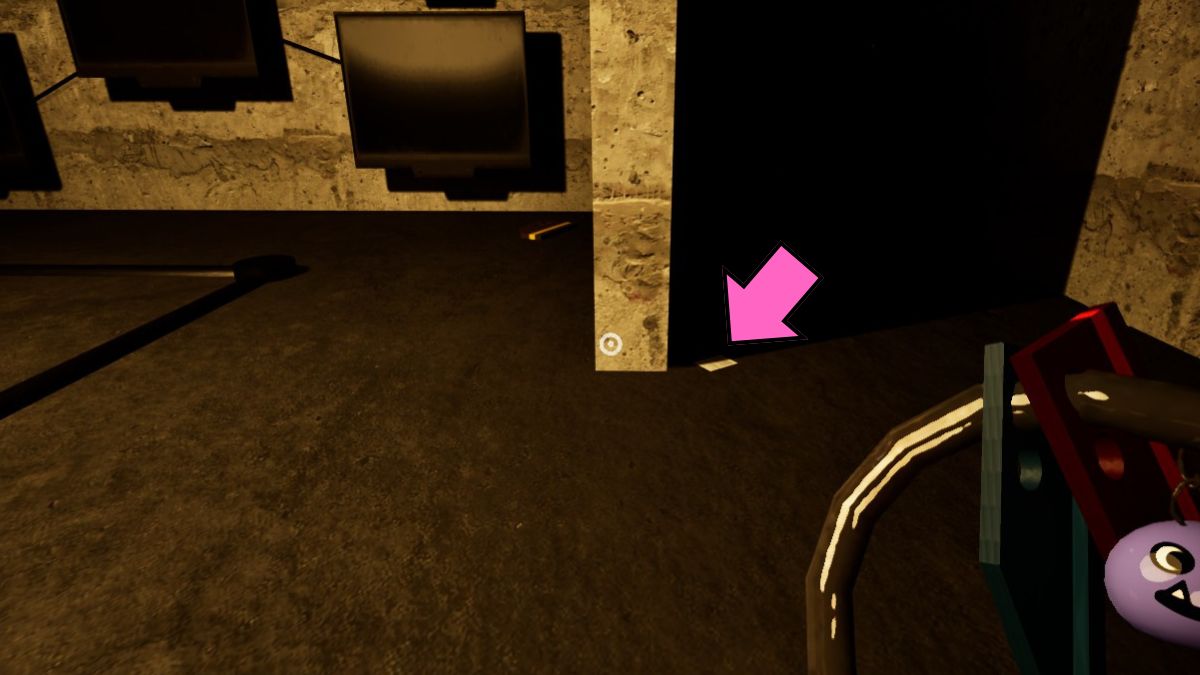
To increase the number of people on the pressure plate, you should retrace your steps and locate the red door. After passing by, veer to the right and retrieve a Keychain 8 from some barrels you’ll encounter along the way. Eventually, you’ll stumble upon a room where Bittergiggle is confined.
How to Escape the Gas Room in Garten of Banban 0
As a gamer, I find myself in a pickle in the enchanting world of Garten of Banban 0. I’m lying down, seemingly strapped to a bed, and an unsettling flow of gas fills the room. A glowing Yellow Keycard is casually discarded on the floor, but before I can grab it, I need to figure out how to halt this gas and save my buddy Bittergiggle first. Quite the conundrum!
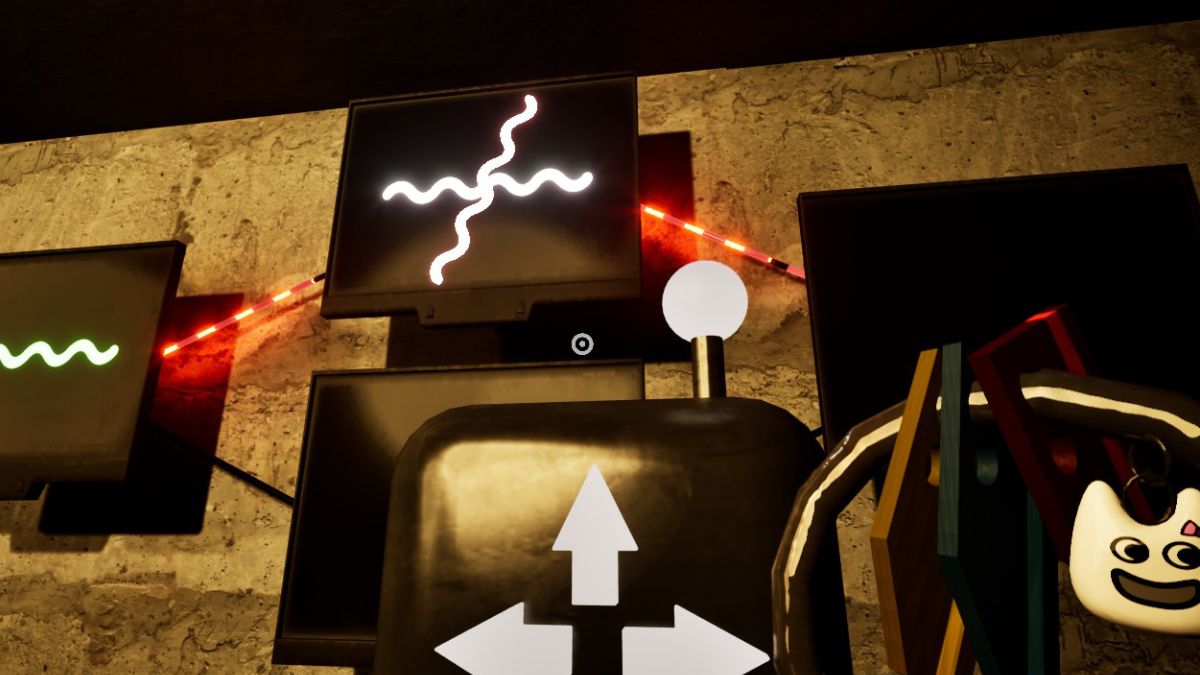
The steps seemed a tad perplexing for me. Feel free to relocate the panel as you wish, its position won’t influence your tasks, so place it in a spot that offers the best view of the screen you are handling. The screens are interconnected via wires, but some of them have malfunctions. Make sure to steer clear of the faulty screens while synchronizing the frequencies on the functioning ones.
The fluctuating rhythm is quite simple to synchronize; simply press the ‘up arrow’ on your control panel whenever the connections are made. But, it takes some timing for the rotating frequency. Press it when there’s a brief gap just before the two lines meet or overlap. Keep repeating this action until you reach the end.
- Go around the wall and activate one keycard reader, then the other.
- Go outside where you’ll meet up with the rest of the crew.
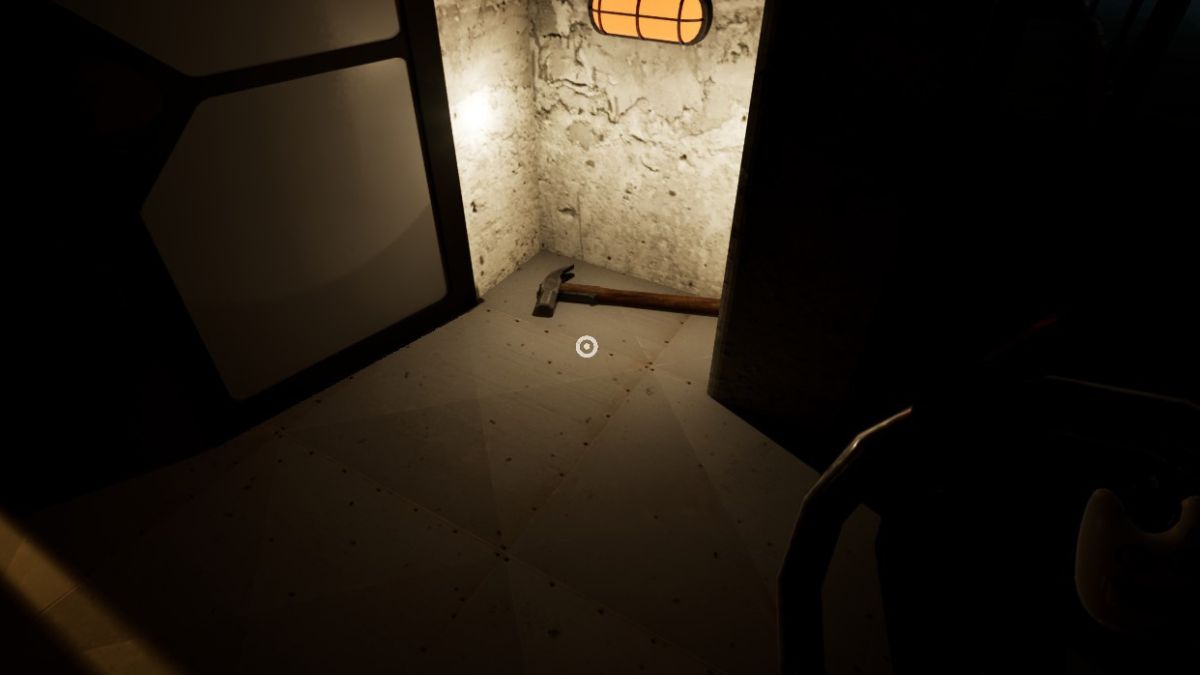
- Before you leave through the red door, head down the right path and you’ll see a little sliver of light coming through. On the wall next to it pretty high above is another reader which opens a secret door and gives you a Hammer. This will be useful along with that secret Purple Keycard.
With the arrival of Kittysaurus from their hiding spots, there are now enough individuals to unlock the door. You find yourself positioned smack in the middle, thanks to Banban’s arrangement, ready to be devoured by Ramamba. Fortunately, Nabnab intervenes and rescues you. Join Bittergiggle on his quest to locate Kittysaurus and witness the encounter. Return to Banban and Truffletoot, but take a tumble into a cave instead.
In a different direction, Banban will tread alone, whereas you and Truffletoot will take another path. As you advance, keep leaping and hurdling over the bumpy terrain. The objective is to continue moving forward until you encounter a stone barrier. However, beware as Ramamba attempts an attack; fortunately, Banban (in his 6b Hellish form) intervenes and engages in a rather dramatic battle with Ramamba.
How to Meet Slow Seline in Garten of Banban 0
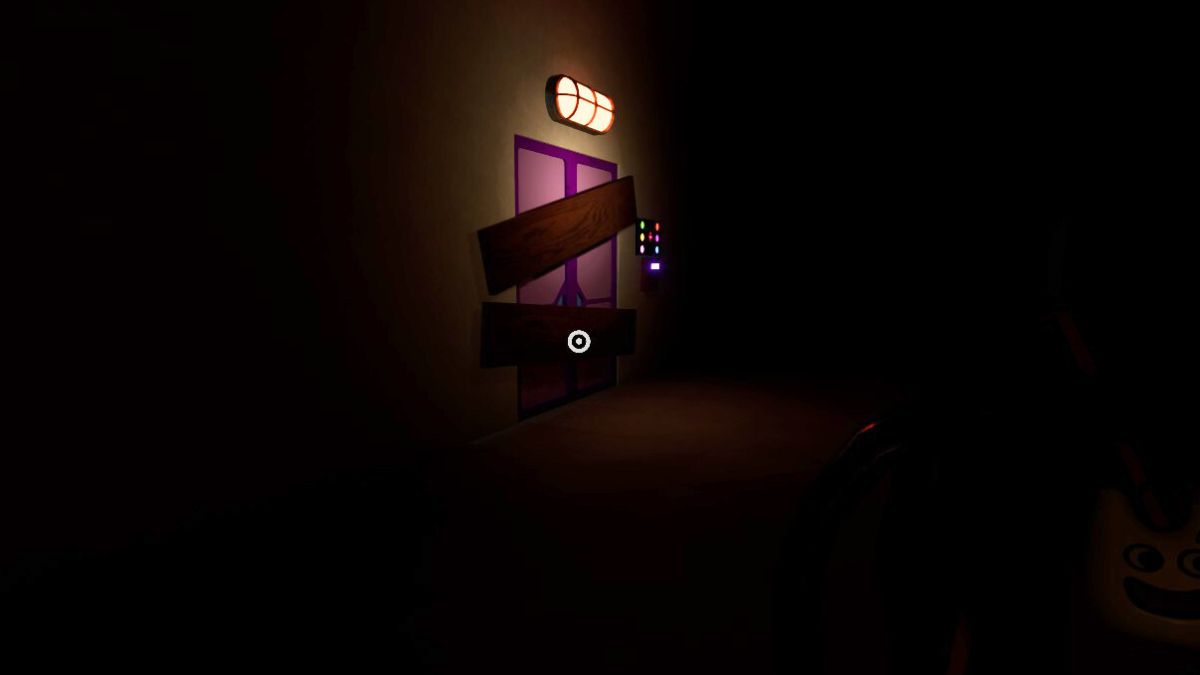
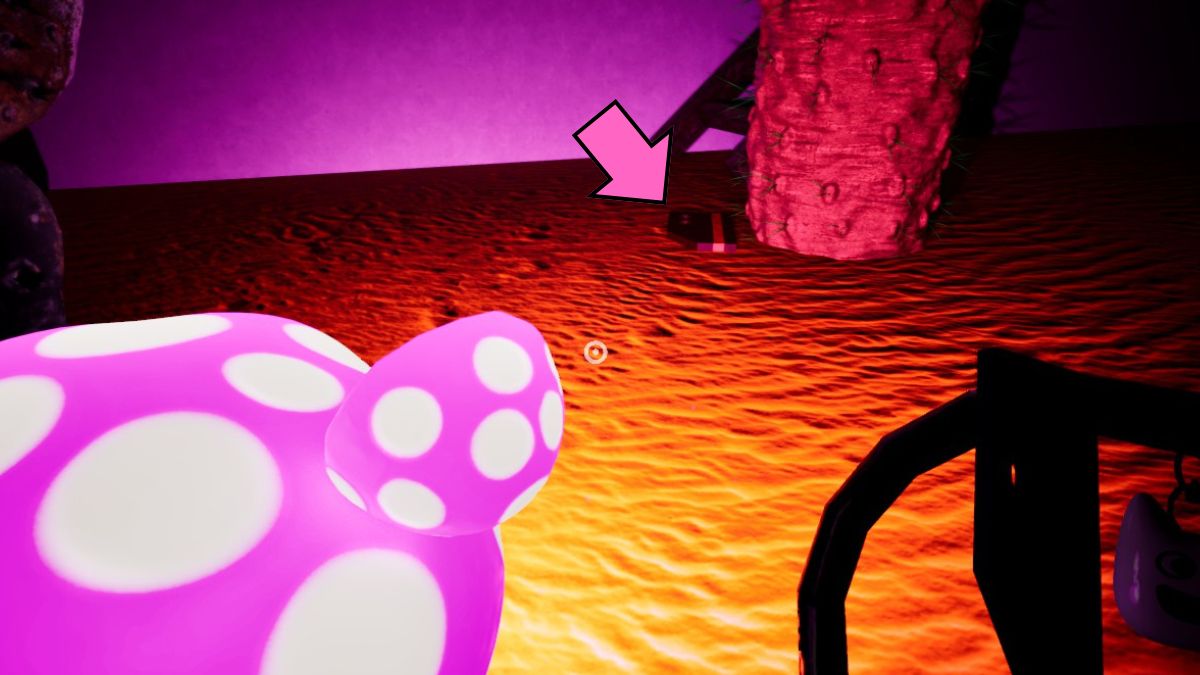
Instead, head back up the ladders once more, this time your destination is the red tunnel below. At the end of it, you’ll discover a barricaded entrance with a keycard scanner. Utilize the Hammer to clear away the barriers and then employ the Purple Keycard to open the door. Inside, you’ll encounter Slow Seline in the Garden of Banban 0.
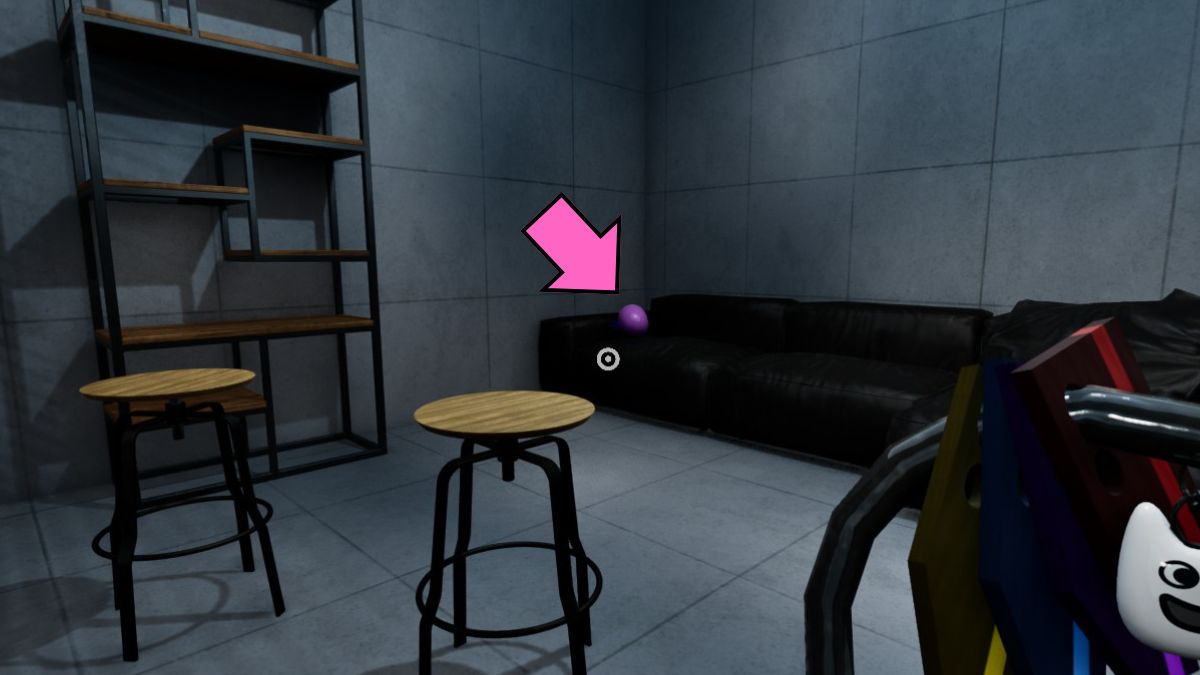
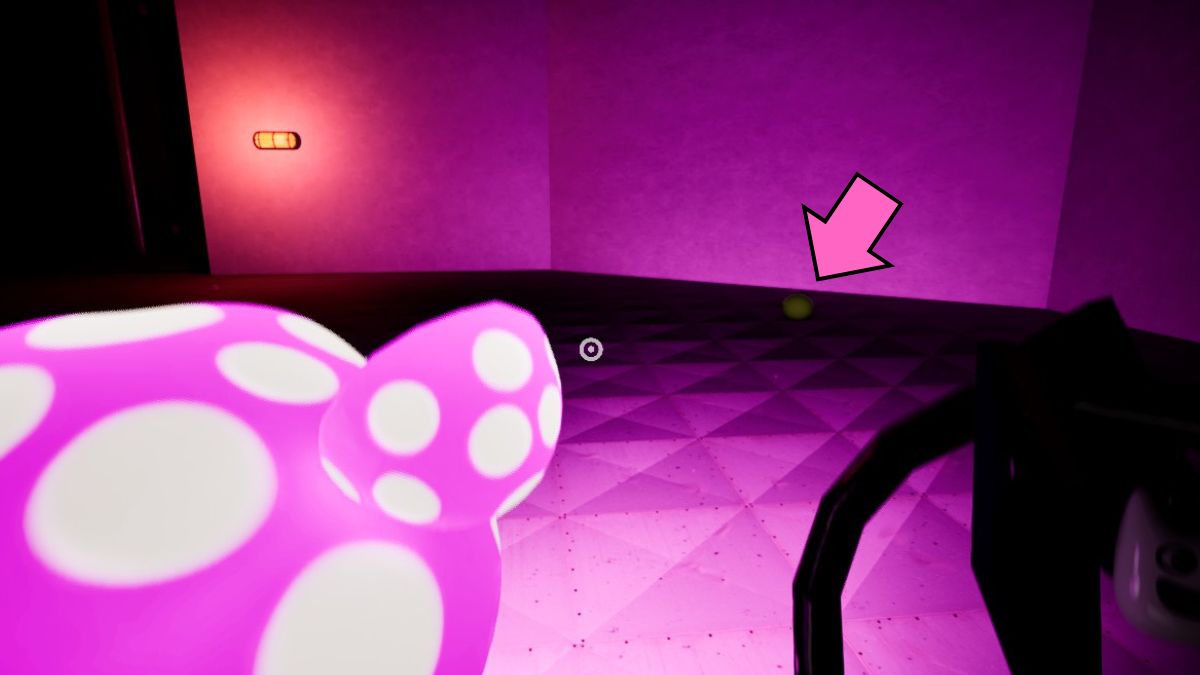
Once you’ve reached Banban and he’s ready to play hide and seek again, lead you to a closet for hiding. Don’t forget to grab the Keychain 9 on the couch to your left before you enter, so you can finish your collection. Now, head into the closet where Flumbo will remain there for quite some time.
All Collectibles in Garten of Banban 0
In the Garten of Banban 0, there are two categories of items you might come across – keychains and journals. To help you unlock all the achievements, here’s a guide on their locations:
(Or)
When exploring Garten of Banban 0, keep an eye out for two types of collectibles – keychains and journals. Here’s how to find them all so that you can achieve everything:
All Keychain Locations
| Keychain | Location |
|---|---|
| Keychain 1 | In the hallway to the right outside your room. |
| Keychain 2 | In the right chest after you complete the secret fourth test. |
| Keychain 3 | On the pink square underneath the ladder. |
| Keychain 4 | In the blue tunnel on the ground |
| Keychain 5 | On top of the red entrance. |
| Keychain 6 | Next to the cones in the hallway during the night. |
| Keychain 7 | On the floor in the room with the large door. |
| Keychain 8 | On the barrels in the room with the red door. |
| Keychain 9 | On the couch in the room with the closet. |
All Journal Locations


| Journal | Location |
|---|---|
| Journal 1 | In the Classroom Pod. |
| Journal 2 | In the Ladder Blob room. |
| Journal 3 | On the floor in the big room. |
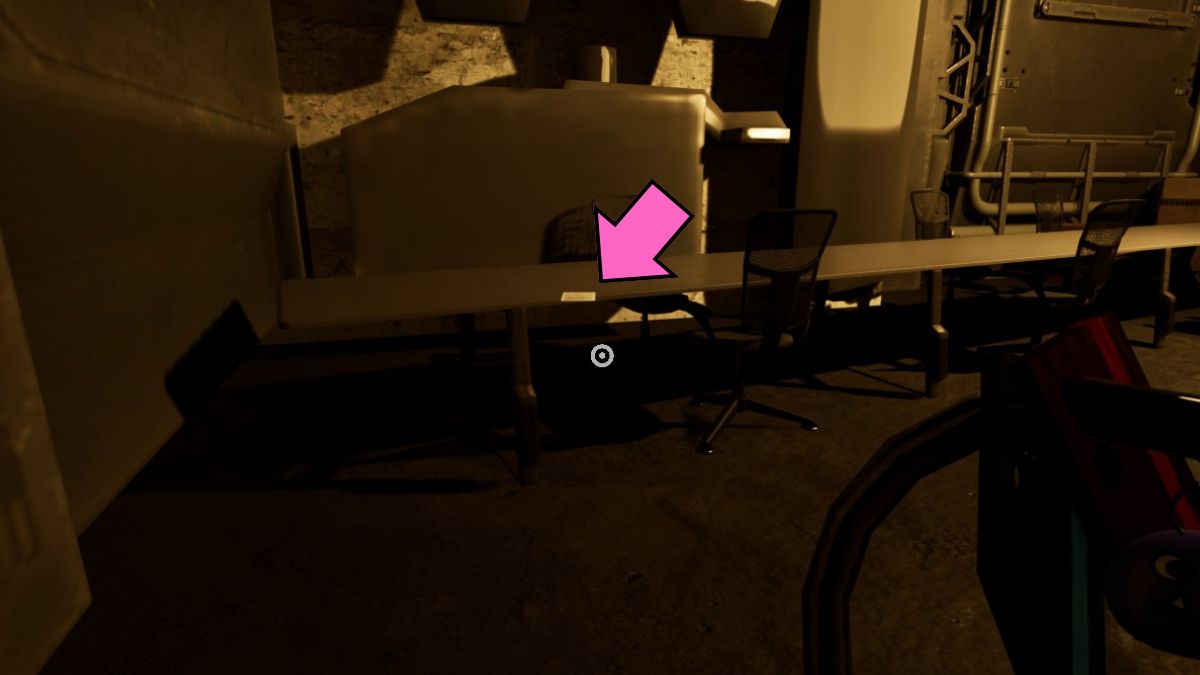
| Journal 4 | On the table in the red room. |
| Journal 5 | On the ground in the gas room. |
| Journal 6 | On the table in the Slow Selene secret room. |
Read More
- Who Is Harley Wallace? The Heartbreaking Truth Behind Bring Her Back’s Dedication
- 50 Ankle Break & Score Sound ID Codes for Basketball Zero
- 50 Goal Sound ID Codes for Blue Lock Rivals
- Here’s Why Your Nintendo Switch 2 Display Looks So Blurry
- 100 Most-Watched TV Series of 2024-25 Across Streaming, Broadcast and Cable: ‘Squid Game’ Leads This Season’s Rankers
- Elden Ring Nightreign Enhanced Boss Arrives in Surprise Update
- How to play Delta Force Black Hawk Down campaign solo. Single player Explained
- Jeremy Allen White Could Break 6-Year Oscars Streak With Bruce Springsteen Role
- MrBeast removes controversial AI thumbnail tool after wave of backlash
- Mirren Star Legends Tier List [Global Release] (May 2025)
2025-02-25 14:52