As a seasoned adventurer with years of exploring the unknown under my belt, I can confidently say that these dungeon coins are quite the hidden gems. Each one holds its own unique charm and adds a sense of accomplishment to my journey.
As an avid fan of the Dungeons of Hinterberg, I’m excited to share that in each of its 26 dungeons, there’s a secret stash holding a special commemorative coin. To help you add these treasures to your collection, I’ll guide you through locating the coins for every single Dungeons of Hinterberg dungeon. Let’s embark on this exciting journey together!
Where to find every Commemorative Coin in Dungeons of Hinterberg
In this list, each dungeon is arranged based on its region and level of challenge, with two exceptions: The Beginner’s Dungeon and The Toxic Archipelago Dungeon, which have distinct locations apart from the rest.
Beginner’s Dungeon
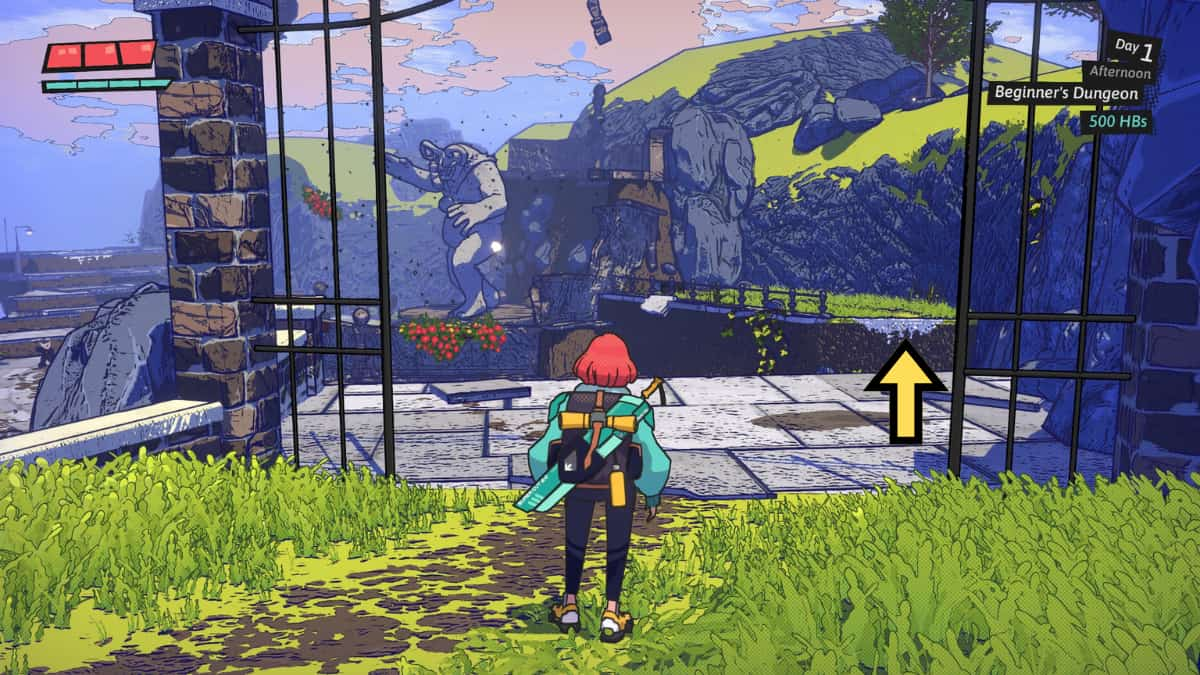
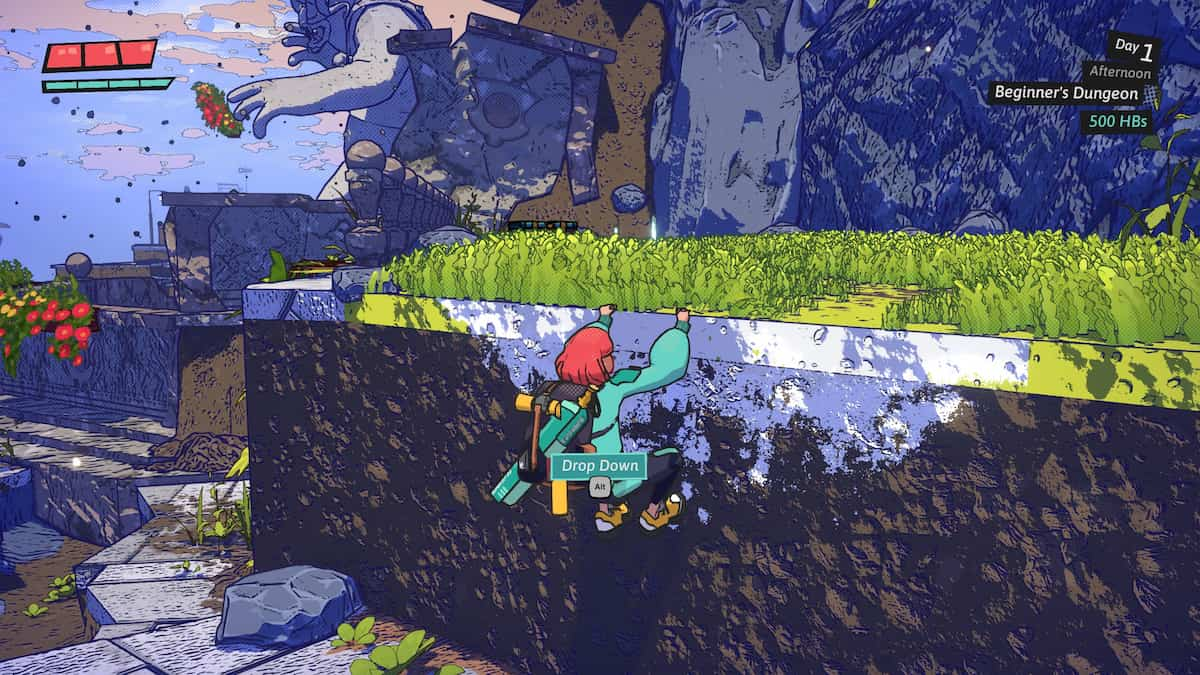
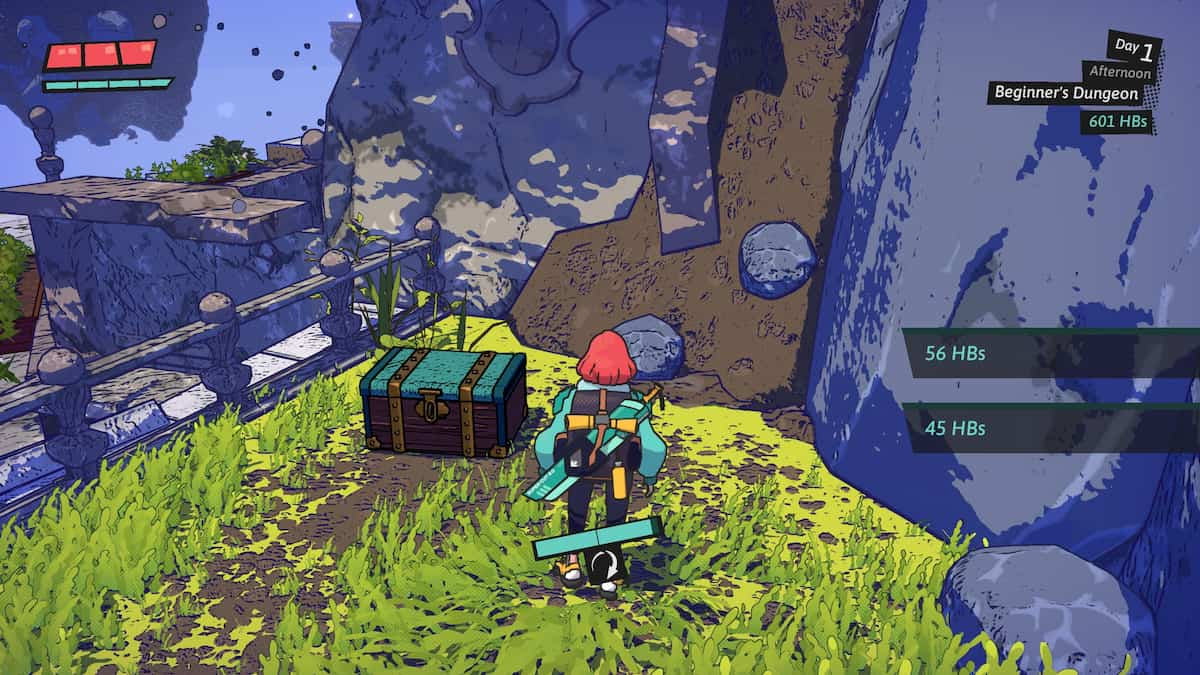
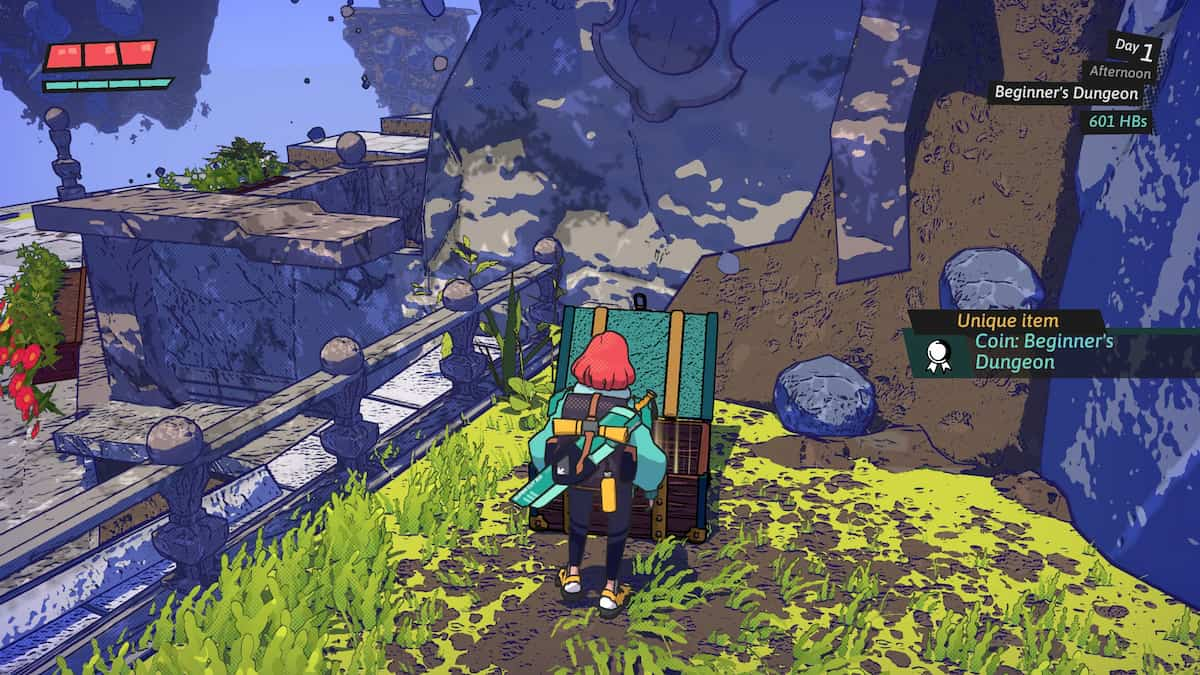
Following your conversation with Klaus for the first time, you’ll encounter an expansive statuary area. Make your way to the ledge situated on the right-hand side. Ascend this ledge to discover and unlock a blue chest. Inside, you’ll find the commemorative coin that marks your completion of the Beginner’s Dungeon.
Doberkogel Dungeon Coins
Doberkogel is a picturesque mountain containing seven dungeons.
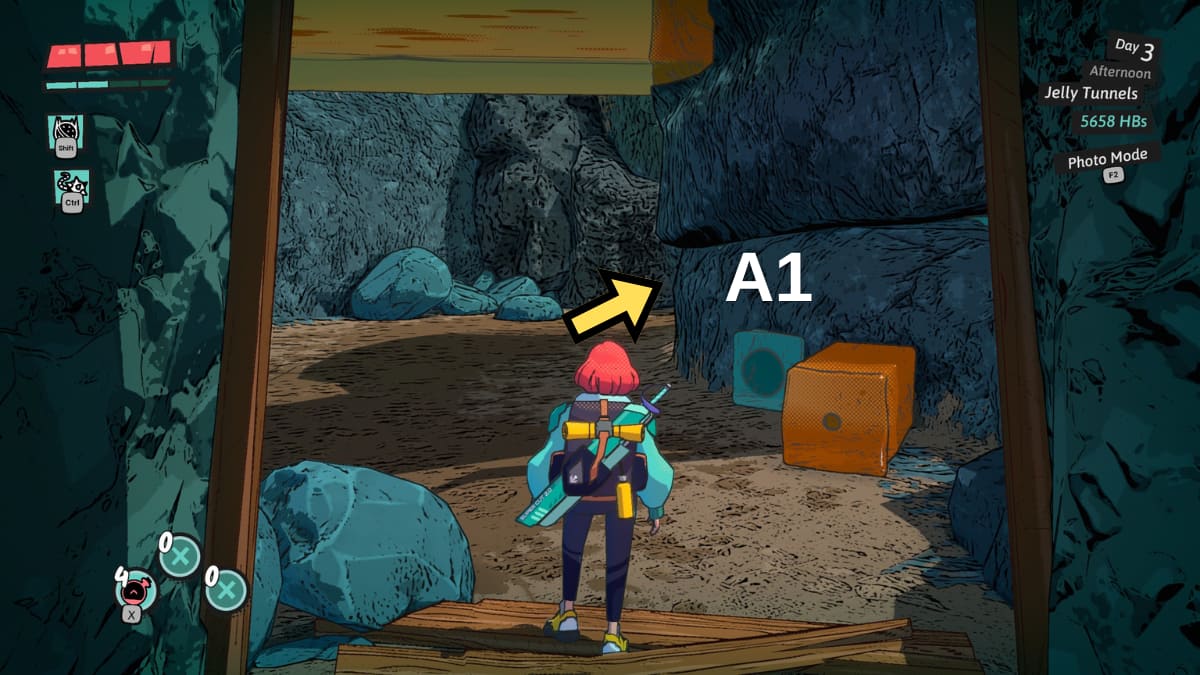
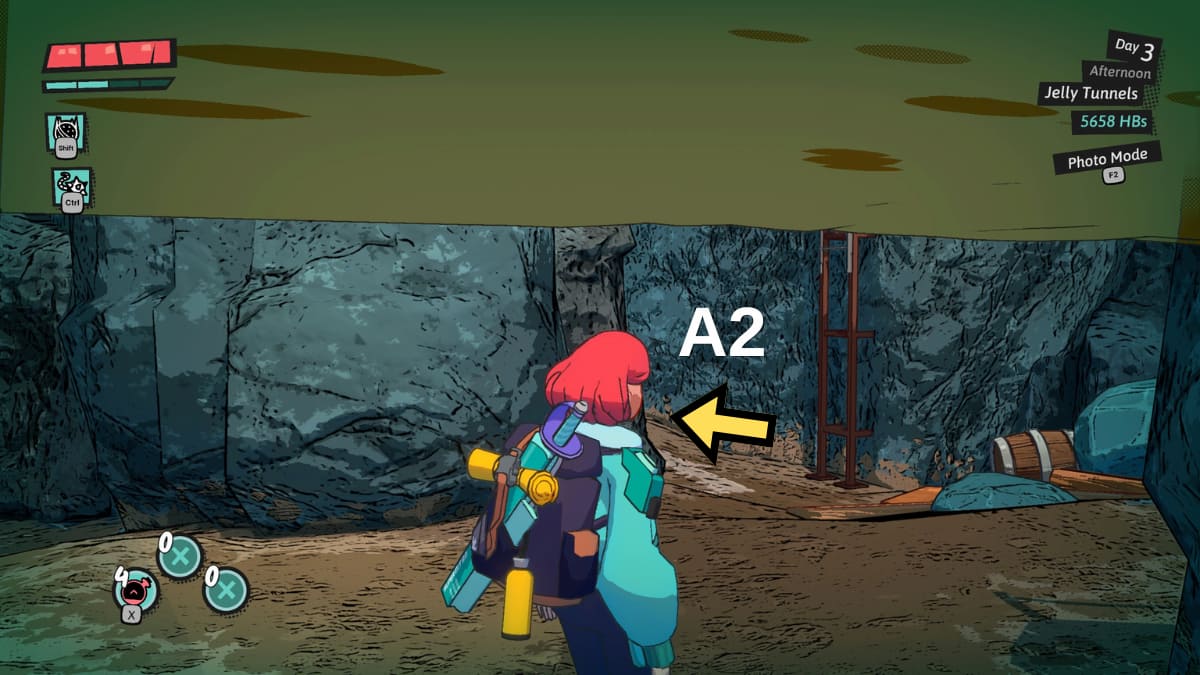
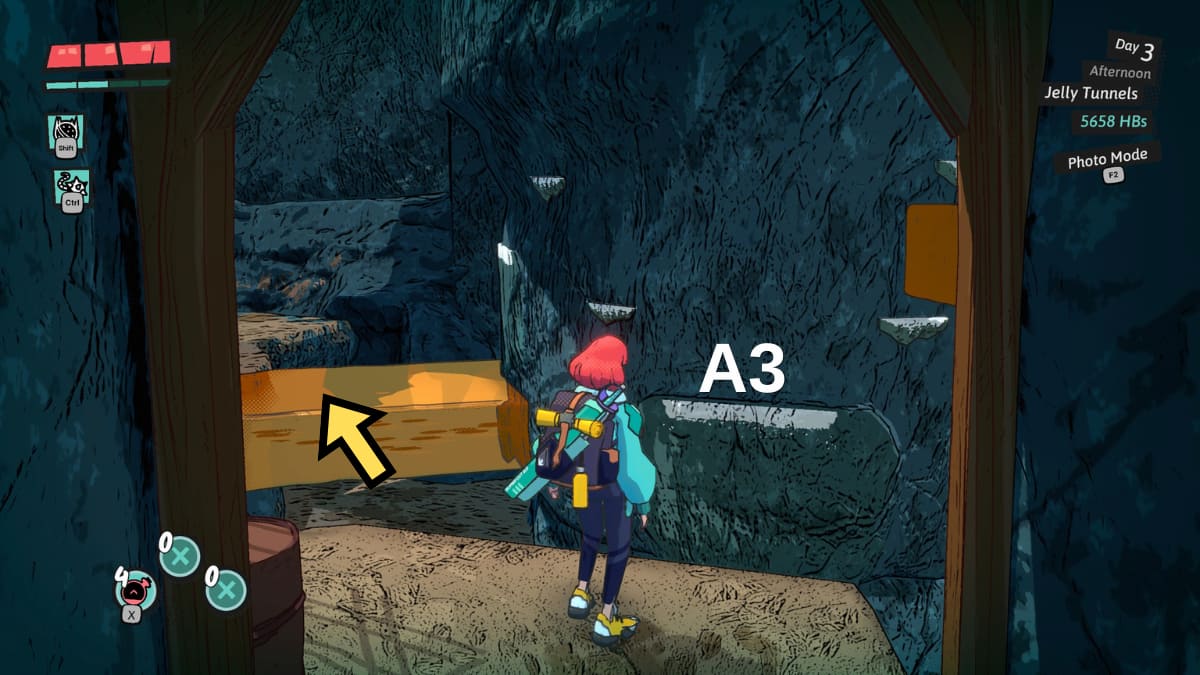
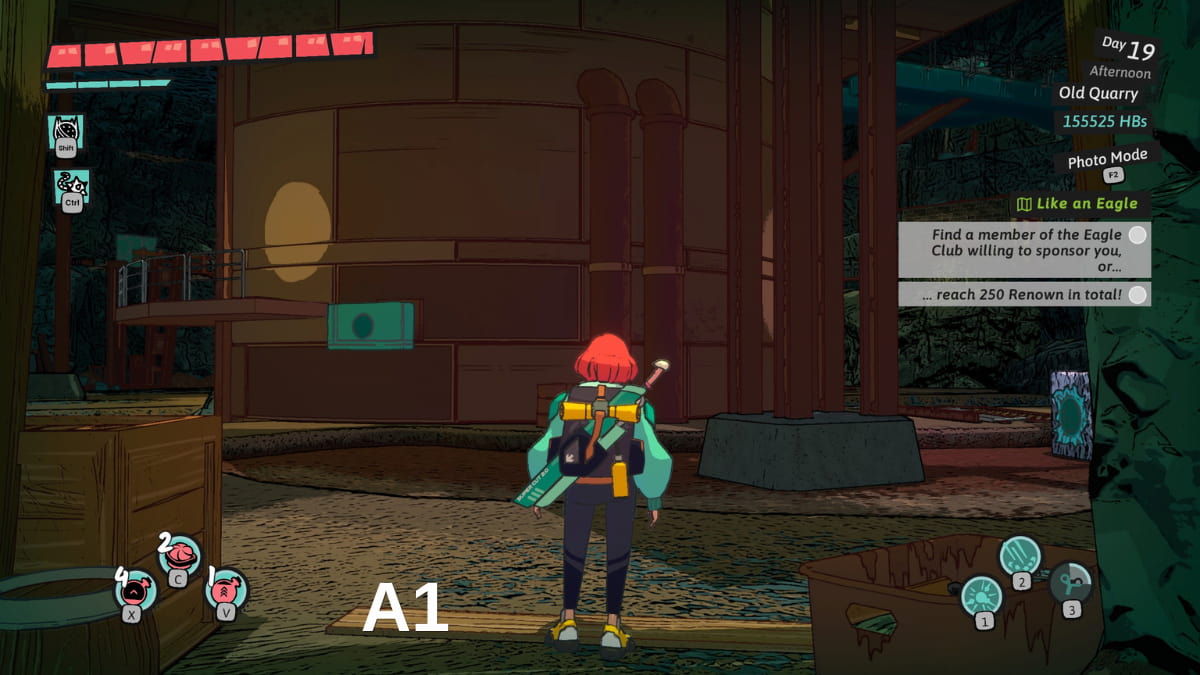
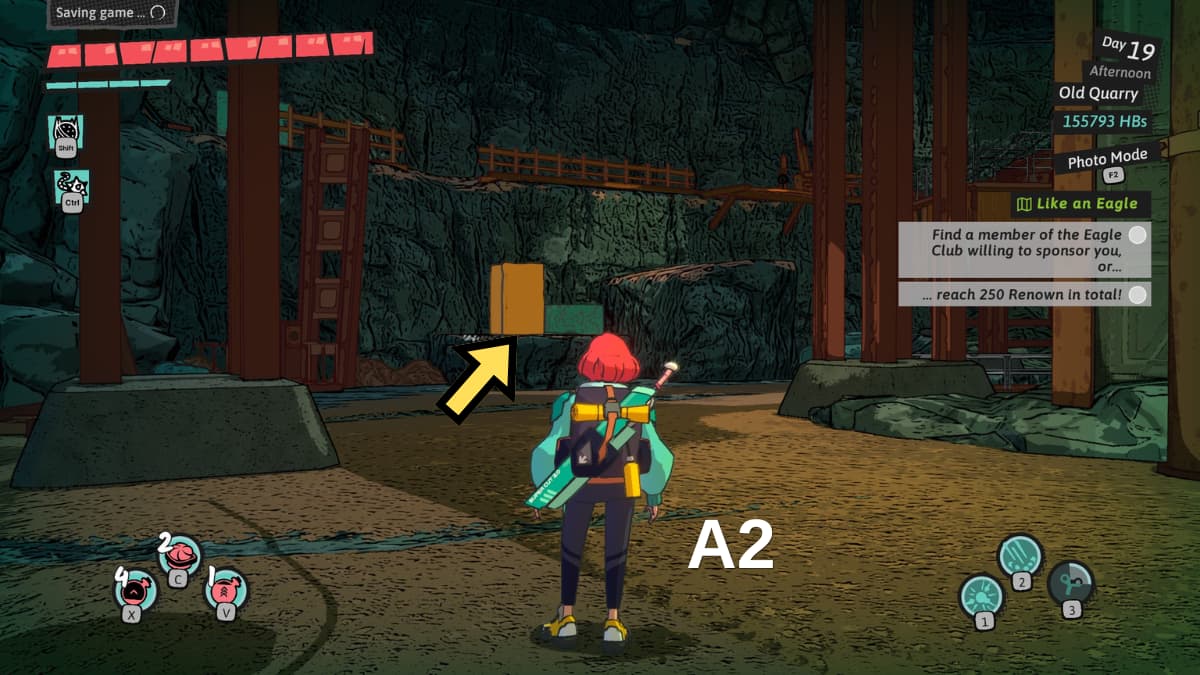
Abandoned Mineshaft
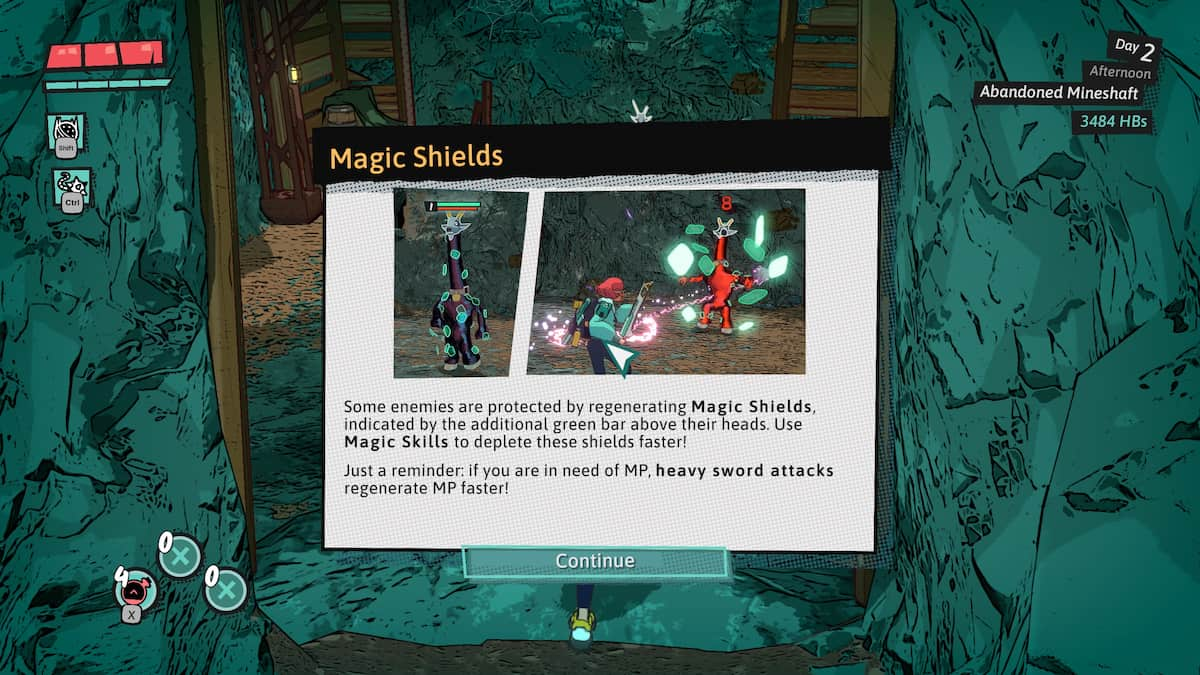
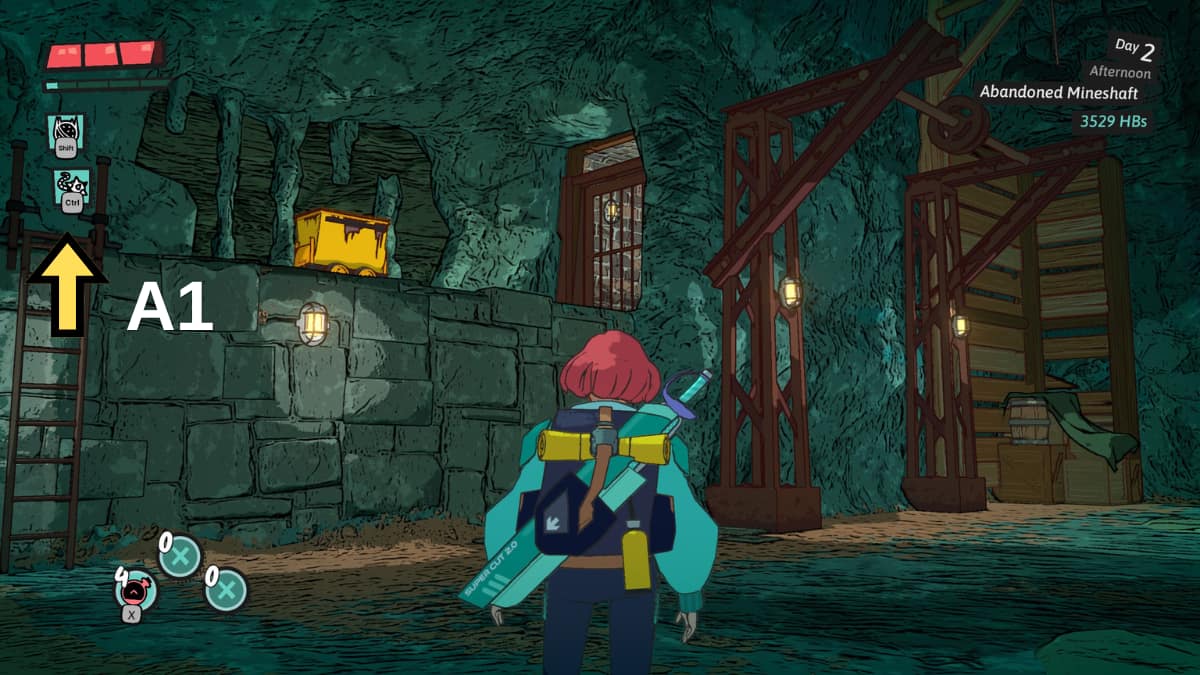
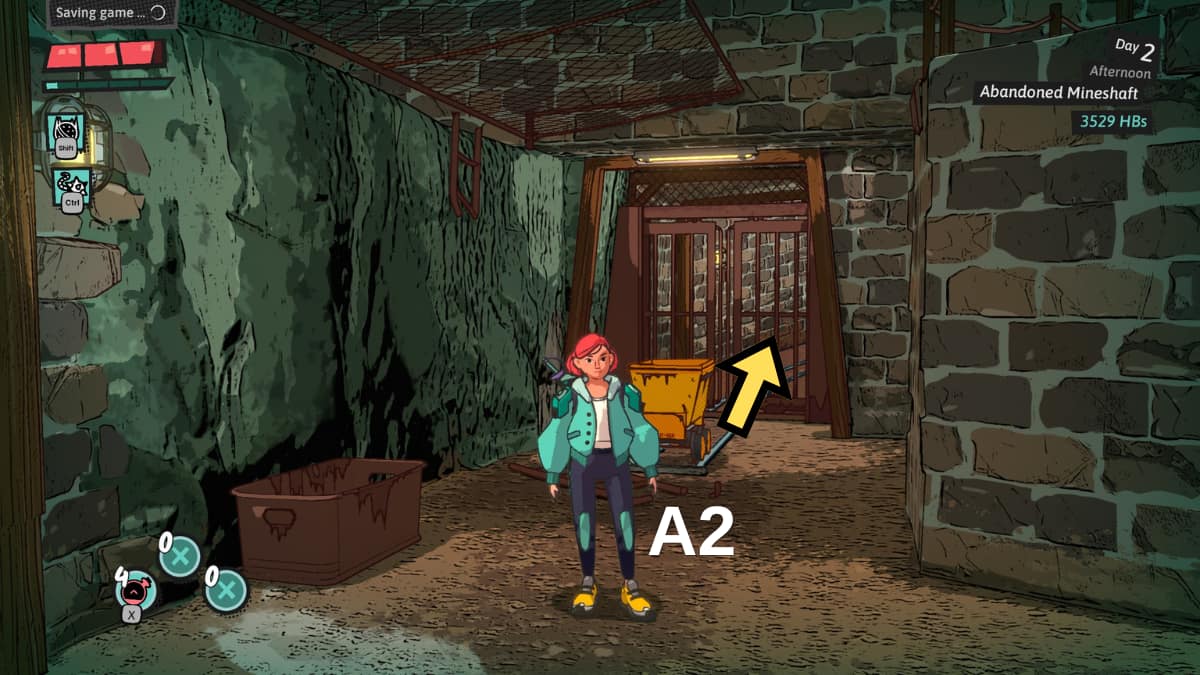
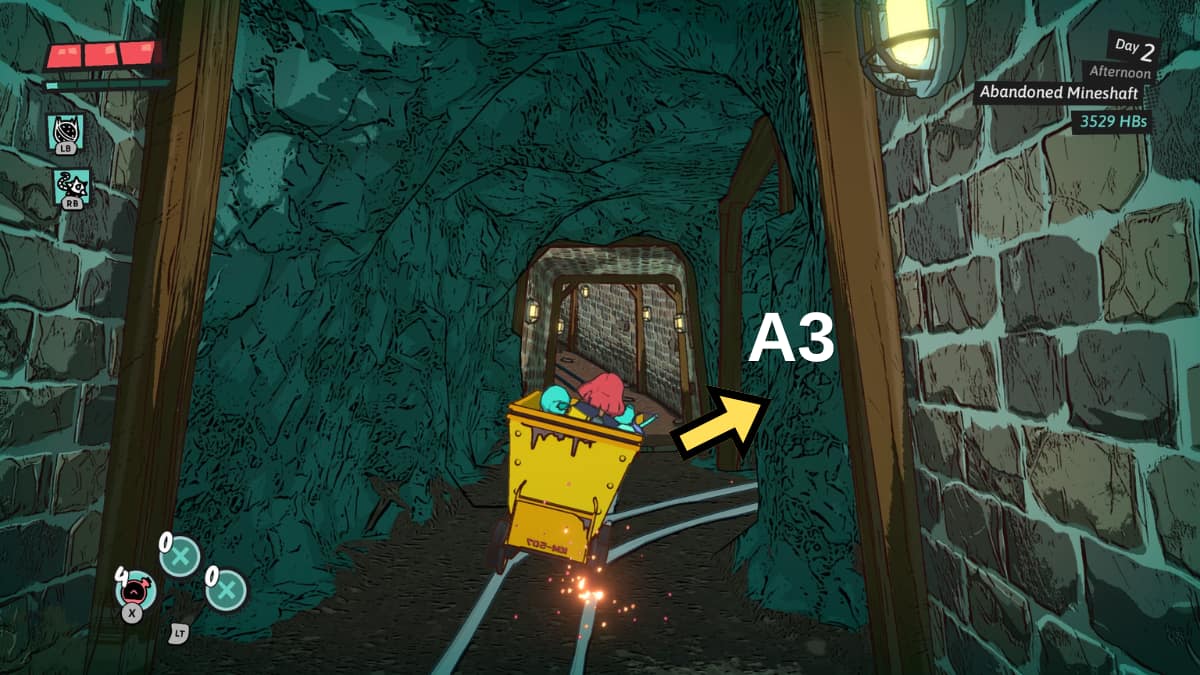
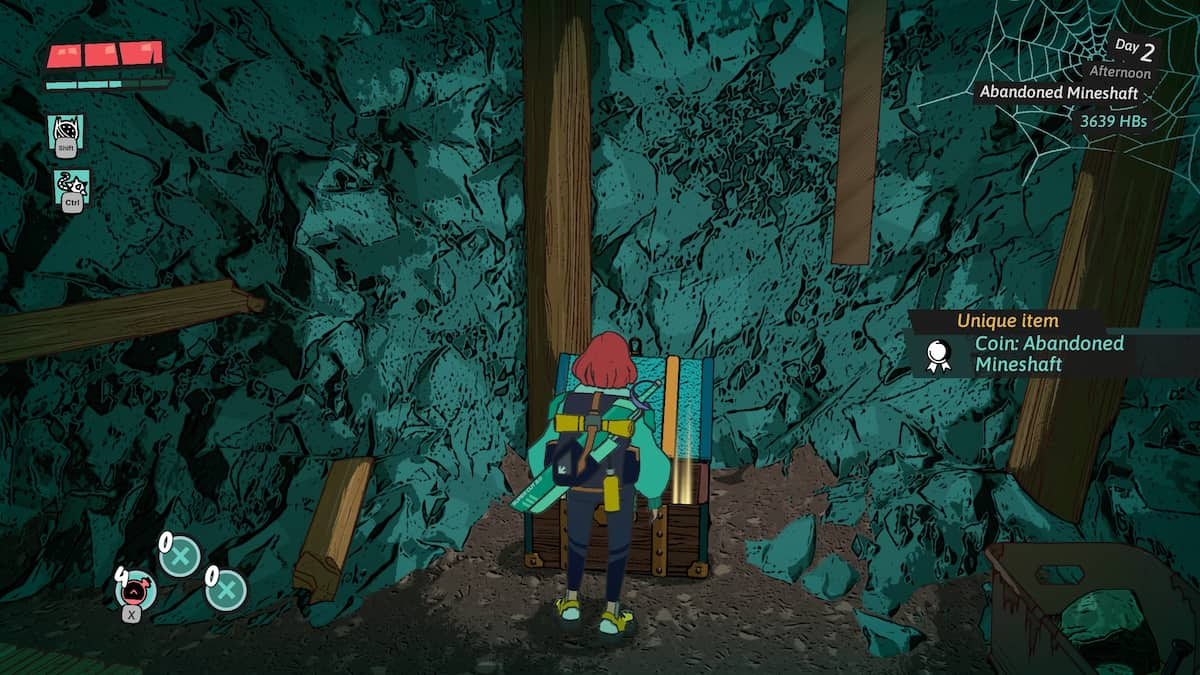
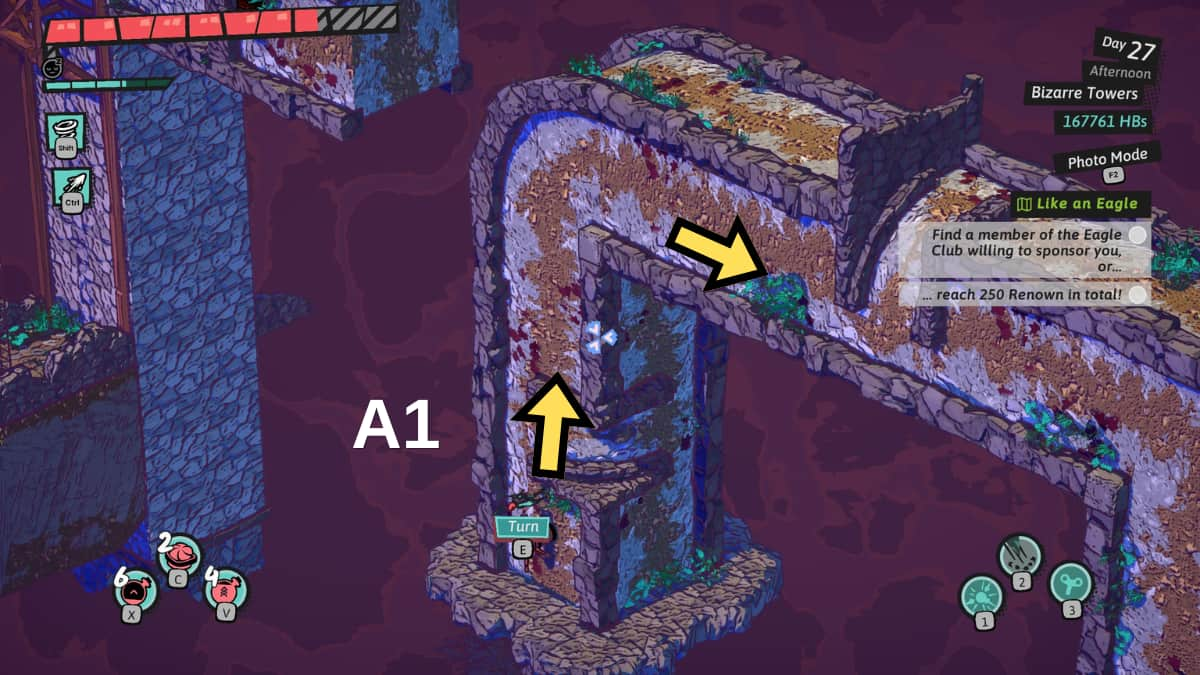
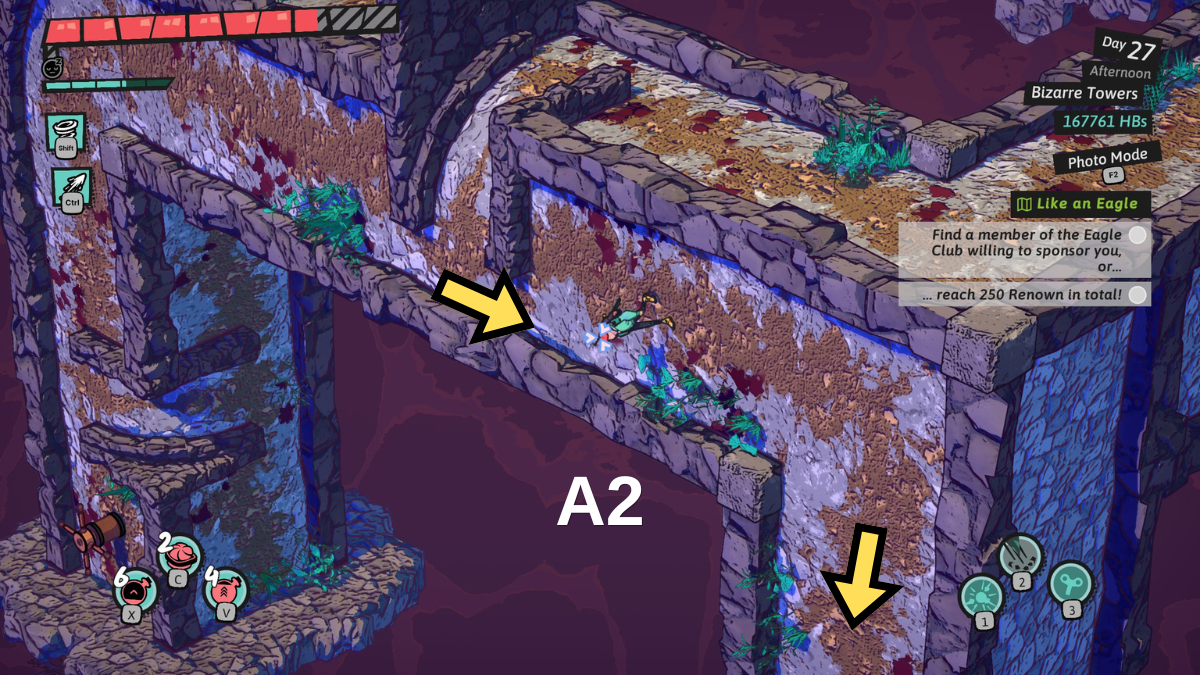
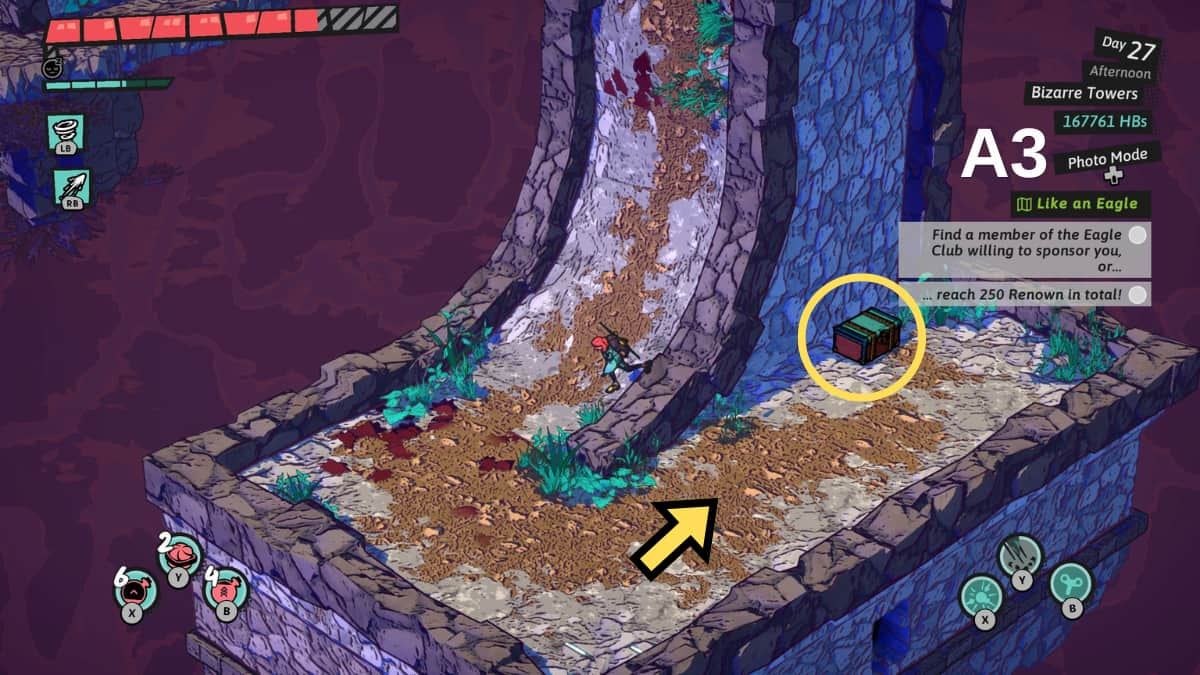
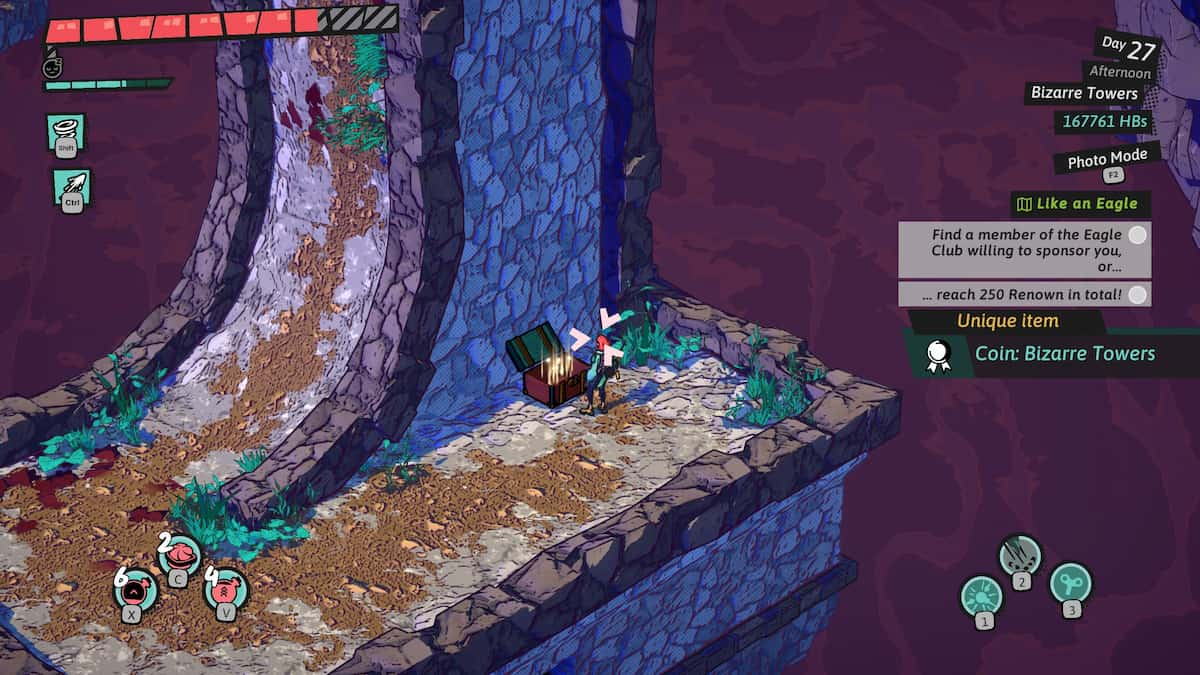
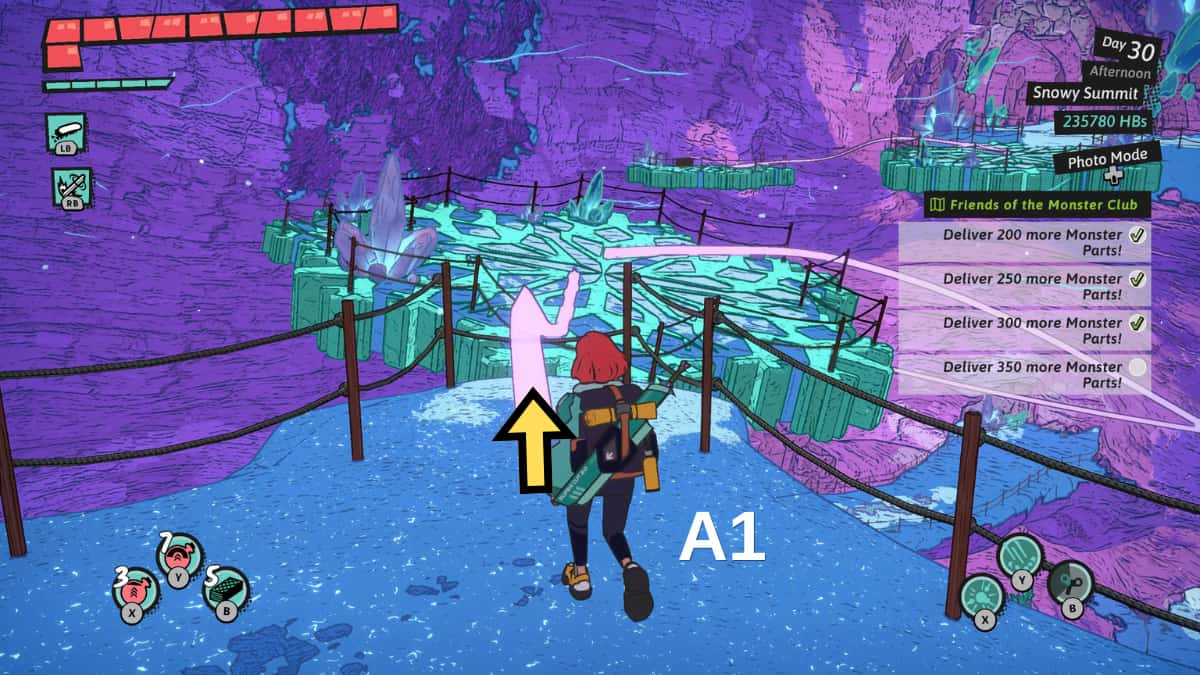
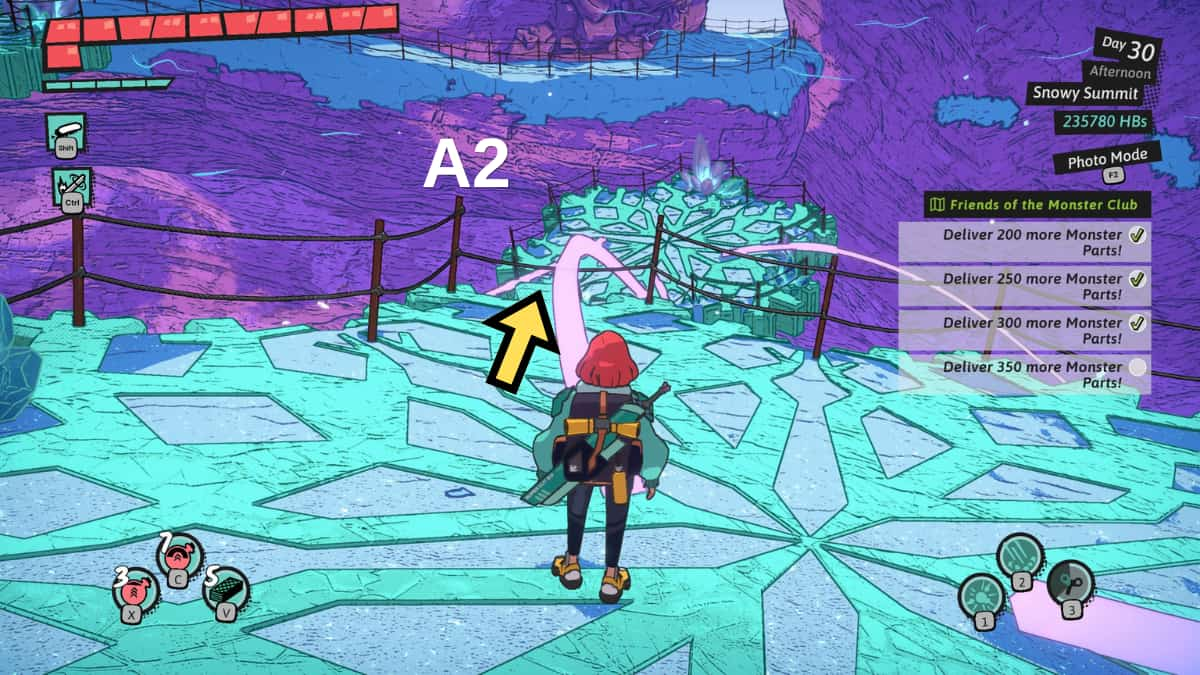
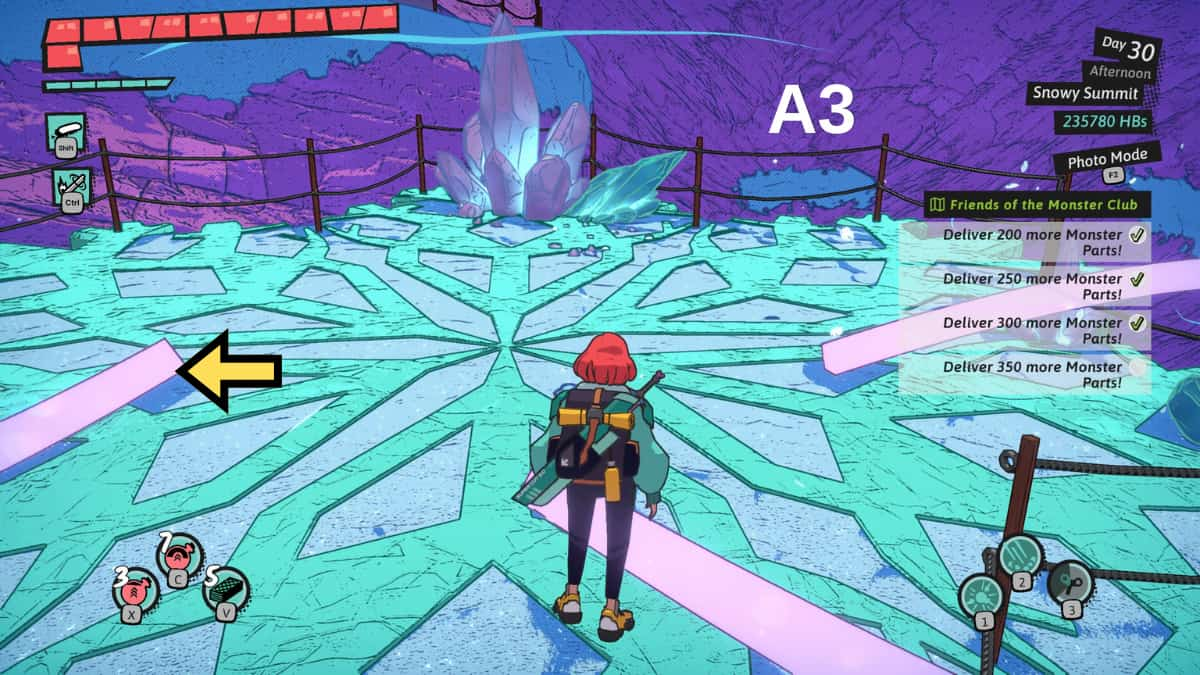
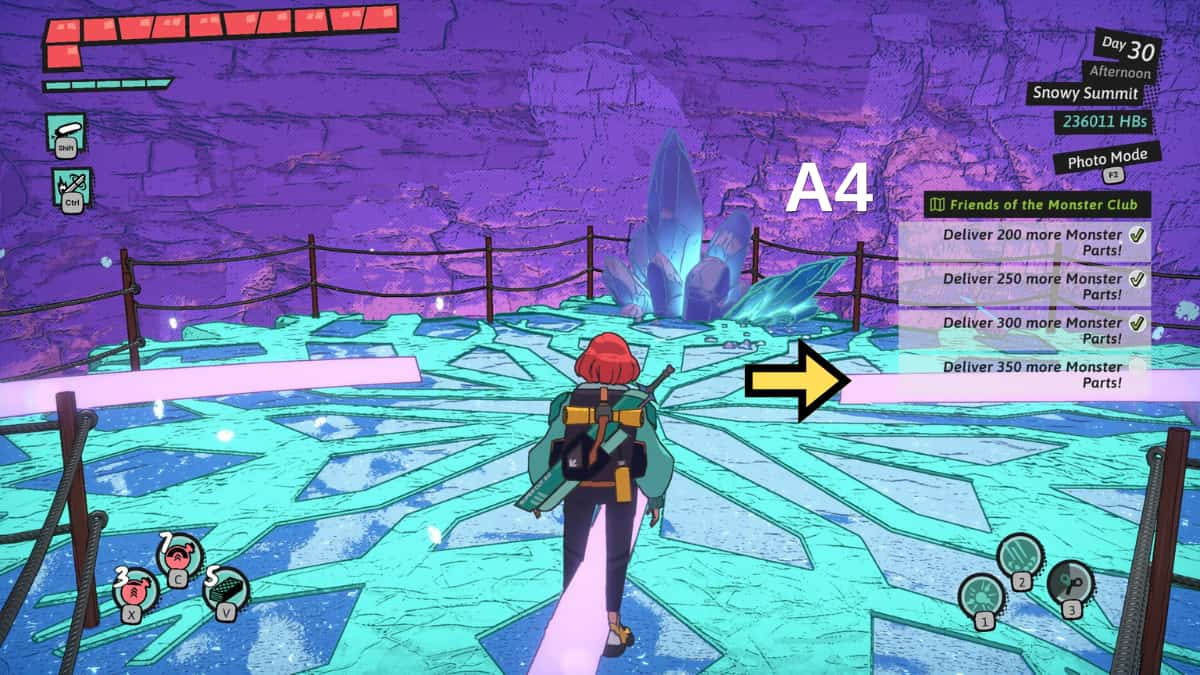
To obtain the commemorative coin hidden in the Abandoned Mineshaft dungeon, you’ll need to retrace your steps a bit. As you delve deeper into the dungeon, a message will appear warning you about heavily armored foes. Prepare for battle against a long-necked adversary that follows. Once defeated, head to the left side of the room and hop onto the ladder. Then, grab the minecart in front of you (marked as A1). Instead of moving forward, take this minecart back towards the initial room (A2), making sure to veer right while riding it (A3). This detour leads you to a clandestine chamber with a treasure chest, which holds your coveted prize. After collecting the coin, board the minecart one more time and resume exploring the Abandoned Mineshaft.
Giant Cavern
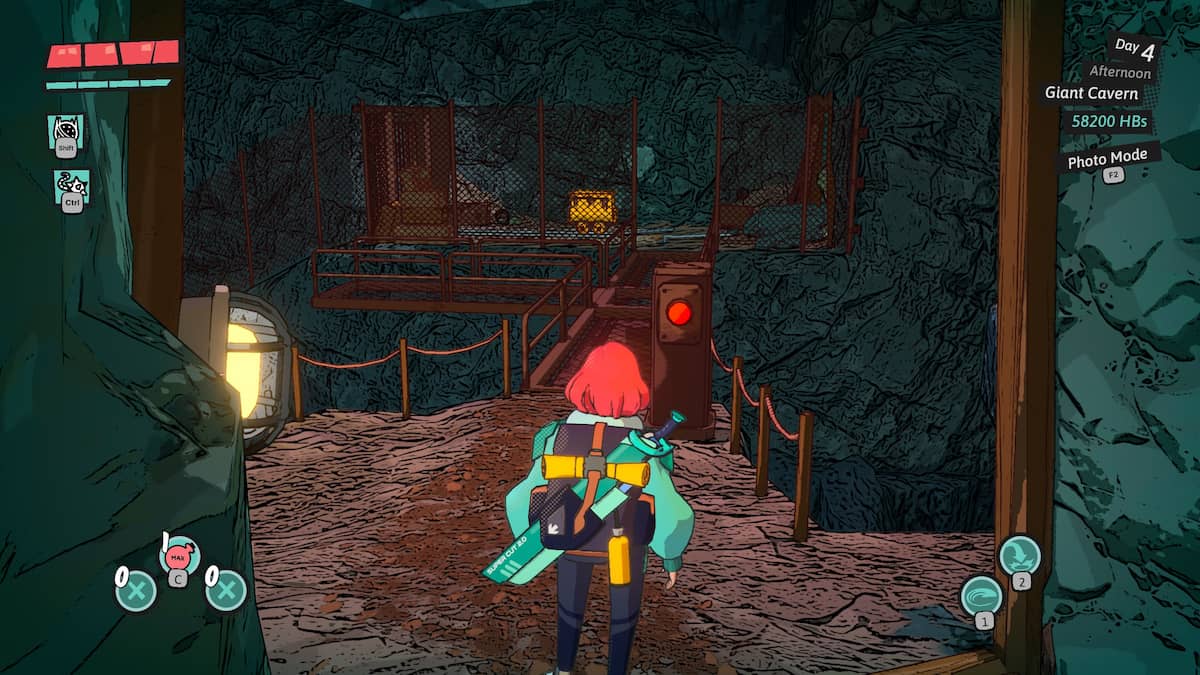

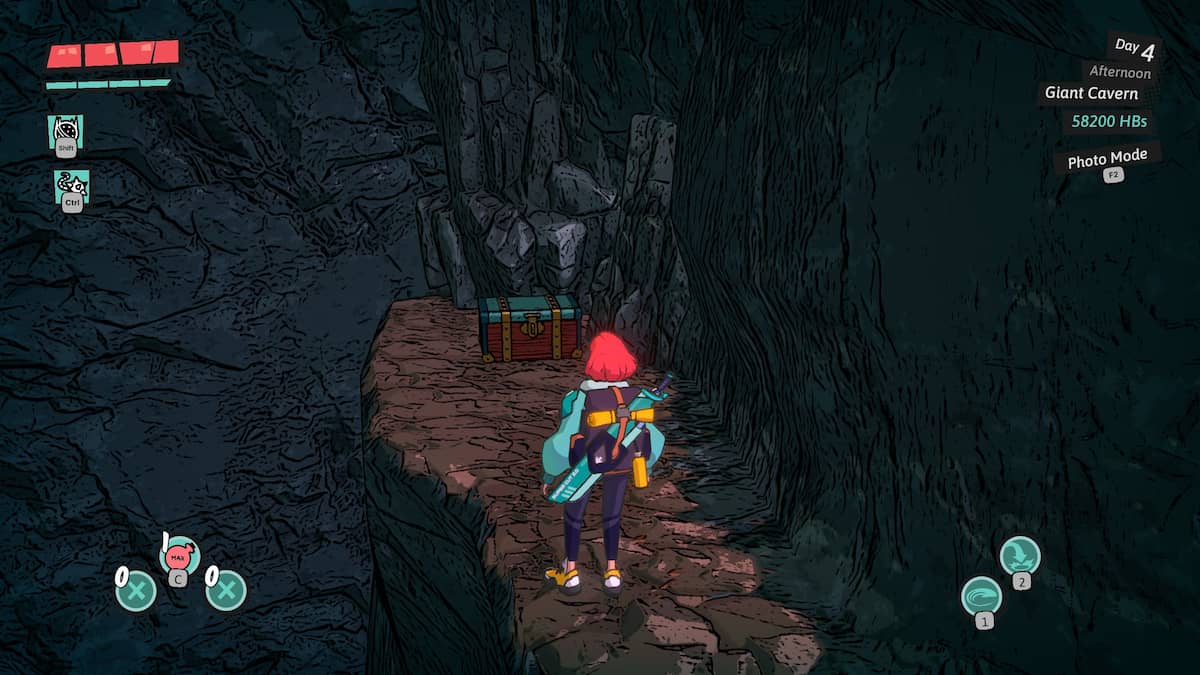
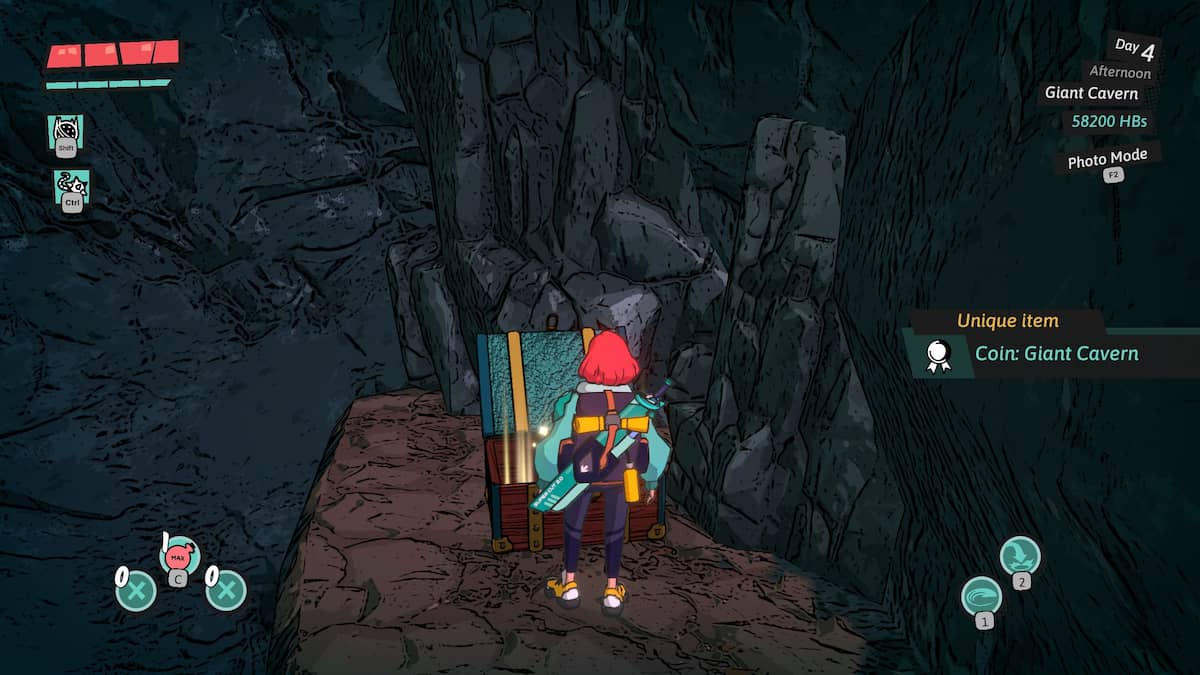
After leaving through the right door near the rotating bridge in the Giant Cavern, instead of crossing the bridge, look back towards where you came from. You’ll notice a winding path on the cavern wall’s left side. Follow this trail to discover the chest that holds the Giant Cavern coin.
Jelly Tunnels
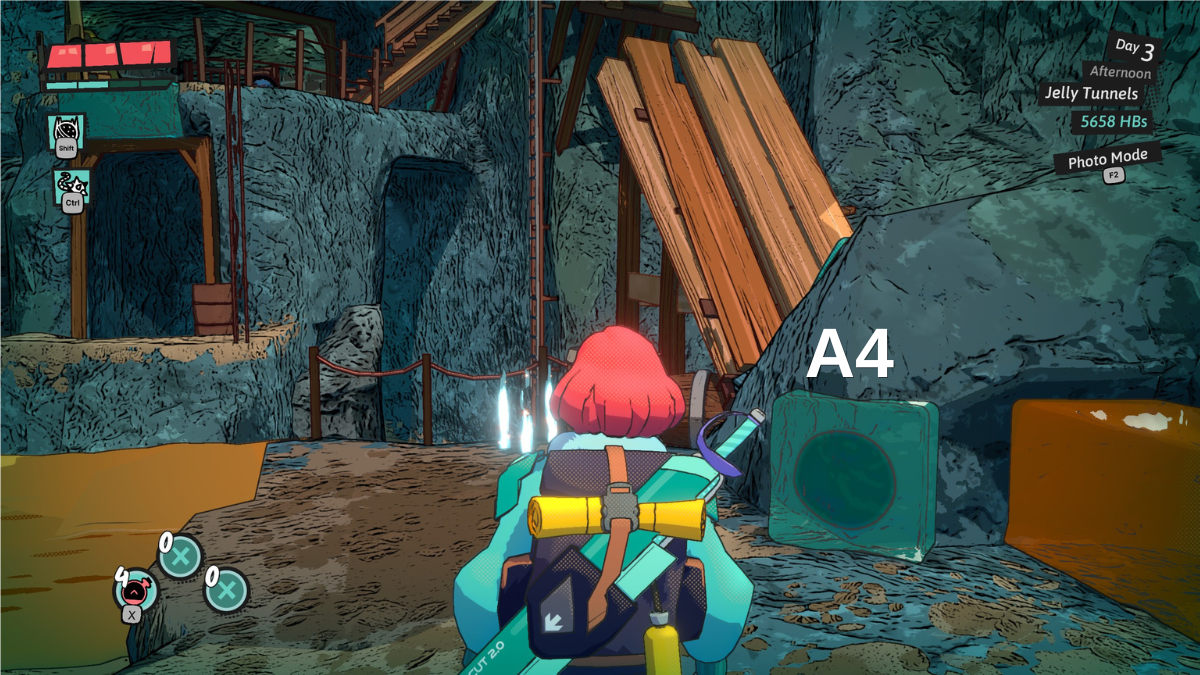
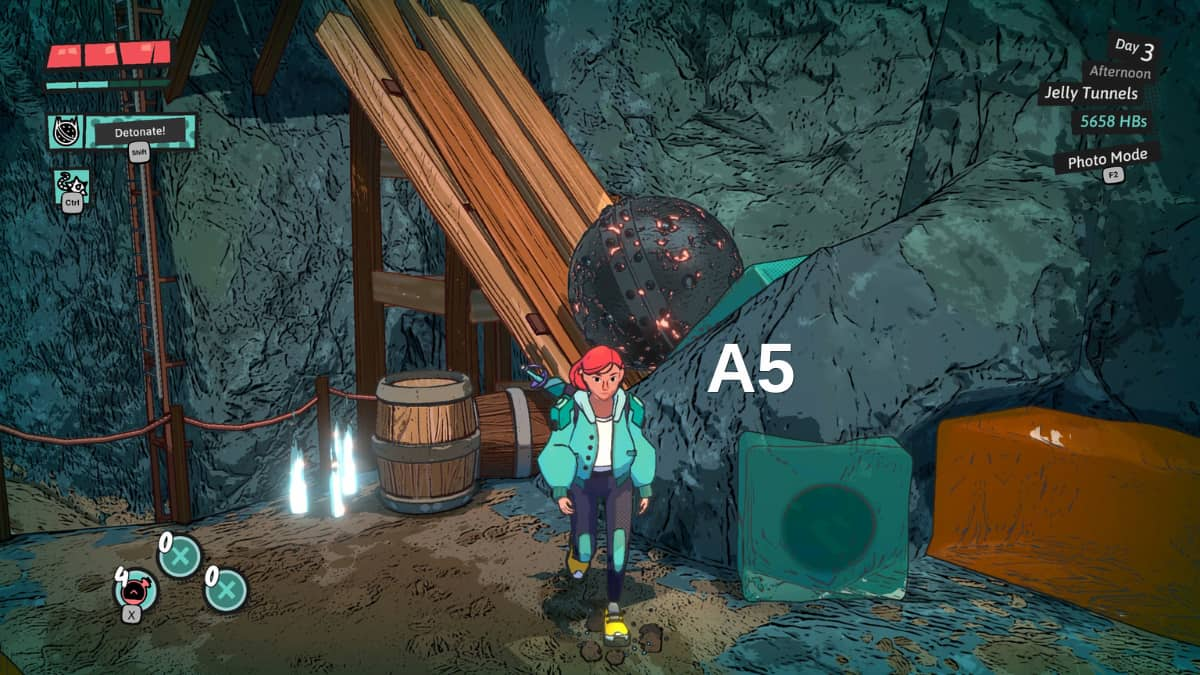
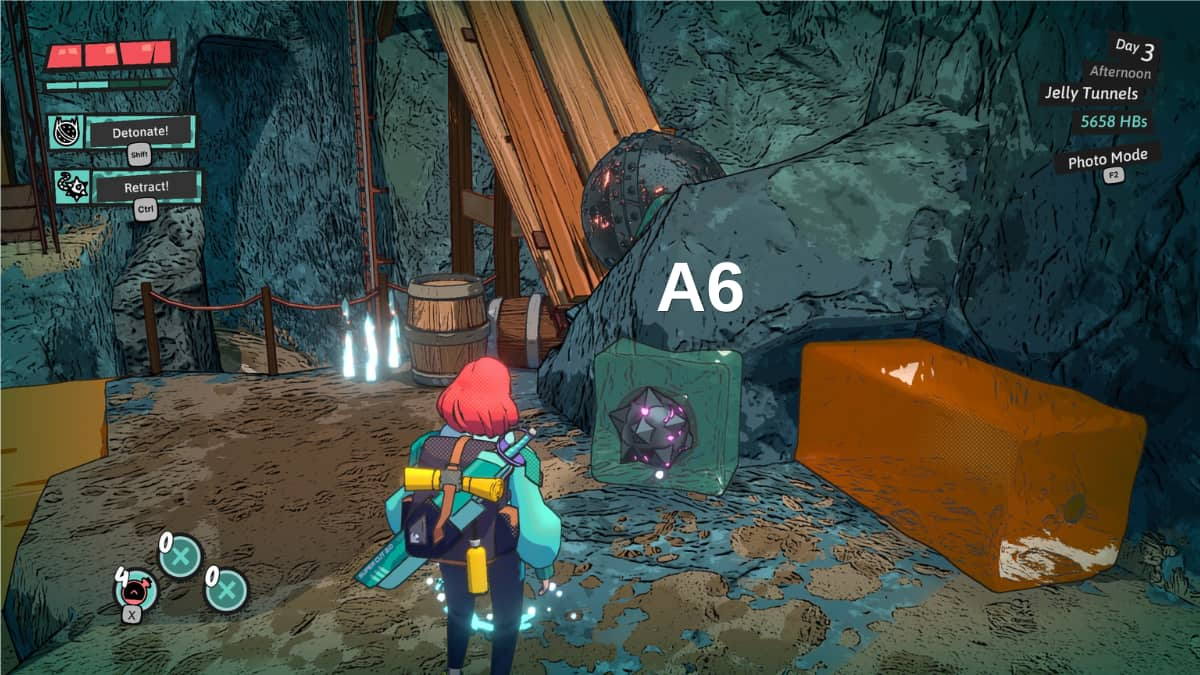
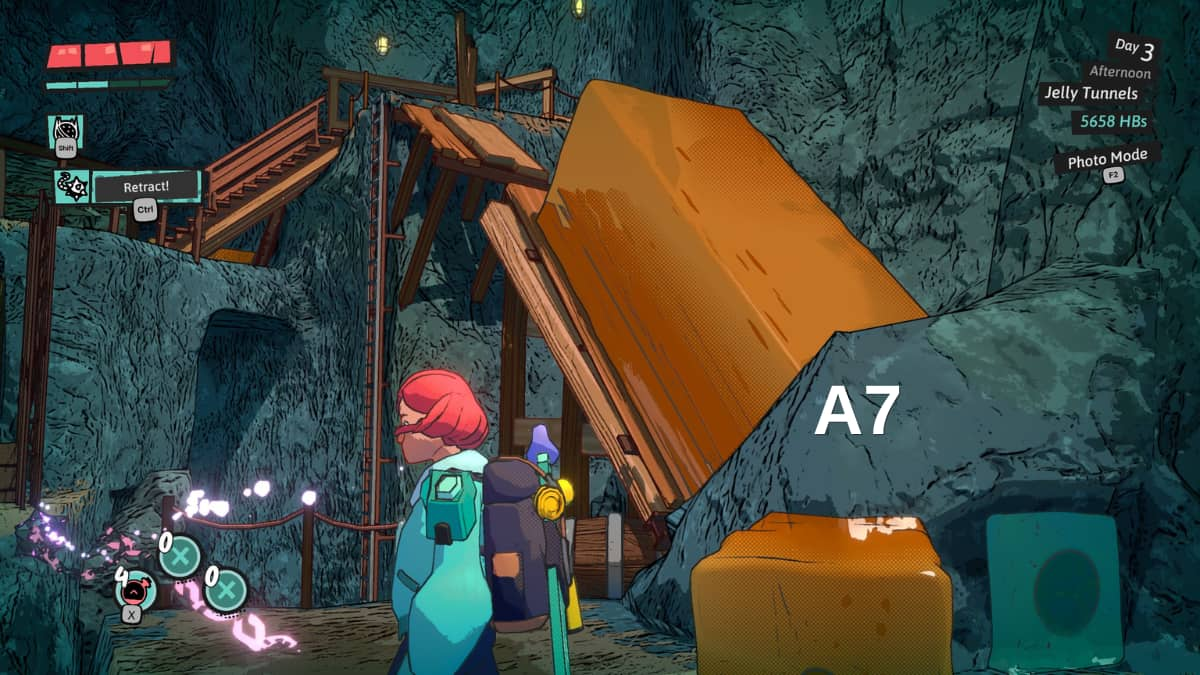

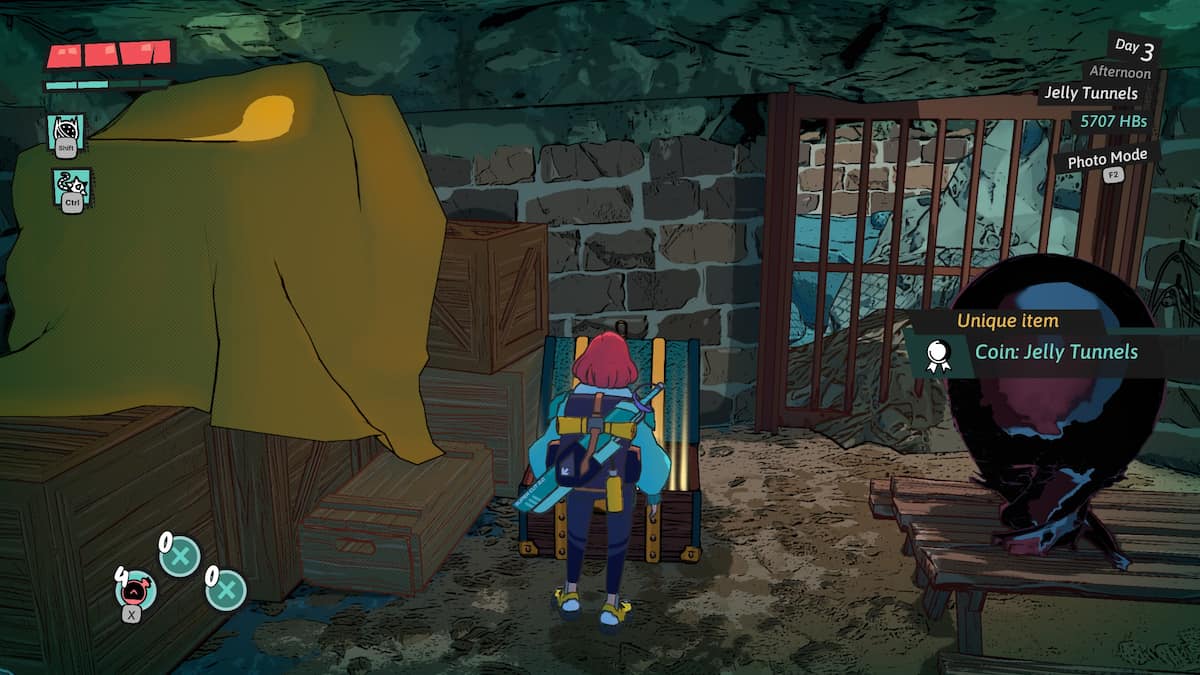
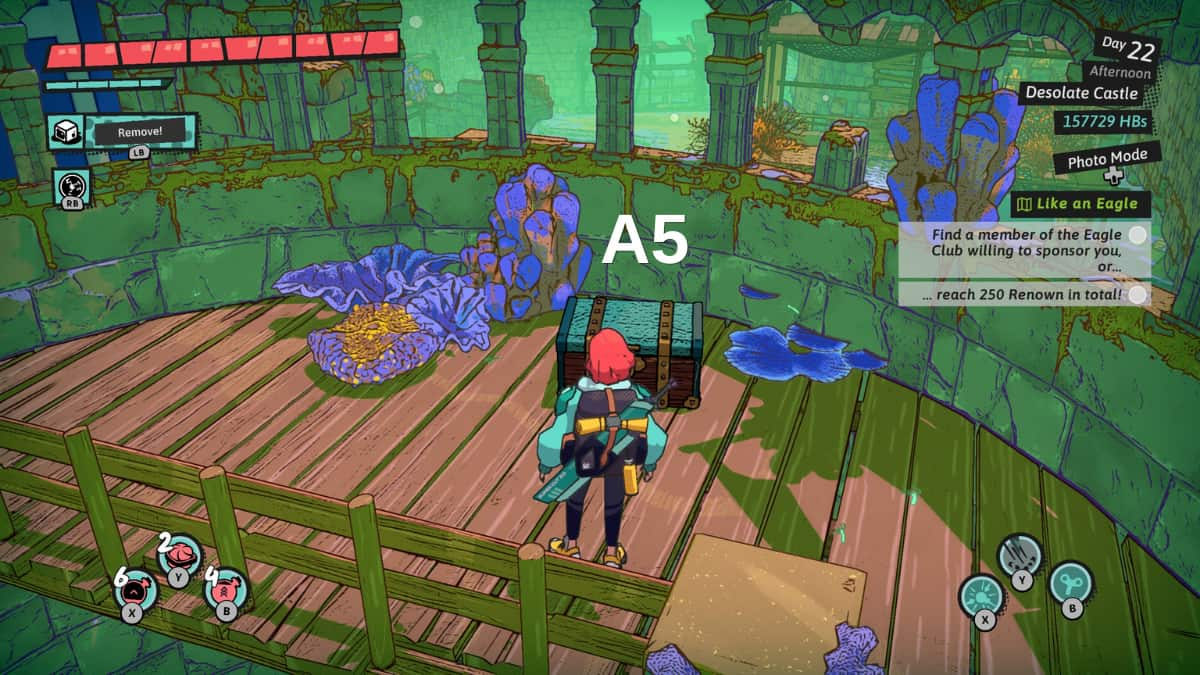
In the heart of the dungeon, you’ll find the Jelly Tunnels treasure hidden in a spacious chamber filled with jelly obstacles (A1). To begin your quest, circle around the pillar until you spot a side path adorned with white symbols on the ground (A2). Ascend this path to reach the upper terrace (A3), then leap from one white ledge to another, making your way to the zone on the left. This part of the room boasts a diagonal wooden plank and two jelly-like structures (A4). Position the Wrecking Ball magic onto the plank (A5), and afterward, deploy the Ball and Chain spell to draw out the blue jelly block. The wrecking ball will then be set in motion, tearing down a vine obstructing a ladder that ascends to an upper platform (A7). Scale this ladder to reach the room’s peak. A tiny chamber with a treasure chest is situated on the right side of this level (A8), and within lies the Jelly Tunnels dungeon coin.
Minecart Workshop
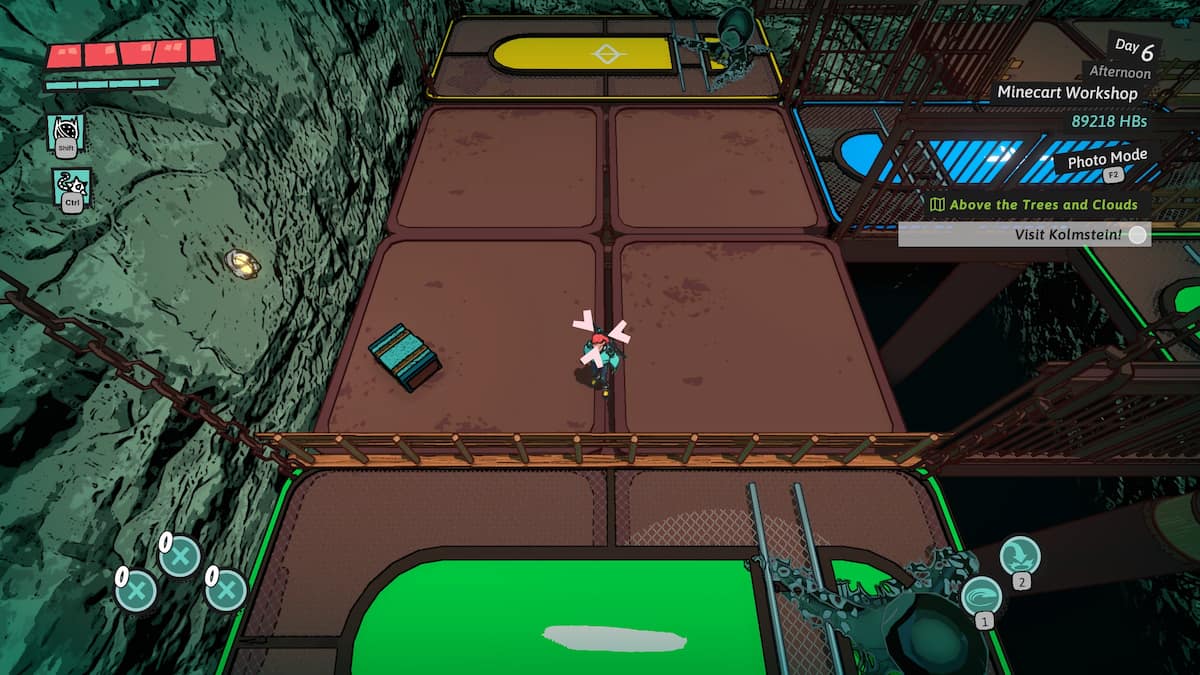
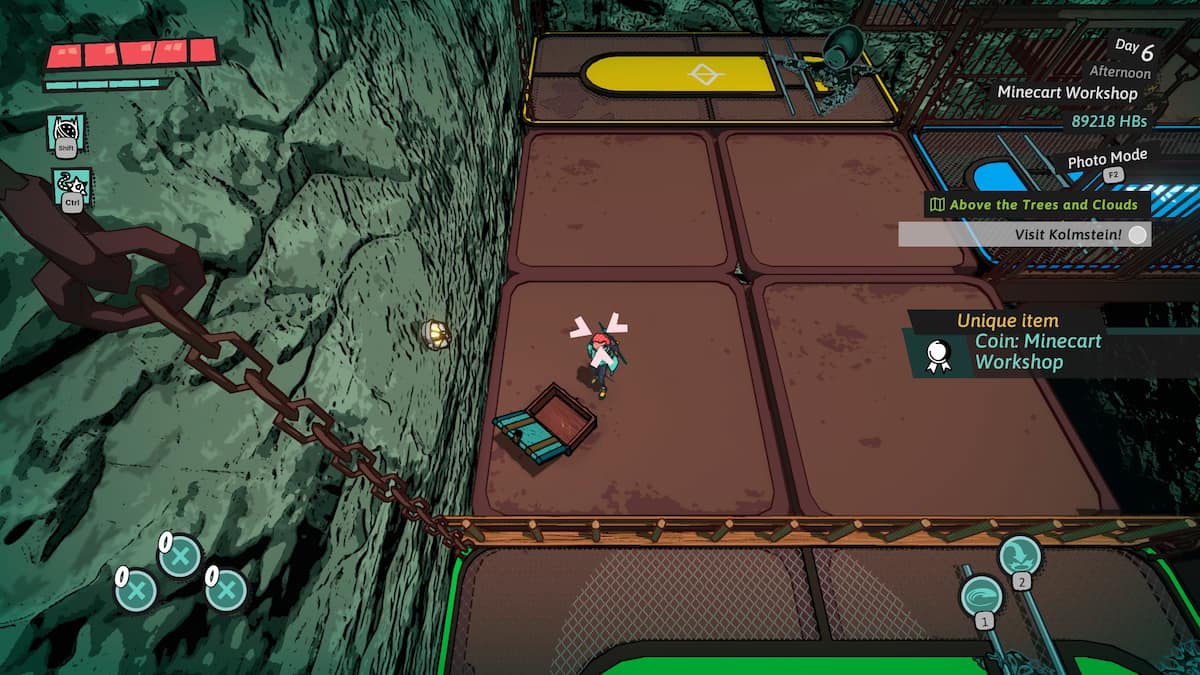
The workshop chest on the minecart, located at the end of the dungeon’s platform puzzle, is easily accessible in the open. To reach it from the right side, simply adjust the position of the platforms.
Tatzelwurm’s Lair
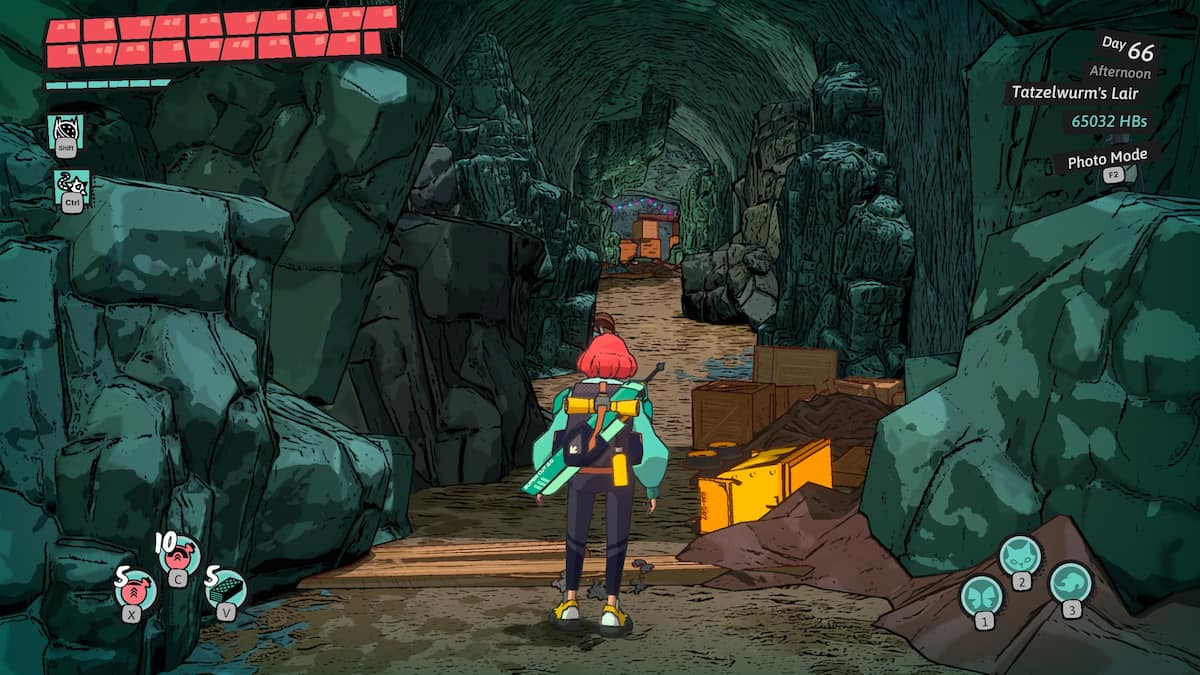
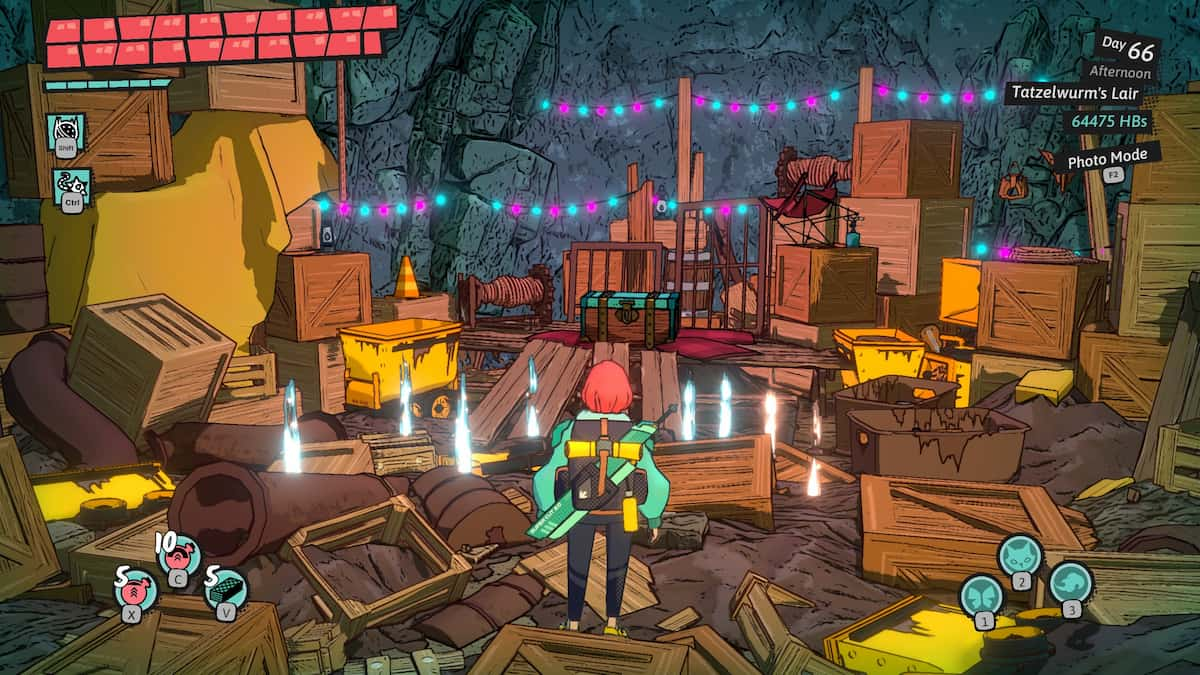
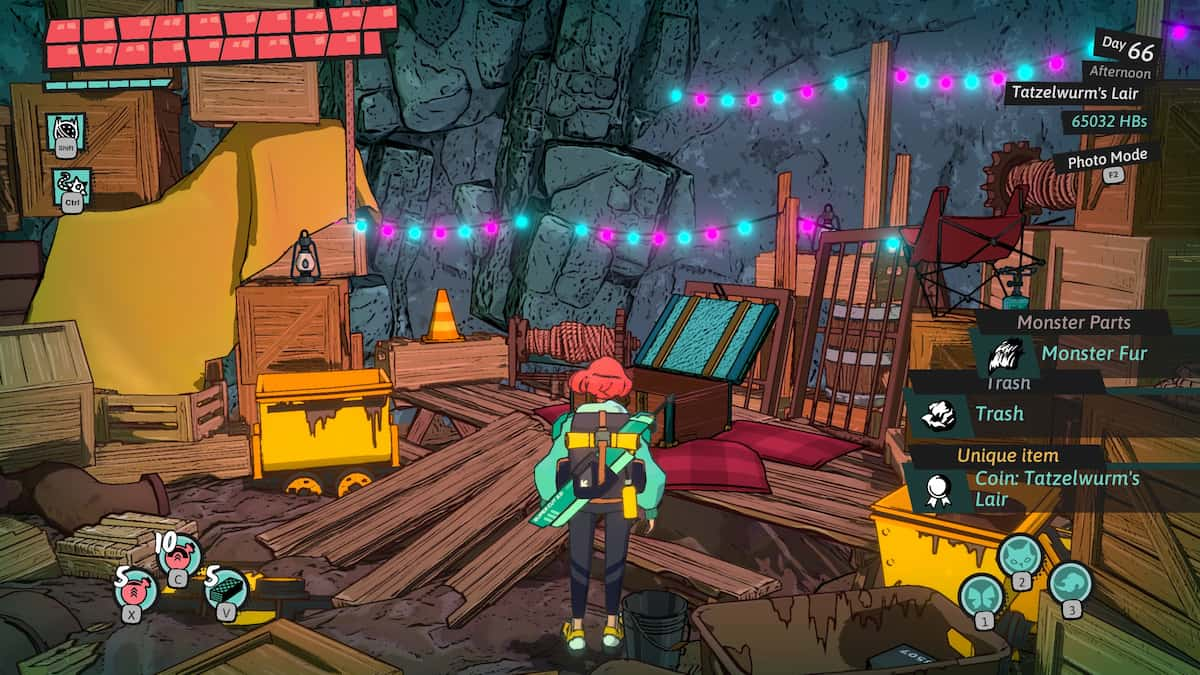
After overpowering the Tatzelwurm, proceed down the corridor to your right. There, you’ll find an exposed treasure chest teeming with crates and illumination – inside lies the coveted Tatzelwurm’s Lair coin.
Old Quarry
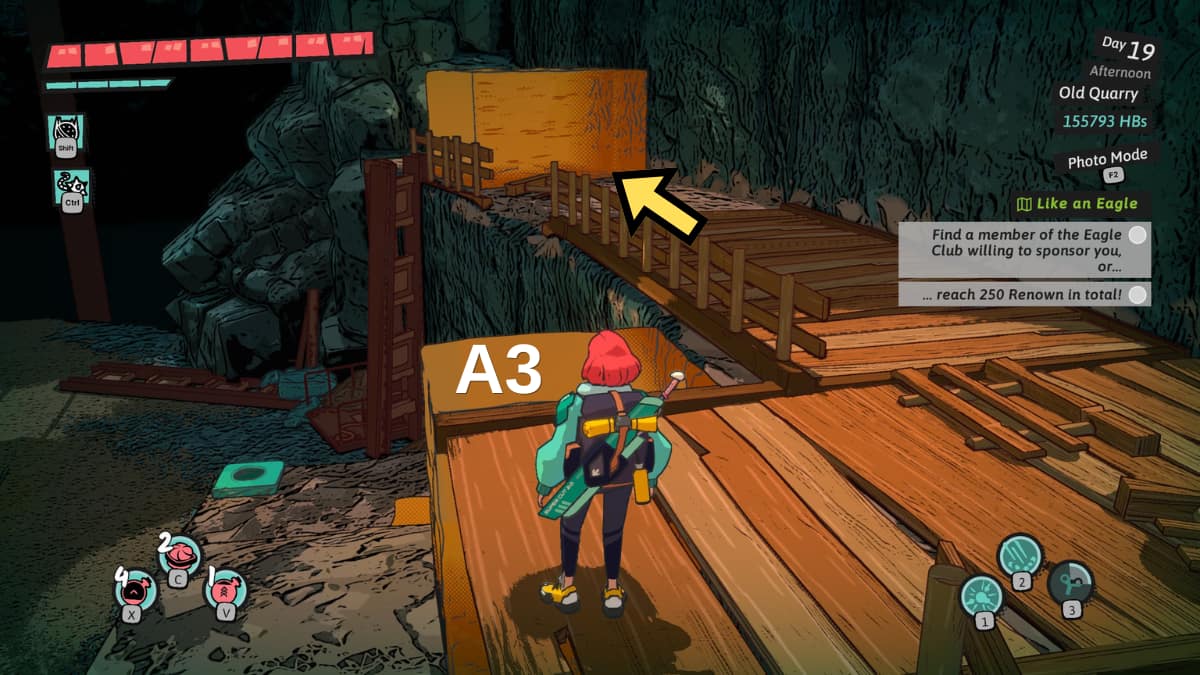
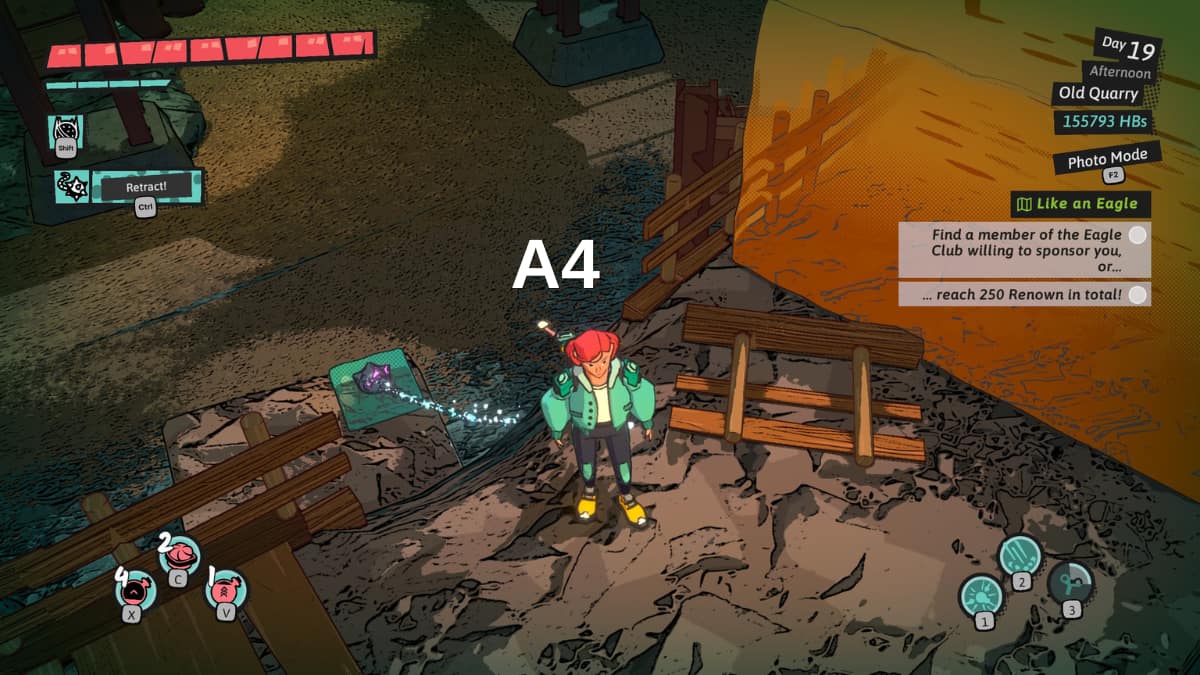
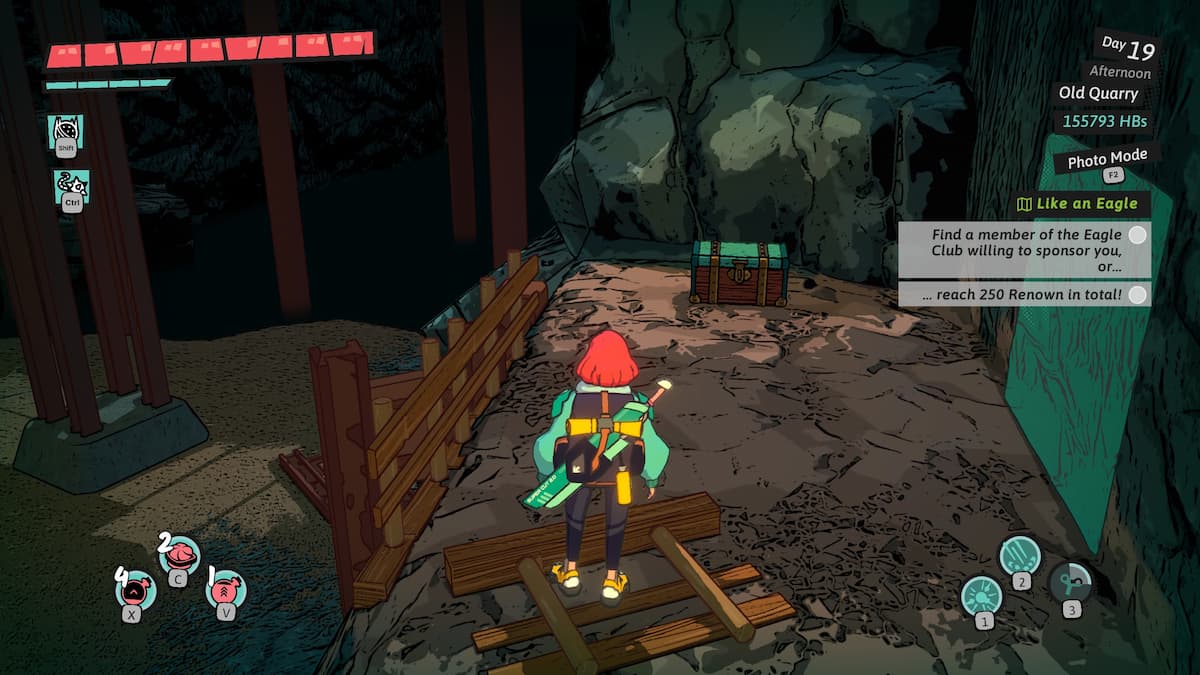
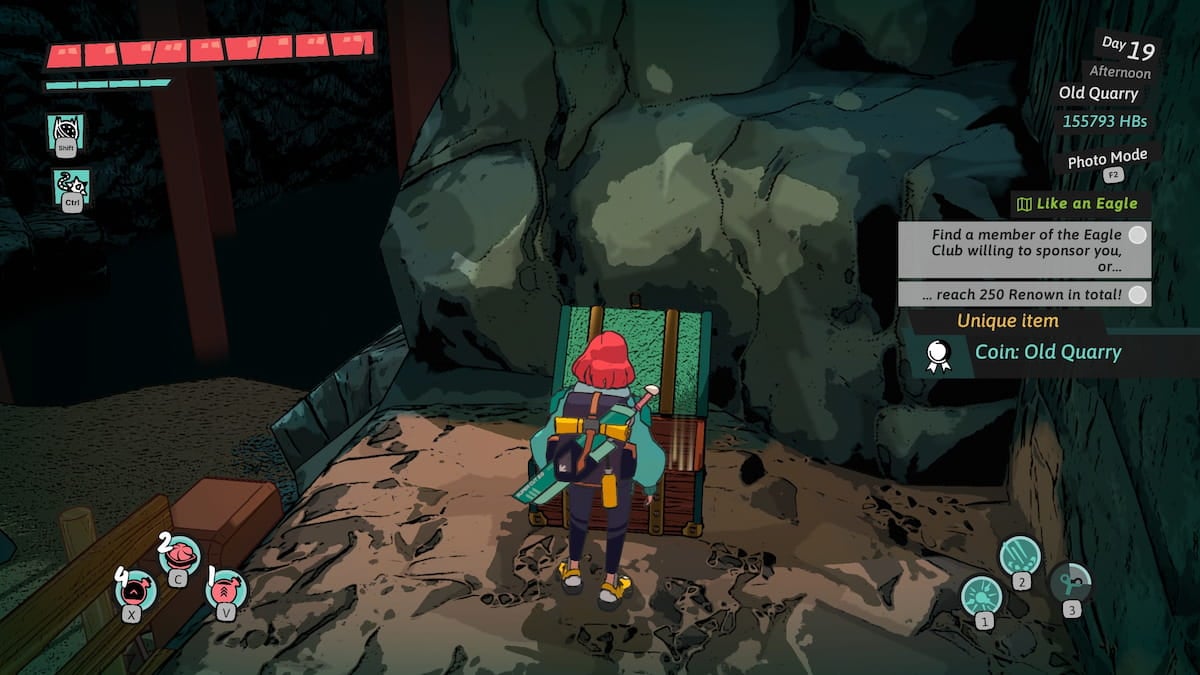
In the Old Quarry’s largest chamber (A1), there’s a hidden treasure chest filled with coins. To access it, first make your way to the opposite side of the room and examine the sticky substances obstructing the stairs (A2). Utilize your ball-and-chain magic to ascend the ledge above them (A3). Once you reach the top, notice another goo block barring your path to the left (A4). Approach it and employ a gap in the fence to attach the ball-and-chain to the blue goo beneath you. Exert force to shrink the goo, uncovering the coin chest.
Shredding Facility
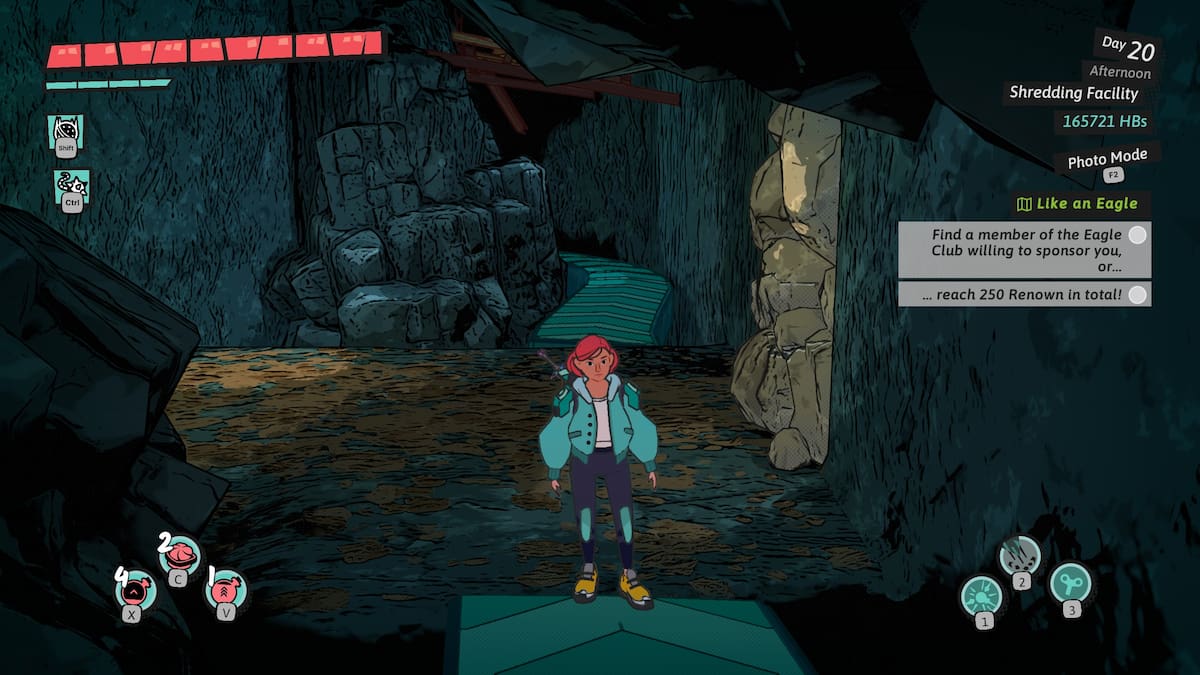
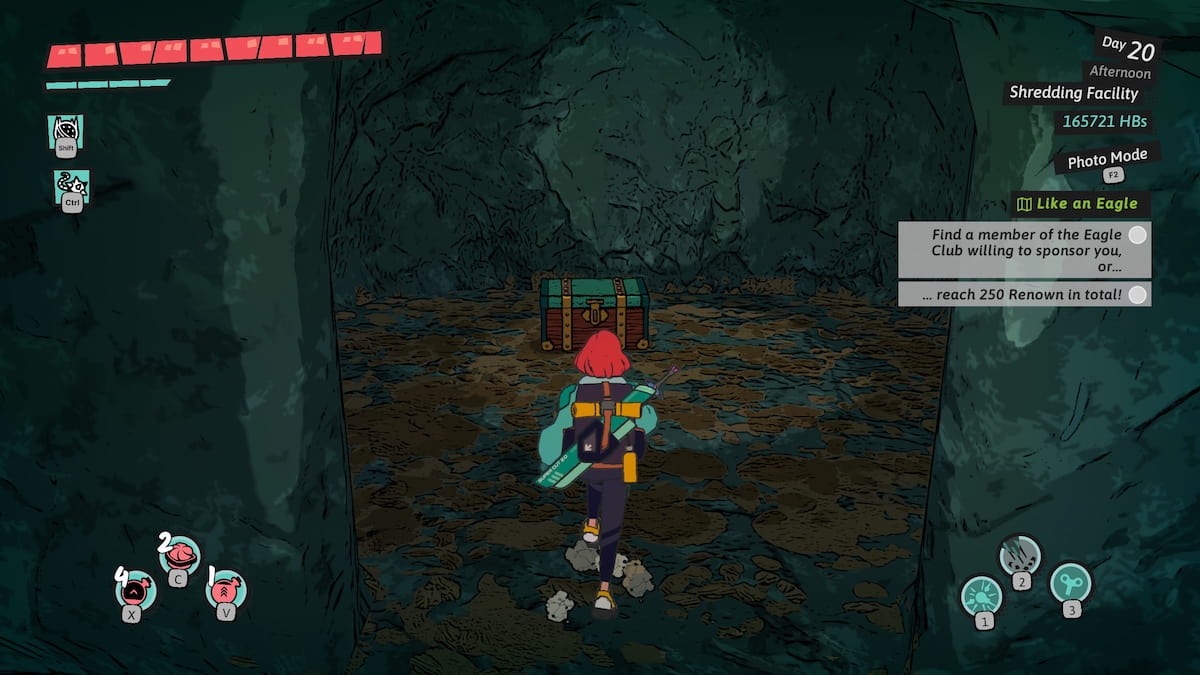
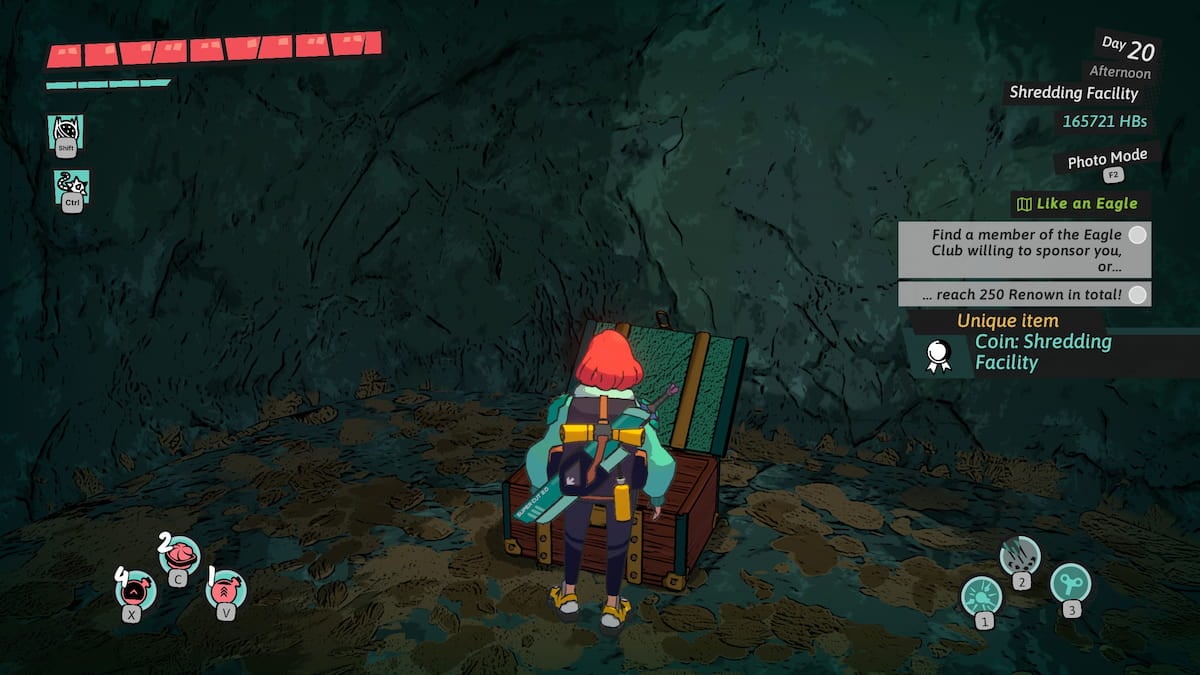
As a fan, I’d describe it this way: After navigating through the initial fast-moving conveyor belt, you’ll find yourself on the first stationary platform. To the right of this platform, there seems to be an odd pile of rocks against the wall. Use your Wrecking Ball to clear the area and reveal a hidden room. Inside, you’ll discover a chest containing the coveted Shredding Facility coin.
Hinterwald Dungeon Coins
The forest of Hinterwald boasts a sunset hue and is teeming with trees, vines, and various other vegetation. Within its bounds, there are seven hidden dungeons waiting to be discovered by intrepid Slayers.
Ancient Tree
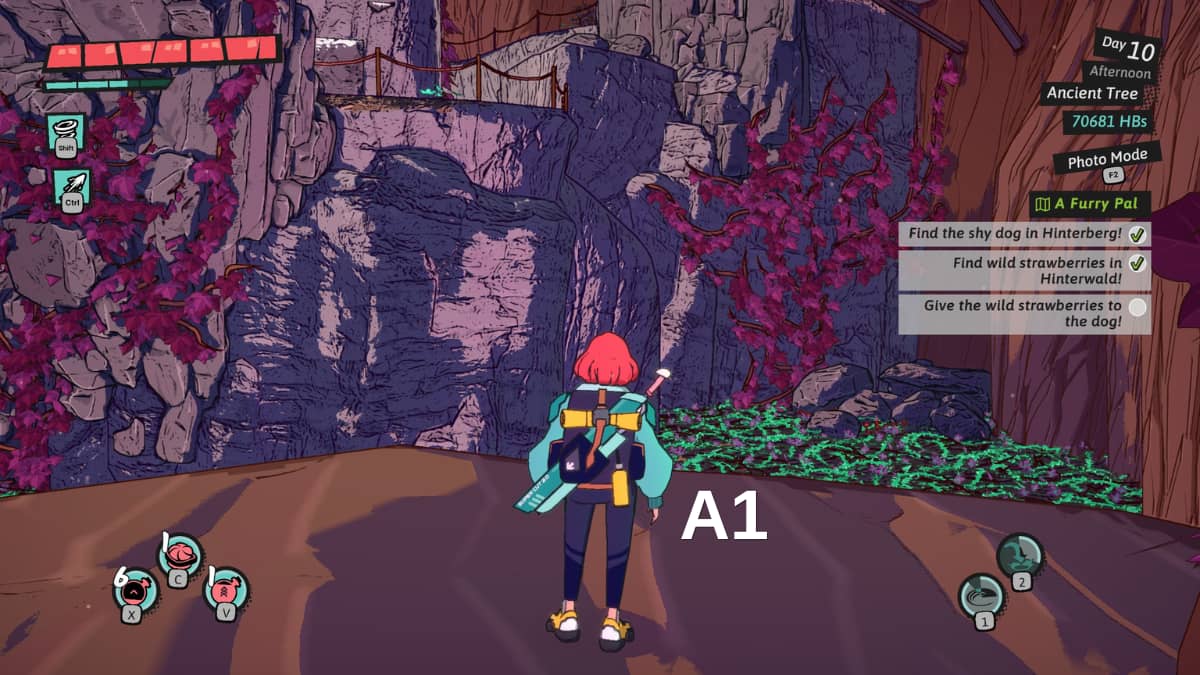
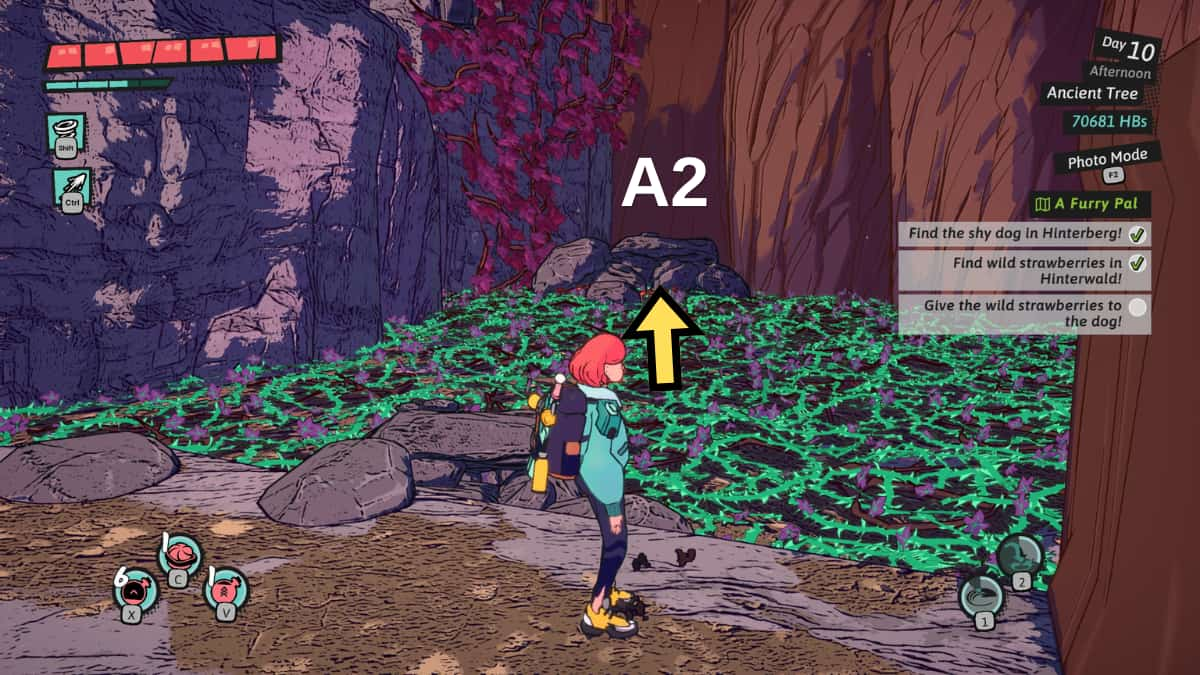
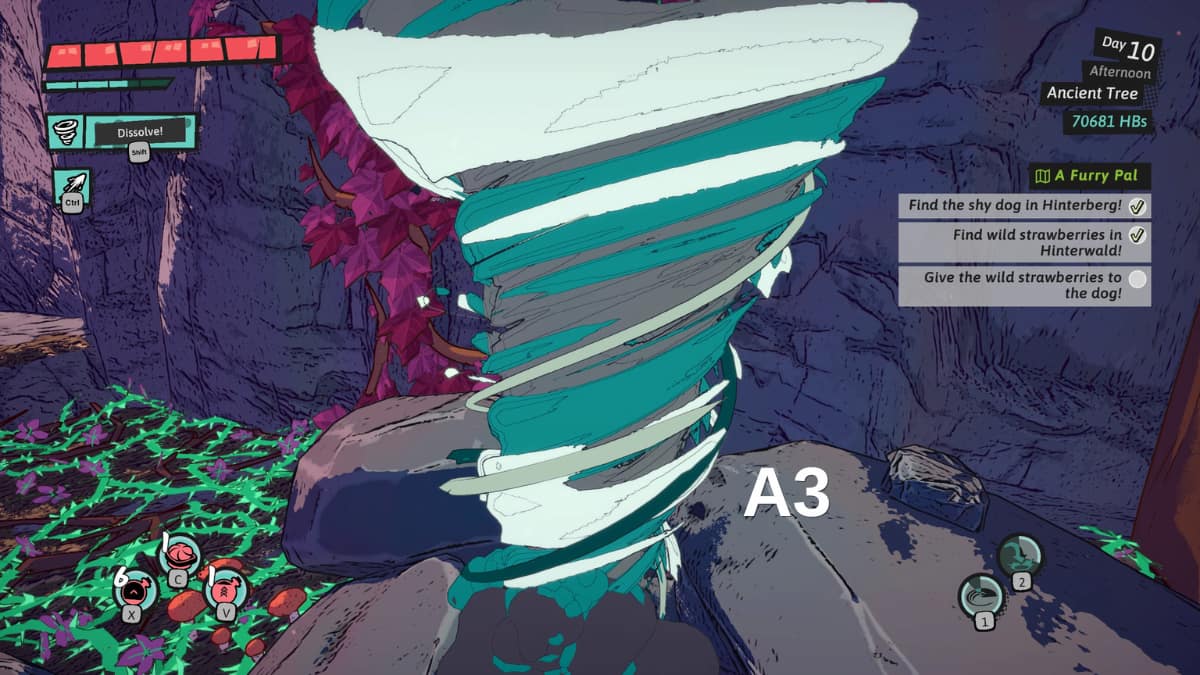
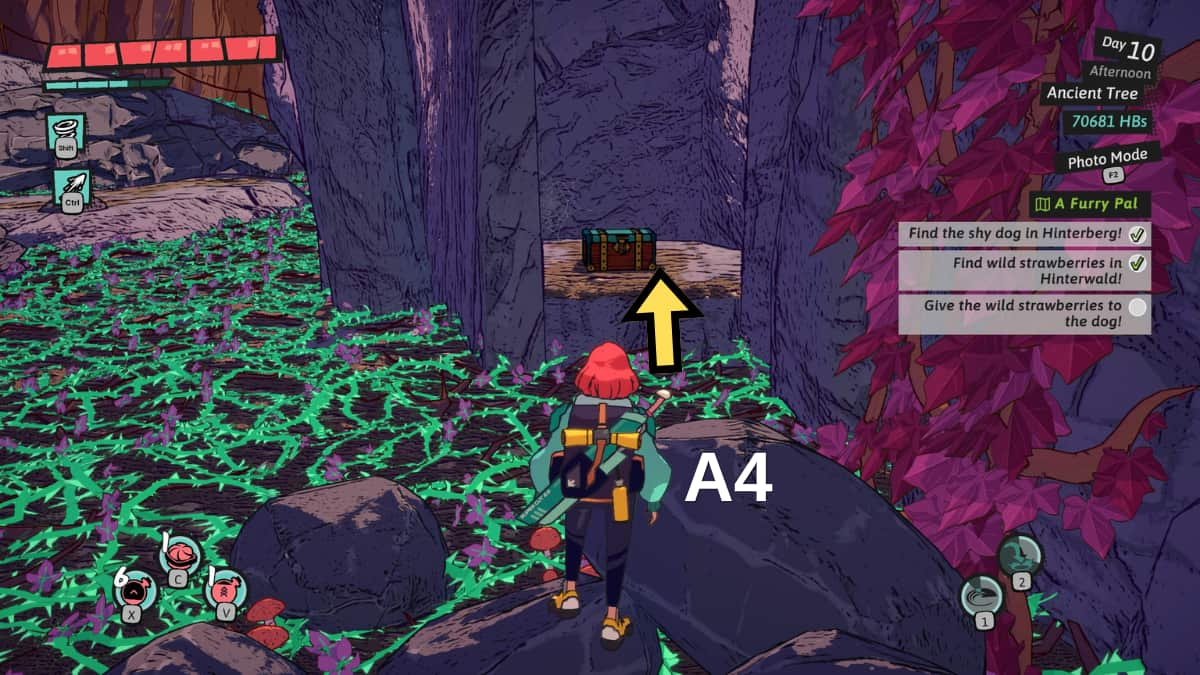
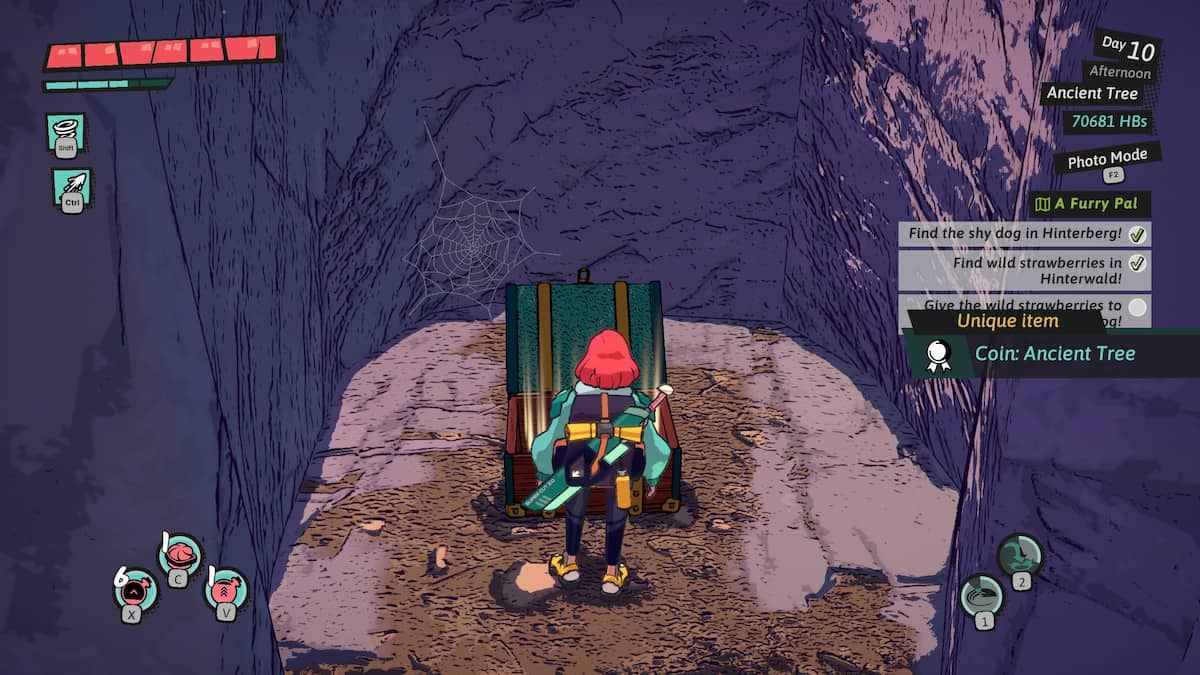
The coin for the Ancient Tree dungeon is hidden in the large room covered in vines (A1). Drop down from the ledge by the doorway and look to the right to see a pile of rocks on the far side of the room (A2). Use the Whirlwind spell to cross the vines to the right (A3). You’ll want to land on the patch of rocks on the far right side of the room. After landing there, turn to the left to find an alcove with a chest containing the Ancient Tree coin hidden in the wall (A4).
Waterlily River

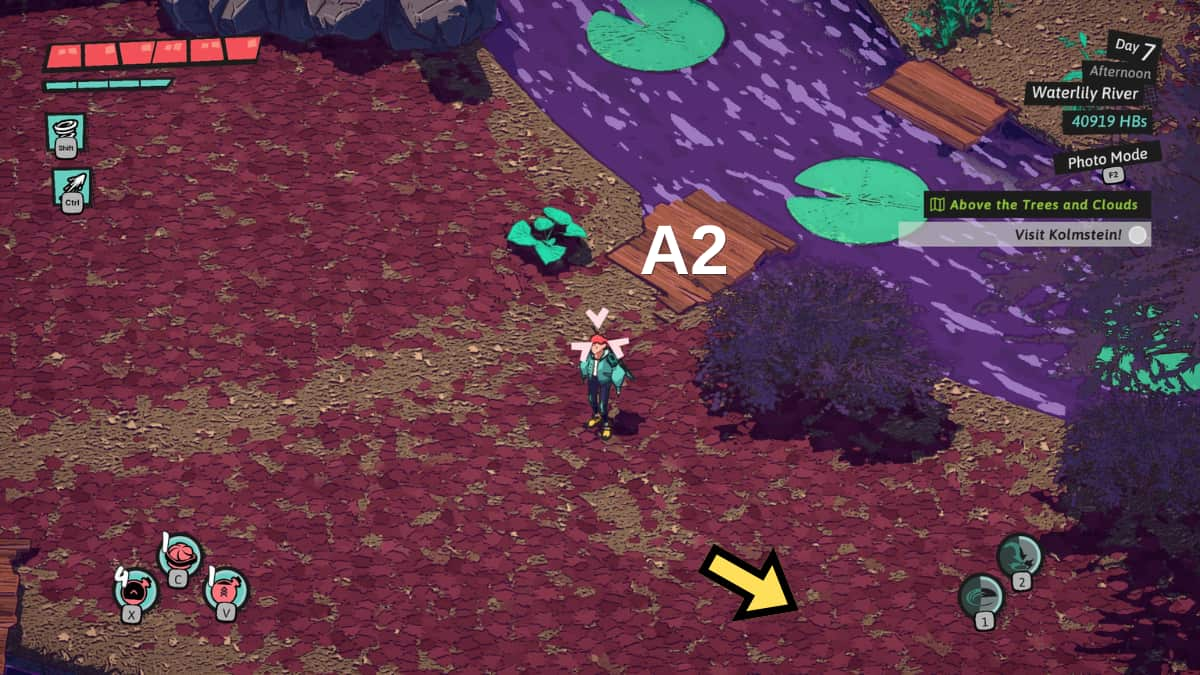
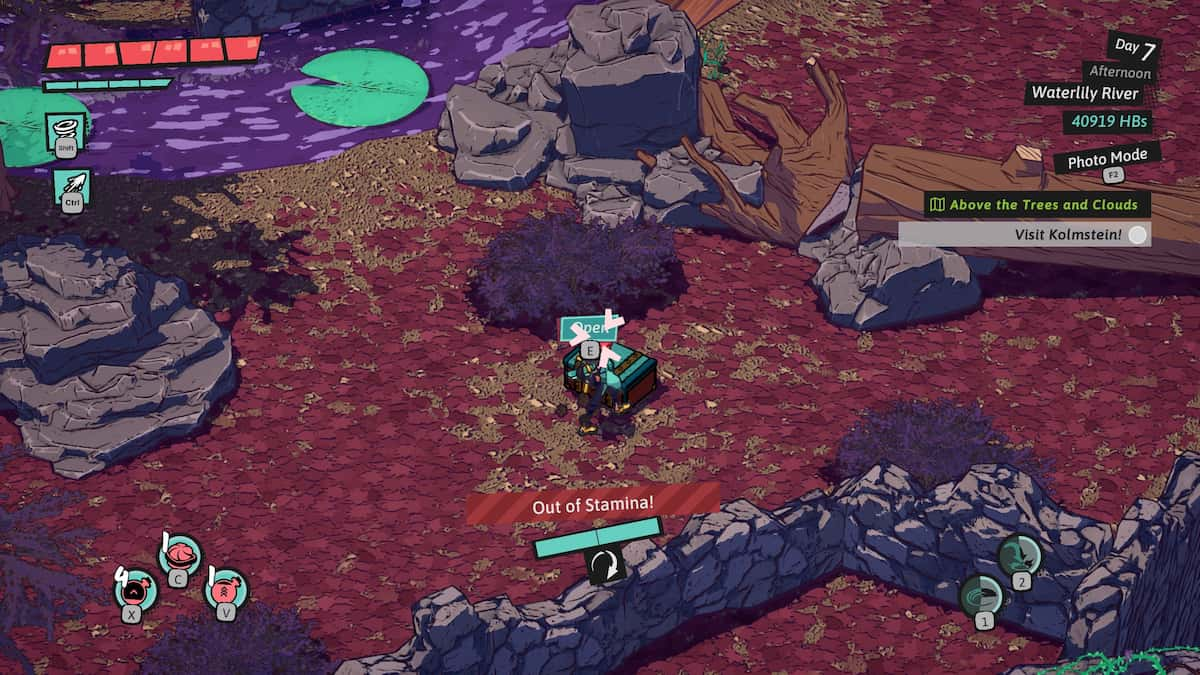
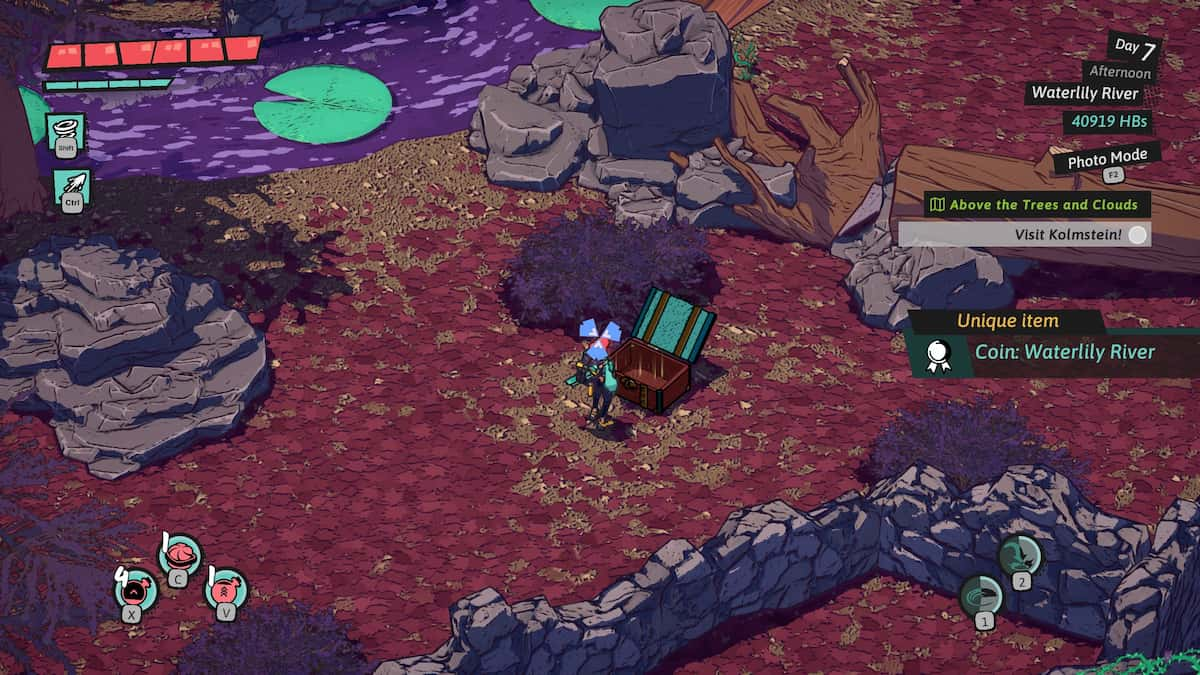
At Waterlily River, where the gameplay is distinctive yet reminiscent of various settings, keep a sharp eye on your surroundings to locate the hidden coin. Following the trek over the bridge in the initial image (A1), descend the cliffside and then proceed left towards the river. Once across the bridge and lilypads, move downhill and to the right (A2) to discover the chest containing the coin.
Overgrown Cave
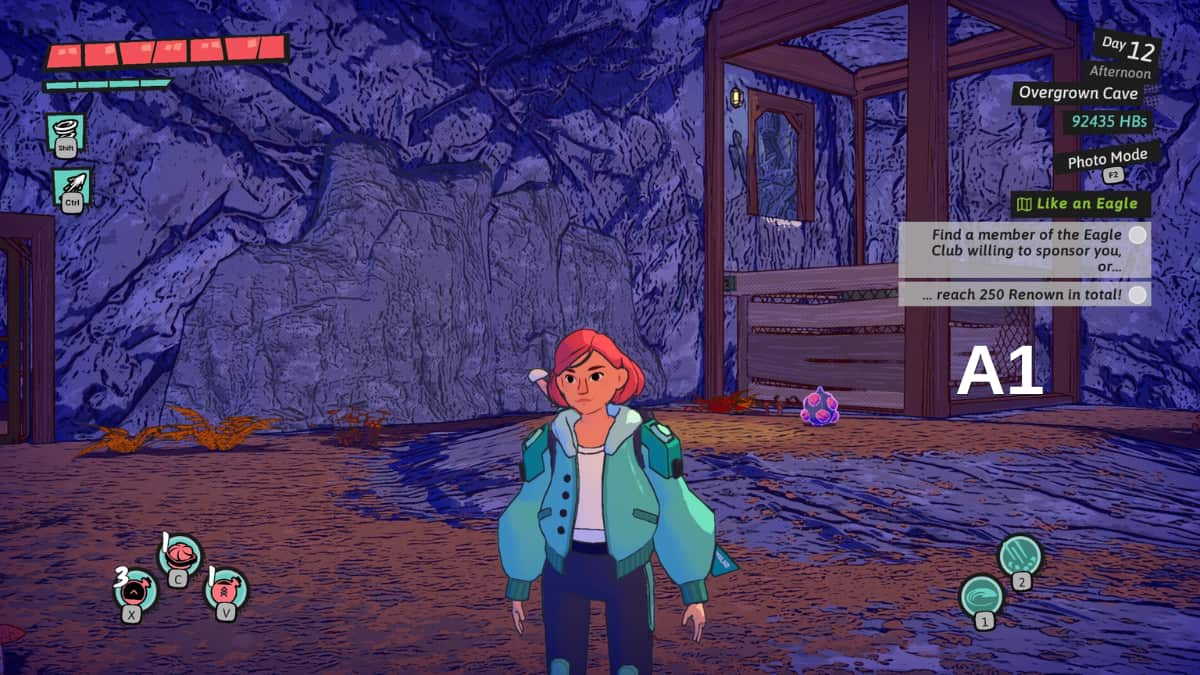
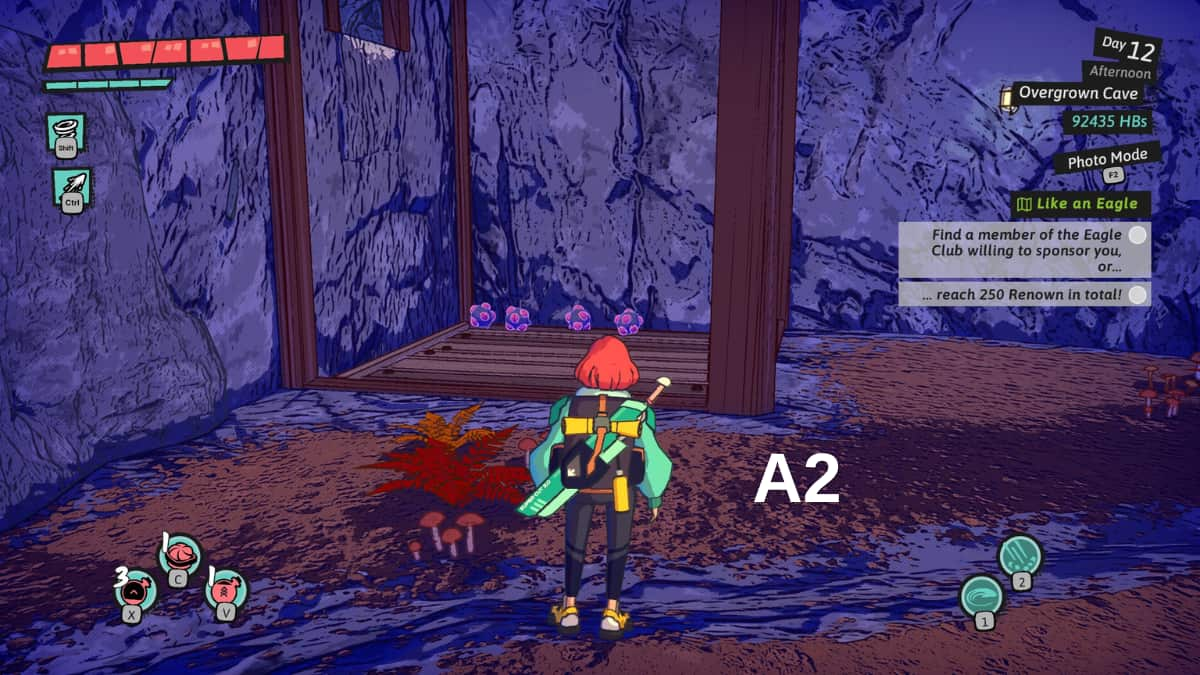
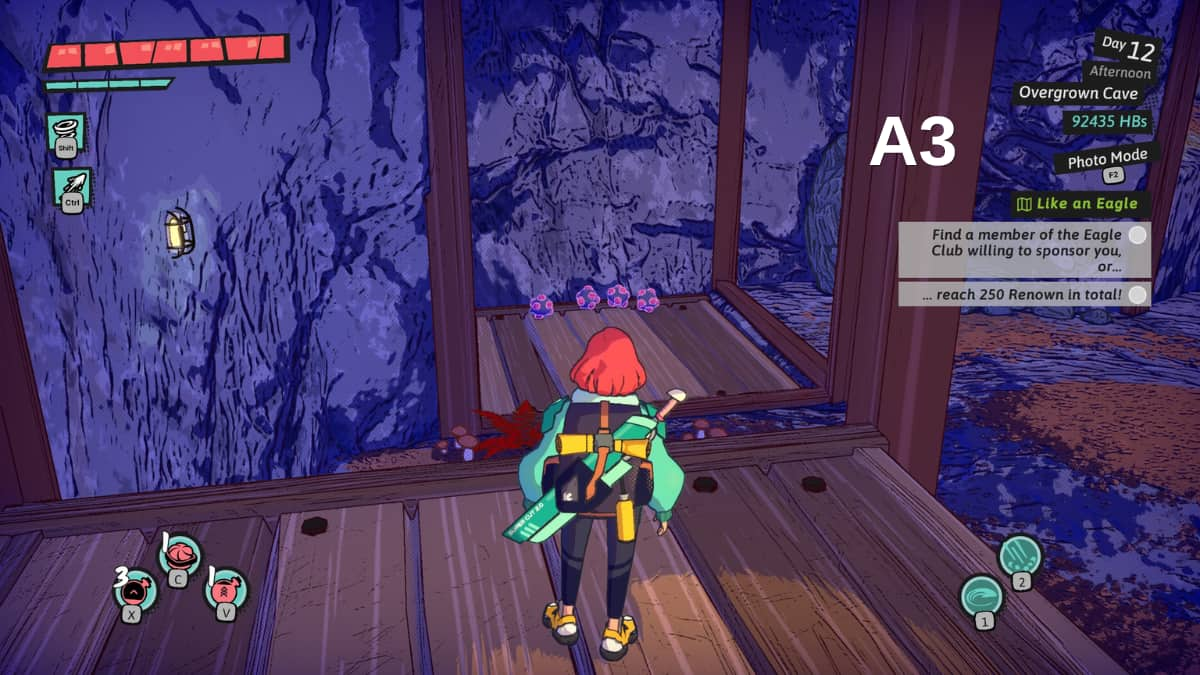
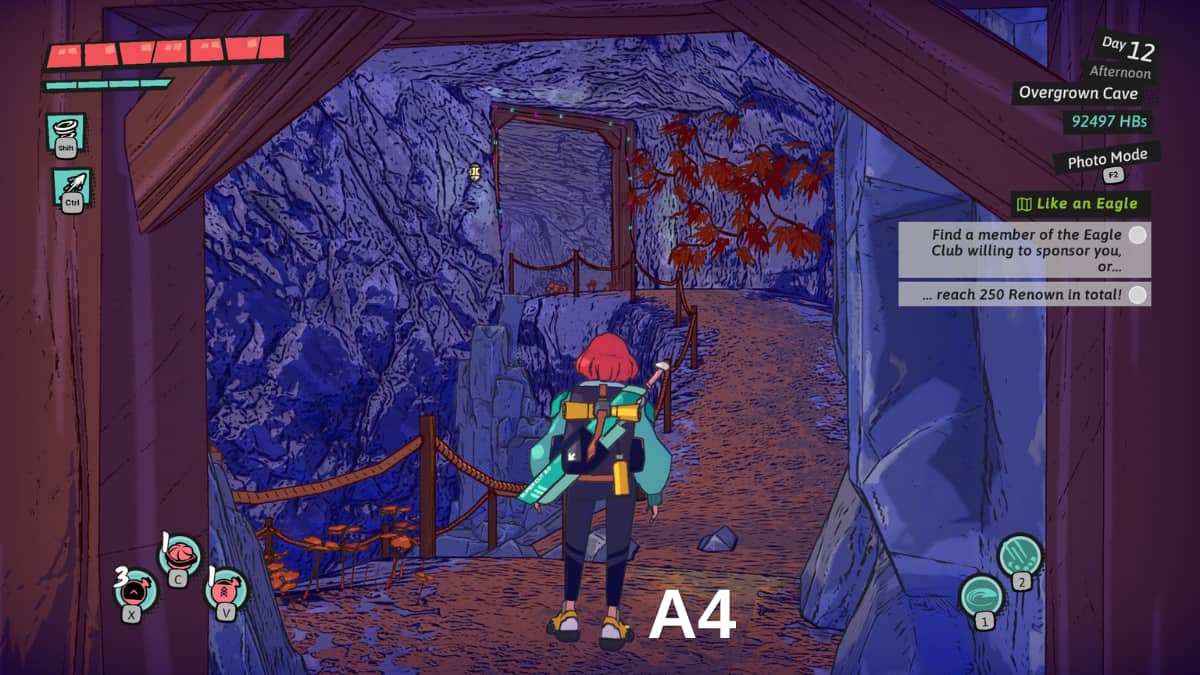
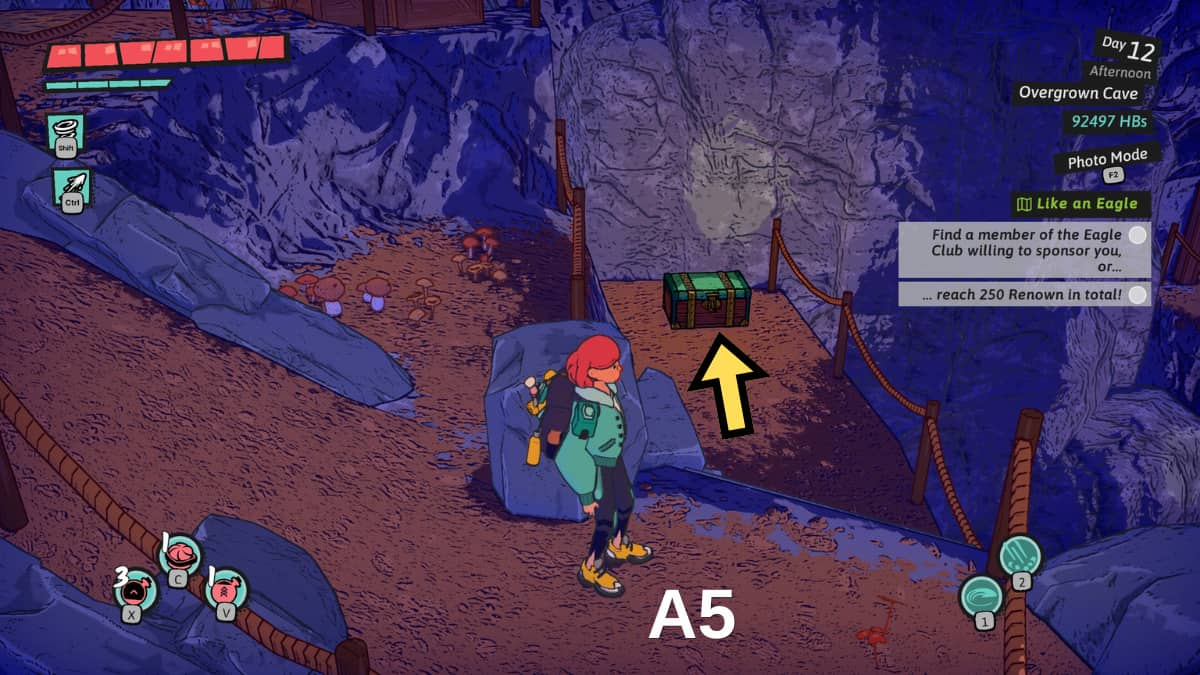
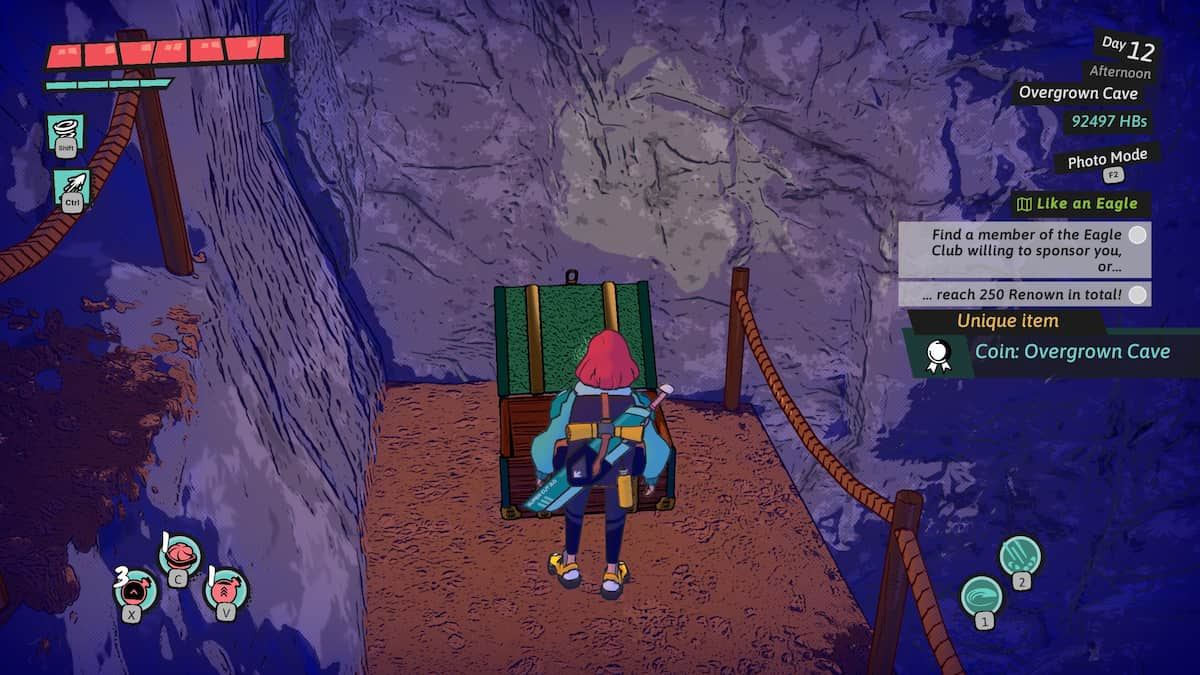
After solving the two-platform puzzle in room A1, the Overgrown Caves coin is located in the next area. To leave this room, cast your spells to move all four balls onto the left platform. Once it lowers, step onto it and toss all the balls to the right platform. Leave the room through exit A4. Once outside, turn right and look for a lower ledge near the door you exited – that’s where you’ll find the chest containing the Overgrown Caves coin (location A5).
Mushroom Isles
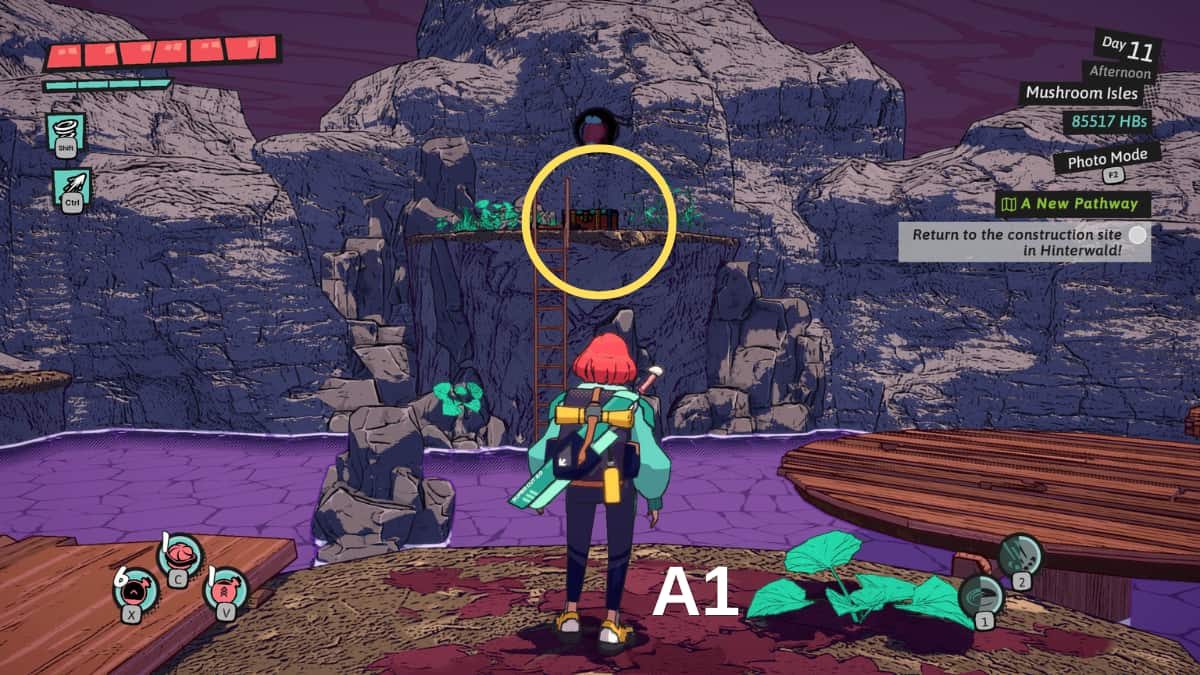
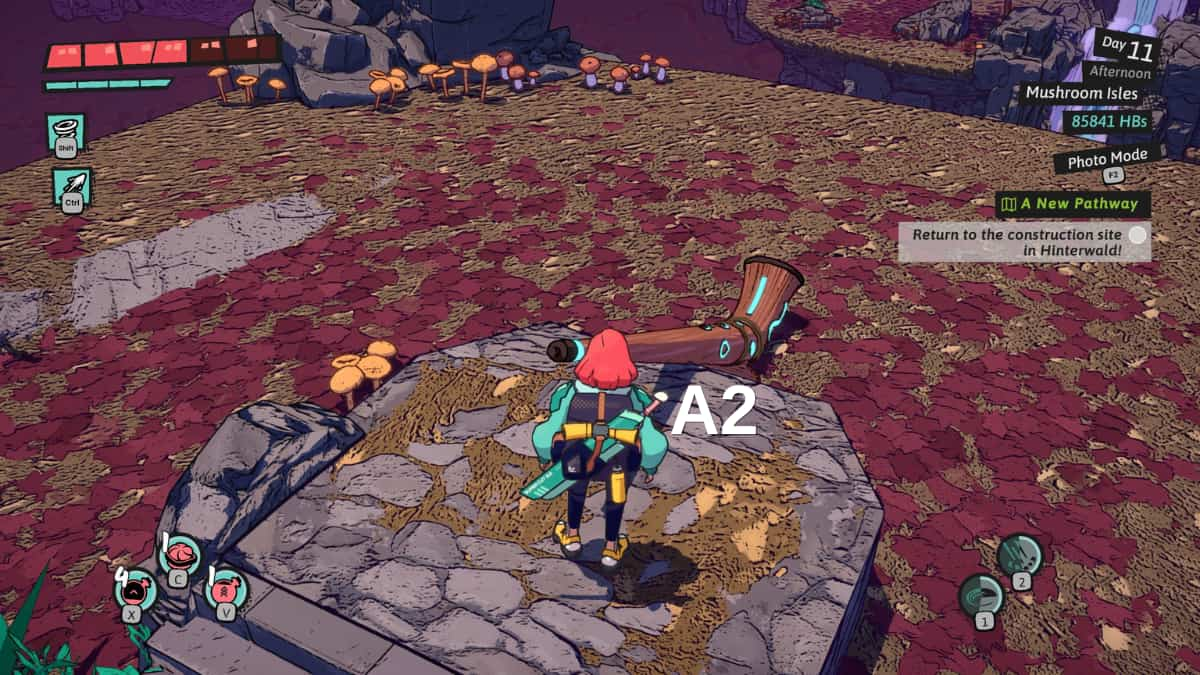
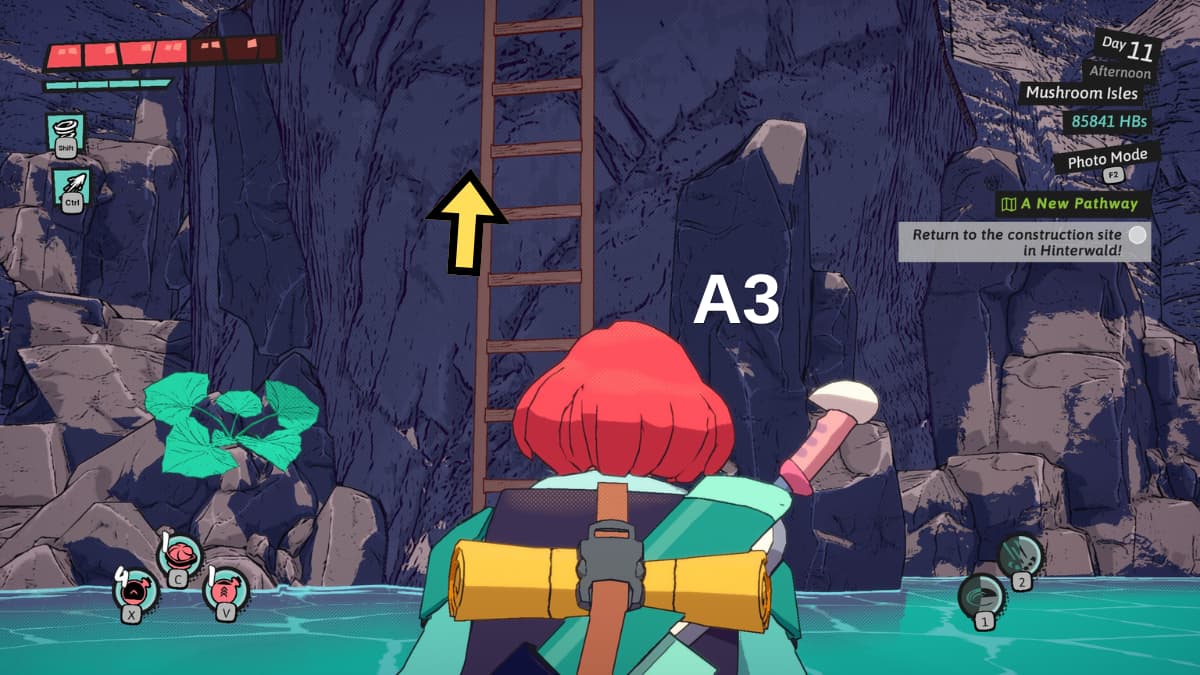
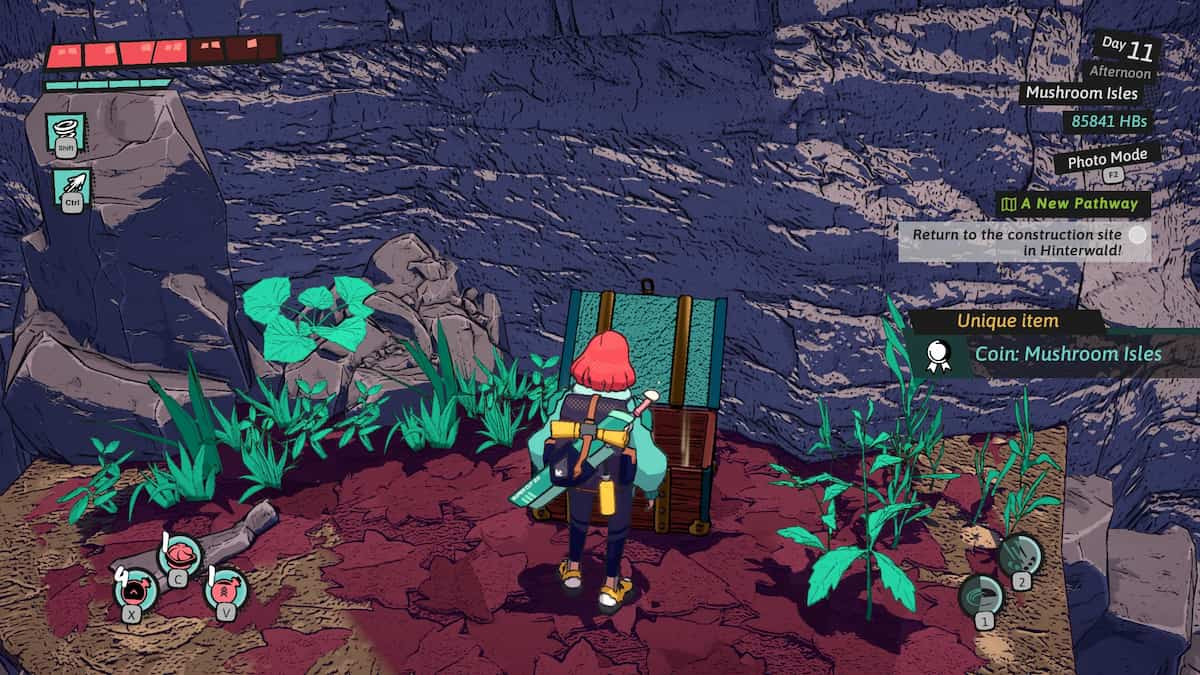
As a gamer, I’d describe it like this: To reach the Mushroom Isles dungeon hideout, you’ll first need to win Hinterberg’s trust by befriending his loyal hound. Once that’s done, make your way into the dungeon and head straight into the initial spacious chamber (Room A1). Over there, against the wall, lies a chest holding the precious Mushroom Isles coin. To grab it, simply move to the left and enter the adjoining room. Next, use the horn in your inventory to purify contaminated areas of water within the dungeon (Area A2). Once the water is clean, go back to Room A1. With the water now pure, you’re free to ascend the ladder without fear and claim your hard-earned reward – the Mushroom Isles coin (Location A3).
Windsbraut’s Treetop
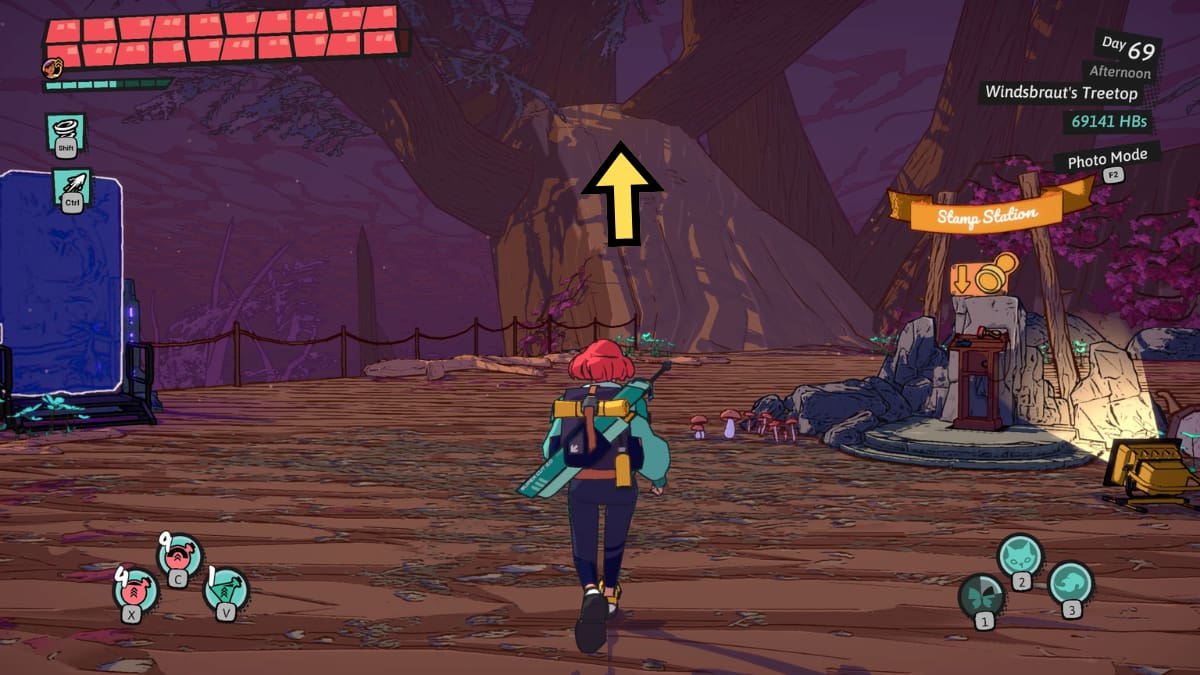
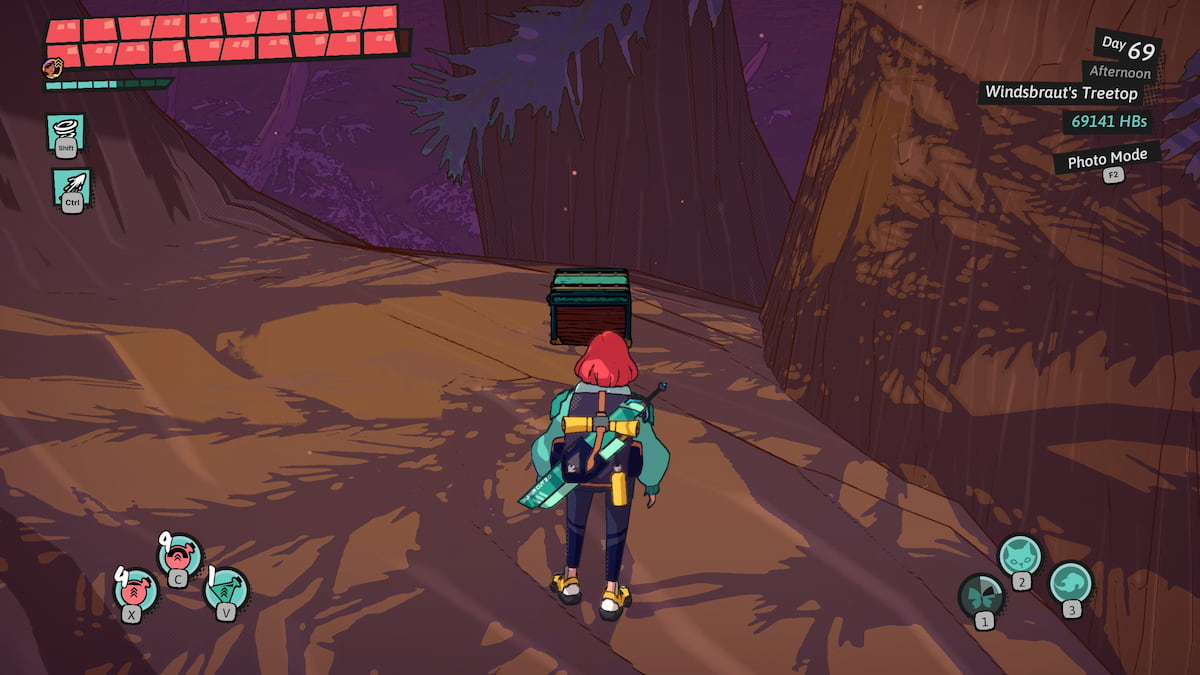
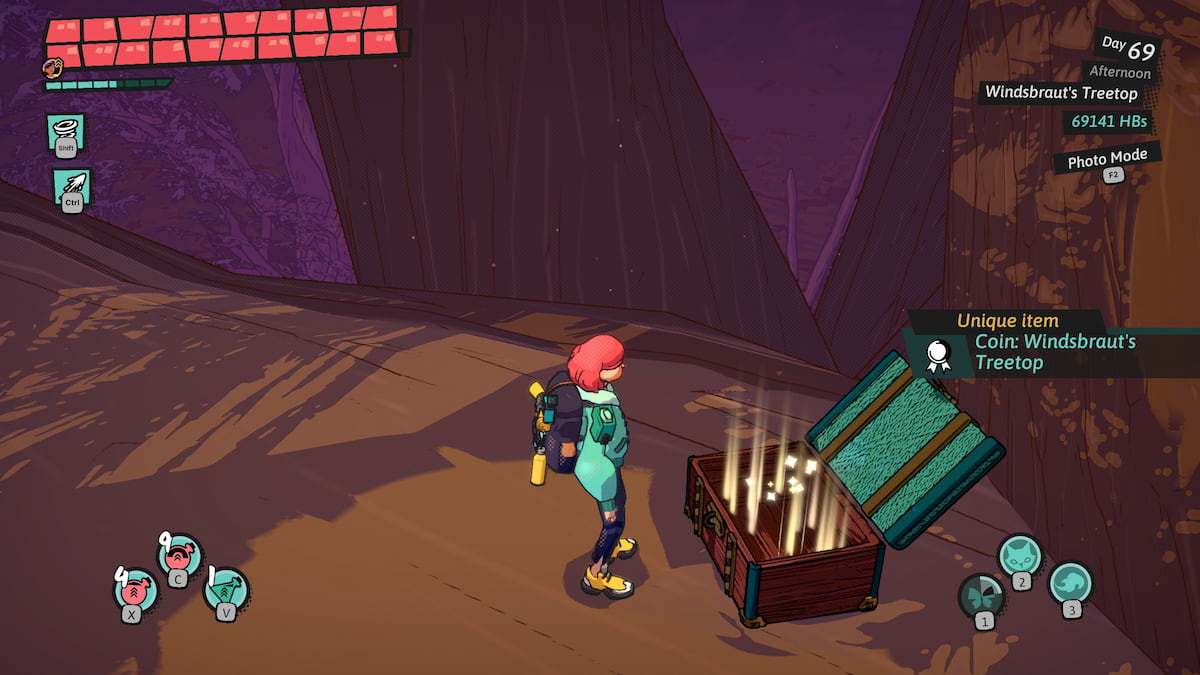
After passing the stamp station in Windsbraut’s Tree, continue your journey by walking up the sizable branch located on the tree’s opposite side. Once you’ve ascended this branch, you will discover a platform where a chest is waiting for you. Inside the chest lies the coveted coin.
Everchanging Grove
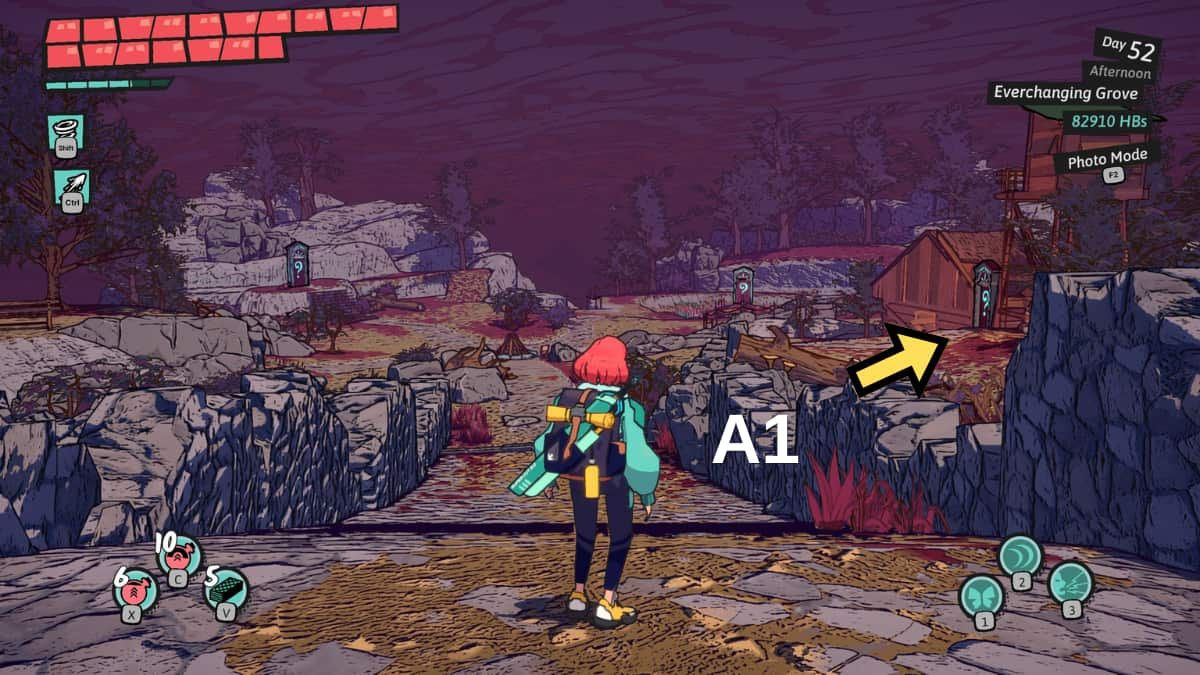
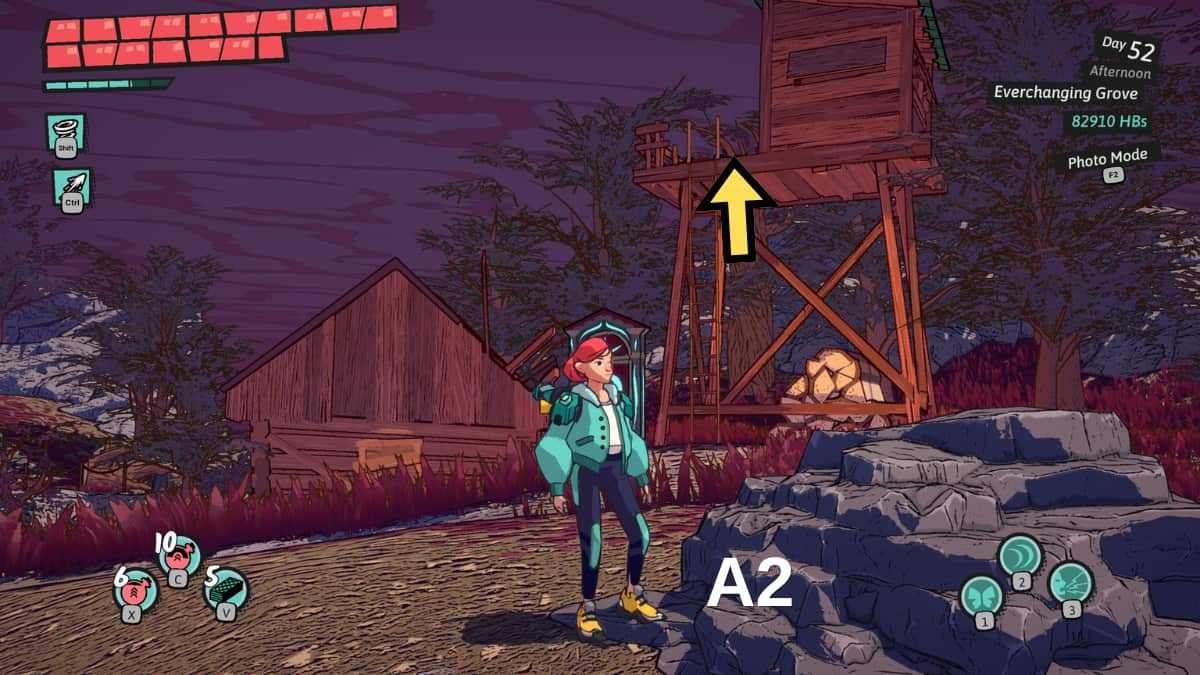
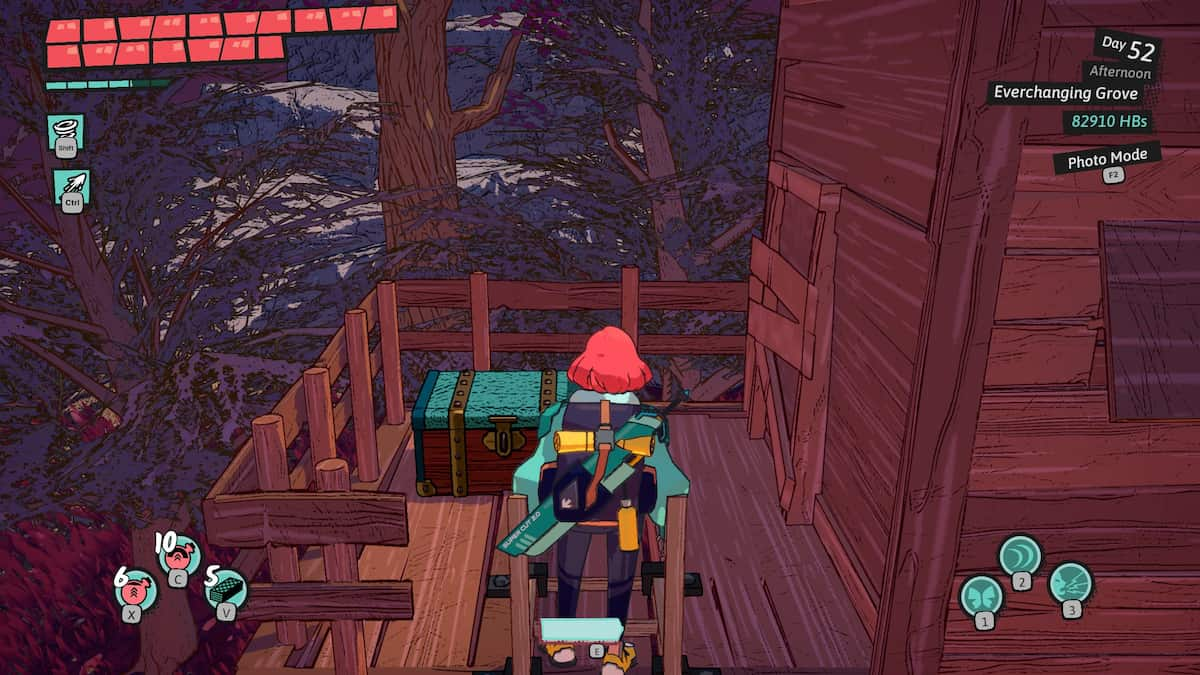
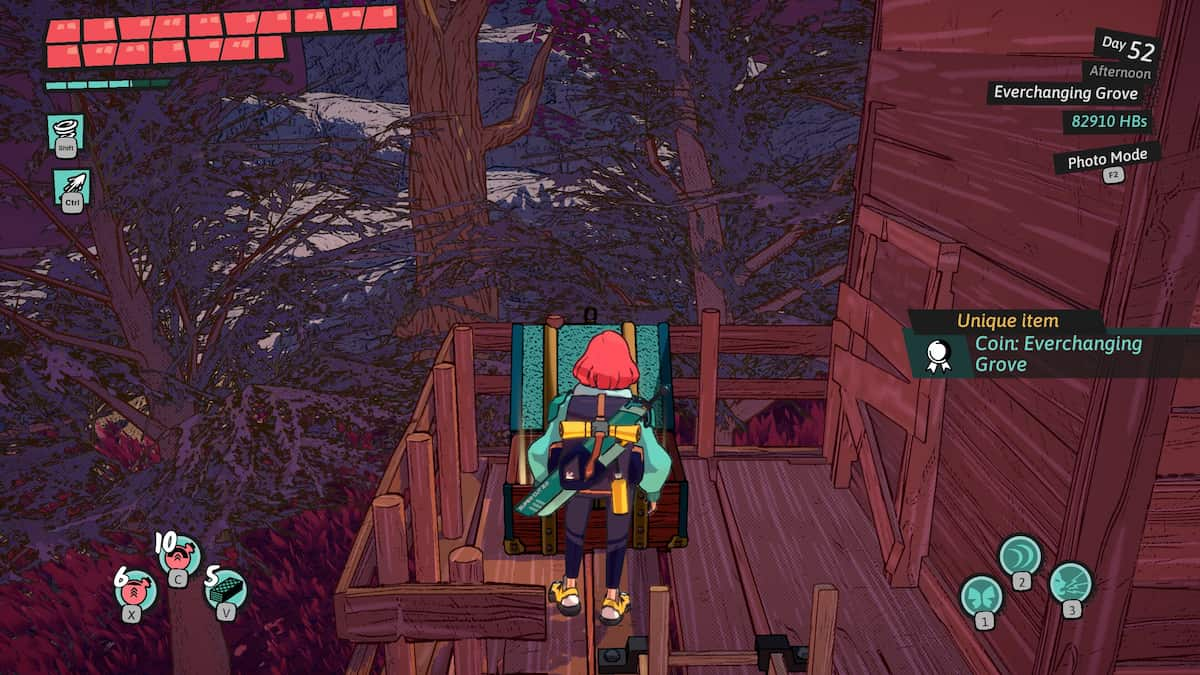
In the main room of The Everchanging Glades dungeon, you’ll find the special coin referred to as the Dungeon Coin. To reach your destination, head right and approach the decrepit house situated next to the tower with a visible ladder. Ascend the ladder and there you will discover a wooden platform holding a chest containing the coin.
Bizarre Towers
As a seasoned adventurer with years of experience delving into the depths of treacherous dungeons, I can confidently guide you through the intricacies of obtaining the elusive Bizarre Towers coin.
Kolmstein Dungeon Coins
Kolmstein is a snowy, icy glacier with five equally frozen dungeons.
Glacial Galaxy
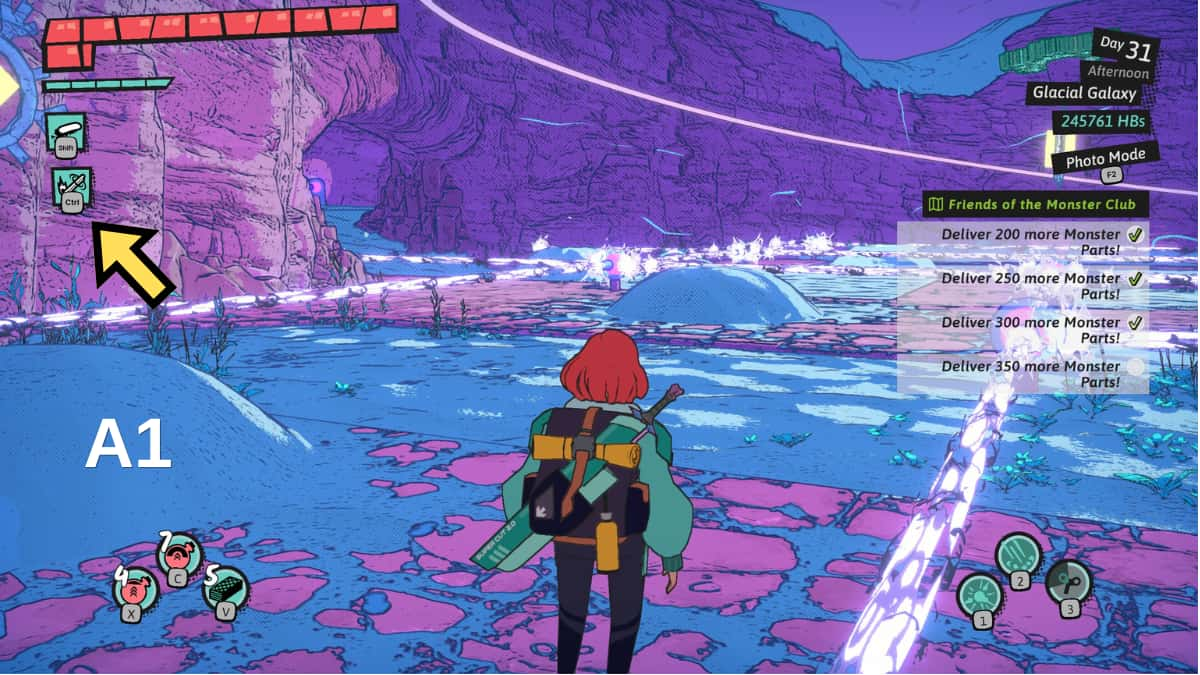
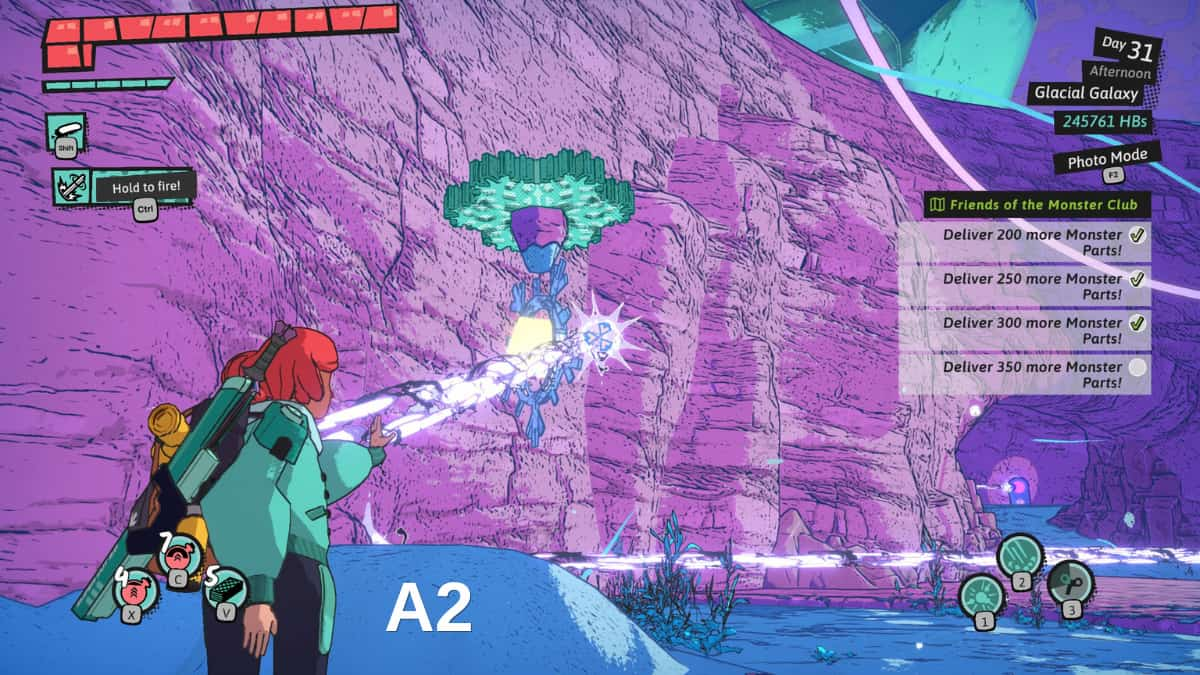

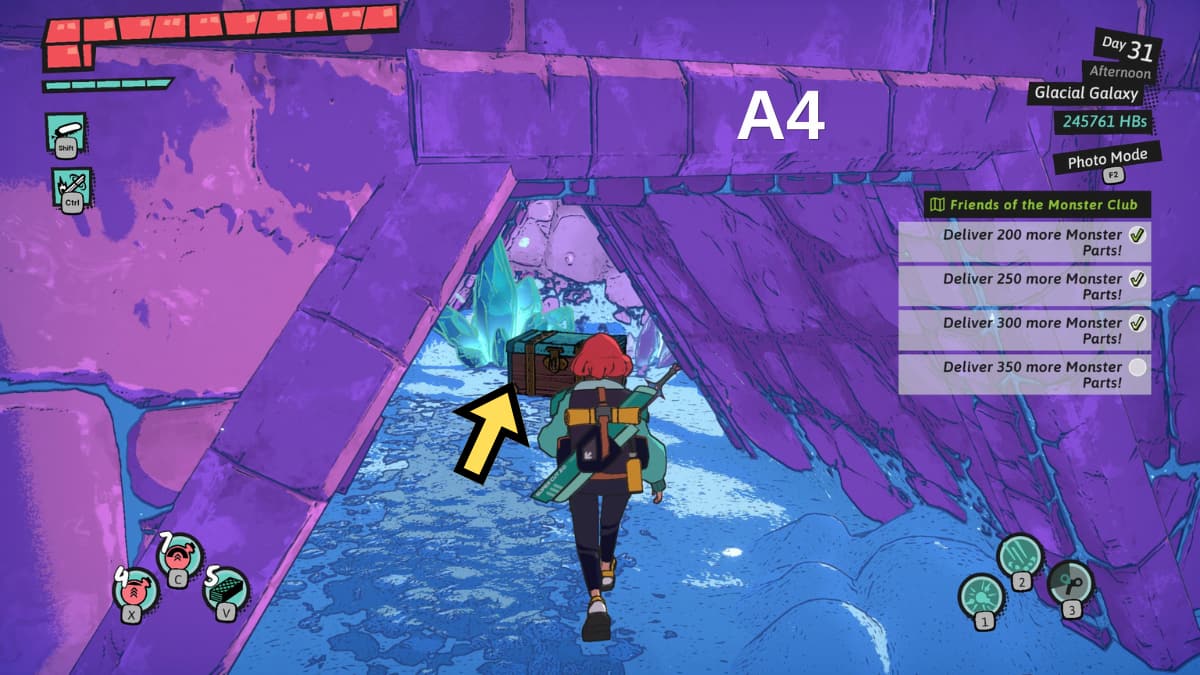
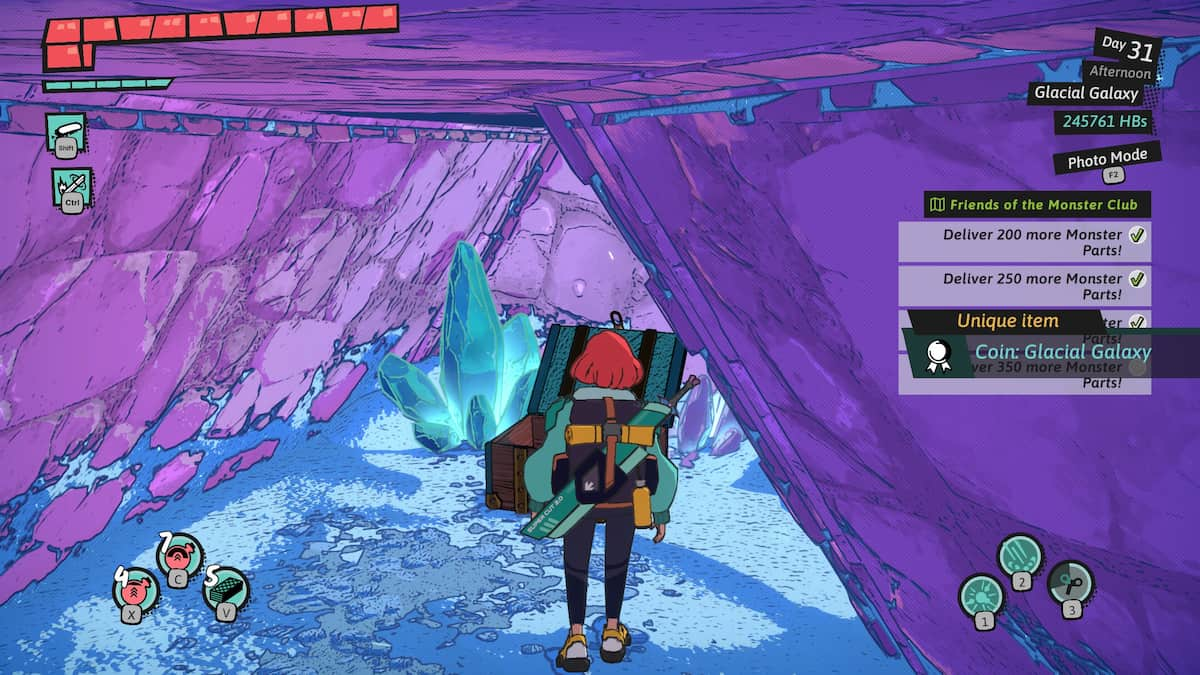
In the spacious chamber of the Glacial Galaxy fortress, where the laser maze lies, you’ll discover the concealed coin. Move towards the right wall of the room and face the entrance (A1). Look to your left and spot the snowflake button (A2), shoot it. The floor beneath will lower, unveiling a hidden space (A3) near the edge of the chamber. Proceed into this new area to claim the Glacial Galaxy Coin tucked away within a chest (A4).
Snowflake Slalom
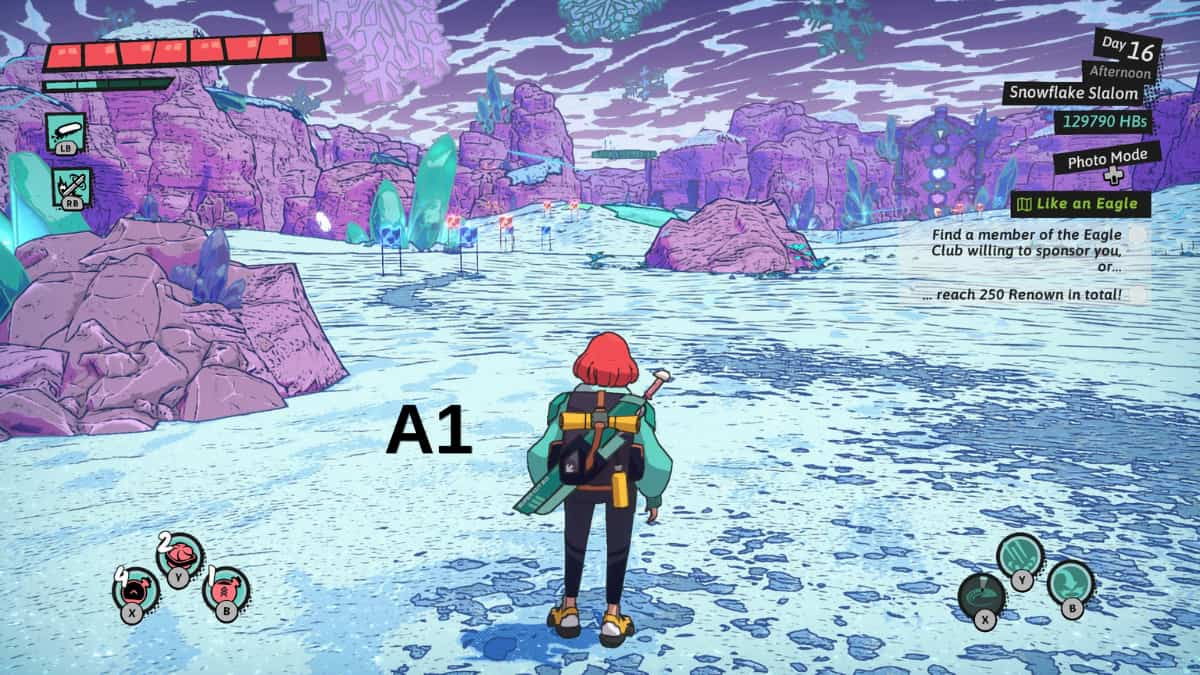
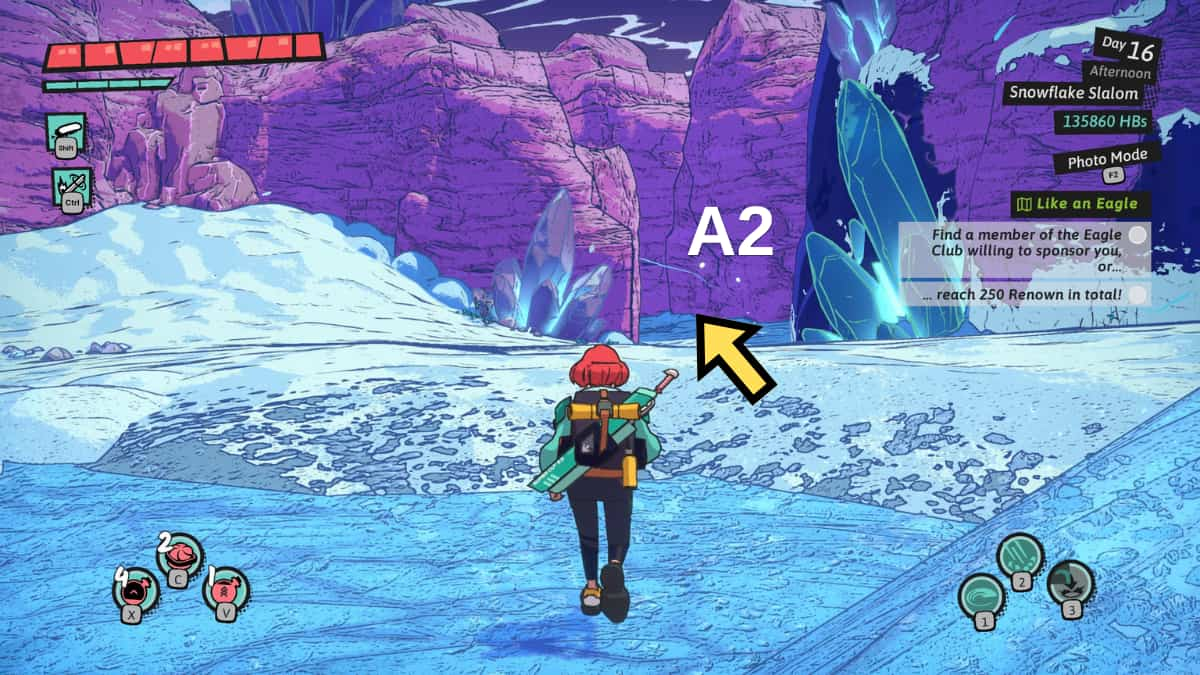
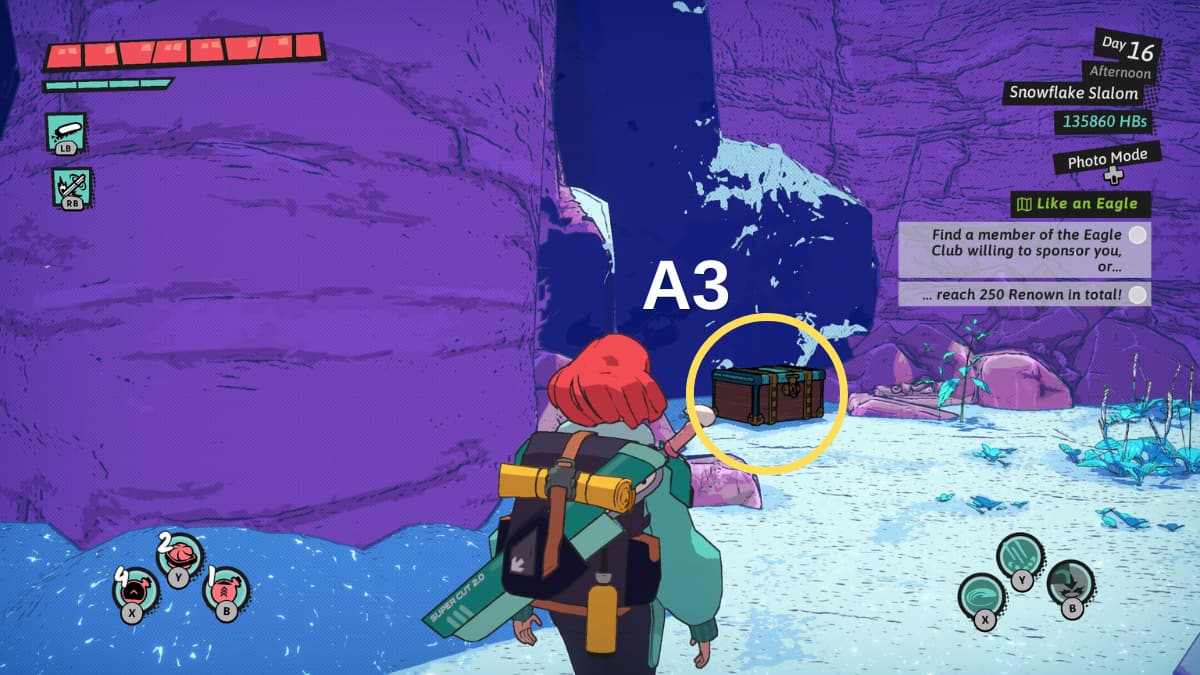
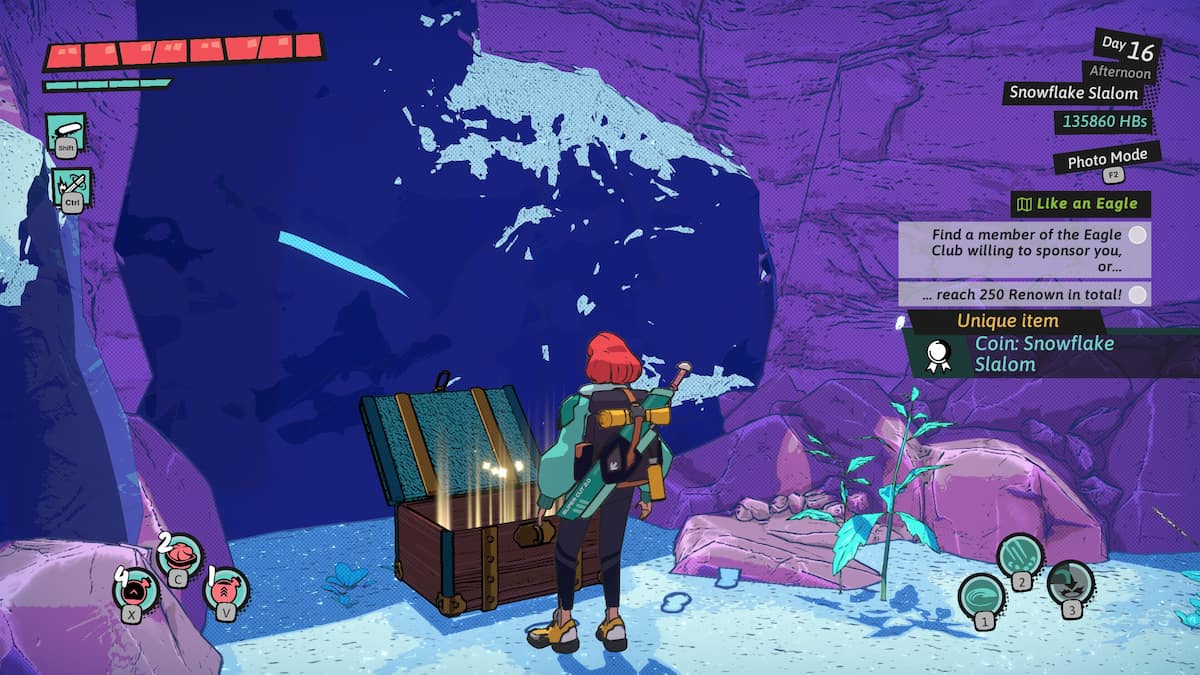
Upon passing through the initial large gate, you’ll come across another vast chamber, where a colossal gate with three locks (A1) awaits. In this spacious area, keep an eye out for a frozen waterfall with two handrails (A2). The alley close to it is where you’ll find the Snowflake Slalom coin concealed within a hidden chest (A3).
Snowy Summit

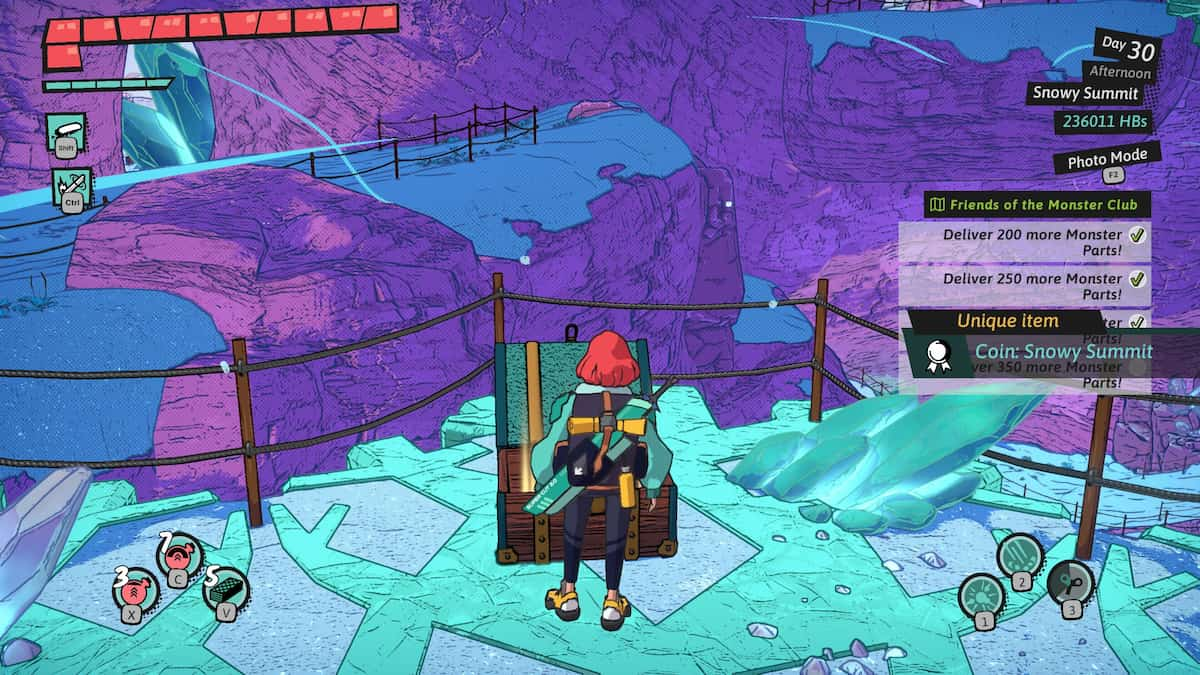
As a seasoned mountain explorer, I’ve embarked on countless adventures to find hidden treasures nestled in the most unexpected places. The legend of the Snowy Summit coin piqued my interest, and I was determined to uncover its location.
Basilisk’s Roost

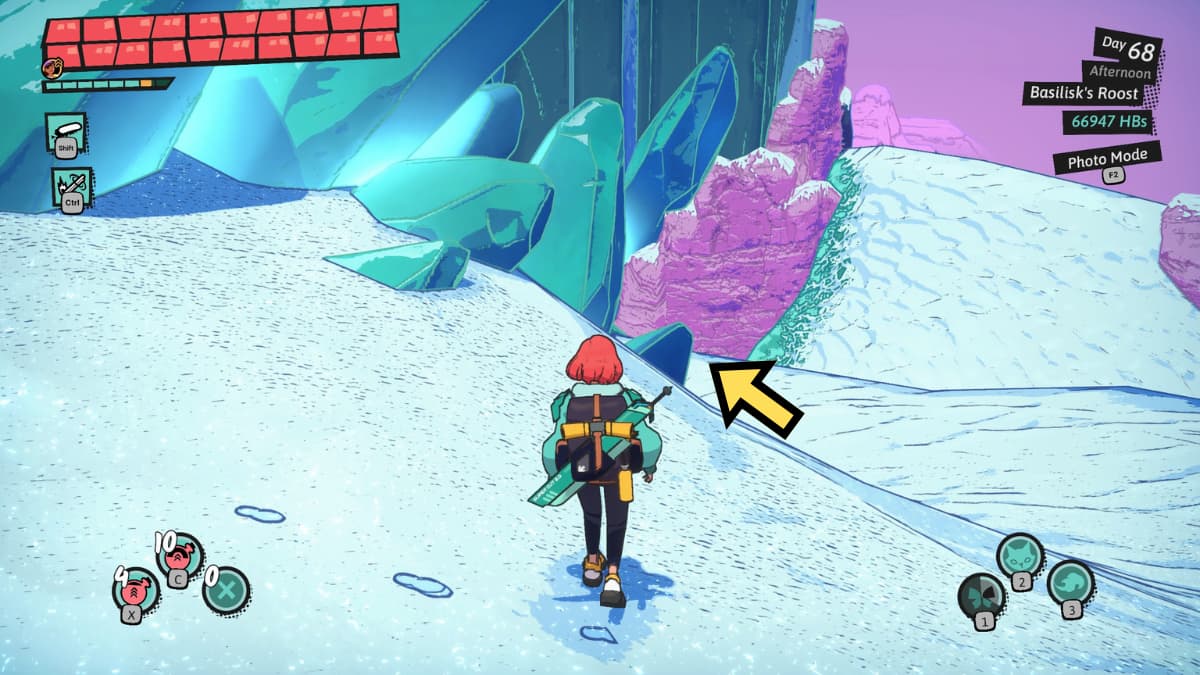
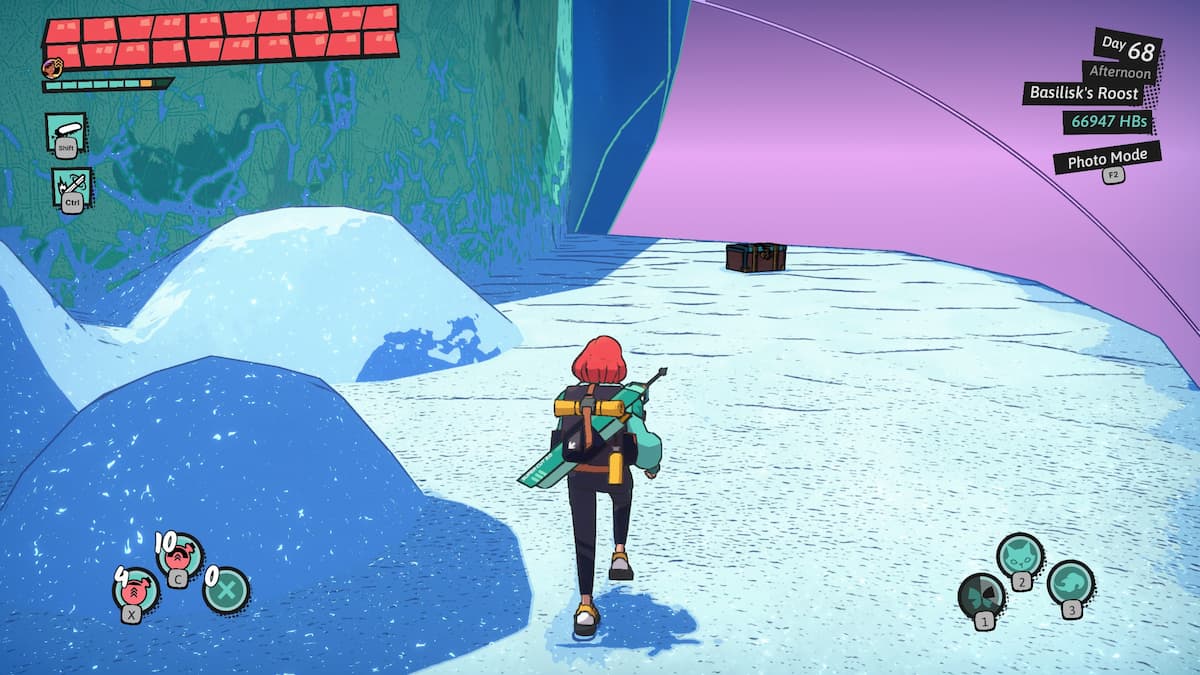
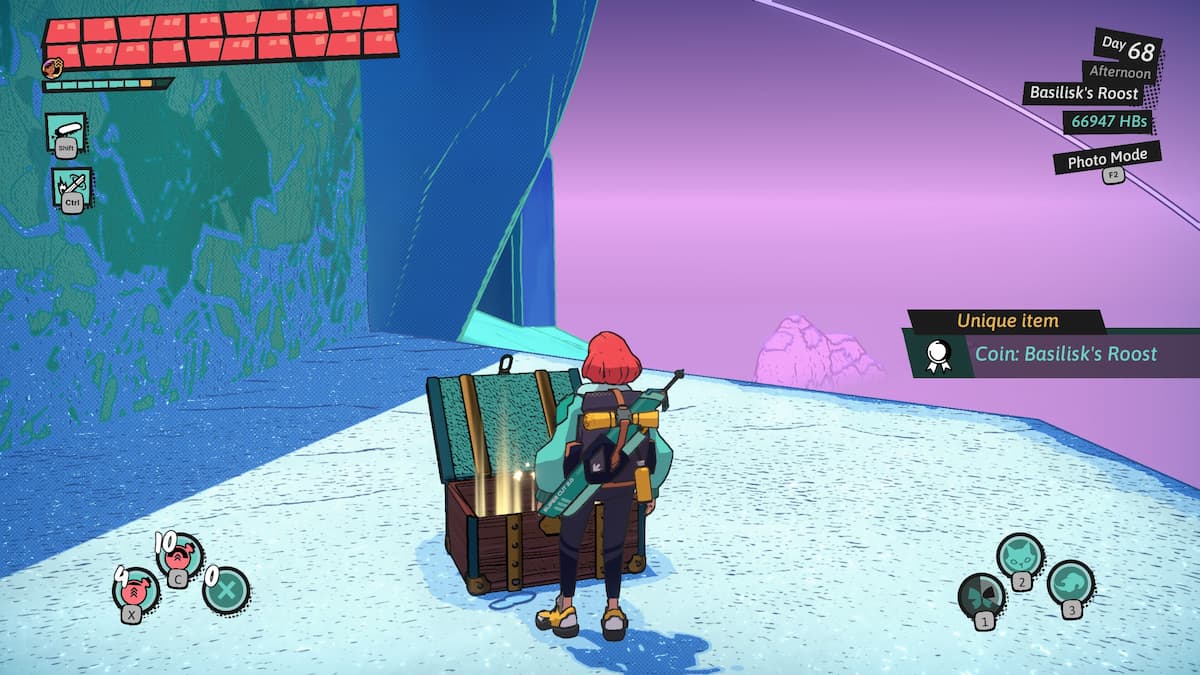
The Basilisk’s Hideout Coin is concealed on the initial isle where you encounter the Basilisk. Rather than departing from the island, seek a narrow trail on its right side. Continue along the path until you reach the terminus, where you will find a chest containing the coin.
Icicle Trail
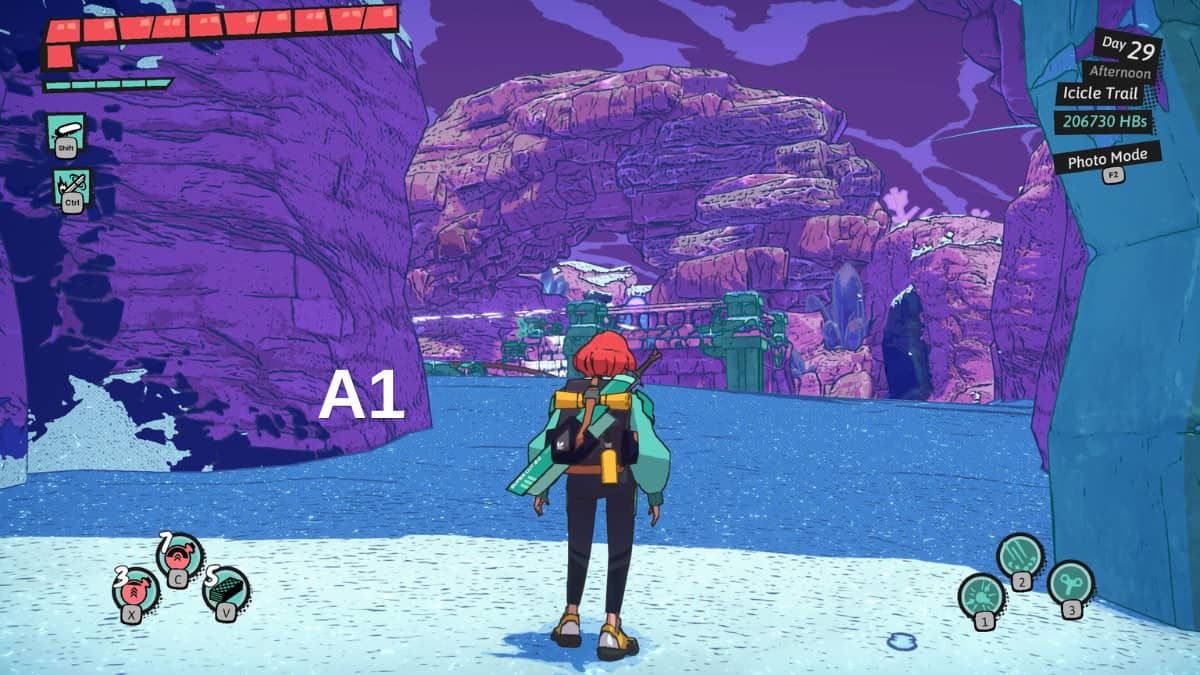
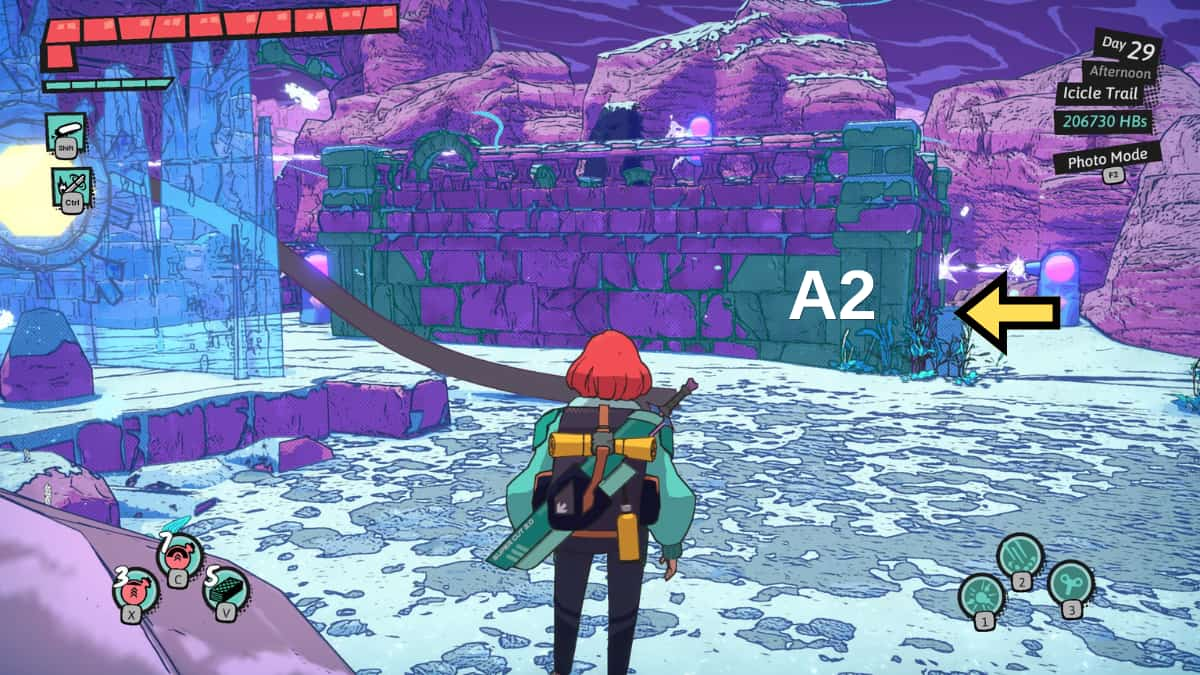
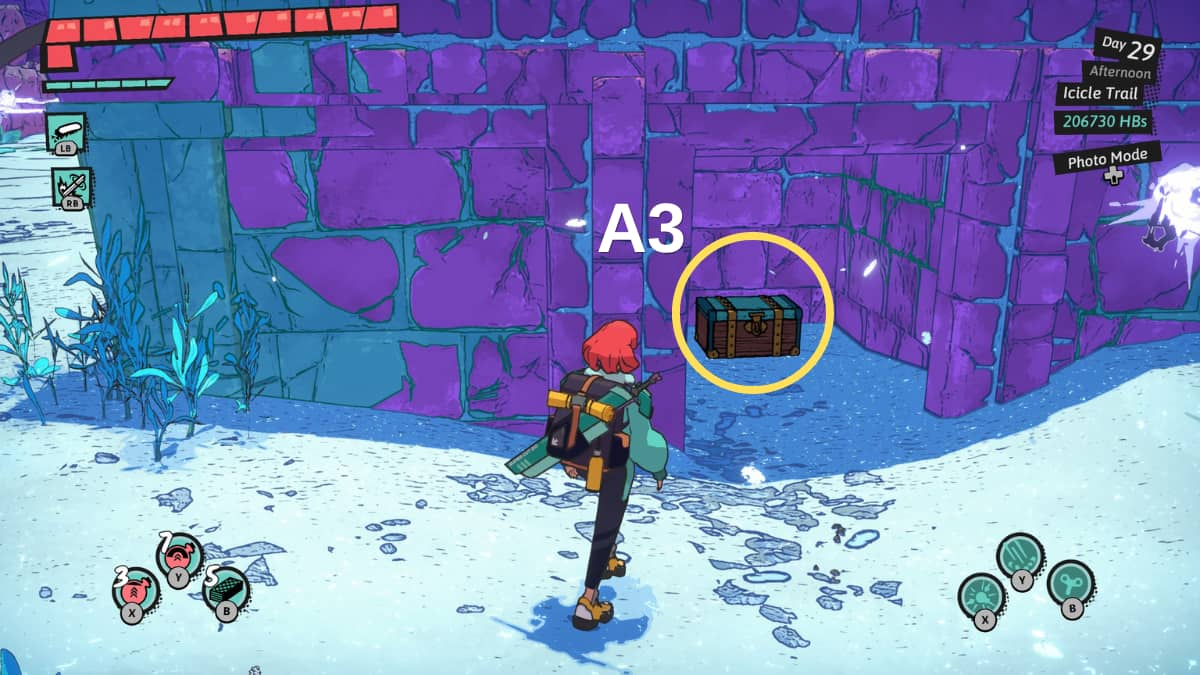
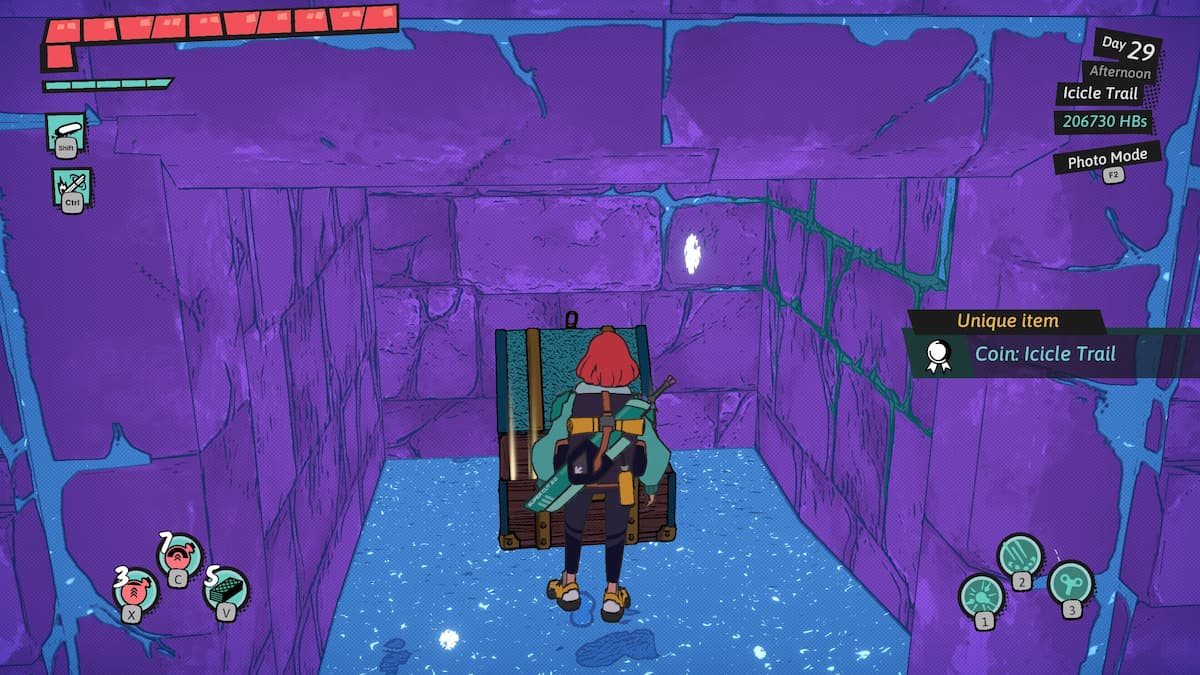
In the laser challenge area, you’ll come across the Icicle Trail token located in a room with two adjustable platforms labeled A1. To reach it, position platform A1 on the left to be raised while keeping platform A1 in the middle stationary. Circle around to the back left corner where there’s a snowflake toggle switch. Once you’re there, observe the elevated platform (A2). A concealed nook will become visible on its side. Simply advance towards this secret nook to reveal and access the hidden chest holding the Icicle Trail coin (A3).
Brünnelsumpf Dungeon Coins
Near Hinterberg lies the Brünnelsumpf, an area inspired by swamps with five distinctly different watery hideaways for exploration. In each, you’ll find unique ruins of castles.
Prisonkeep Island
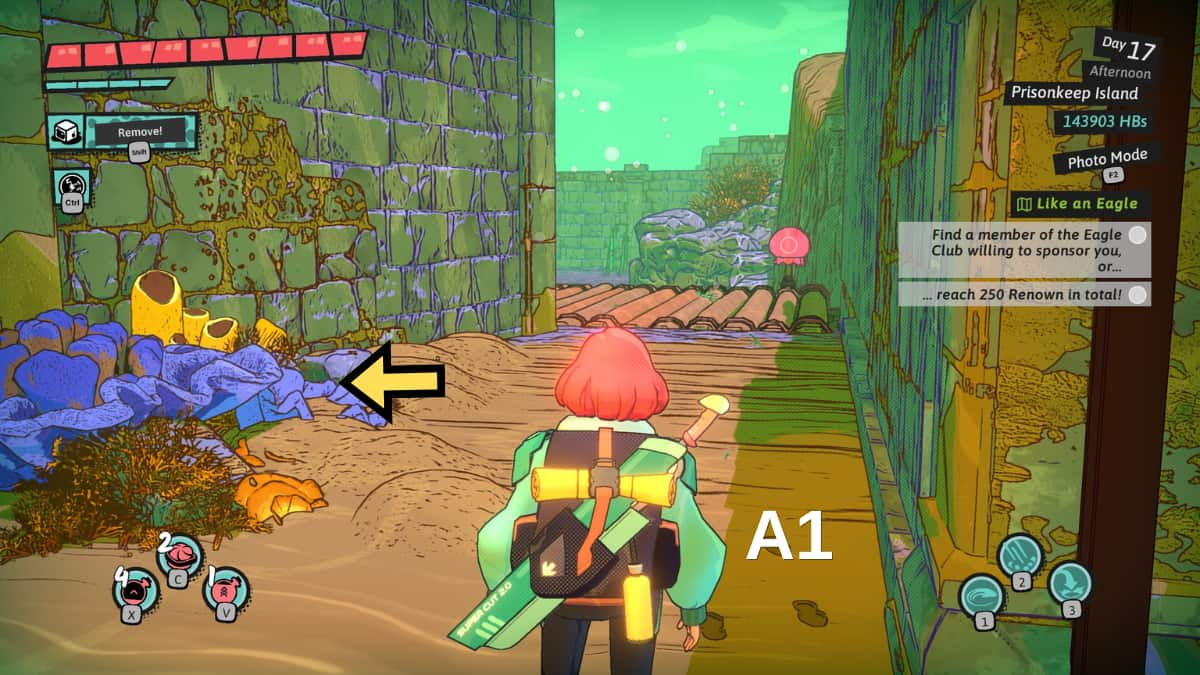
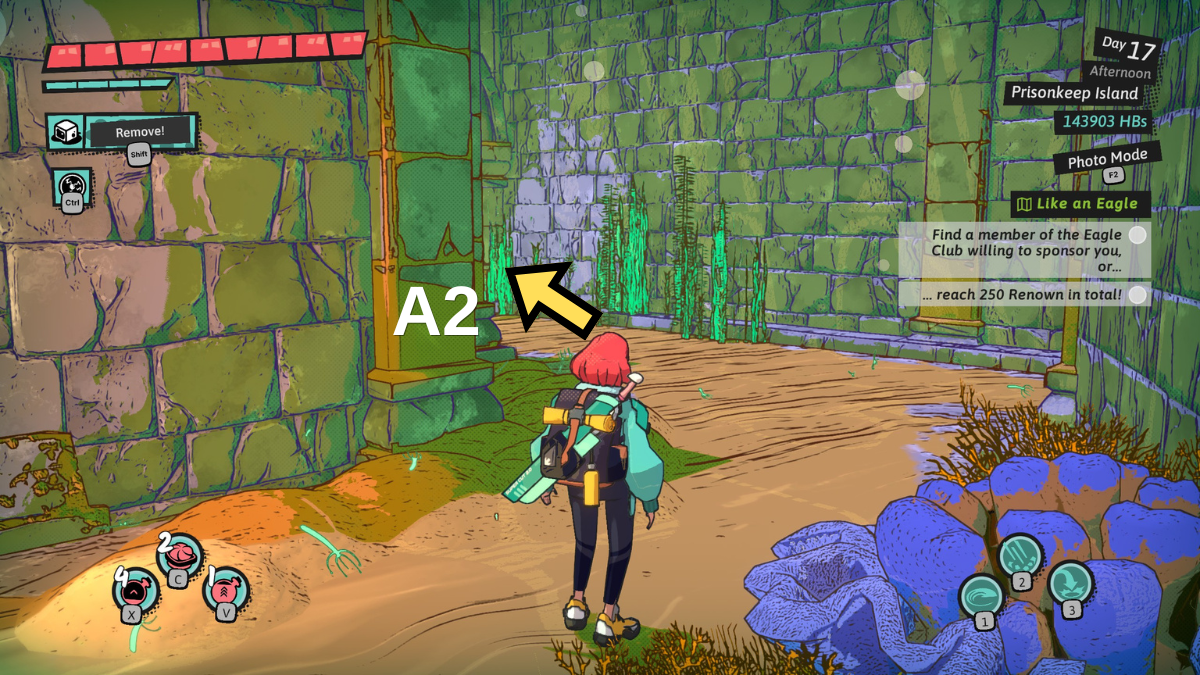
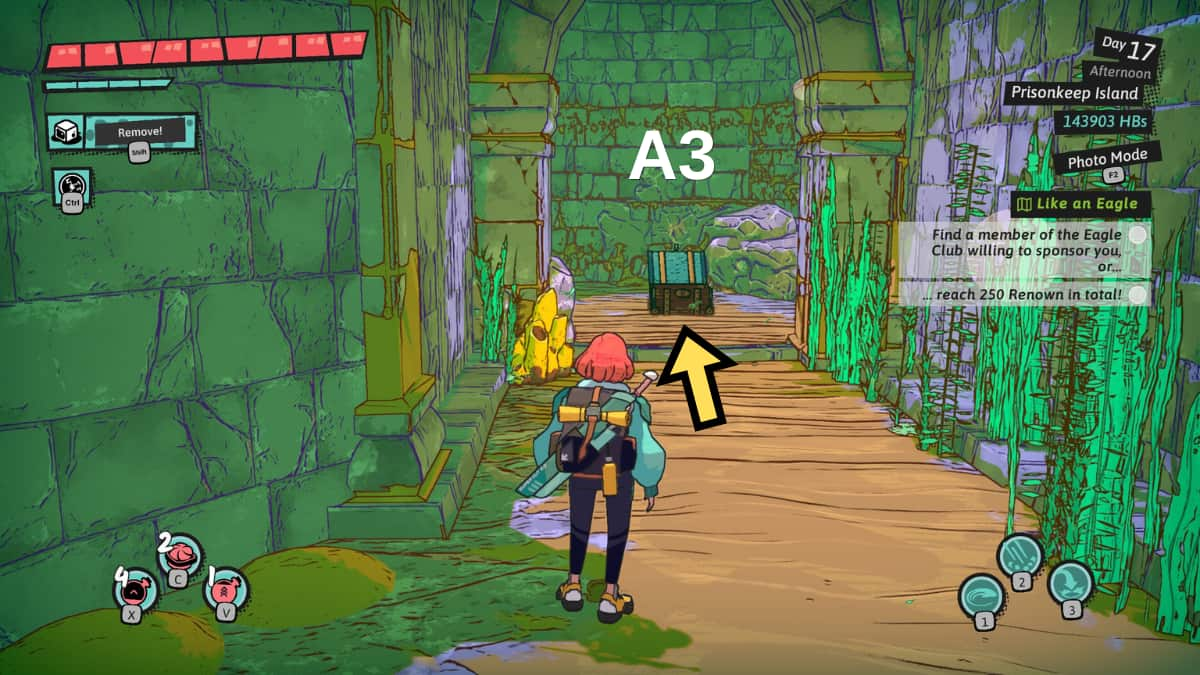
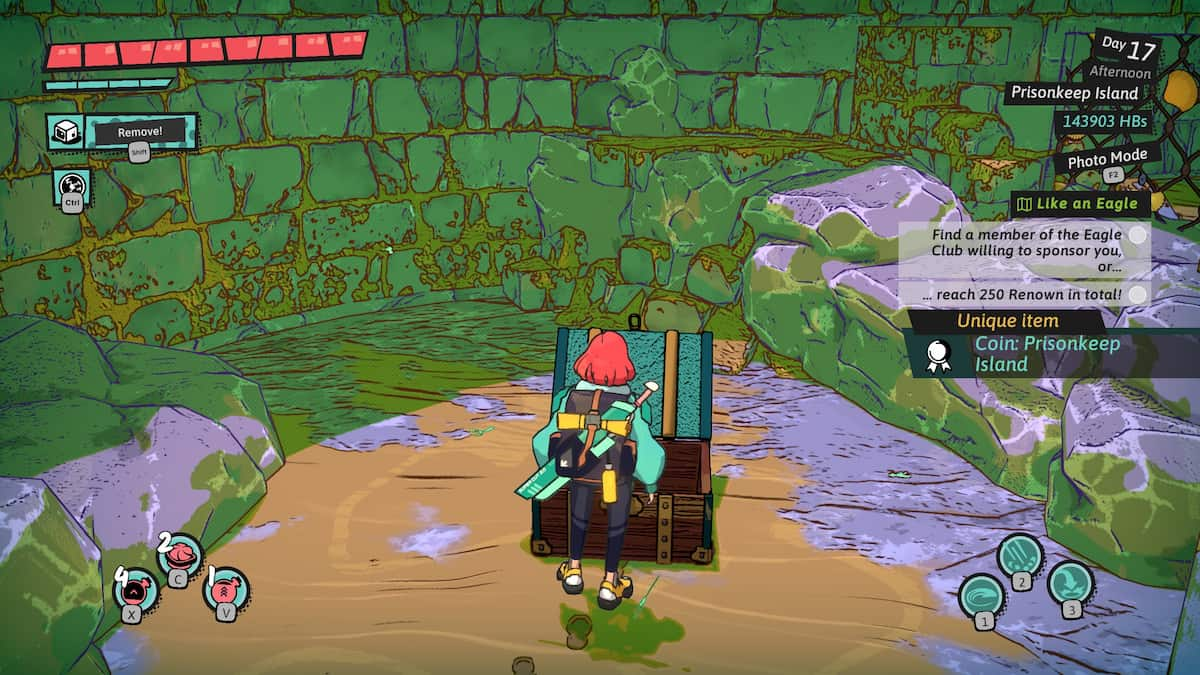
Before encountering the boat puzzle (located at A1), you’ll find the Prisonkeep Island coin in the surrounding area. To reach it, go left upon spotting the puzzle and follow the hallway all the way to its end (A2). The reward for your efforts will be a chest at A3, which contains the coveted Prisonkeep Island coin.
Desolate Castle
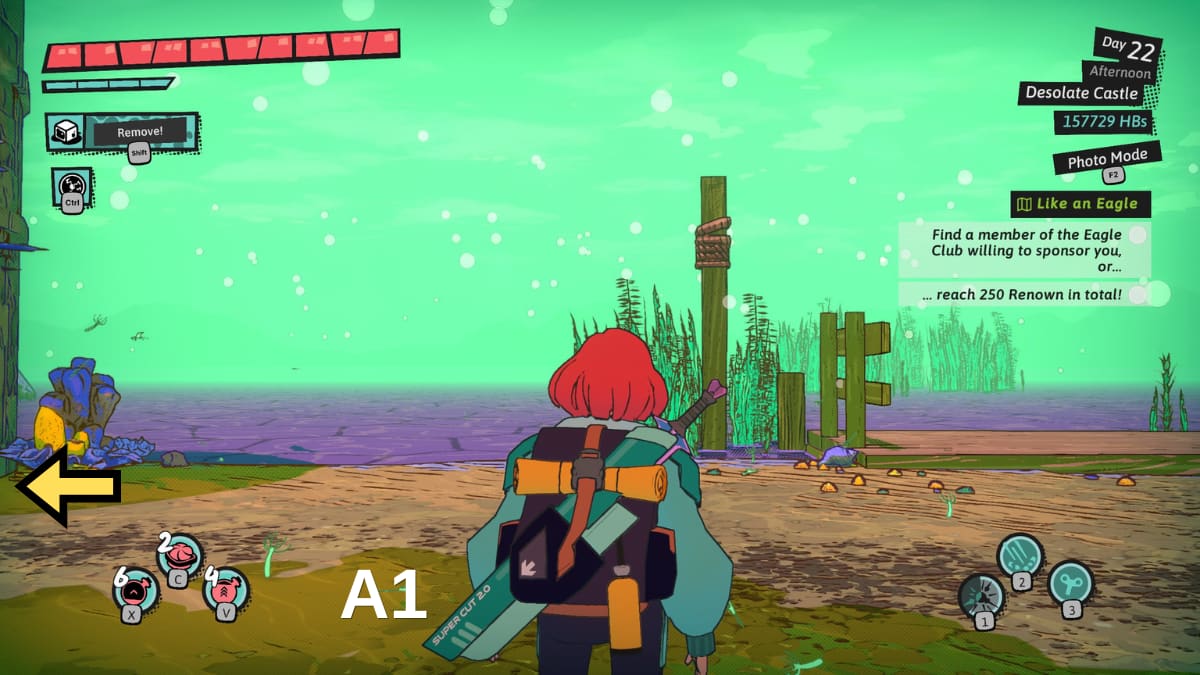
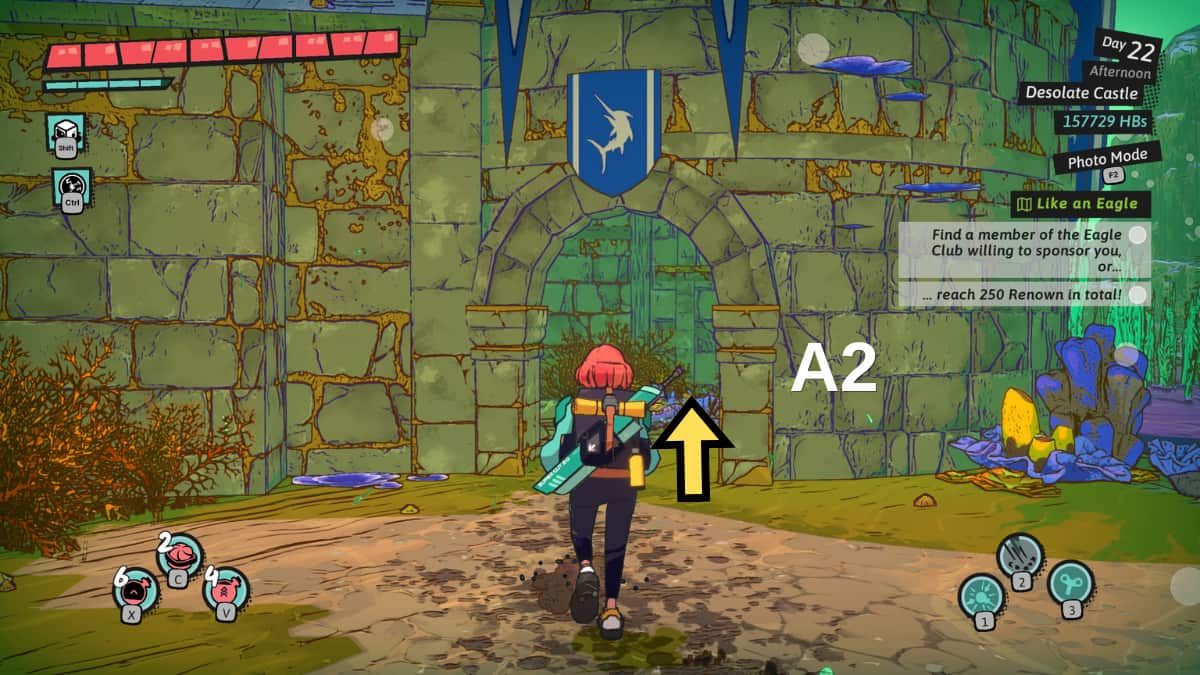
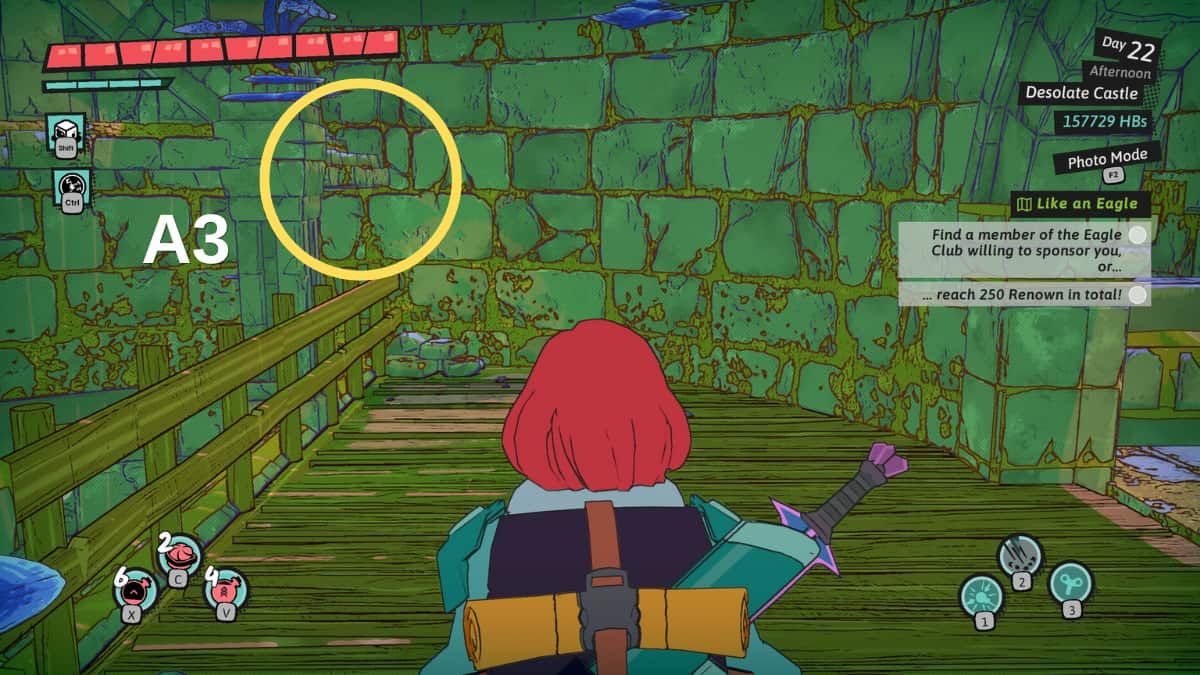
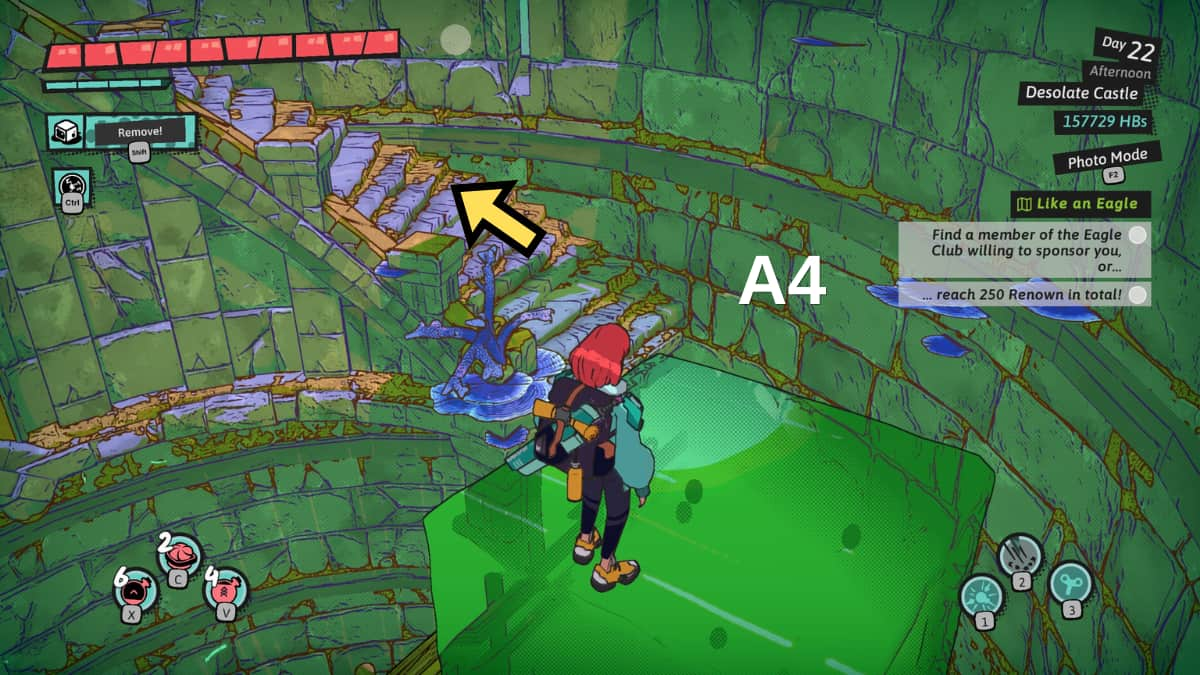
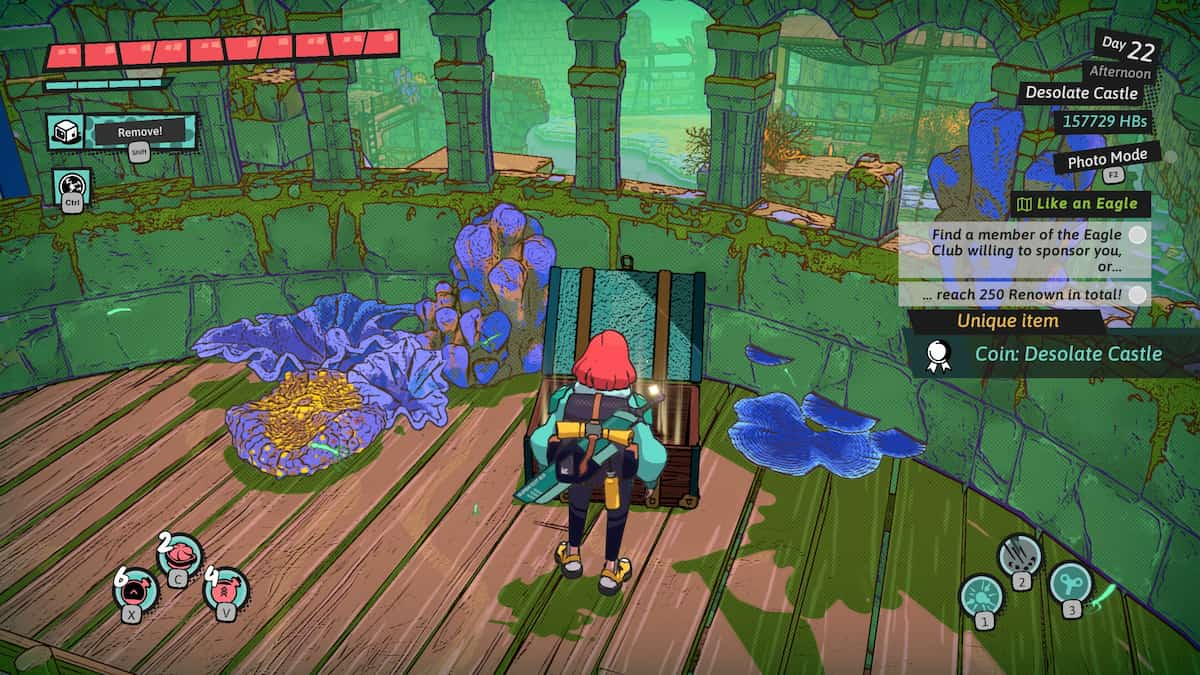
As an old pirate with decades of seafaring adventures under my belt, I’ve come across many a treasured hoard hidden within the crumbling walls of forsaken castles. The Desolate Castle, with its ominous presence on the rocky cliffs, has long piqued my interest. Following the instructions, I make my way to the gated room with two flickering lightbulbs, their feeble glow illuminating the dusty cobwebs that cling to the stone walls.
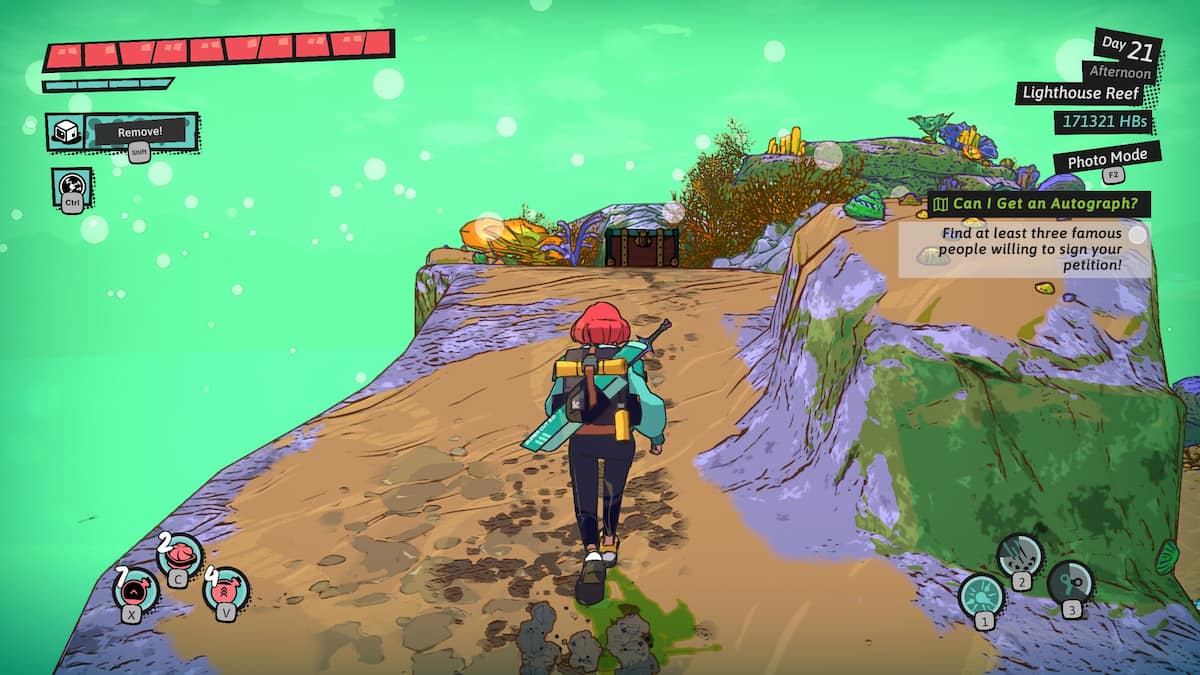
Lighthouse Reef
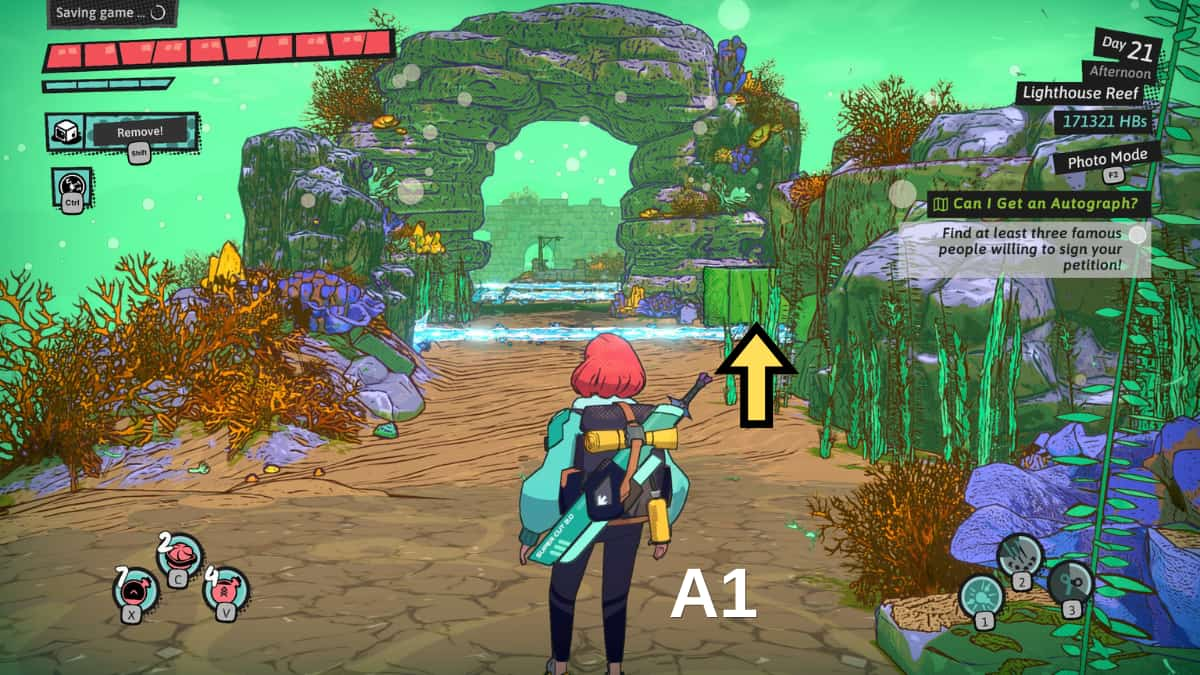
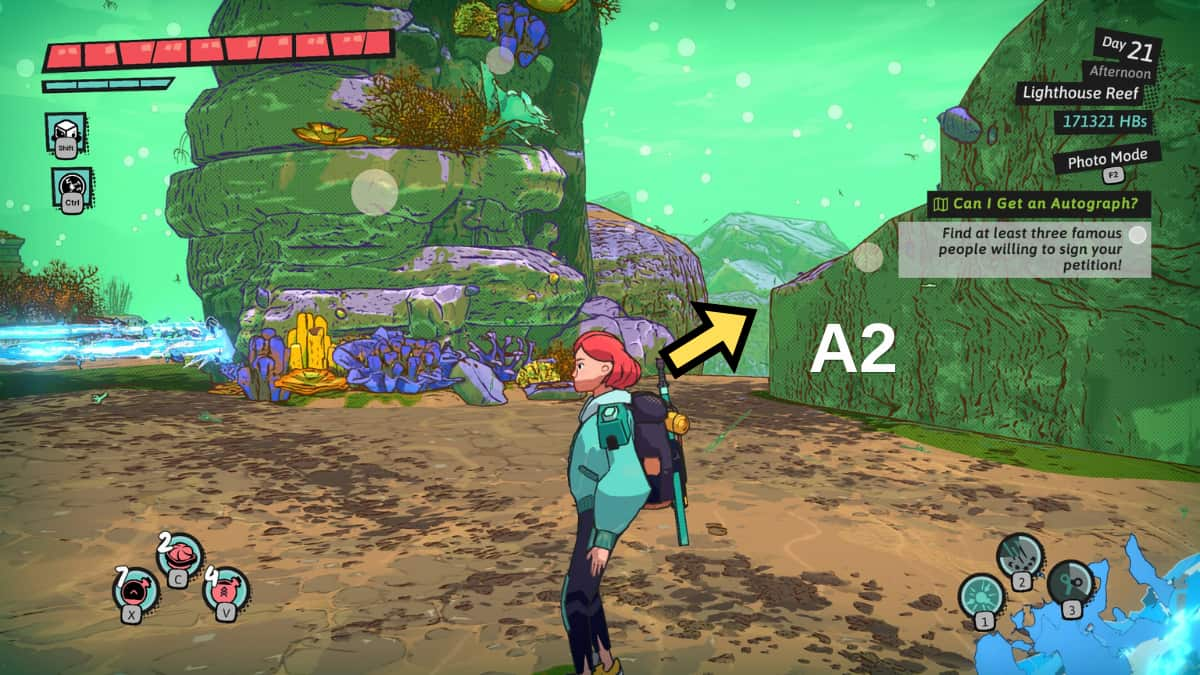
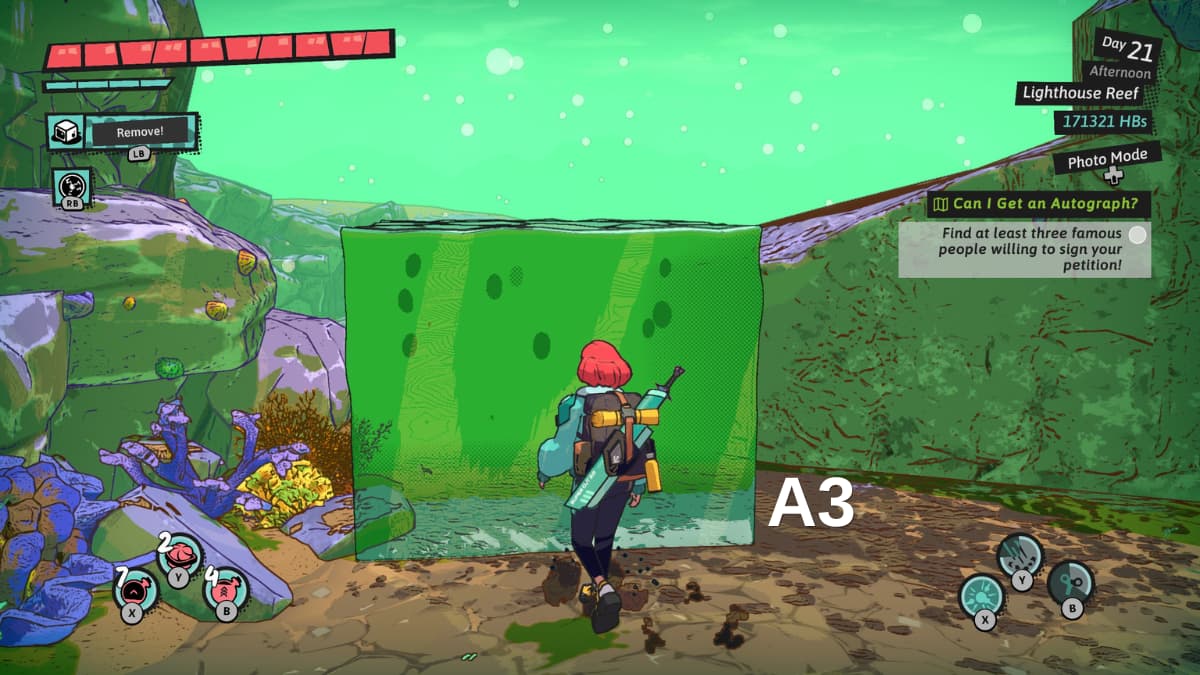
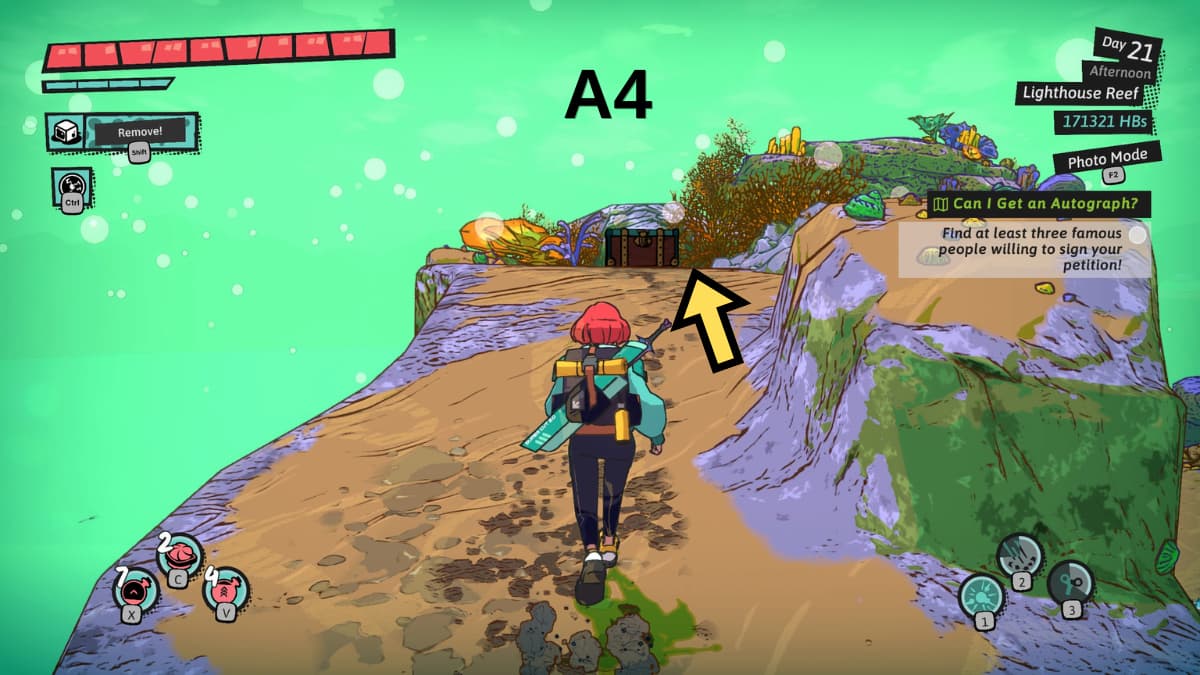
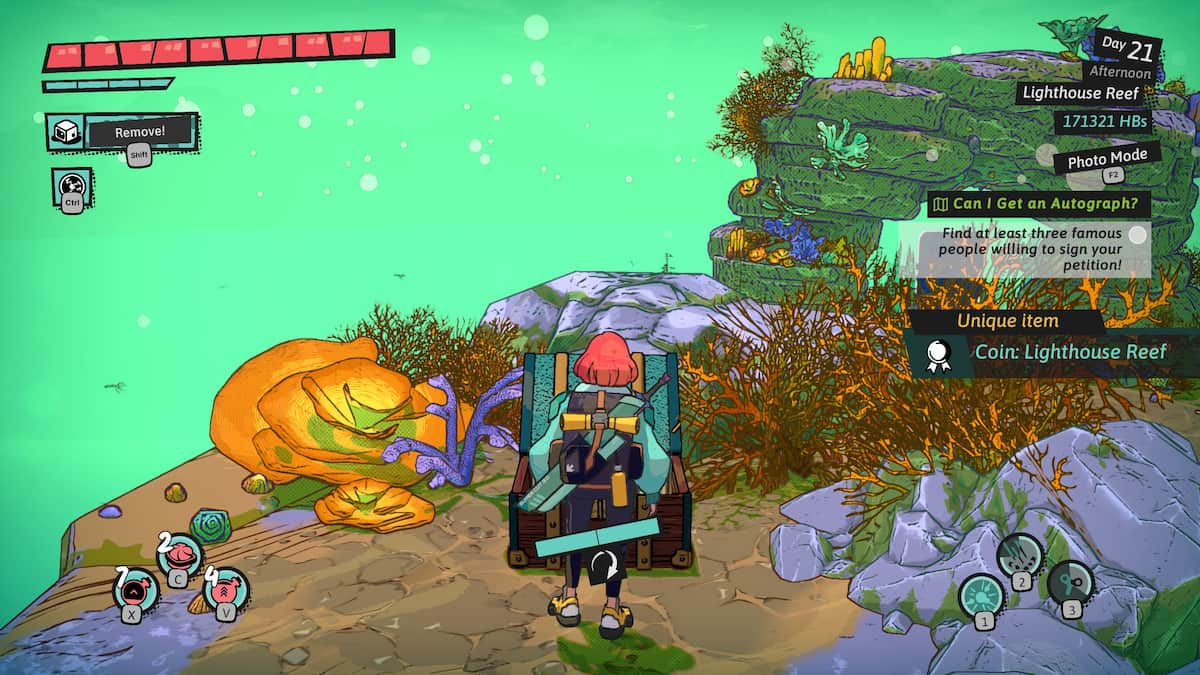
At the beginning of the dungeon, you can find the Lighthouse Reef coin situated near the entrance (A1). To reach a small nook with a protruding ledge (A2) on the left wall, stroll along its edge. Employ your magical abilities to generate a sticky substance, subsequently step onto it for ascending the ledge (A3). Moving forward directly toward the entrance will lead you to the coin chest (A4).
Tower of Trials
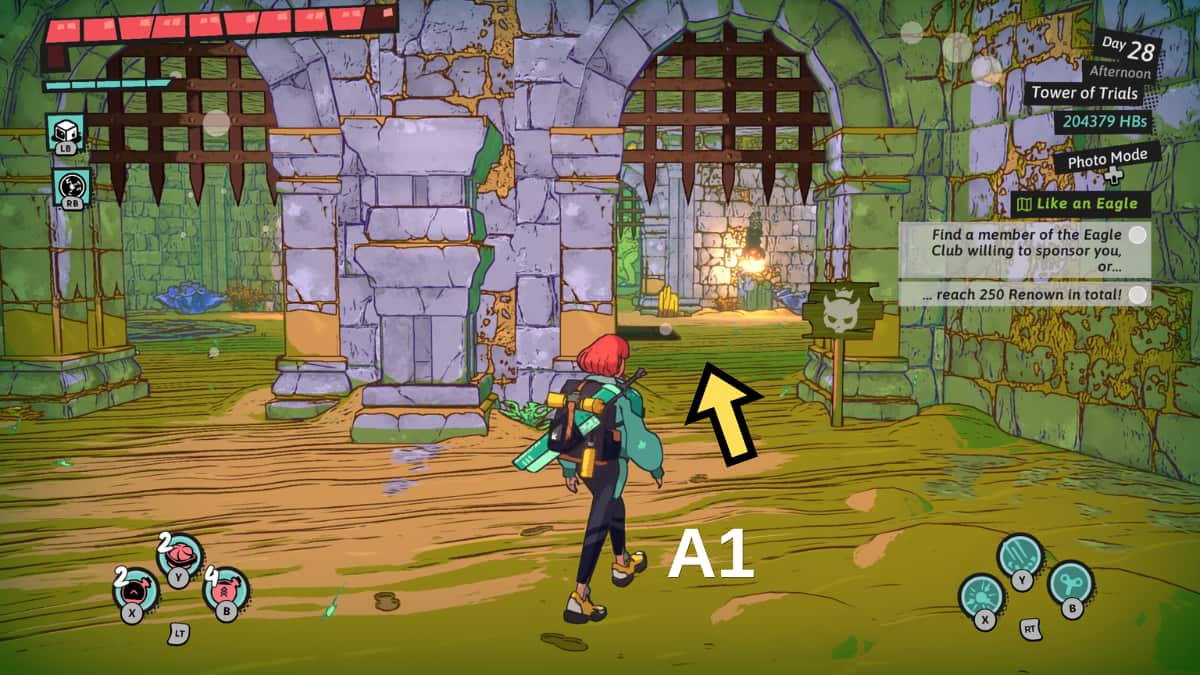
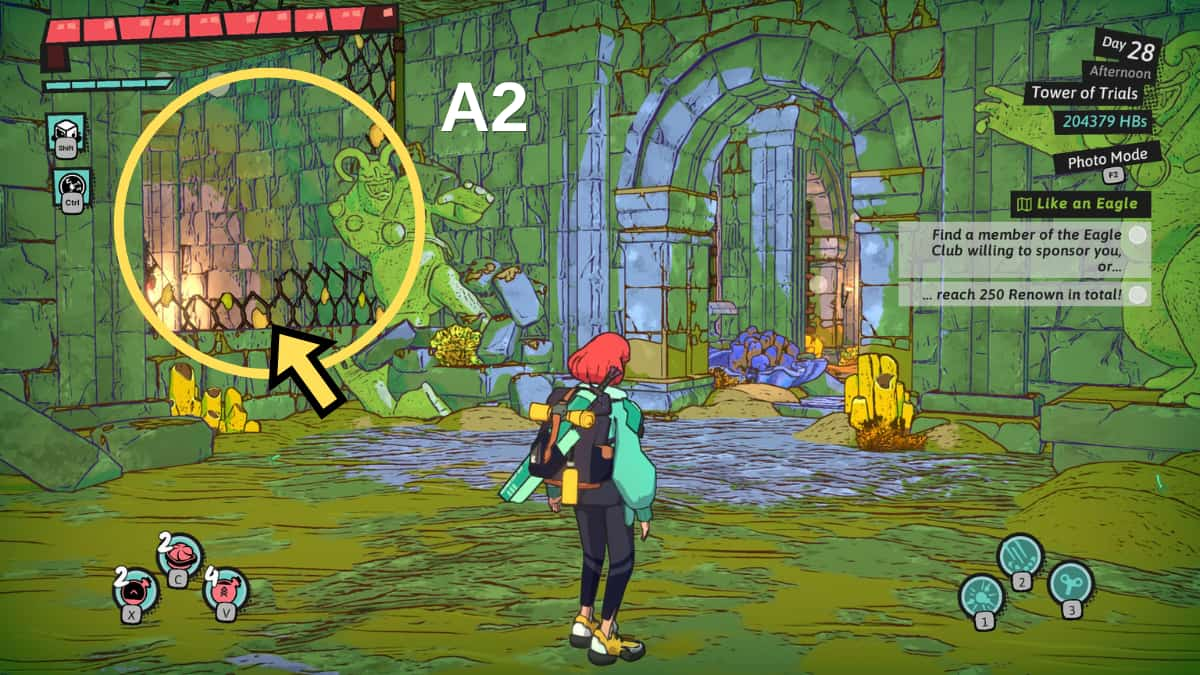
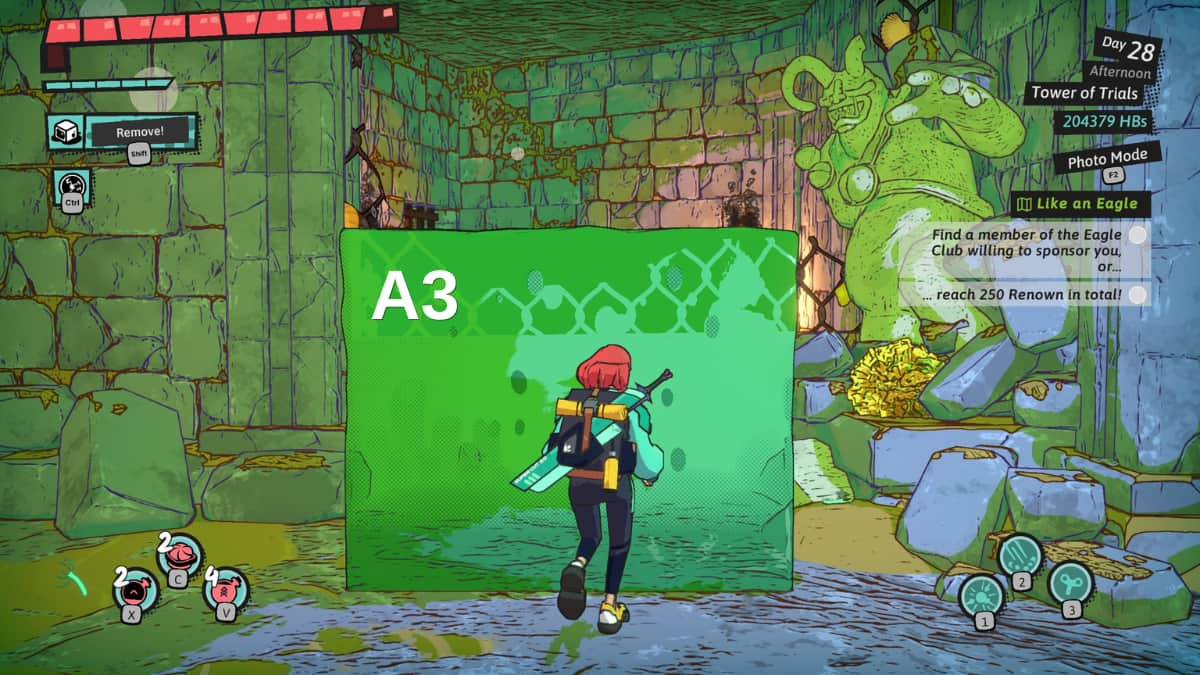
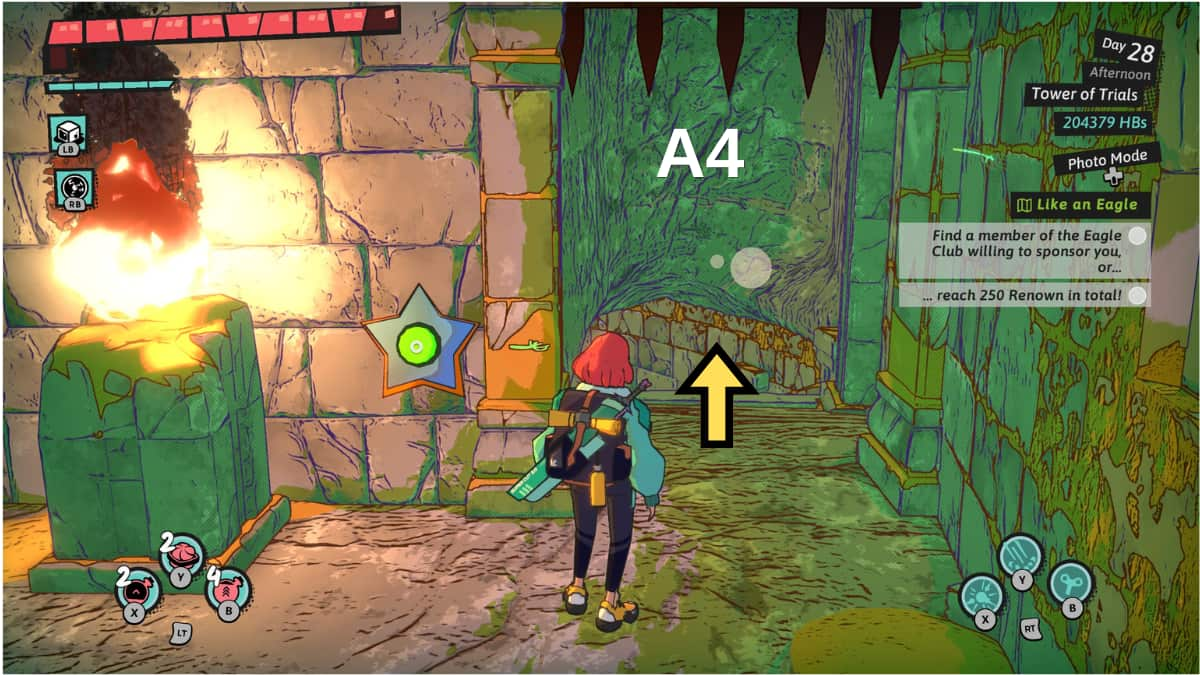
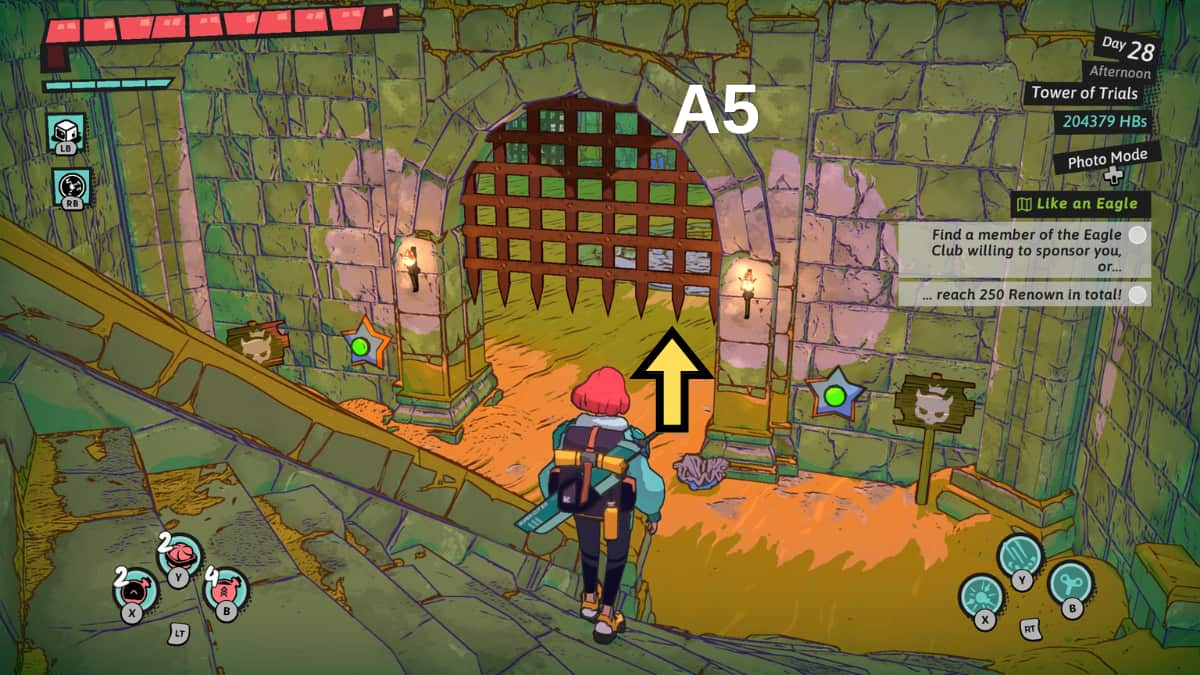
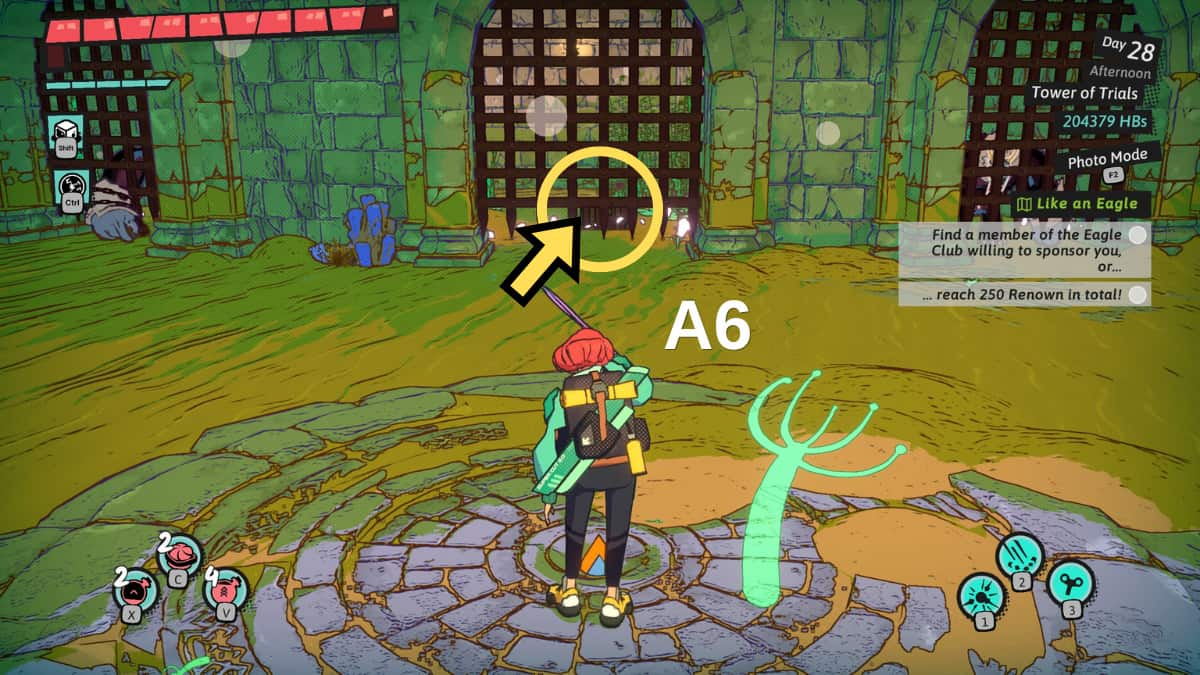
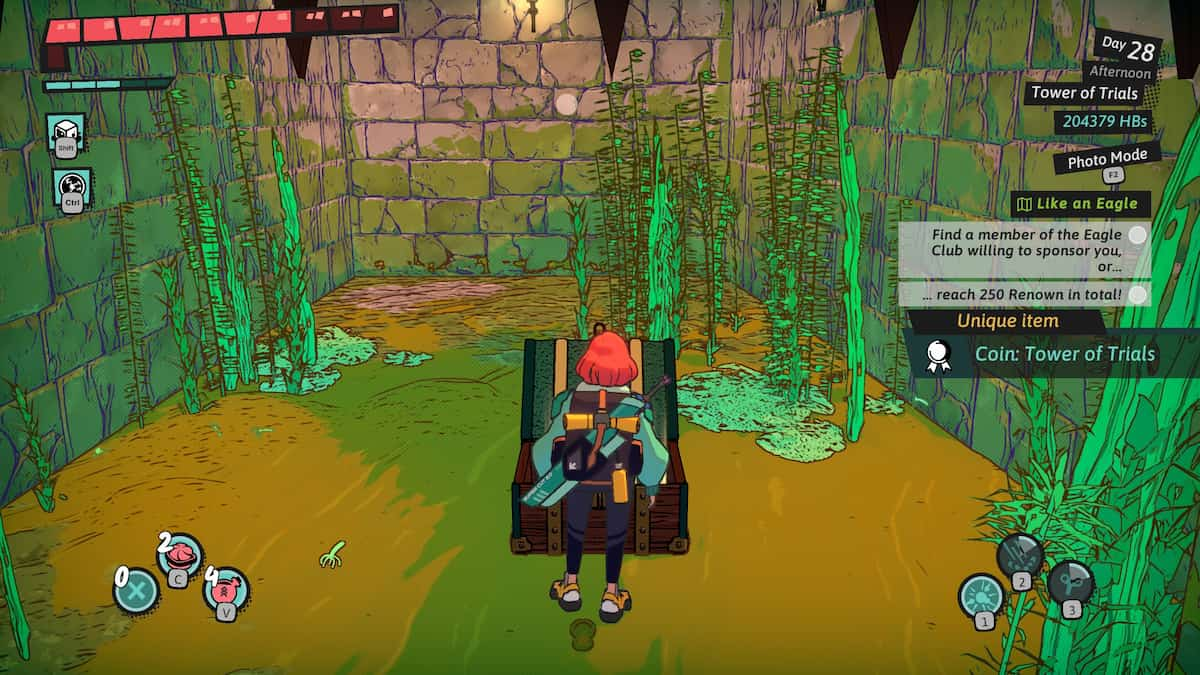
As a gamer, I’ve made it through one of the two challenging rooms in the game, marked as A1. I’m feeling pretty proud of myself since both paths lead to the same destination. In that shared area, there’s a hole in a fenced wall next to a statue (A2). To reach it, I summon a goo block and use it as a stepping stone to hop into the hidden area (A3). Once there, I press the star button next to the door to reveal a staircase (A4). At the next gate, I deftly press the buttons on either side to open it (A5). This brings me to a vast room filled with locked gates. The one straight ahead houses the coveted Tower of Trials coin chest, while the others harbor monsters. To gain access to all, I use the star button in the center of the room to unlock every gate (A6). With determination and skill, I defeat all the enemies that stand between me and my hard-earned Tower of Trials coin.
Wassermann’s Arena
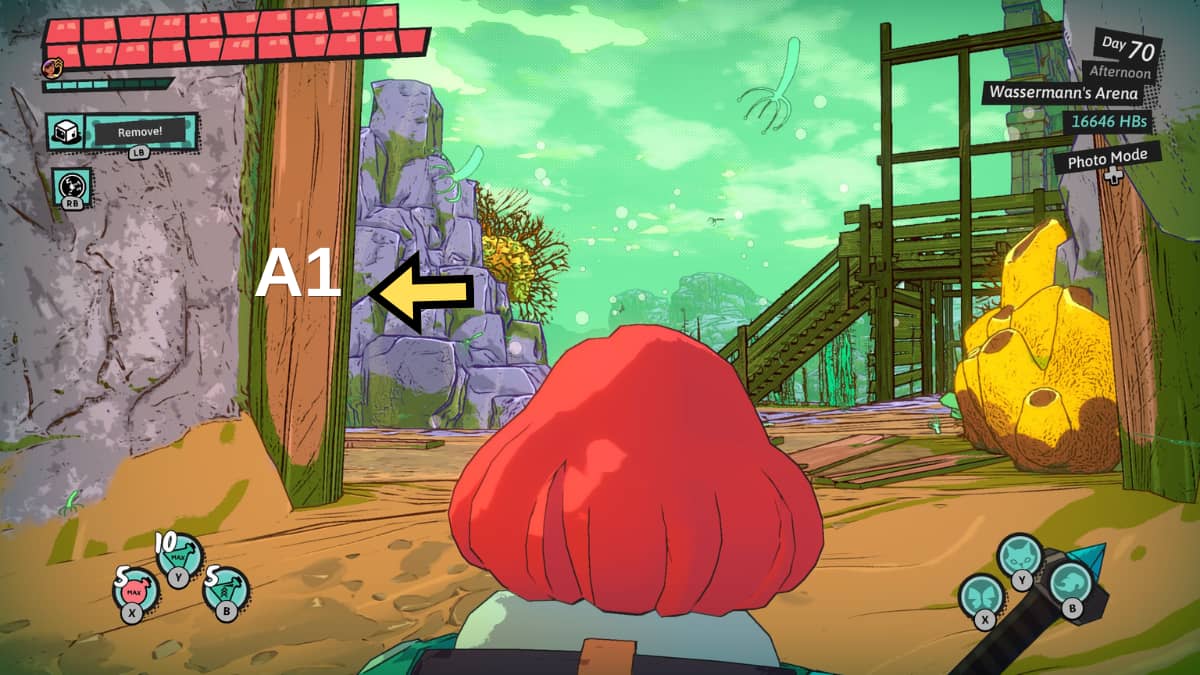
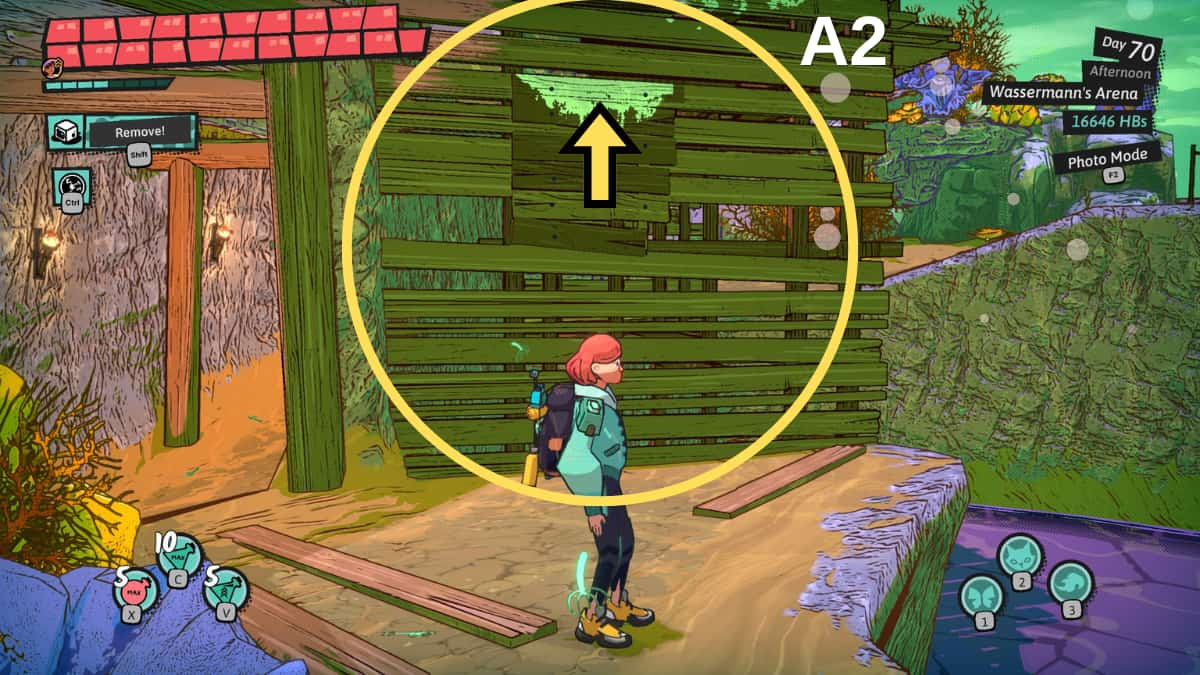
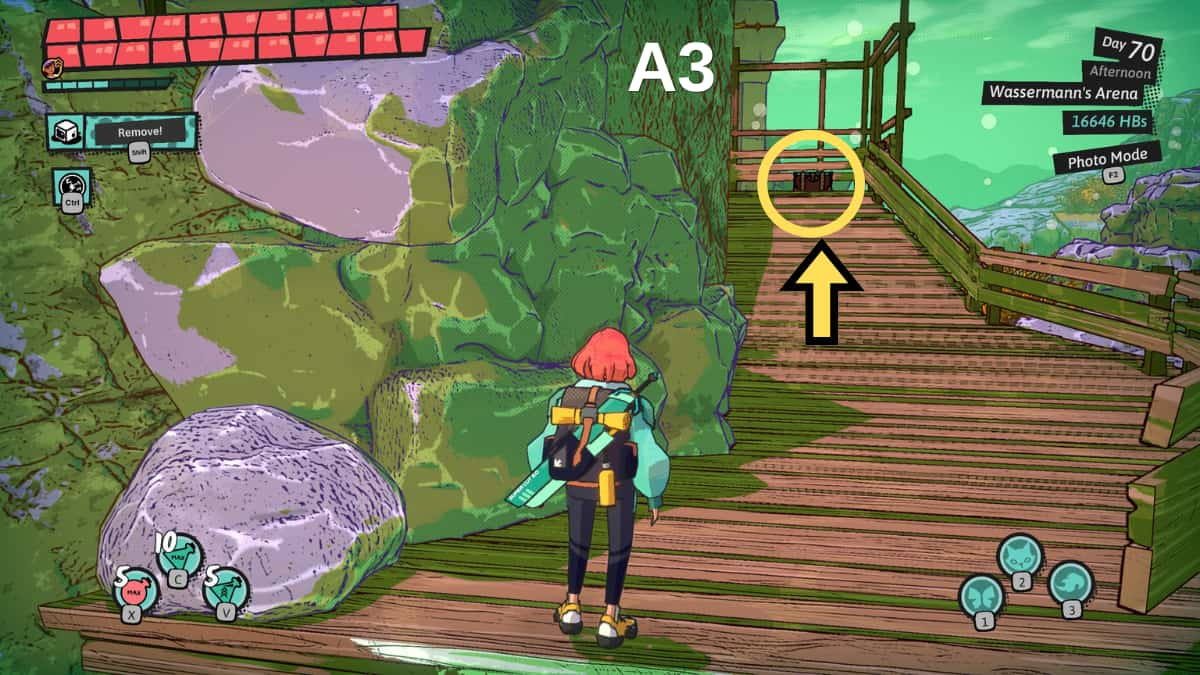
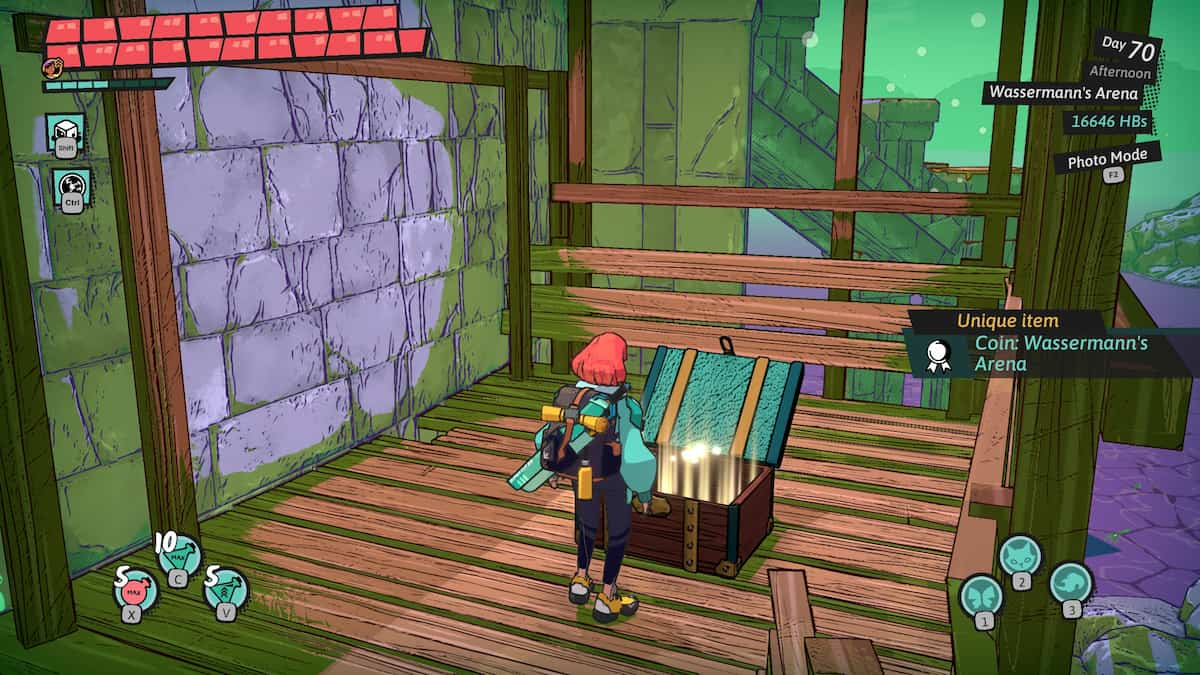
Once you’ve conquered Wassermann’s initial form, proceed according to the given directions to encounter his next stage. A segment of this journey involves traversing an underground tunnel. Upon emerging from the tunnel, veer left instead of right (A1). You’ll come across a ledge that is slightly out of your reach (A2). Employ your goo block magic to scale the ledge, then continue along it to discover the chest harboring the Wassermann Arena token (A3).
Toxic Archipelago
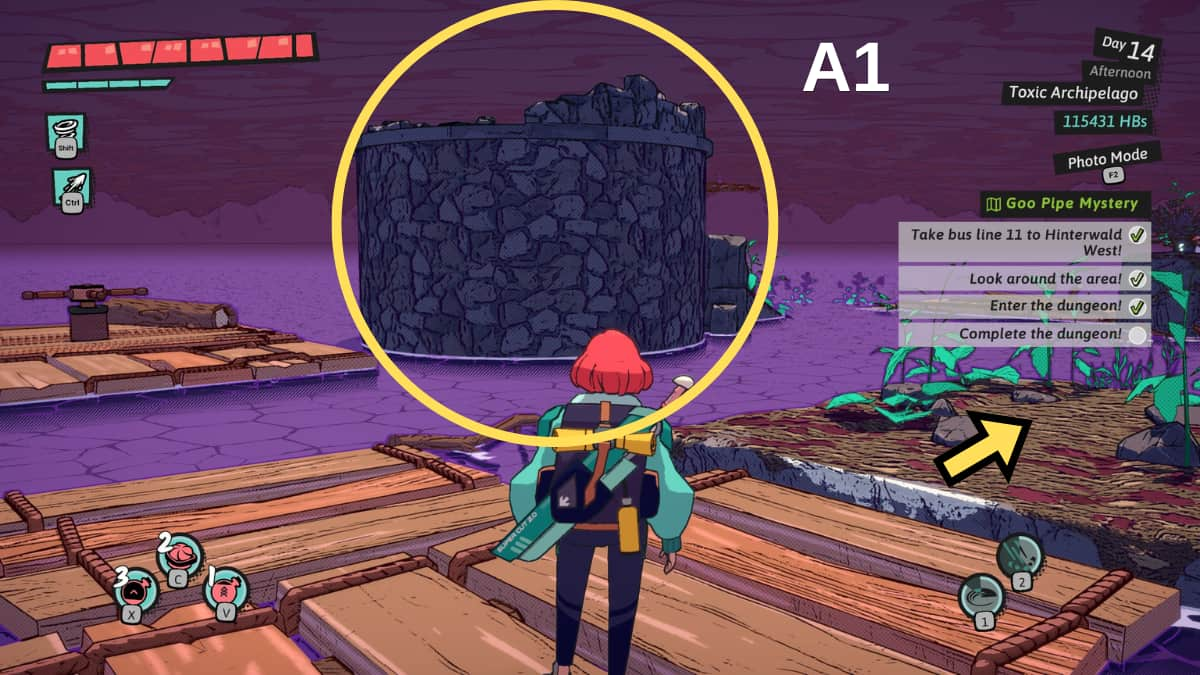
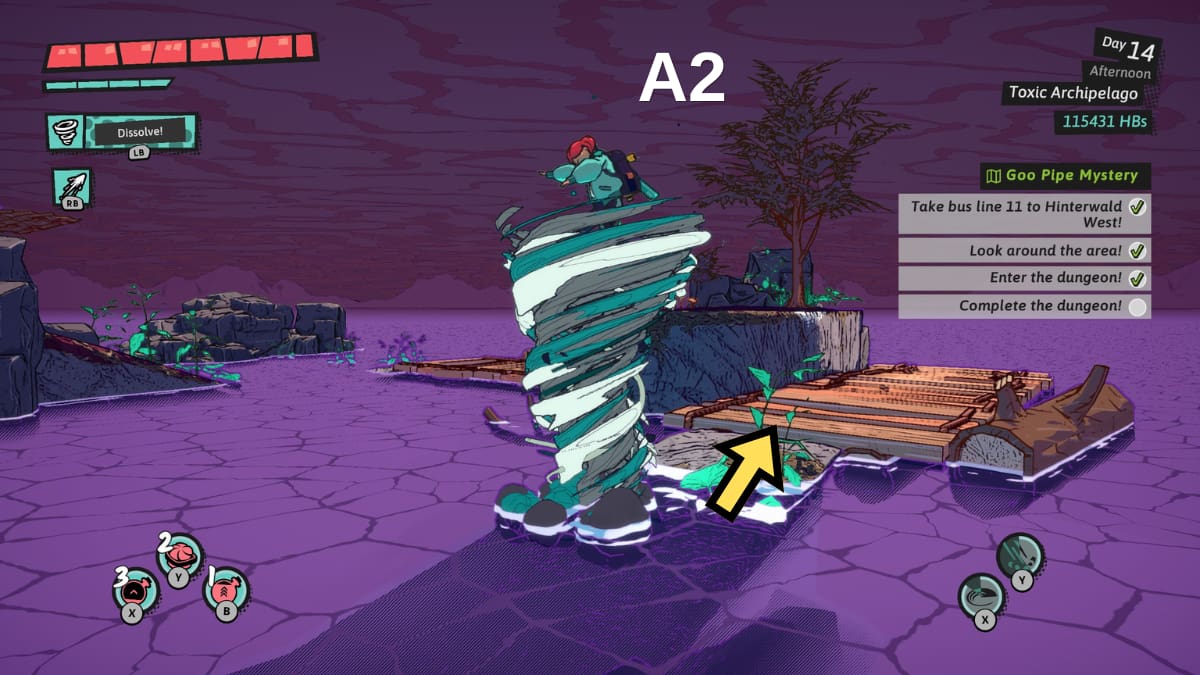
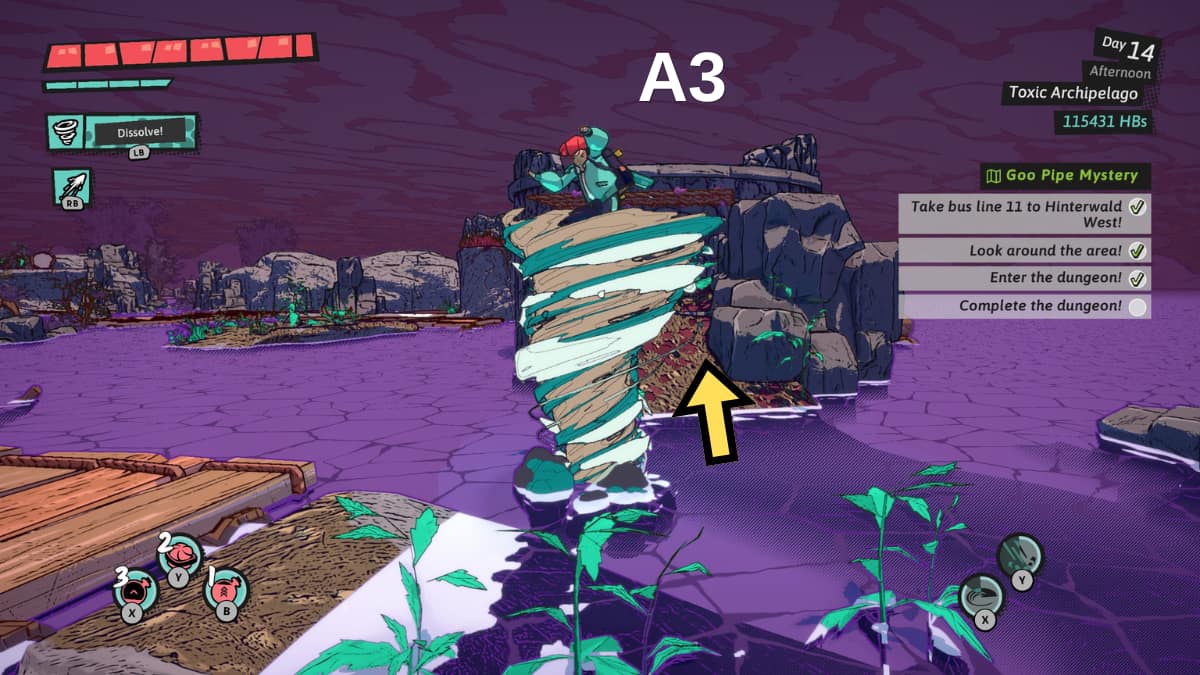
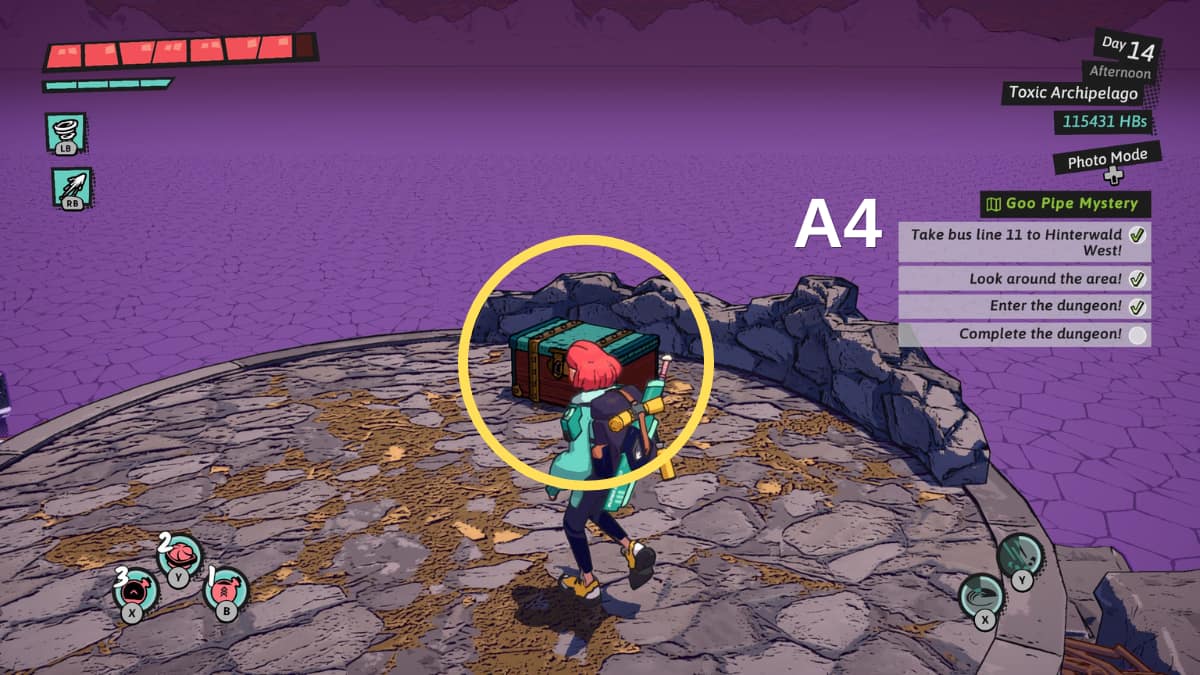
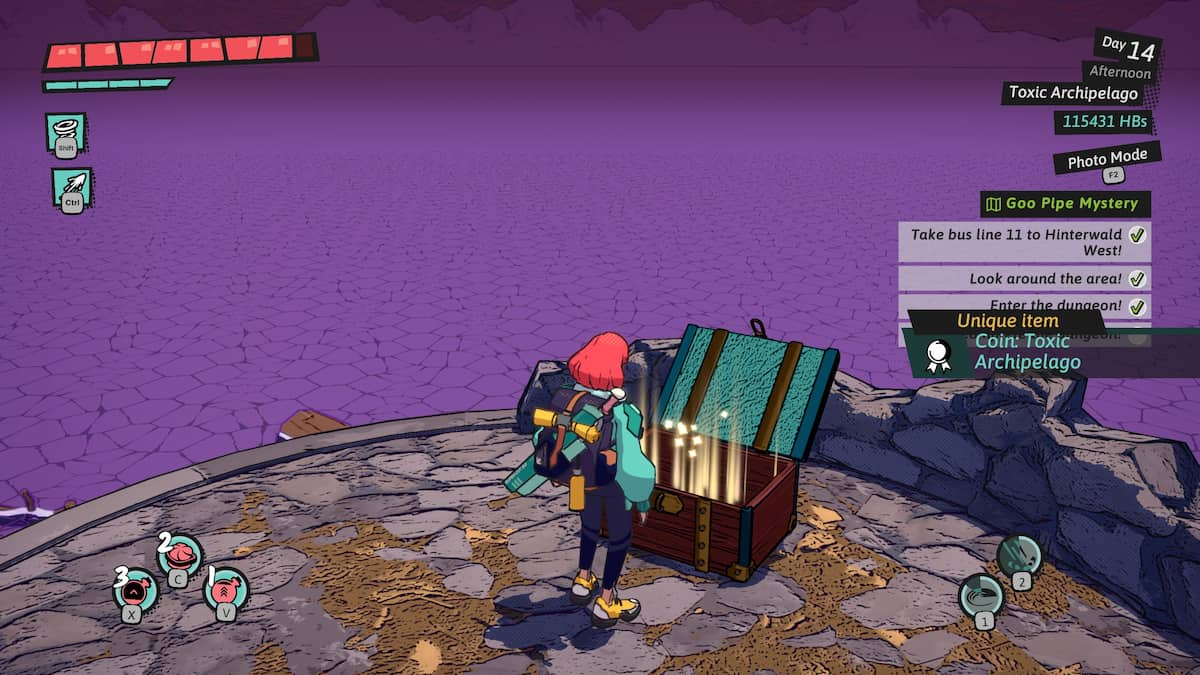
In the hidden labyrinth known as the Toxic Archipelago, there’s a treasure to be discovered. This prize lies within a chest situated near the exit gate, which is nestled amidst the debris of an old tower (Area 1). To reach this area, first drain the water and then cast the Whirlwind spell to traverse the water gap between two rocky jutts (spots A2). Your goal is to land on the platforms located to the right of the ruins. Once you’ve arrived there, use your Whirlwind spell once more to ascend to the rubble (Area 3). The treasure chest harboring the Toxic Archipelago coin sits atop these ruins (Area 4).
Read More
- PBX PREDICTION. PBX cryptocurrency
- GEAR PREDICTION. GEAR cryptocurrency
- EUR INR PREDICTION
- Michelle Yeoh Will Not Appear in ‘Avatar 3,’ Says James Cameron: ‘She’s in 4 and 5’
- Skull and Bones: Gamers’ Frustrations with Ubisoft’s Premium Content Delivery
- ‘Starting 5’: LeBron James, Jayson Tatum and Jimmy Butler Among NBA Players Featured in Obamas-Produced Sports Series
- TANK PREDICTION. TANK cryptocurrency
- W PREDICTION. W cryptocurrency
- BSW PREDICTION. BSW cryptocurrency
- IMX PREDICTION. IMX cryptocurrency
2024-07-18 16:23