
Step into our simplified walkthrough for Lunar: Eternal Blue, the sequel in the revamped Lunar series. This vintage role-playing game may appear straightforward compared to today’s standards, but its advancement relies on interacting with key characters and reaching story locations. Unlike many contemporary games, it won’t provide you with objective markers – that’s where our guide comes in handy!
In Eternal Blue, the bosses are much harder compared to those in its previous version. If you find yourself struggling, increasing your character’s level through grinding can be an effective approach since the boss battles don’t adjust based on your level. For trophy collectors, Lunar Eternal Blue offers a slightly easier challenge as there is just one missable trophy – gathering all the bromides. Unlike the original game, you have a larger timeframe to collect them.
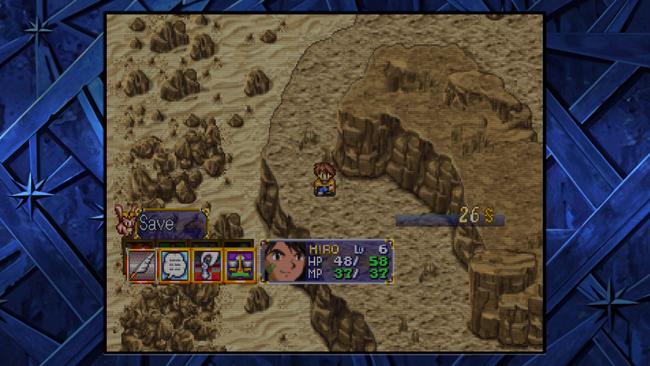
Keep in mind, this particular game doesn’t have an automatic save function. To ensure data safety, get into the habit of saving manually as often as possible and maintain several backup saves. In case of ‘Game Over’, you will be restored to your most recent saved version.
Main Story Table of Contents
- Intro
- Blue Spire
- Lapra Village
- Dalton
- Starlight Forest
- Illusion Woods
- Takkar
- Ghost Manor
- Bandit Bukke
- Nota and Carnival
- Mystic Ruins
- Zulan & Zulan Mountains
- Meribia
- Taben’s Peak
- Meribia Sewers
- Vane
- Sluice Forest
- Azado
- Pentagulia
- White Dragon Cave
- Horam
- Blue Dragon Cave
- Zaback Mines
- Neo-Vane
- Black Dragon Cave
- Raculi
- Serak Palace
- Red Dragon Cave
- Althena Fortress
- Zophar’s Keep
Epilogue Table of Contents
- About the Epilogue
- Finding Your Friends
- Side Quest
- Optional Dungeons
- Dragon Ruins
- Water Ruins
- Star Dragon Tower
Intro
- Objective
- Exit to the world’s map.
- Past through the valley southeast.
- Get through the passage until you exit to the world’s map again.
- Head to the house northeast to find Grandpa’s House.
- Approach Gwyn for a scene.
- Climb the ladder to see an event at the blue spire.
- Check the basement and open the chest to get the Ancient Dagger.
- Talk to Gwyn and he’ll join your party.
- Leave and head to the Blue Spire (North).
- Tip 1: Unlike most RPGs, Lunar doesn’t feature traditional inns for healing. Instead, you can fully restore your party’s HP and MP by examining the statue of Athena found in towns.
- Tip 2: Use AI battle to acquire another trophy. Then hold down the trigger buttons to adjust the battle speed for another trophy. (You will not get this trophy if you have already earned it in Lunar Silver Star Story).
- Treasure (Desert Pass): Herb, 100 Silver
Blue Spire
- Objective
- Navigate through the Blue Spire. There are chalice switches around here that must be activated for the warp to work.
- Once you have activated the warp, you can head to the higher floors, reach the top for an event.
- Currently with the extra party member, you can easily wipe out enemies. Do so, if you want to grind, but you won’t be able to take advantage of this moment when you head to the gardens.
- If you exit out of the gardens, there is a boss fight.
- Then leave the Blue Spire for another boss fight.
- Return to Gwyn’s House for an event.
- After the event scene, take the boat west to find a new town.
- Trivia: During the boss fight, there is a possible way to end the boss fight if Hiro and Gwyn are K.O.
- Treasure: Angel Tear x2, Healing Nut, Star Light x2, Herb, 72 Silver
- Boss Tip: Bosses have different starting animations for their attacks. You can use this gimmick to anticipate some of their attacks.
Larpa Village
- Objective
- In Larpa Village, there will be some items hidden around here.
- To continue the story, head inside the sanctuary and talk to the priest by the Althena Statue.
- Leave and head to the pub, talk to the person by the northeast corner.
- Play a game of dice, then select the second choice to stop. Talk to him again for an event.
- Talk to Ronfar near his house in the west corner of the map.
- Talk to Ronfar by the bed. Then talk to him again, and he will open a secret passage.
- Move through the passage, and you will end up in the sanctuary.
- Go near the Althena Statue for an event.
- Return to Ronfar’s place to rest for the night.
- During this moment, you can get one of the bromides, head outside, and talk to the person above the Athena statue. You will get Lucia’s Bromide. Collecting all the bromides will unlock a trophy.
- Head inside the house that is right above the Althena Statue. Talk to the woman with her baby for an event.
- Go to the Mayor’s house and talk to the mayor upstairs.
- Talk to Lucia to the left of the weapon shop.
- Leave the village and go through the left desert passage.
- Make your way to the town of Dalton.
- Treasure (Town): Herb, Angel Tear, Saucepan Lid, Healing Nut
- Treasure (Hidden Passage): 500 Silver
- Treasure (West Desert Pass): 300 Silver
- About Bromides: Bromides are usually found by talking to specific NPCs or examining objects at a specific time; they’re easily missable.
- Bromide (1/23): Lucia’s Bromide 1 – After resting up at Ronfar’s Place, talk to the man above the Althena Statue.
Dalton
- Objective
- Watch the event as you arrive in town.
- You will need to sneak into the Destiny, which can be done by going through the house above the weapon shop.
- While going through the destiny, enemies must be defeated to get through.
- Find Lucia in the cell room, and rescue her. Then click on the switch afterwards.
- Exit out of Destiny, then leave Dalton.
- Head north to the forest.
- Treasure: Herb, Star Light, Dagger
Starlight Forest
- Objective
- Navigate through the forest until you reach the tower.
- Talk to Lucia for an event.
- Leave and head to another forest to the north.
- Treasure: Herb, 600 Silver
Illusion Woods
- Objective
- Talk to the man in front to go into the forest.
- Navigate through the forest until you see an event at the caravan.
- Talk to Jean in the left part of the forest.
- After the event, enter the springs on the right side of the caravan.
- Enter the male side (left) for an event.
- Then talk to Jean by the caravan. Head down the tunnel, move to the end for a boss fight.
- After the boss fight, talk to Jean.
- During this part, you can get another bromide, talk to the girl who was guarding the exit earlier, and she will give you Jean’s Bromide 2.
- Leave the forest through the north exit.
- Enter the town to the north.
- Treasure: Herb x3, Star Light, Snake Crest,
- Bromide (2/23): Jean’s Bromide 2 – After the boss fight, talk to the girl by the exit.
Takkar
- Objective
- Head to the pub and talk to the hooded figure.
- Then talk to the guard who is guarding the north pass.
- Follow the hooded figure to the east exit.
- Treasure: Star Light, Holy Light, Passion Fruit
Ghost Manor
- Objective
- Navigate through the valley until you enter the mansion.
- The mansion is a small maze with a boss fight at the end.
- Once you have defeated the boss, leave the hill, and you will end up in the north part of Takkar.
- On the world’s map, head to the cave in the western part of the map.
- Treasure: Purity Ring, Wind Ring, Holy Water, Angel’s Tear, 302 Silver, Star Light, Herb, Star Light
Bandit Butte
- Objective
- Navigate through the cave, which will lead to a valley and outside.
- From the world’s map, head west to the city that is located near the river.
- Treasure: Shiro Crest, Star Light, Wind Staff
Nota and Carnival
- Objective
- Like most cities in Lunar Eternal Blue, there are some treasures placed around you can grab.
- New equipment are available in this city, but if you can wait until your next visit, you’ll find better gear available..
- To continue with the main story, try to cross the bridge for an event scene.
- After this, you will have to leave Nota.
- Head northeast to find the Carnival.
- Grab the items around the Carnival, then talk to Giban in the northwest corner.
- Then head into the middle car.
- Then talk to the person by the flying propeller.
- Treasure (Nota): Gauss’ Necklace, Silver Light, Herb
- Treasure (Carnival): Angel’s Tears, Holy Water
Mystic Ruins
- Objective
- Examine the magic crest in the center for an event.
- When you regain control after the event, head inside the mystic ruins.
- This dungeon is filled with platforms that only go in a certain route. Exit out of the dungeon to end up on the world’s map.
- Head west back to Nota, the city by the river.
- In Nota, you can now access the west side of the map. Previously inaccessible treasures are now available, along with shops offering improved gear.
- Exit out through the west part of Nota and then travel north to the village of Zulan.
- Treasure (Mystic Ruins): Healing Nut, Dream Crest, Star Light x2, Flame Staff
- Treasure (Nota, West Half): Life Jewel, Peasant Clothes, Herb
Zulan & Zulan Mountains
- Objective
- Head to the house in the northwest corner and speak with the mayor.
- Exit out through the west exit, it will take you to the mountains.
- While navigating through the mountains, you’ll encounter an event around the halfway point.
- Afterwards, talk to Jean, then Ronfar, and finally Lemia.
- If you move to the top, there will be a boss fight ahead.
- After the boss fight, talk to the woman at the northwest corner.
- After the event scene, take the southwest exit to the world map.
- Head to the city to the south.
- Treasure (Zulan): Plate Armor, Star Light
- Treasure (Zulan Mountains): 2000 Silver, Healing Nut, Power Crest, Water Staff, Barrier Ring, Phoenix Ring
Meribia
- Objective
- Before moving on with the main story, there are some bromides and items to collect in Meribia.
- Head into Ramus’s Store, and talk to the grandpa by the counter. Talk to him FOUR TIMES and you will get Lemina’s Bromide 3.
- Then check the barrel in the northwest corner of Ramus’s Store to get Lemina’s Bromide 2.
- Head to the pub, it’s the house to the right. Talk the man in the northwest corner, and he will give you Jessica’s Bromide.
- To continue with the main story, head to the castle. It’s been remodeled into a dojo.
- After the event scene, talk to Lunn.
- When you finish wrapping up in Meribia, head outside and take the east exit to Taben’s Peak.
- Treasure: Life Jewel, Herb, Earth Crest, Dagger
- Bromide (3/23): Lemina’s Bromide 3 – Talk to Ramus’ Grandpa at his store four times.
- Bromide (4/23): Lemina’s Bromide 2 – Examine the barrel in the northwest corner in Ramus’ Store.
- Bromide (5/23): Jessica’s Bromide – In the pub, talk to the man in the northwest corner.
Taben’s Peak
- Objective
- Examine the barricade to the east.
- Then head north for an event scene.
- Reach the summit for an event scene.
- Talk to all your friends in the cell until you rest up for the next day.
- Exit the cell and look for Nall. Talk to him for an event.
- Then head to the balcony for an event scene.
- Afterwards, leave Taben’s Peak. You can talk to the kids by the elevator for a shortcut to instantly go down.
- Return to Meribia. Head to the sewers, this is found by going through Ramus’ Store.
- Treasure: Life Jewel, Herb, Legendary Lid, Thunder Staff, Luck Ring, Spirit Ring
- Treasure (Summit): Cute Ribbon, Herb
Meribia Sewers
- Objective
- Navigate through the sewers, there forced enemy encounter right at the end.
- Once you have defeated cult members, exit the sewers and return to Taben’s Peak.
- Ride the elevator to go to the summit.
- After talking to Nall, look for Lucia on the balcony.
- Then leave Taben’s Peak, as you’re about to head down, you will get the White Dragon Wings.
- Note: The White Dragon Wings now only allow you to instantly exit dungeons and towns, unlike in the previous game, where they also let you teleport to previously visited locations.
- When you head down, take the east exit, then enter the city to the east.
- Treasure: Star Light x3, Steel Shield, Dew Ring, Quake Staff, Soul Bandanna, Silver Light, Steel Helm, Healing Nut, Silk Dress
Vane
- Objective
- As you enter Vane, an event will appear that will prevent you from entering the city.
- Head to the world’s map and go south to the transmission springs.
- Talk to the man holding a pitchfork to get Mia’s Bromide.
- Use the transmission springs to warp into the Cave of Trials.
- Make your way to the end of the dungeon—there’s one treasure chest here, but Lemina won’t let you take it just yet.
- Head inside the Magic Guild, then go near the throne room for an event.
- Head to the roof and speak with Lemina to trigger an event. Afterward, you’ll be able to collect all the treasures in Vane, including the one inside the Cave of Trials.
- While exploring Vane, head to the library in the southeast corner. If you check the bookshelf on the far right in the top row, you will get Lemina’s Bromide 1.
- Note: The treasure found in the Cave of Trials is the Thieves’ Staff. When equipped, it gives Lemina a chance to randomly steal items from enemies during battle. Successfully stealing an item will also earn you a trophy.
- Once you have gathered everything in Vane, leave and go south until you enter a forest.
- Treasure (Vane): Lemina’s Purse, Gorgon’s Doll, Seal Crest, Thunder Crest, Silver Light, Angel Ring
- Treasure (Cave of Trials): Thieves’ Staff
- Bromide (6/23): Mia’s Bromide – Talk to the man holding the pitchfold at the tranmission spring.
- Bromide (7/23): Lemina’s Bromide – Examine the bookshelf in the top row, far right in the Vane Library.
- Bromide Note: This is the final bromide you can obtain during the main story. If you haven’t missed any up to this point, the remaining bromides can be collected during the epilogue without any special requirements or time-sensitive conditions.
Sluice Forest
- Objective
- Navigate through the forest, there will be an event when you reach the springs.
- During nighttime, talk to your friends, then go to the springs for an event.
- Exit the forest and go Southeast to the city of Azado.
- Treasure: Vigor Ring, Star Light, Warrior Crest
Azado
- Objective
- Enter the temple and talk to the head priest by the Althena Statue.
- Around the middle-right section of town, speak to the blonde kid standing near the red house to trigger an event.
- During the evening, sneak into the Destiny that is parked in the southwest corner of town.
- Navigate through town until you reach the same red house where you previously spoke to the blonde kid.
- Go to the temple and talk to the priest guarding the entrance.
- Watch the event as you head upstairs. From there, sneak into the inner chambers of the temple by taking the staircase in the southwest corner.
- Navigate through the top to trigger a boss battle.
- After the fight, leave the temple and return to the Destiny.
- When you regain control, leave and look for Lucia on the ship’s deck.
- Treasure (Town): Safety Helmet, Angel Ring, Life Jewel
- Treasure (Temple): Silver Light x2, Healing Ring, Healing Crest, Healing Nut
Pentagulia
- Objective
- All your friends will temporarily go their separate ways. You can visit each of the towers to witness event scenes featuring your companions and their respective rivals.
- To progress with the main story, make your way to the top of the tower and speak with Leo.
- Once you reach the midpoint of the dungeon, it branches into four paths. Each of your friends is located at the end of one of these sections. You can find Ronfar in the upper-left quadrant, Jean in the bottom-left, and Lemina in the bottom-right.
- When everyone is gathered, return to the middle part of the dungeon and examine the Althena Statue to find a hidden passage.
- Head further for an event scene, then talk to Lucia at the center.
- Follow Lucia to the Balcony to leave Pentagulia.
- Talk to Nall for an event scene.
- Talk to all your friends until the party is full again. Use the elevator to leave Taben’s Peak.
- Head for the east exit and enter the Destiny.
- Talk to Leo to engage in a boss fight.
- After the event, you’ll gain control of the Destiny. Use it to sail toward the snowy mountains in the northwest—this is where you’ll find the White Dragon Cave.
- Treasure (White Tower): Healing Ring, Platinum Blade, Life Jewel
- Treasure (Red Tower): Hellfire Staff, Silver Light
- Treasure (Blue Tower): Jewel Gauntlet, Ritual Hairpin
- Treasure (Black Tower): Jewel Gauntlet, Ritual Hairpin
White Dragon Cave
- Objective
- Make your way through the Dragon Cave. It’s highly recommended to level Lemina to at least 32—at this level, she learns Erase Magic, which can clear out the elemental field. This spell is incredibly handy for the upcoming boss fight.
- Once you defeat the boss near the end of the dungeon, go near the crystal for an event.
- After the event scene, you’ll receive the White Dragon Crest. Equipping it grants access to White Dragon Protect, the same spell Alex uses that makes the party immune to a single hit. This ability is incredibly useful during tough boss battles, as it guarantees protection from powerful or deathblow attacks.
- Leave the Cave and on the world’s map, sail with Destiny directly south of the snow area. You will find the town of Horam.
- Treasure: Star Light, Snake Ring, Endurance Ring, Wind Crest, Chiro Crest, Angel Ring, Ice Staff, Vitality Vial
- Note: This dungeon has an enemy called Chiro – Lunar’s equivalent of the ‘Metal Slime’ from Dragon Quest. These elusive foes will typically flee from battle immediately, but if you’re quick enough to defeat one, you’ll be rewarded with massive silver and EXP gains. As a bonus, taking down a Chiro for the first time also unlocks a trophy. This trophy can also be earned in Lunar Silver Star Story.
Horam
- Objective
- Head into the dojo and talk to the master for an event.
- After this event, you will receive an invitation letter.
- Head outside and board the Destiny, head to the arena just further south.
- Show your invitation letter to gain entry. If you head toward the arena, it will trigger a battle sequence. You can approach the arena whenever you’re ready to duel. Between each round, be sure to use the Althena Statue to fully restore your health. After clearing three rounds, speak to Lunn at the center of the arena to initiate a one-on-one fight with him.
- Afterwards, head outside and board the Destiny. Use it to reach the Blue Dragon Cave, which is northeast of the arena.
- Treasure: Star Light, Protection Ring, Rubber Boots, Blue Pajamas, Life Jewel
Blue Dragon Cave
- Objective
- Navigate through the dungeon, and at the end of the cave, there is a boss fight. Similar to the boss in the White Dragon Cave, there is a big difficulty spike with these bosses. This one in particular can cause mute.
- Talk to the Blue Dragon at the end of the cave. You will also receive the Blue Dragon Crest.
- Exit the cave and board the Destiny. Follow the river upstream—it’ll lead you all the way south. Continue heading south until you reach a point where you can disembark.
- Once you arrive, the Althena Fortress will block further use of the Destiny. From there, head to the mines located on the left side.
- Treasure: Silver Light, Passion Fruit, Fresh Ring, Angel’s Tear, Rusty Dagger, Star Light, 92 Silver, Earth Ring
Zaback Mines and Zaback
- Objective
- Navigate through the mines until you reach the final screen. There’s an exit located to the south, and in that same area, you’ll also find the entrance to the Black Dragon Cave in the northeast corner. Make a note of this location—you’ll need to return here later in the story.
- Once you arrive in the town of Zaback, head to the house located at the far west side of the map. Inside, you’ll find a teleportation circle. Use it, and the next story scene will bring you to Neo-Vane.
- Treasure: Silver Light, Passion Fruit, Fresh Ring, Angel’s Tear, Rusty Dagger, Star Light, 92 Silver, Earth Ring
- Treasure (Zaback): Peasant Clothes, Passion Fruit, Life Jewel
Neo-Vane
- Objective
- Explore the town to collect treasures and visit the nearby shops to purchase new equipment and upgrades for your party.
- To progress with the story, enter the cave located in the northwest section of the map.
- You’ll encounter Ronfar and Jean around the midpoint of the cave. Continue forward until you come across a barrier—Lemina will step in to unseal it. Once it’s removed, proceed deeper toward the throne room, where a boss battle awaits.
- After defeating the boss, make your way back to the Zaback Mines. From there, enter the Black Dragon Cave located in the northeast corner of the final area.
- Treasure (Vane): Luck Ring, Life Jewel, Herb
- Treasure (Cave): Healing Ring, Clear Ring, Earth Staff, Star Light, Silver Light x2, Red Pajamas
Black Dragon Cave
- Objective
- Like the other Dragon Caves, there’s a deadly boss waiting at the end. This one is particularly tough due to its high resistance to physical attacks, so be prepared to rely more on magic to get through the fight.
- Once you’ve defeated the boss, step onto the platform to reach the Black Dragon. After the conversation, you’ll receive the Black Dragon Crest.
- Return to the Destiny and manually backtrack out of the mines. With the ship now usable again, sail southeast and disembark on the nearby landmass. There, you’ll come across a small village.
- Treasure: Healing Nut, Lightning Staff, Angel Ring, Force Ring, Star Dagger, 312 Silver, Stardust Ring, Angel’s Tear, Passion Fruit, Hunter Crest, Star Light
Raculi
- Objective
- Look for Leo by the hilltop near the Althena statue.
- After talking to him, head to the house located in the northeast corner and find him again. Then, talk to Leo for an event scene.
- Head to the World Map and make your way to the palace located in the northwest.
- Treasure: Silver Light, Yellow Pajamas, Passion Fruit
Serak Palace
- Objective
- Navigate through the palace, which is designed with three separate floors. When you reach the large chest at the end and obtain the Althena Aura, an event will trigger as you leave the area.
- When you have control over Ronfar, talk to the fake Mauri (The 4th one) and select the second option to initiate a boss fight.
- Then talk to Mauri by the Althena Statue.
- Then, go north, and before going to the cave, an event will appear. Once ready, head inside the cave.
- Treasure: Holy Hairpin, Psycho Gauntlet, Master Helm, Miracle Clothes, Tiger Wrap, Life Jewel x2, Star Light, Silver Light
Red Dragon Cave
- Objective
- Navigate through the Red Dragon Cave. Unlike the other Dragon Fiends, there isn’t much of a gimmick to this fight.
- Once you reach the end, examine the crystal for an event, and you will receive the Red Dragon Crest.
- As you leave the cave, an event scene will take place.
- Return to the Destiny and head toward Althena’s Fortress. Travel east and aim for the large pool of water near the center of the map. Once you’re close enough, an event scene will trigger.
- Then go inside Althena’s fortress.
- Treasure: Holy Hairpin, Healing Nut, Life Jewel, Dyne’s Armor, Tiger Armlet, Passion Fruit, Ogre Crest, Star Light x2, Holy Water, Water Ring, Angel’s Tear x2, Shield Ring, Angel Ring
Althena’s Fortress
- Objective
- Navigate through Althena’s Fortress, a lengthy dungeon divided into two parts: the fortress section and the tower section.
- After defeating the boss at the end of the fortress, proceed to the final room for an event scene.
- Then talk to Lucia. Return to the Destiny for another event scene
- After the event scenes, you will find yourself in Vane. Head over to the Magic Guild. You can talk to Ramus to buy items from him, or if you’re ready to continue the story, talk to Miria to advance the plot.
- Once you’re ready, head to the rooftop and speak with Leo. As you’re about to leave, an uninvited guest will appear. Talk to him to trigger a boss fight.
- After defeating the boss, talk to him and choose the second option to tell him you’re ready. This will transport you to the final dungeon.
- Treasure (Fortress): Vitality Vial, Healing Nut, Holy Water, Holy Mace, Crushing Fist, Master Shield, Holy Bracelet, Aura Bandanna, Aura Robe
- Treasure (Tower): Life Jewel, Passion Fruit, Silver Light, Angel’s Tear, Spirit Talisman, Goddess Crest, Star Light, Tri-Ring
Zophar’s Keep
- Objective
- The final dungeon isn’t particularly long, and it doesn’t feature the best loot. Most of the items you’ll find are Silver Lights and Life Jewels.
- However, the final boss is extremely tough. It’s highly recommended that you’re over level 50 to unlock Hiro’s final ability, which will make the fight easier. During the final battle, you’ll need to exploit the White Dragon Protect ability from the crest to survive. This ability requires a lot of MP, so make sure you have Silver Lights ready. It’s also recommended that you have Jean equip the White Dragon Crest, as she is the fastest and will ensure that everyone gets protected in time.
- When you regain control, talk to Nall.
- Then talk to Lucia on the balcony.
- Return and talk to Ruby.
- Head to the top of the Blue Spire to watch the ending.
- Treasure: Silver Light x4, Fiend Ring, Life Jewel x3
About the Epilogue
After you’ve finished saving your game and quit, reloading it will transport you to an additional storyline known as the Epilogue. This section serves as extra content post-game and ultimately leads to the actual ending. In this part, you have the liberty to traverse the world in whichever sequence suits you best. You’ll encounter several optional dungeons that offer top-tier gear as rewards, and there’s also an opportunity to gather numerous leftover bromides within this segment.
Reminder: You can now utilize Lucia’s Pendant, which operates much like the White Dragon Wings in Silver Star Story. It grants you the ability to warp to any town or location you’ve previously visited. Keep in mind that there are restrictions—it is not operable within buildings, so make sure to step outside before activating it.
Finding Your Friends
- Ronfar
- Recruitment: Find Ronfar in Raculi. He’s in the house in the upper right.
- Bromide (8/23): Mauri’s Bromide 2 – Open the treasure behind Ronfar’s house.
- Bromide (9/23): Mauri’s Bromide 1 – Talk to Mauri after Ronfar joins you.
- Lemina
- Recruitment: Talk to Lemina in the Vane Magic Guild.
- Bromide (10/23): Luna’s Bromide – Head to the house on the left near the entrance. Then talk to the woman there.
- Bromide (11/23): Borgan’s Bromide – Talk to Borgan in the Magic Guild.
- Bromide (12/23): Borgan’s Bromide X – Examine the Tapestry behind Borgan.
- Jean
- Recruitment: Talk to Jean in Madoria Carnival.
- Bromide (13/23): Jean’s Bromide 3 – On the second map of the Carnival, purchase for 3000 Silver by talking to the guy in front.
- Bromide (14/23): Jean’s Bromide 4 – Treasure chest in the second map by the upper right corner.
- Leo
- Recruitment: Talk to Leo at the top of Mystic Ruins.
- Bromide (15/23): Lucia’s Bromide 3 – Talk to the fairy by the upper right corner in the fairy garden.
- Bromide (16/23): Ghaleon’s Bromide – There is a chest in the room where Ghaleon first appears.
Side Quest
- Nota
- Rememberizer: This is a side quest that rewards you with the Rememberizer, an item that allows you to view all the anime cutscenes in the game. To begin the quest, head to Nota and go to the bridge, then enter the building to the east and speak with Julia. Choose the second dialogue option when prompted. Afterward, make your way to the pub on the west side of Nota and find Kyle sitting in the far left corner. Talk to him, select the second option again, and continue the conversation until he leaves. Once that’s done, return to the bridge for an event.
- Note (About the Rememberizer): Unlike Silver Star Story, in Eternal Blue, the Rememberizer doesn’t automatically unlock cutscenes as you view them throughout the game. Instead, to make the anime cutscenes playable through the Rememberizer, you’ll need to revisit the locations where the events originally triggered. When you find the right spot, a dialogue box will pop up, confirming that a scene has been unlocked.
Taben’s Peak
- Bromide (17/23): Lucia’s Bromide 4 – Check one of the cell rooms—inside, you’ll find a chest containing the bromide.
- Bromide (18/23): Lucia’s Bromide 2 – Talk to the baby on the balcony.
- Bromide (19/23): Nall’s Bromide – In the room before the balcony, talk to the girl in the left room with the playground equipment.
- Althena’s Sword: Talk to Nall.
- Meribia
- Bromide (20/23): Lemina’s Bromide 4 – There is a chest found on the very left side of the sewers.
- Horam
- Bromide (21/23): Jean’s Bromide 1 – Head to the house just to the left of the center yin-yang symbol. Make sure Jean is in your party, then speak to the old man inside.
- Takkar
- Bromide (22/23): Mystere’s Bromide – Talk to the old guy guarding the northern gate.
Optional Dungeons
- Brave Labyrinth
- Location: This is found by going to the cave north of Horam.
- Description: A dungeon full of dangerous enemies and no treasure chest. There is a boss at the end, and defeating it will let you obtain the Hero’s Talisman.
- Main Reward: Hero’s Talisman
- Dragon’s Nest
- Location: This is found by going to where Zophar’s Keep was previously located. This is to the west of Azado.
- Description: A dangerous dungeon spanning 9 floors, each containing a treasure. While there are no bosses to worry about in this dungeon, the regular enemy encounters can still be tough.
- Treasure: Goddess Hairpin, Goddess Bracelet, Nameless Sword, Dragon Shield, Sage Staff, Life Jewel, Silver Light, Chaos Armor, Gale Crest
- Lionhead
- Location: This is found just southeast of Neo-Vane.
- Description: A lengthy dungeon is riddled with traps. For the first several floors, there’s nothing to collect. As you climb higher, you’ll finally start finding treasures, culminating in a boss fight at the end. Just before the last room, you’ll find the final bromide in a chest on the balcony, and if you’ve collected all of them up to this point, you’ll unlock the Bromide Trophy.
- Treasure: Fantasy Ribbon, Miracle Bandanna, Lunn’s Armlet, Holy Shield, Hiro’s Bromide, Silver Light, Healing Ring, Fierce Fist
- Bromide (23/23): Hiro’s Bromide – Found in the treasure chest on the roof before the boss room.
- Lost Labyrinth
- Location: This hidden dungeon is accessed by making your way through the Illusion Woods. Once you return to the area where the bathing springs are located. A new entrance here will lead to a secret dungeon that wasn’t accessible earlier in the game.
- Description: A confusing dungeon where you will be looping around until you hit the correct warp to go further up. You can create a save file to check which floor you’re on. There are no treasures in the dungeon.
- Main Reward: Alex’s Ocarina
Dragon Ruins
- Objective
- To gain access to the final dungeon in the epilogue, you’ll need to obtain two key items: the Dragon Eyes.
- One of the Dragon Eyes can be obtained from the Dragon Statue seen in the introduction scene with Hiro and Ruby. To get there, head back to the area just west of Gwyn’s House.
- Head to the top of the ruins, and there will be a boss guarding at the end.
- Examine the dragon statue to obtain the Right Opal Jewel.
- Treasure: Justice Rod, Dragon Armor, Scarlet Wrap, Lion Helm, Archer Crest, Goddess Gauntlet, Silver Light
Water Ruins
- Objective
- The other dragon eye is located in the Water Ruins. You can get there by going to Sluice Forest. This is northwest of Azado.
- As you arrive at the location where the springs were originally found, you’ll notice that the water has now completely drained. This change reveals a previously inaccessible path leading into the Water Ruins.
- Navigate through the Water Ruins, make your way until you reach the final chamber. At the end of the dungeon, you’ll face off against a Guardian. Once you’ve defeated the Guardian, proceed to the last room where you’ll find the Left Sapphire Jewel.
- Treasure: Saint Clothes, Goddess Armor, Sage Robe, Dragon Helm, Berserker Claw, Life Jewel, Silver Light
Star Dragon Tower
- Objective
- With both Dragon Eyes in your possession, you can now unlock the entrance to the final dungeon in the epilogue.
- Star Dragon Tower is located at the end of Starlight Forest (East of Dalton). Once you make your way through the forest, you’ll come across a dragon statue. Insert the Left Sapphire Jewel and the Right Opal Jewel into the statue to go in.
- There isn’t any treasure chest in the final dungeon, but the dungeon is very lengthy. When you reach the top, you will fight the last boss of the epilogue.
- This boss is much straightforward compared to the main story final boss and should be far less of a struggle.
- After the battle, go near the green crystal to see the True Ending.
Read More
- Who Is Harley Wallace? The Heartbreaking Truth Behind Bring Her Back’s Dedication
- Basketball Zero Boombox & Music ID Codes – Roblox
- 50 Ankle Break & Score Sound ID Codes for Basketball Zero
- TikToker goes viral with world’s “most expensive” 24k gold Labubu
- Revisiting Peter Jackson’s Epic Monster Masterpiece: King Kong’s Lasting Impact on Cinema
- 100 Most-Watched TV Series of 2024-25 Across Streaming, Broadcast and Cable: ‘Squid Game’ Leads This Season’s Rankers
- 50 Goal Sound ID Codes for Blue Lock Rivals
- League of Legends MSI 2025: Full schedule, qualified teams & more
- KFC launches “Kentucky Fried Comeback” with free chicken and new menu item
- How to watch the South Park Donald Trump PSA free online
2025-04-17 13:32