Gray Zone Warfare offers gamers an immersive experience by combining strategic decisions with hard-hitting realism, where each piece of your equipment could spell the difference between survival and defeat. In this game, players tackle demanding missions that require careful management of gear, fine-tuning loadouts, and outwitting adversaries, adding depth to conventional gameplay. A current topic generating buzz among enthusiasts is the Terminal Initiative, where veterans are dissecting their strategies and equipment selections. Recently, a player named corporal__clegg shared his mission account, demonstrating that selecting the right gear isn’t merely a tactical move but a matter of staying alive in the harsh conditions of Gray Zone Warfare. The conversation among players quickly picked up steam with comments, suggestions, and their own interpretations of the mission, transforming it into a lively interaction filled with triumphs and obstacles.
Summary
- Choosing the right gear is crucial; a higher-rated plate carrier and compatible helmet were favored for stealth missions.
- Community members shared experiences on the importance of managing weight and equipment efficiently during exfiltration.
- Visual aids, like photos of gear setups, provide valuable insights into optimal loadouts.
- Success stories highlight how tactical preparation can influence the outcome of challenging missions.
Gear Selection: A Lifesaver in Gray Zone Warfare
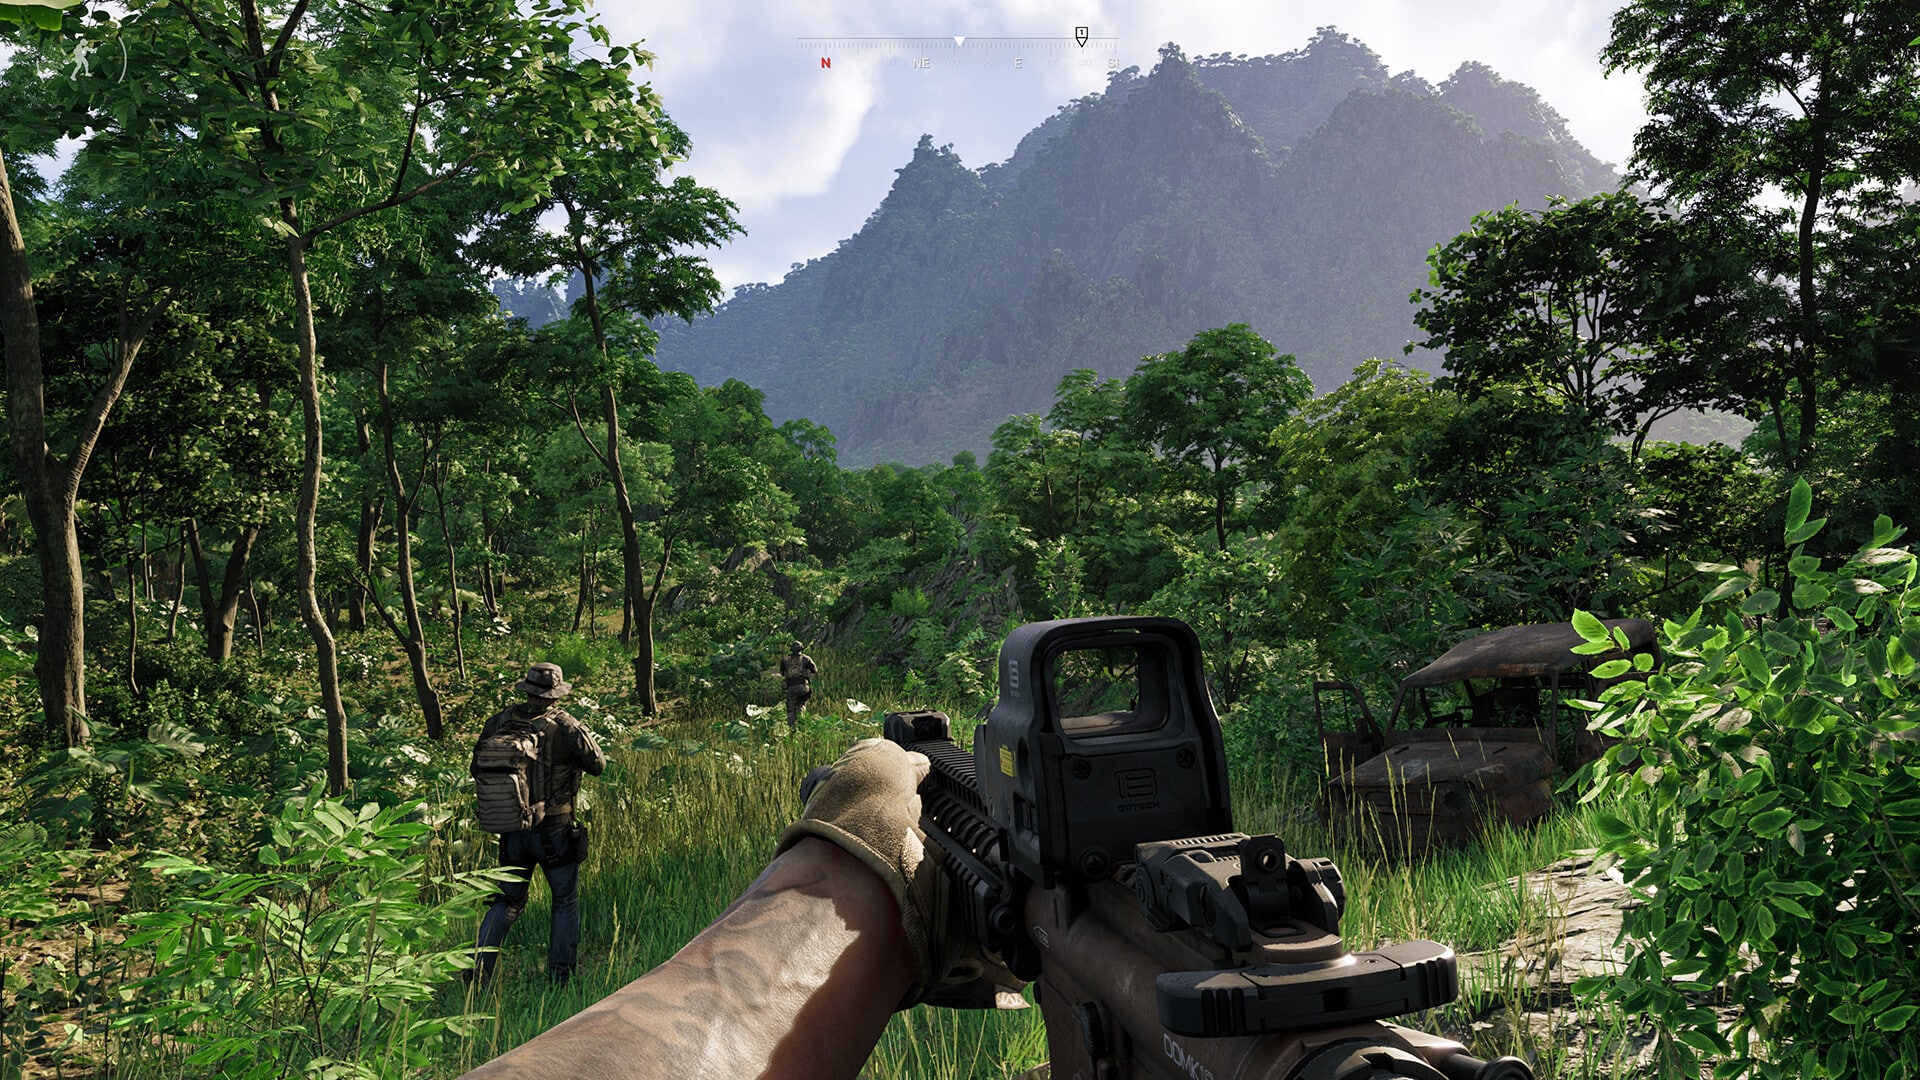
In Gray Zone Warfare, choosing the right gear can sometimes resemble preparing for an impending doomsday, with each item undergoing thorough examination, discussion, and doubt. Corporal Clegg exemplified this process flawlessly when he divulged details from his Terminal Initiative mission. He opted to carry a top-tier body armor plate carrier, renowned for its exceptional protection, and paired it with a disposable helmet optimized for Night Vision Goggles (NVG), signifying his dedication to stealth. His choice to forego grenades in favor of 855A1 rounds underscored his intention to stay unnoticed while minimizing unexpected difficulties during evacuation. This well-thought-out gear selection underscored a deep comprehension of the mission plan and the necessity of being agile, transforming camouflage and protection into a successful strategy.
Community Strategies and Weight Management
From the comments, it’s evident that carefully considering your choices is just as important as minimizing your physical load. User No_Ruin7486 offered a personal account of how they managed a mission effectively with their regular equipment and an innovative approach. Upon receiving the package, they decided to discard their backpack to reduce their overall weight. This action highlights a crucial lesson frequently disregarded in intense gameplay: the ability to adapt. In a scenario where excess becomes cumbersome, shedding unnecessary gear can significantly enhance mobility, particularly during escape. Numerous players have expressed similar thoughts, warning against hoarding items as it may result in a slow and vulnerable character, making them an easy target for surprise attacks. Therefore, in the realm of Gray Zone Warfare, less truly can be more effective.
Visuals: Insight Through Imagery
In a tactical gunfighting subreddit, the phrase “What you see can help you win” is more valuable than the familiar saying “What you can’t see can hurt you.” User LBants emphasized the importance of visual storytelling by showing off their gear setup, sparking enthusiasm and conversation among other players. It’s amazing how a single image can convey far more than mere words. These images not only display available equipment but also provide tips on improvising and optimizing loadouts for various missions. This has led to an engaging thread where users post their gear photos, creating a gallery that showcases creativity and innovative thinking. The growth of social media has fostered a vibrant community based on shared knowledge, which is crucial for success in a game like Gray Zone Warfare.
The Thrill of Victory and Learning from Losses
Following numerous tactical debates and equipment analyses, it’s the tales of triumph and close calls that truly captivate. Corporal Clegg’s triumphant yell upon successfully completing the Terminal Initiative on the first attempt underscores the value of careful planning. Their account of finishing part three with a remarkable 17 out of 20 kills, while wearing level 3+ gear, showcases the mix of strategy, skill, and a touch of fortune. This encouragement resonates throughout the comments, as players share their victories and missteps. Each story functions as a teaching tool, reminding everyone that each mission presents a chance for growth. Whether players are bragging about their equipment or learning to adapt after a failed attempt, every experience enhances their strategy in Gray Zone Warfare, continually shaping an evolving comprehension of gameplay.
success depends on having the appropriate gear and the right companionship.
Read More
- Who Is Harley Wallace? The Heartbreaking Truth Behind Bring Her Back’s Dedication
- Basketball Zero Boombox & Music ID Codes – Roblox
- 50 Ankle Break & Score Sound ID Codes for Basketball Zero
- TikToker goes viral with world’s “most expensive” 24k gold Labubu
- Revisiting Peter Jackson’s Epic Monster Masterpiece: King Kong’s Lasting Impact on Cinema
- 100 Most-Watched TV Series of 2024-25 Across Streaming, Broadcast and Cable: ‘Squid Game’ Leads This Season’s Rankers
- 50 Goal Sound ID Codes for Blue Lock Rivals
- League of Legends MSI 2025: Full schedule, qualified teams & more
- KFC launches “Kentucky Fried Comeback” with free chicken and new menu item
- Gaming’s Hilarious Roast of “Fake News” and Propaganda
2025-04-07 18:45