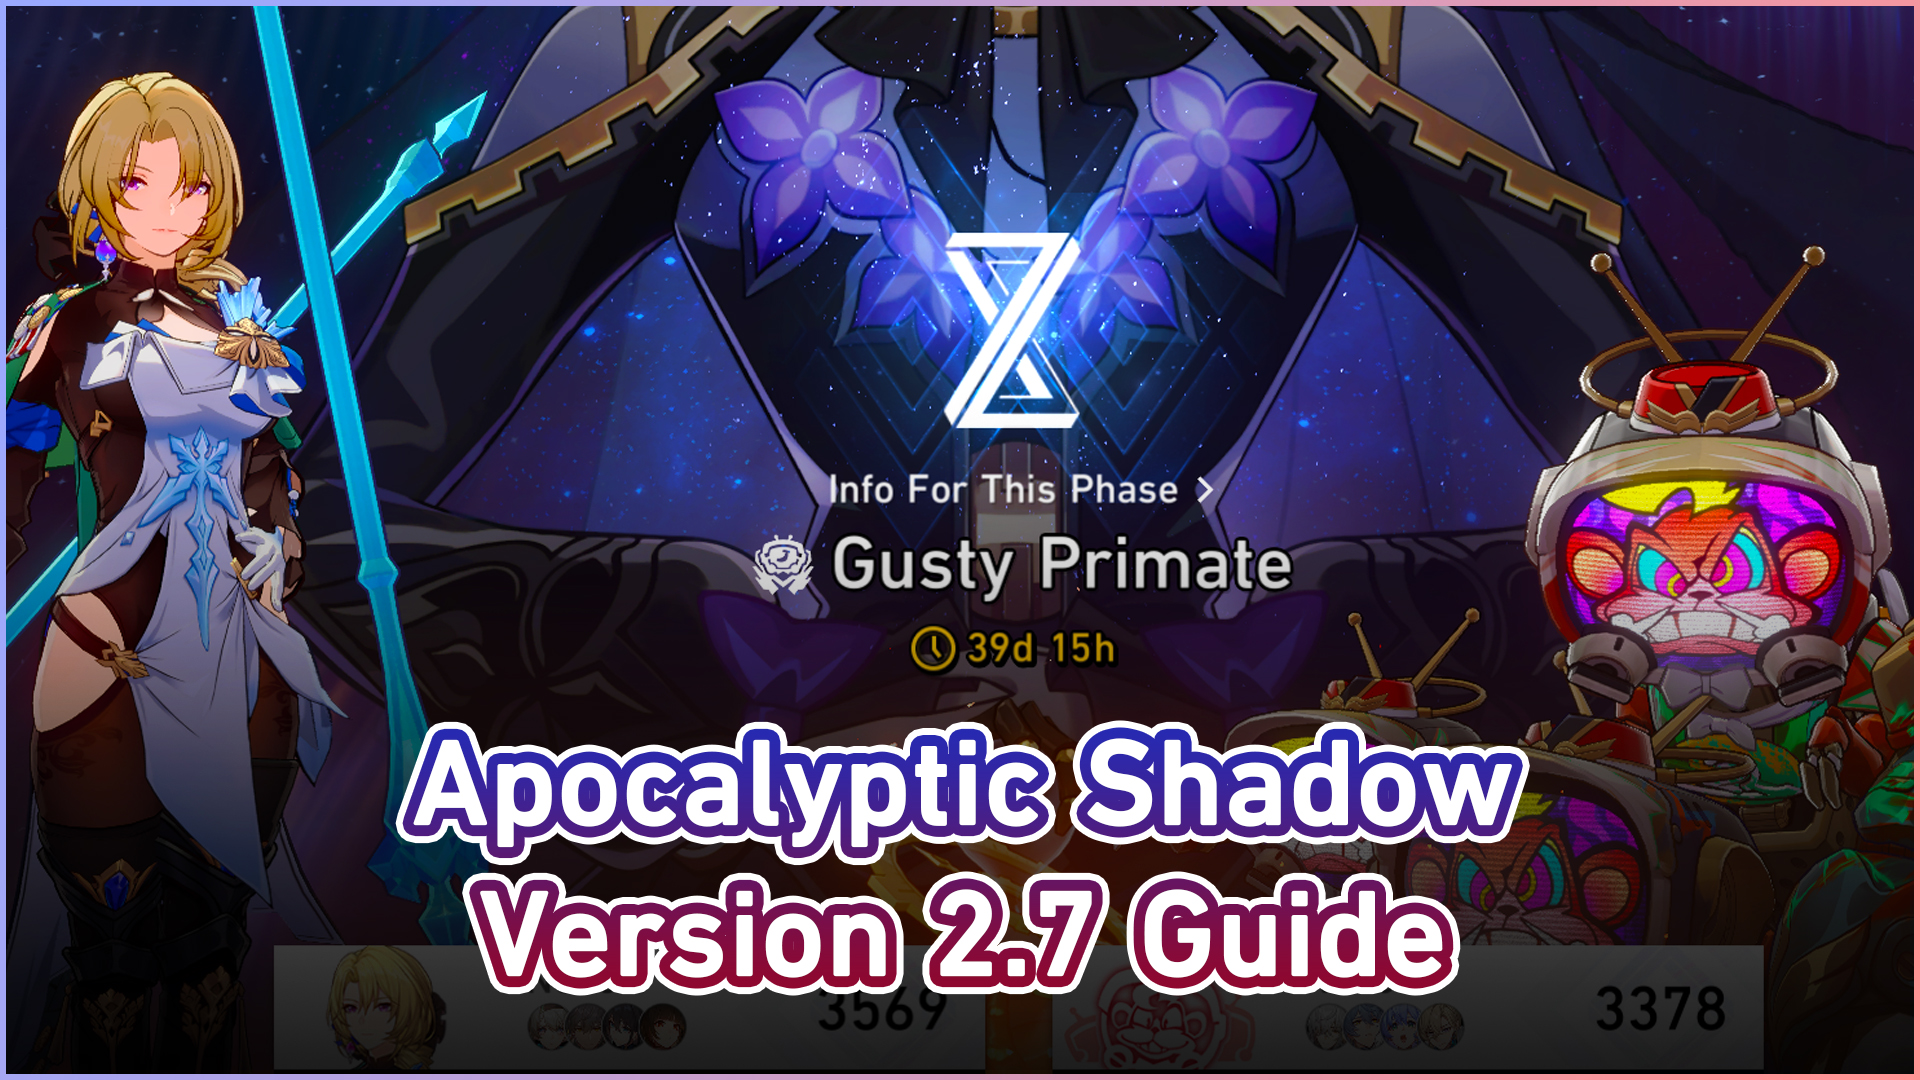
Alright folks, let me tell you about my encounter with this peculiar Banana-themed battle. As a seasoned gamer with over 30 years of experience under my belt, I’ve seen it all – from pixelated Pac-Men to hyper-realistic zombies in VR. But nothing quite prepared me for the bizarre spectacle that was this Bananacademy showdown.
Apocalyptic Shadow in version 2.7 has refreshed to Gusty Primate. In this version, you’ll be facing Cocolia and Blaznana Monkey Trick.
Current Buff in Apocalyptic Shadow V2.7
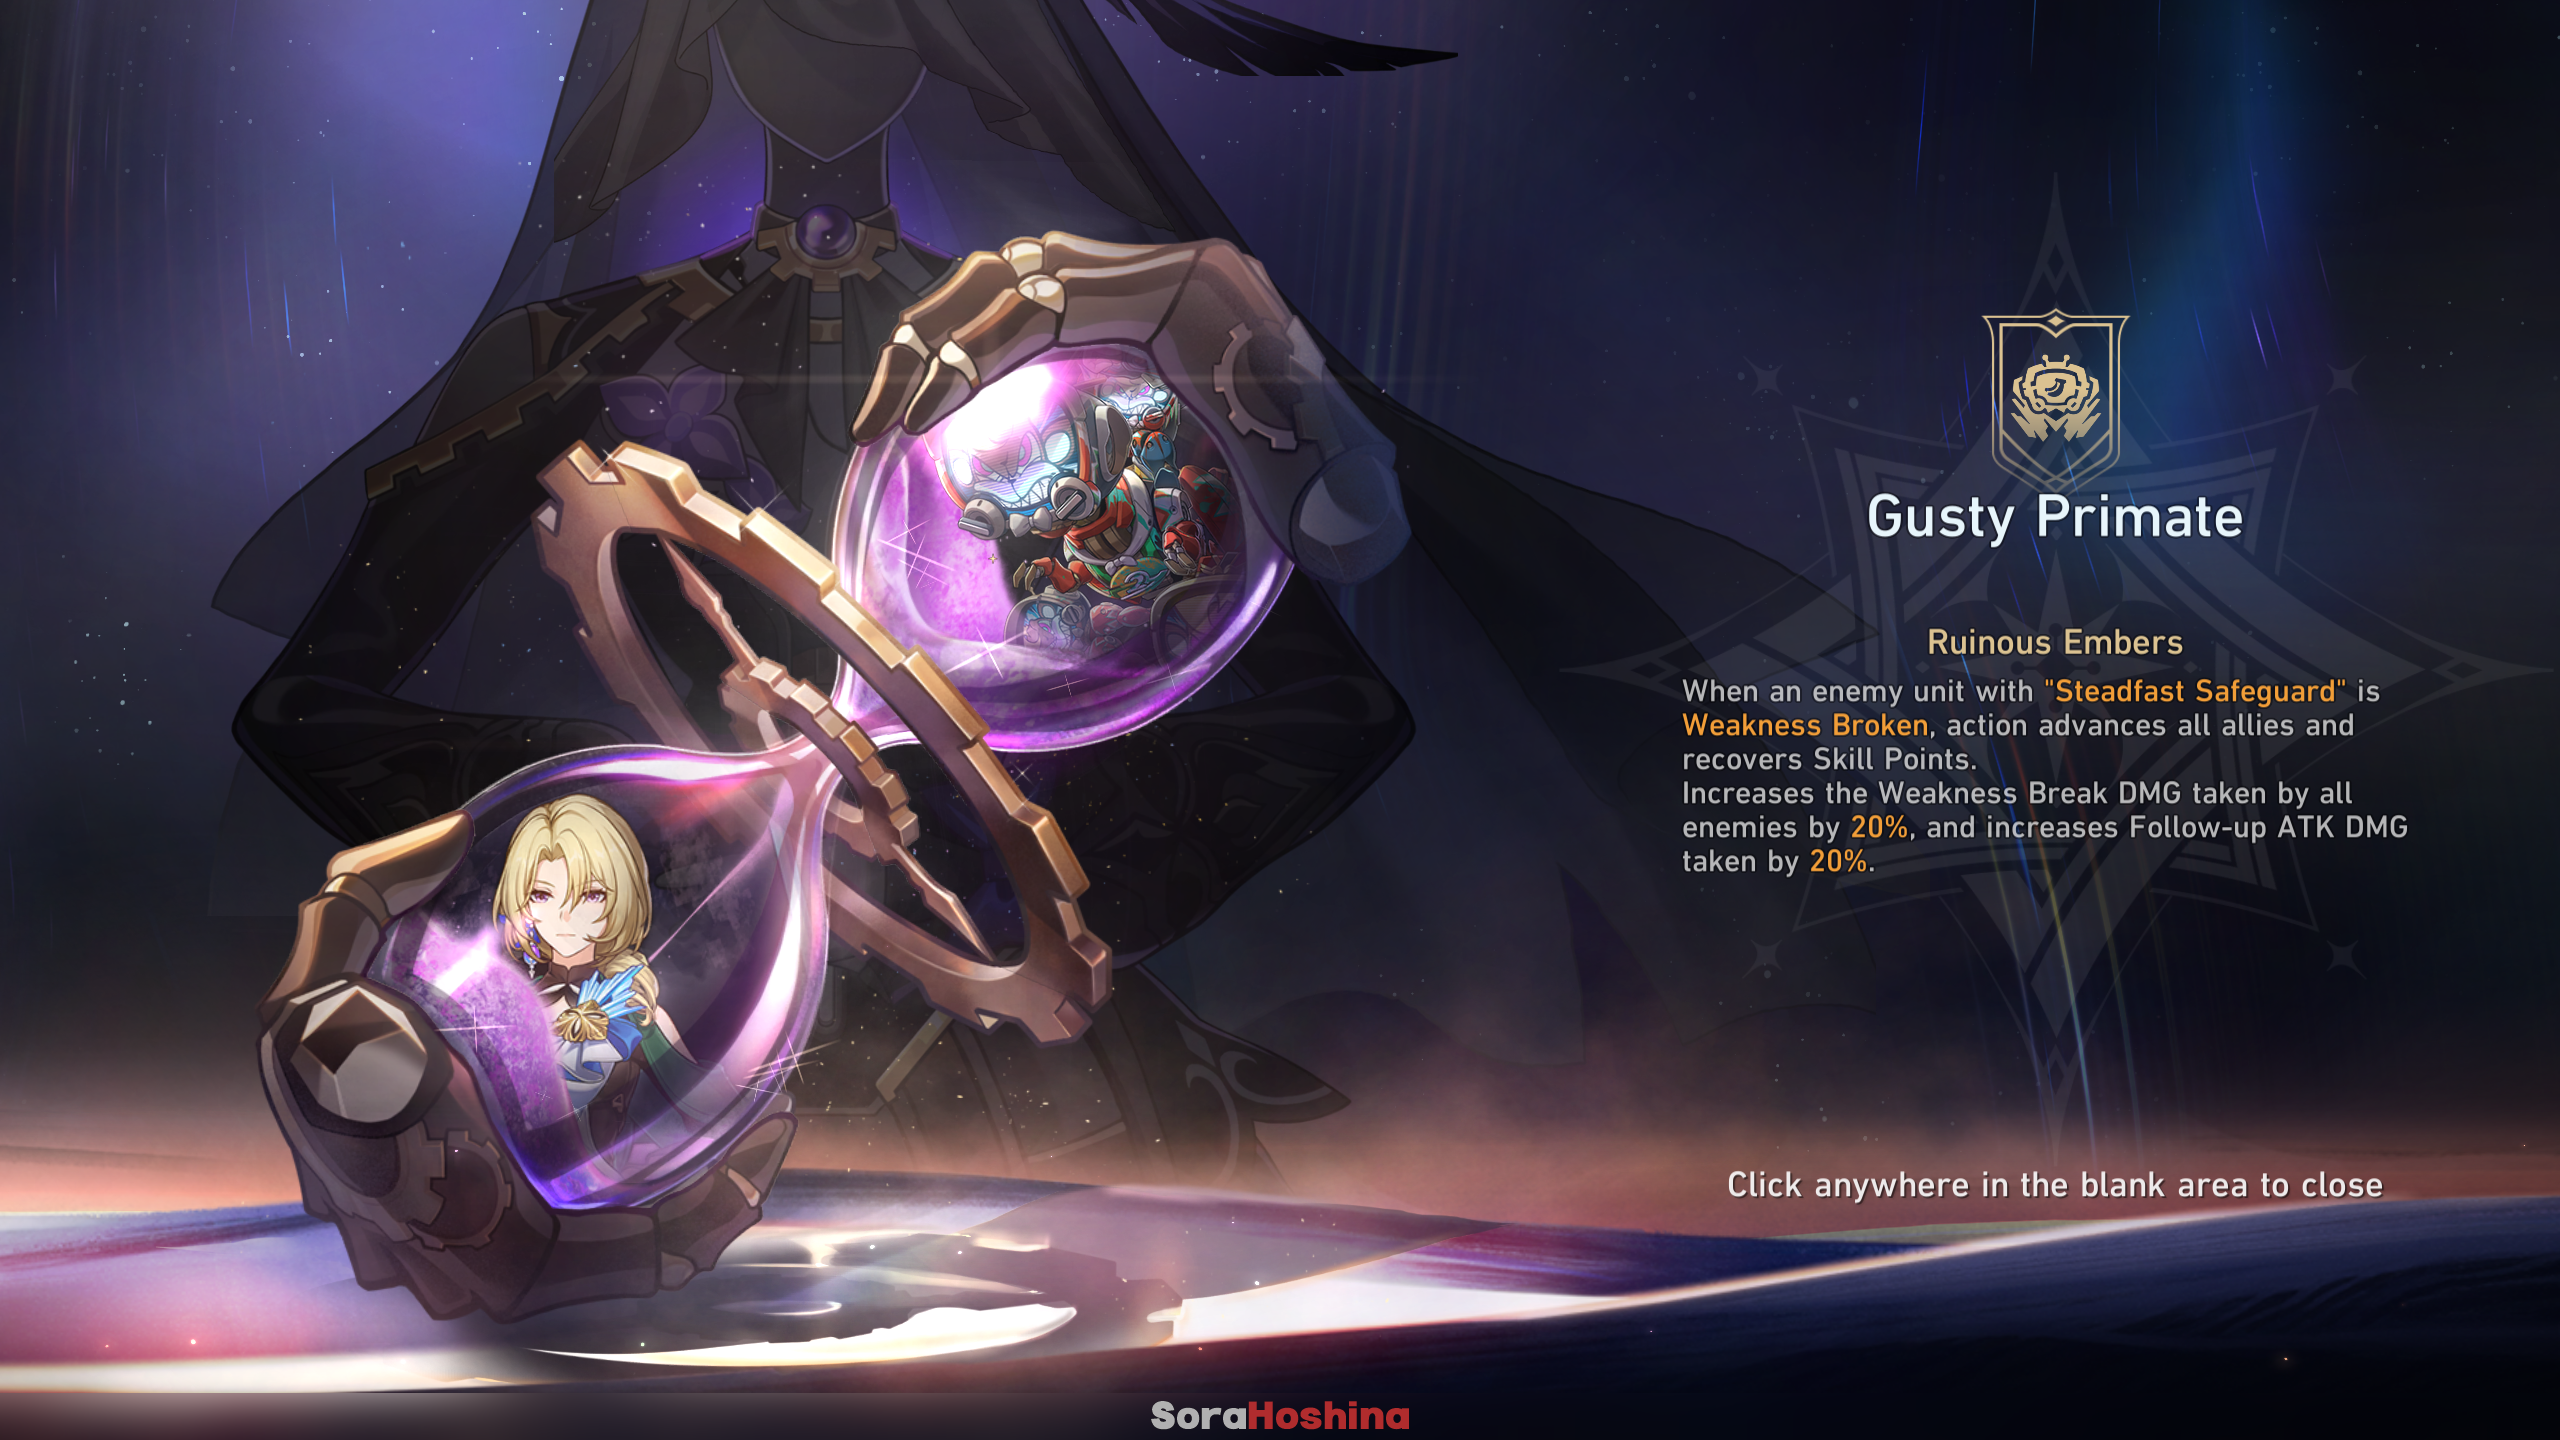
- When an enemy unit with “Steadfast Safeguard” aka Cocolia and Blaznana Monkey Trick is Weakness Broken, action advances all allies and recover Skill Points.
- The Skill Points recovered are 5 SP. If you bring Sparkle in the team and Weakness Break the enemy, your SP will recover from 1 to 6 SP (out of 7 SP)
- Increases Weakness Break DMG taken by all enemies by 20%.
- Increases Follow-up ATK DMG taken by all enemies by 20%.
- Based on the two buffs above, it’s obvious this AP is suitable for Follow-Up team like Feixiao or Jing Yuan as the Main DPS & Break team with Firefly or Rappa as the Main DPS.
Boss 1: Cocolia (Annihilator of Desolation Mistral)

| RES | Physical RES, Ice RES, Imaginary RES & Control Effects RES |
| Recommended Type | Quantum, Wind, Lightning & Fire |
List of Buffs

- Rime PiercerIncreases all enemies’ Break DMG taken by 10%. After Breaking an enemy’s Weakness, increases all allies’ SPD by 20% for 2 turn(s)
- Persistence of Decay
Before enemy units with “Steadfast Safeguard” are Weakness Broken, tally the amount of DoT they receive. When a unit is Weakness Broken, deals Additional DMG to this unit equal to 200% of the tallied DoT - Rolling StormIncreases Quantum DMG dealt by all allies’ by 60%. After defeating an enemy target, advances the attacker’s action by 15%.
Team Comp & Buff Choice

| No. | Team Example | Buff |
|---|---|---|
| 1 | Acheron + Kafka + Black Swan + Healer | Persistence of Decay |
| 2 | Firefly + Ruan Mei + Harmony Trailblazer + Lingsha/Gallagher | Rime Piercer |
| 3 | Feixiao + Topaz/March 7th The Hunt/Moze + Robin + Aventurine/Lingsha | Rime Piercer |
| 4 | Seele + Sparkle/Bronya/Sunday + Silver Wolf + Fu Xuan/Lynx | Rolling Storm |
| 5 | Boothill + Ruan Mei + Harmony Trailblazer + Lingsha/Gallagher | Rime Piercer |
| 6 | Jade + Himeko + Robin/Ruan Mei/Asta/Pela + Healer | Rolling Storm |
| 7 | Jing Yuan + Sunday + Robin/Tingyun + Huohuo | Rime Piercer |
| 8 | Acheron + Jiaoqiu + Pela + Lingsha/Gallagher | Persistence of Decay / Rime Piercer |
Boss Trait
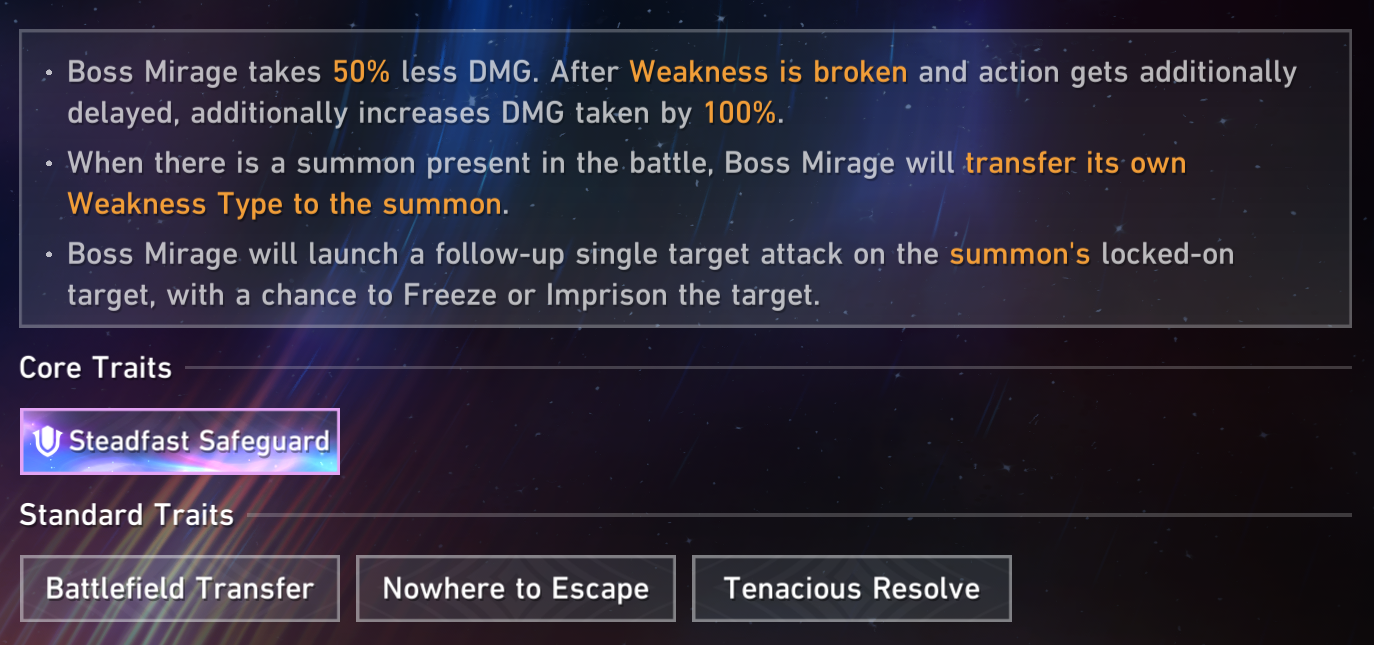
- Boss Mirage takes 50% less DMG. After Weakness is broken and action gets additionally delayed, additionally increases DMG taken by 100%.
- Boss Mirage will transmit its own Weakness Type to the summon. After any one of its summons is defeated, the summon’s Weakness Type will be returned to the Boss Mirage.
- Boss Mirage will launch a follow-up single target attack on the summon’s locked on target, with a chance to Freeze or Imprison the target.
Boss Trait: Steadfast Safeguard
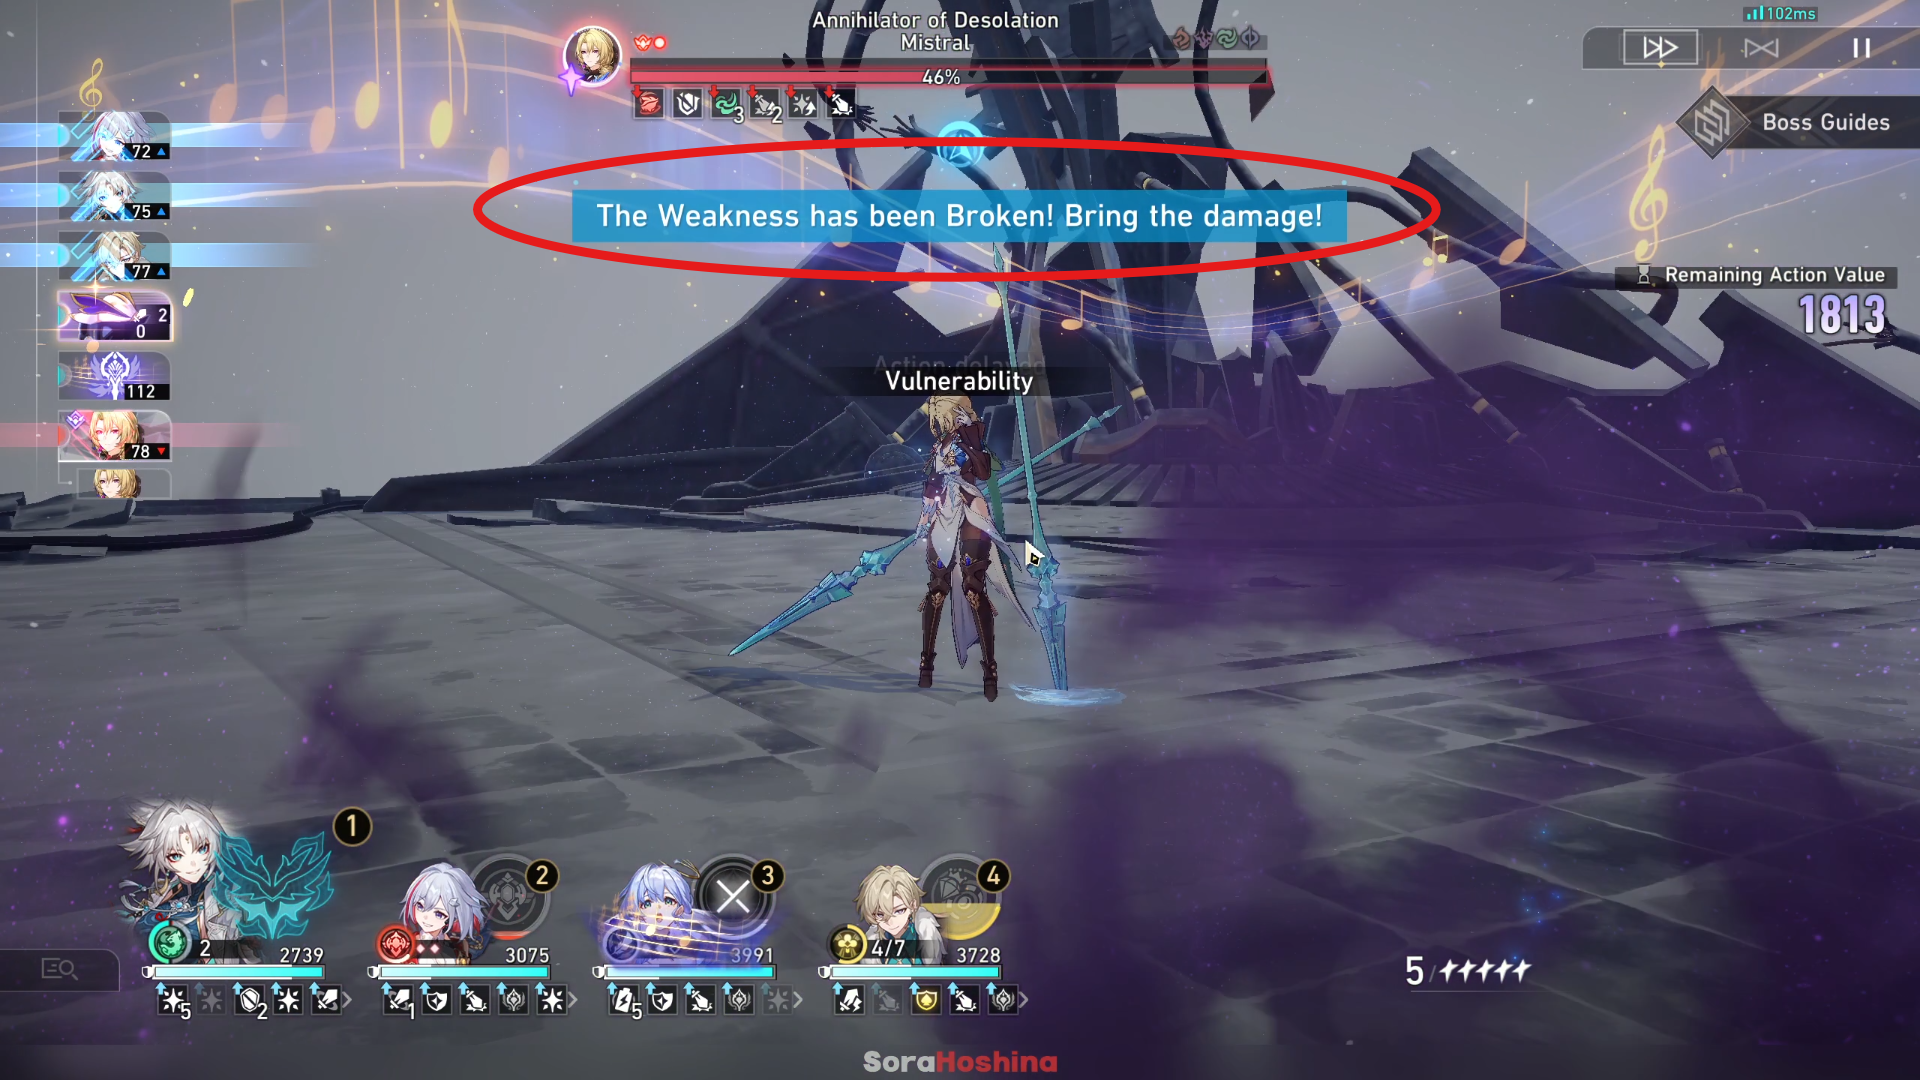
When fighting against Cocolia, it’s important to note her unique traits. If Cocolia hasn’t had her Weakness Broken, she can withstand 50% less damage than normal. However, once her Weakness is broken and action gets delayed, she becomes more vulnerable and will take 100% more damage.
Boss Trait: Battlefield Transfer
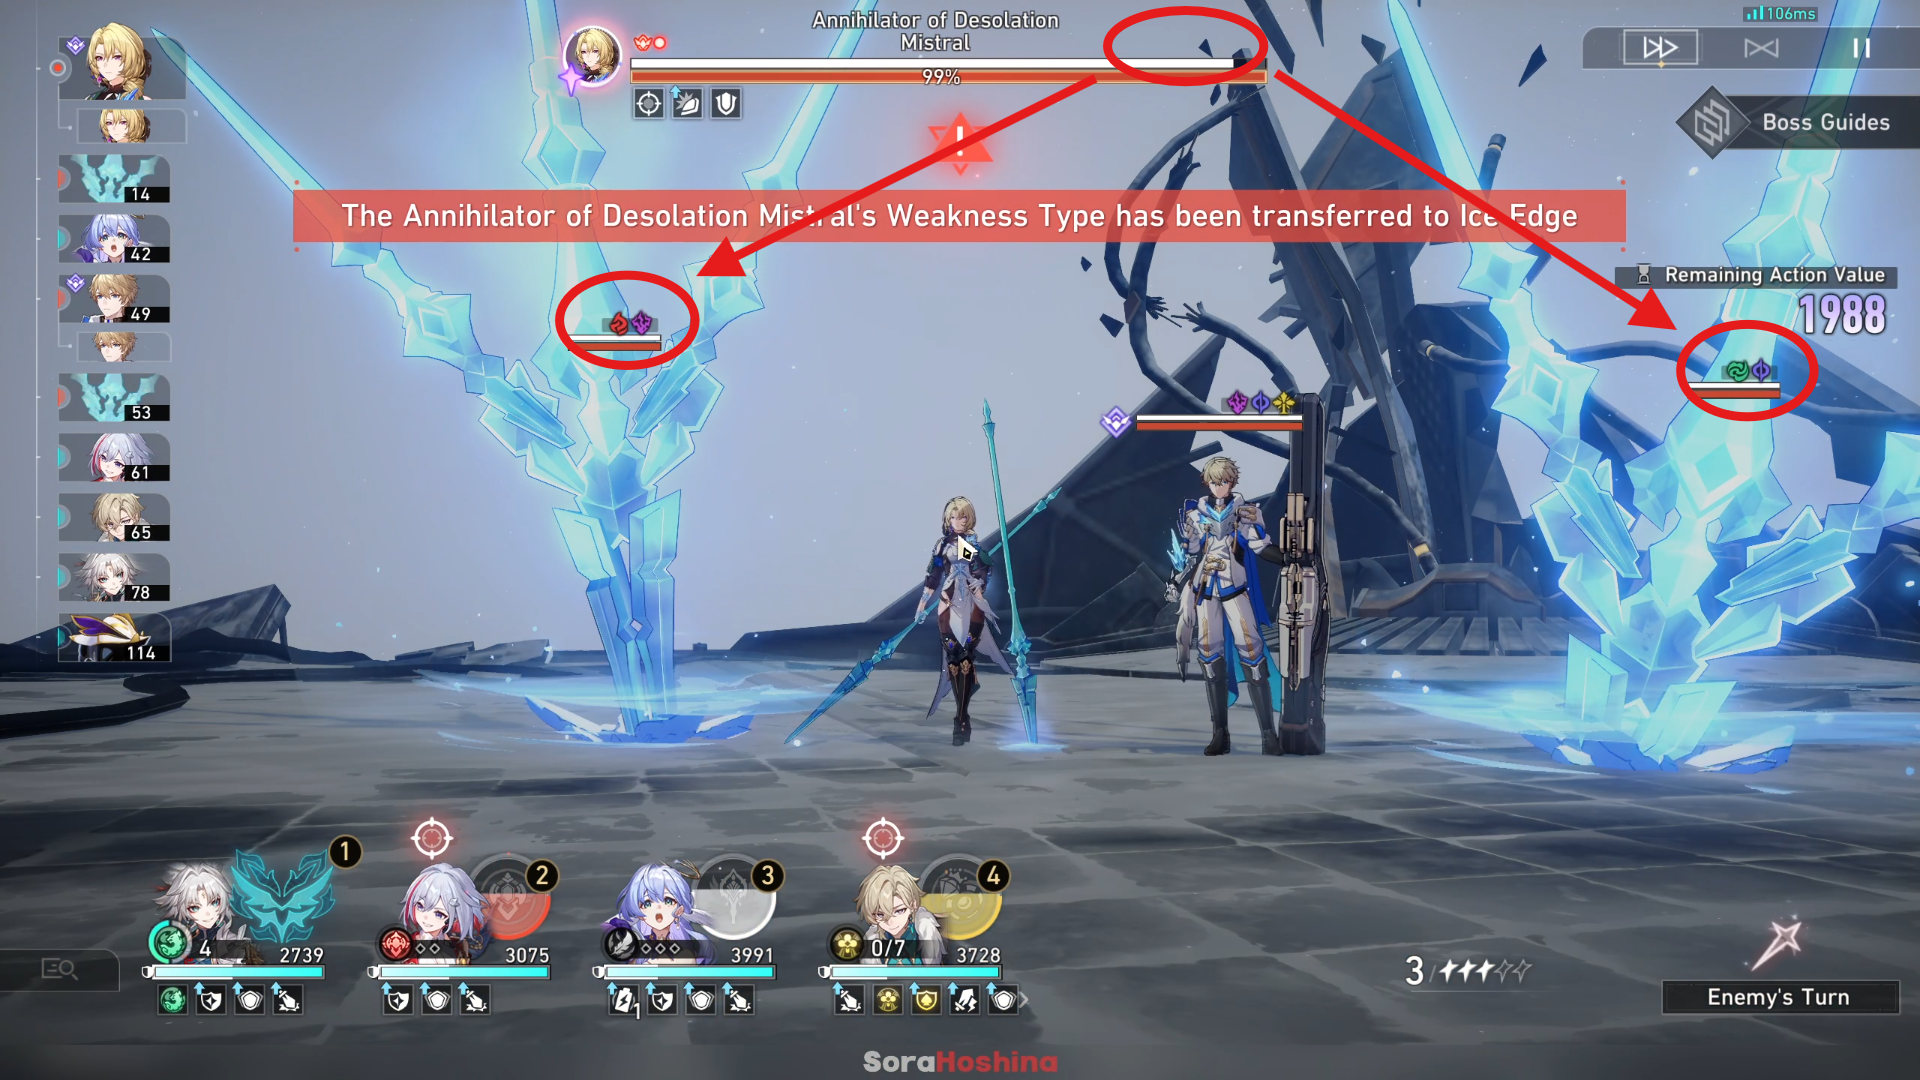
Initially, Cocolia will materialize just two ice blades. Once these two appear, she transfers her vulnerabilities to them: one blade is vulnerable to Fire and Lightning elements, while the other is susceptible to Wind and Quantum. At this point, Cocolia herself becomes immune to any Weakness Breaks since she no longer has any weaknesses. However, if you manage to defeat these ice blades, their Weakness will revert back to Cocolia, and her toughness will decrease slightly as well.
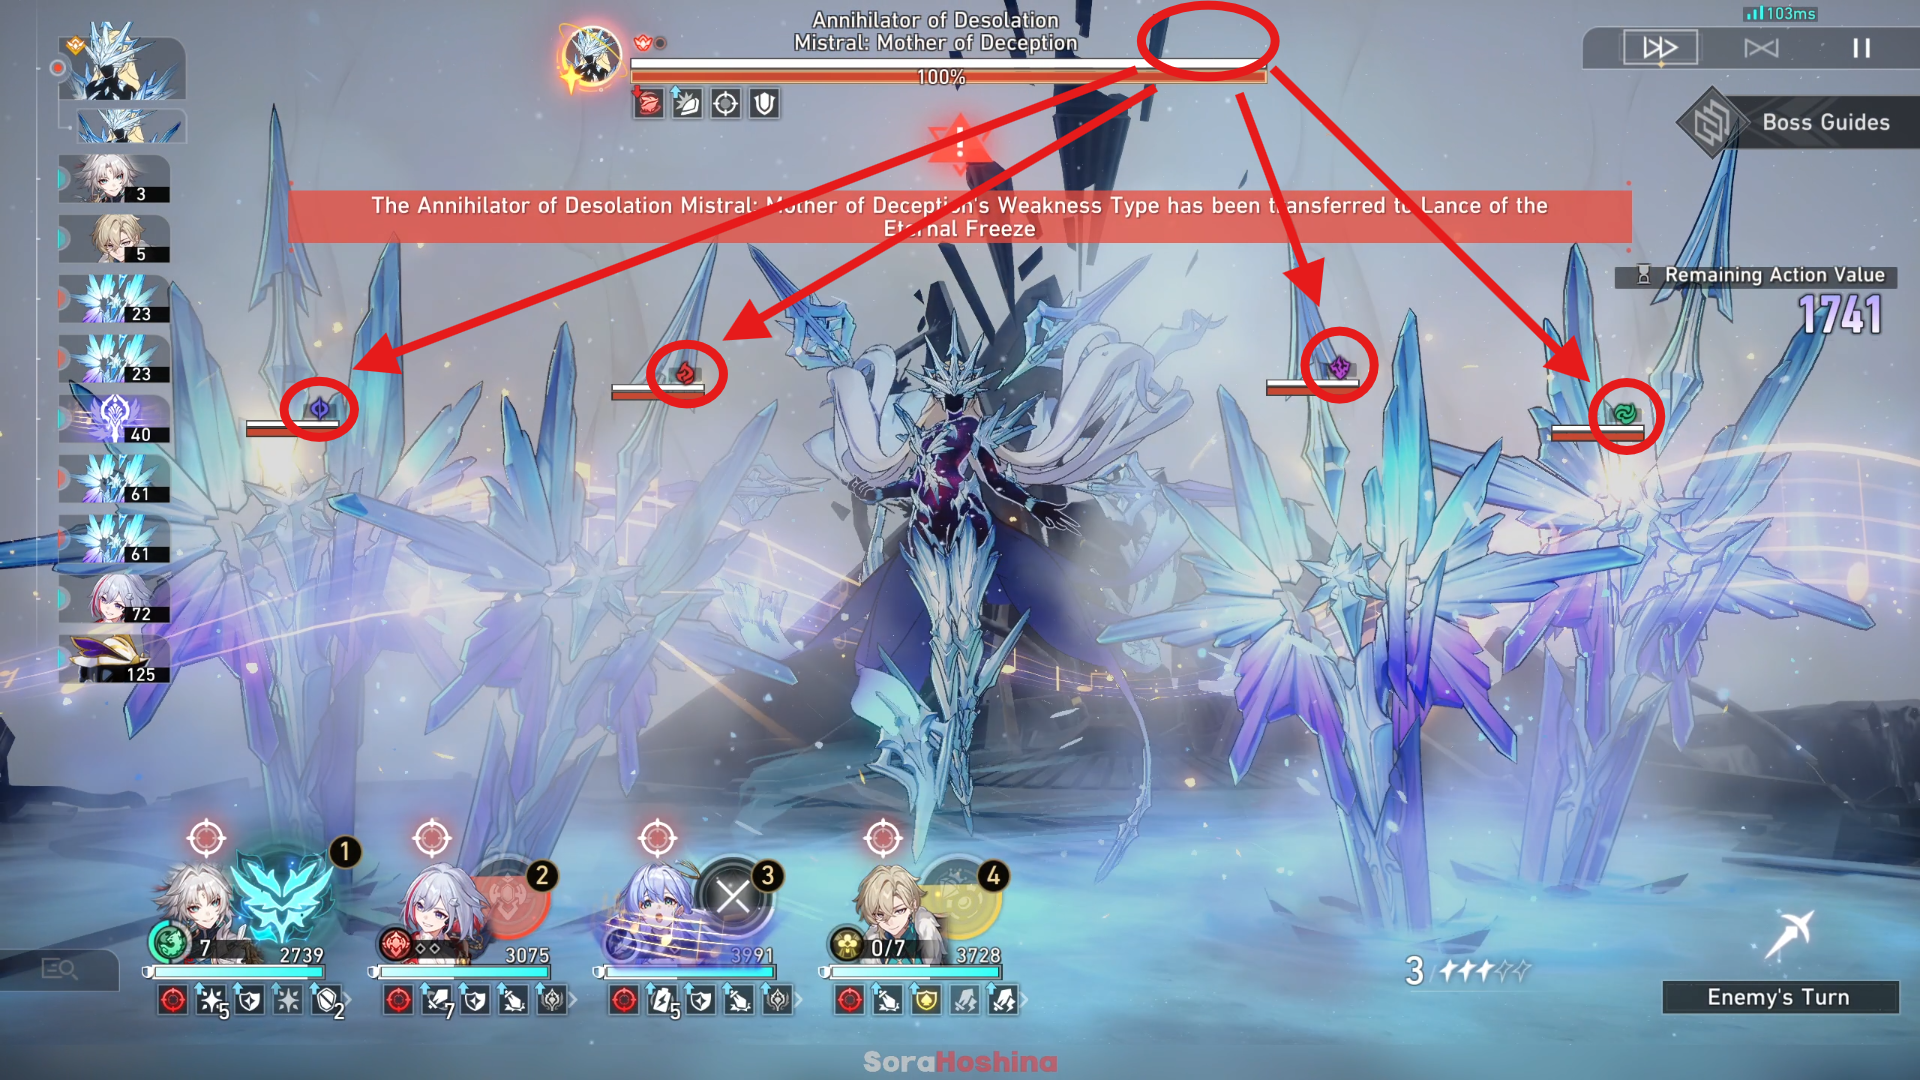
During the second stage, Cocolia is expected to conjure up four ice blades. Once all of these blades have been summoned, each one will absorb one of Cocolia’s vulnerabilities.
Boss Trait: Nowhere to Escape
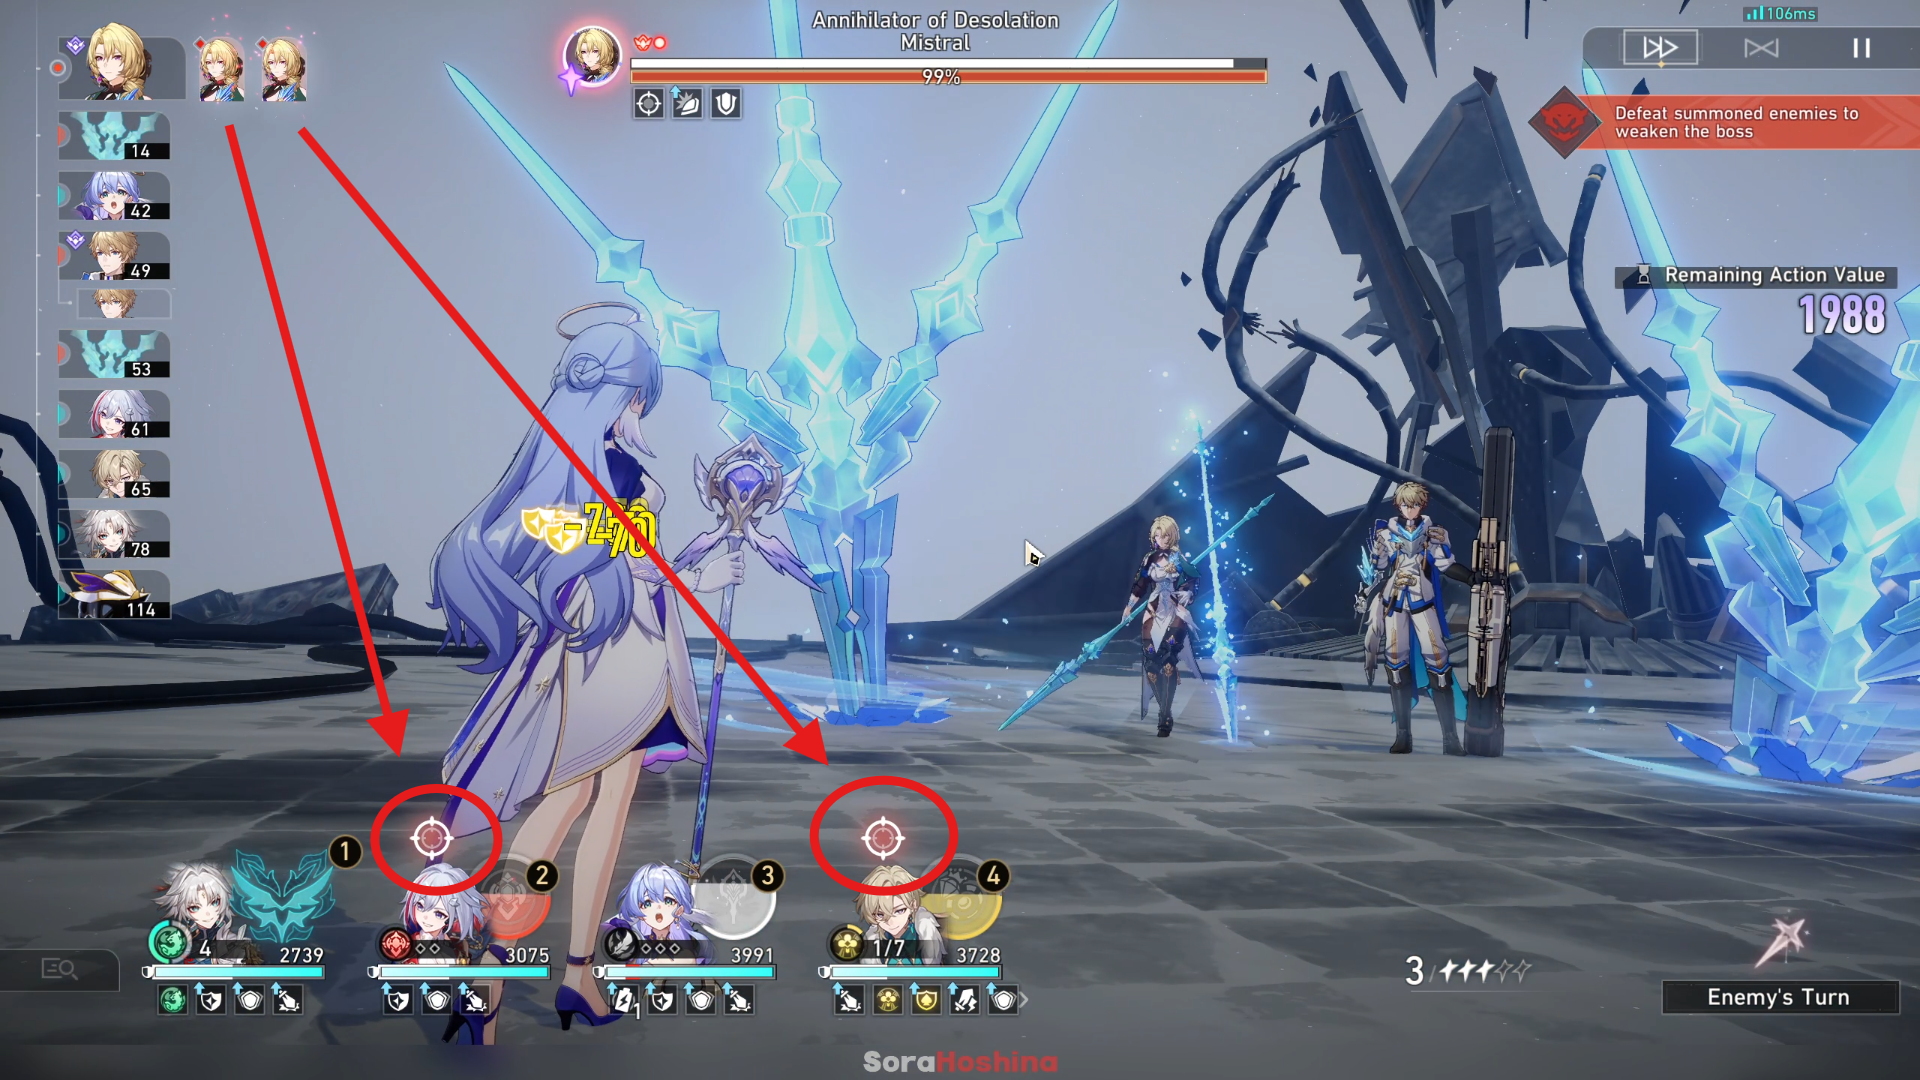
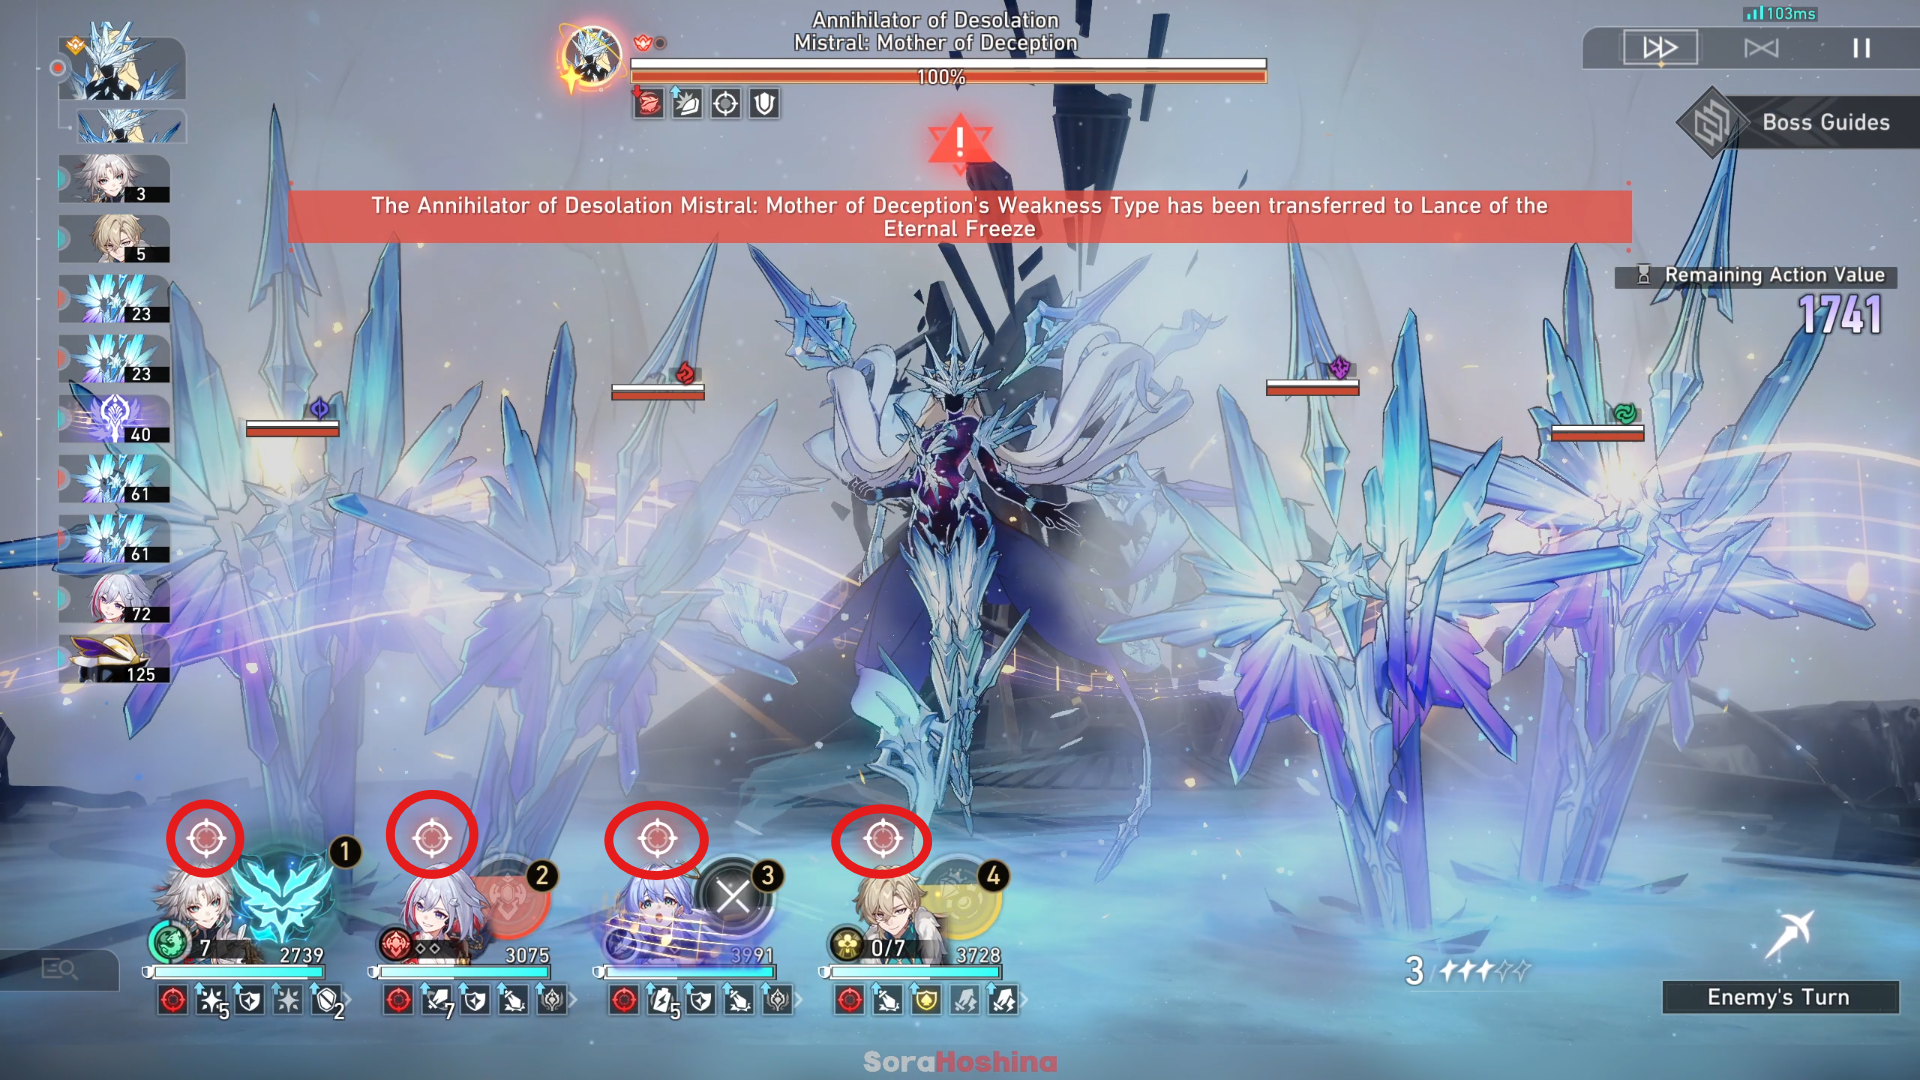
The ice blade will tag one character. After Cocolia employs a skill that targets only one, if there’s a tagged character, she’ll follow up with an additional attack. This becomes more problematic in the second phase because there are 4 ice blades, which means 4 characters are tagged, resulting in 4 Follow-Up attacks by Cocolia.
Boss Trait: Tenacious Resolve
The more weakness types an enemy possesses, the greater the damage they’ll incur, while their overall damage received is simultaneously reduced. For instance, if Cocolia only has one weakness, she sustains minimal damage. However, when Cocolia has all four weaknesses restored, the amount of damage she receives increases significantly.
Challenge Strategy
Defeat the 2 summons to return the Weakness
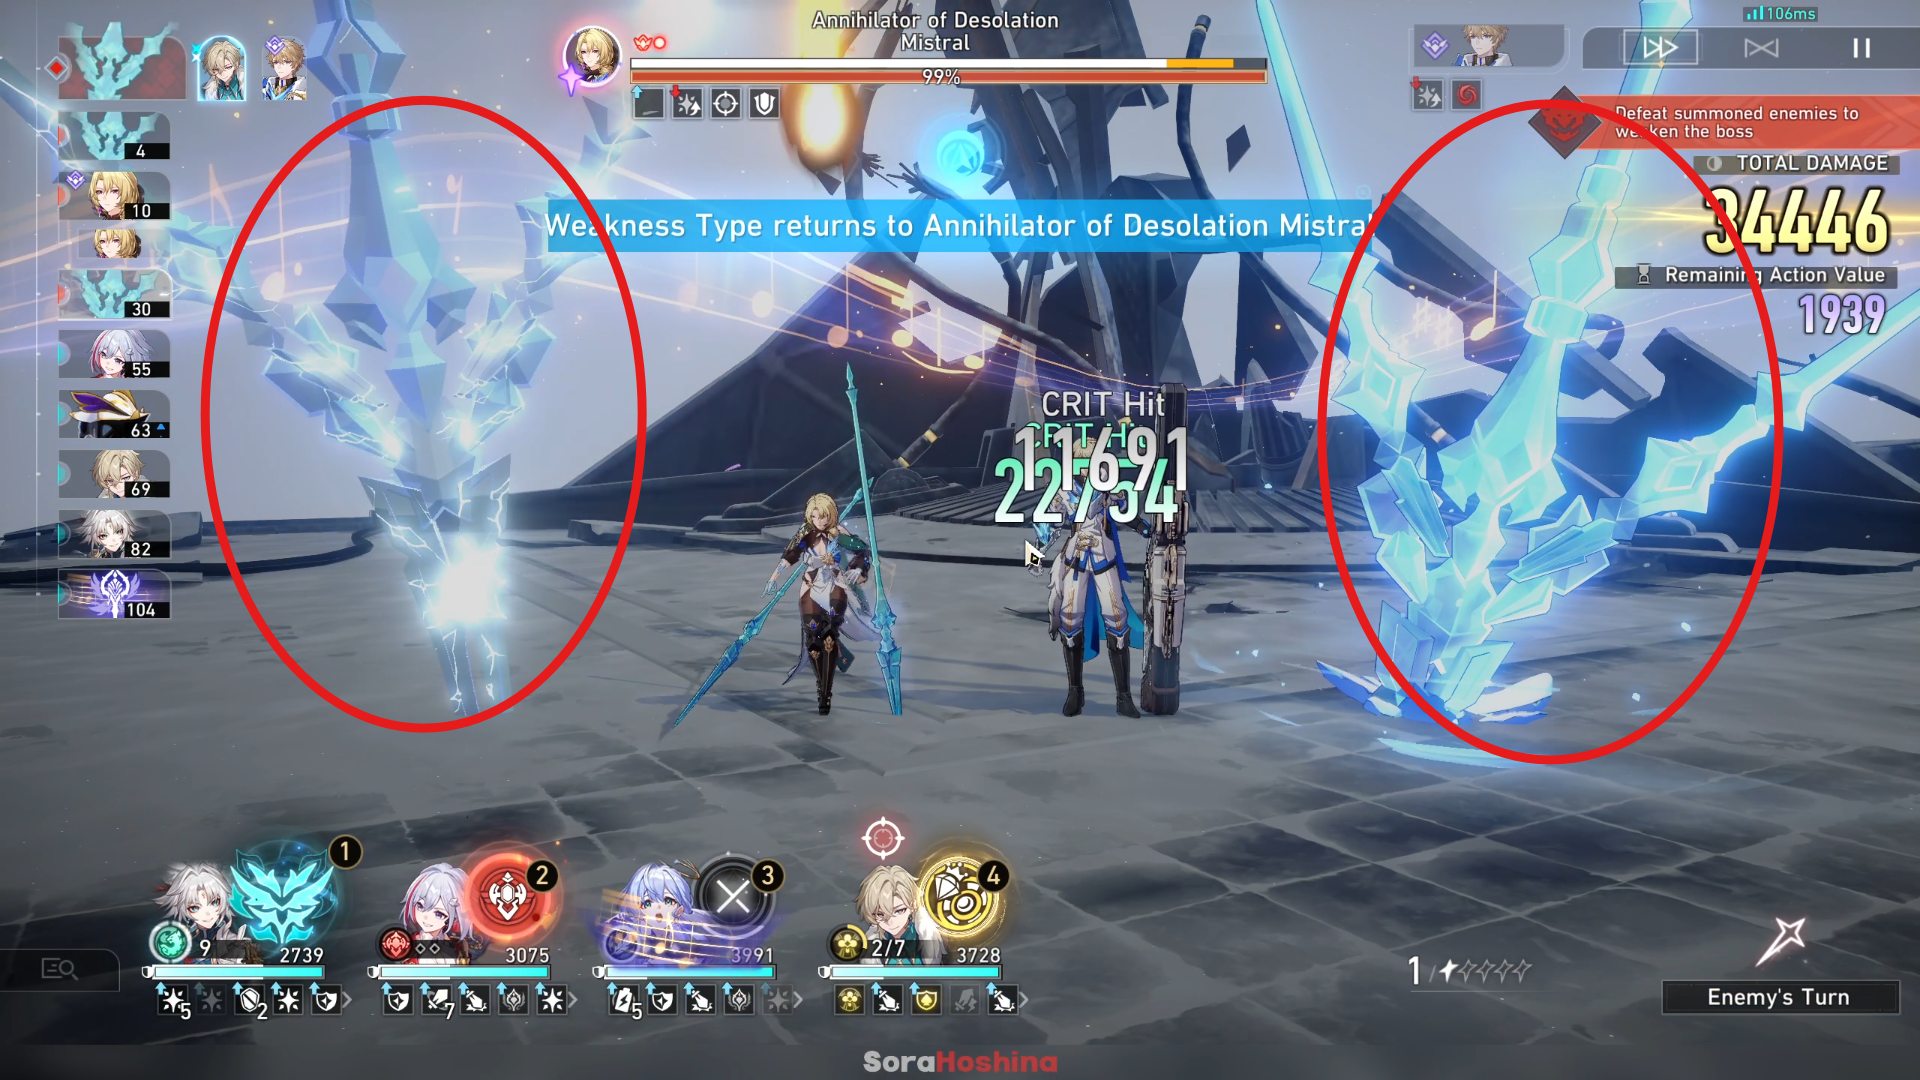
During the fight, once Cocolia calls forth her icy blades, you should concentrate on a single summon, switching to both if you’ve brought an Area of Effect damage dealer. Among these summons, target the minion with the Weakness Type that aligns with your Main DPS character. As the first minion falls, its Weakness will shift to Cocolia herself.
Defeat Gepard before he can create a shield
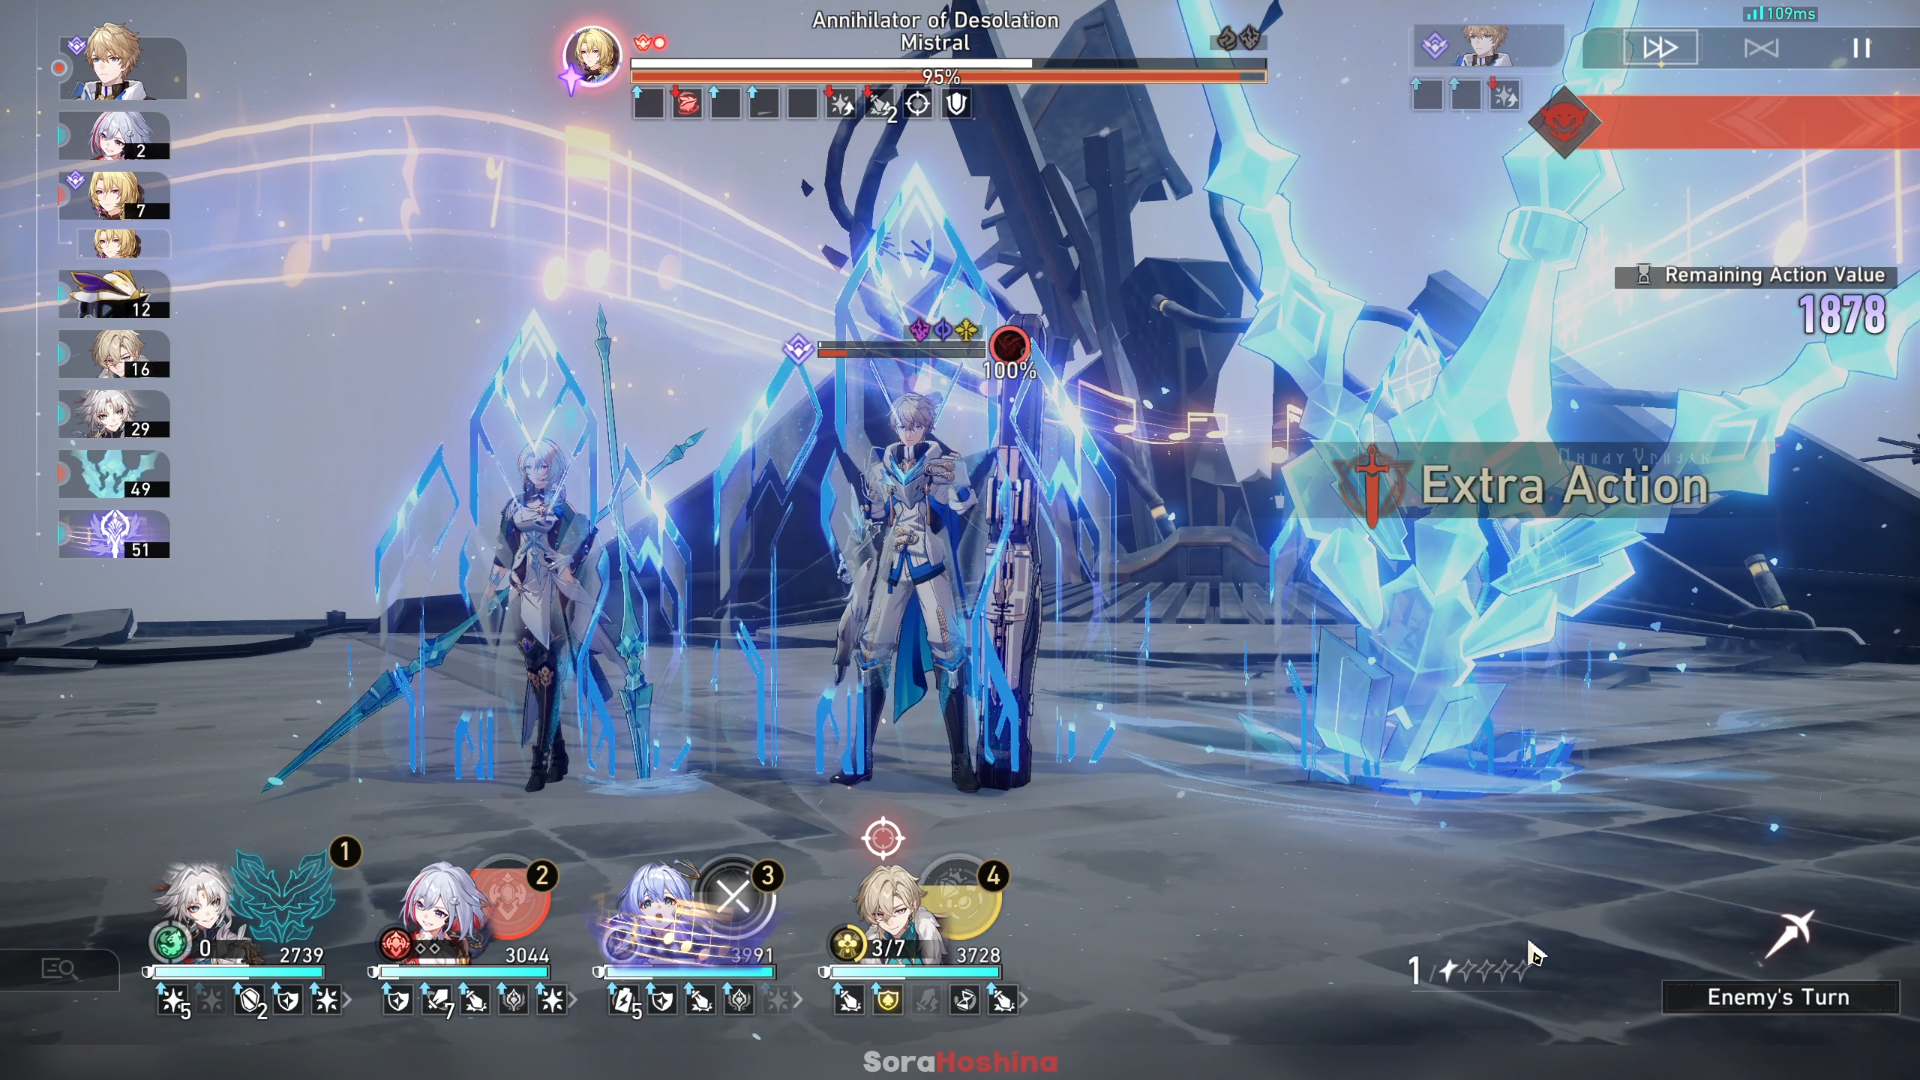
Apart from his icy blades, Gepard poses a danger as he can erect a robust barrier on his second turn – something he doesn’t do when fighting alongside us. Keep in mind, it’s his second turn! If you can break his defense before the second turn, he will revert to his initial move sequence. In essence, the sequence goes like this: attack > additional attack > second attack > barrier (SHIELD).
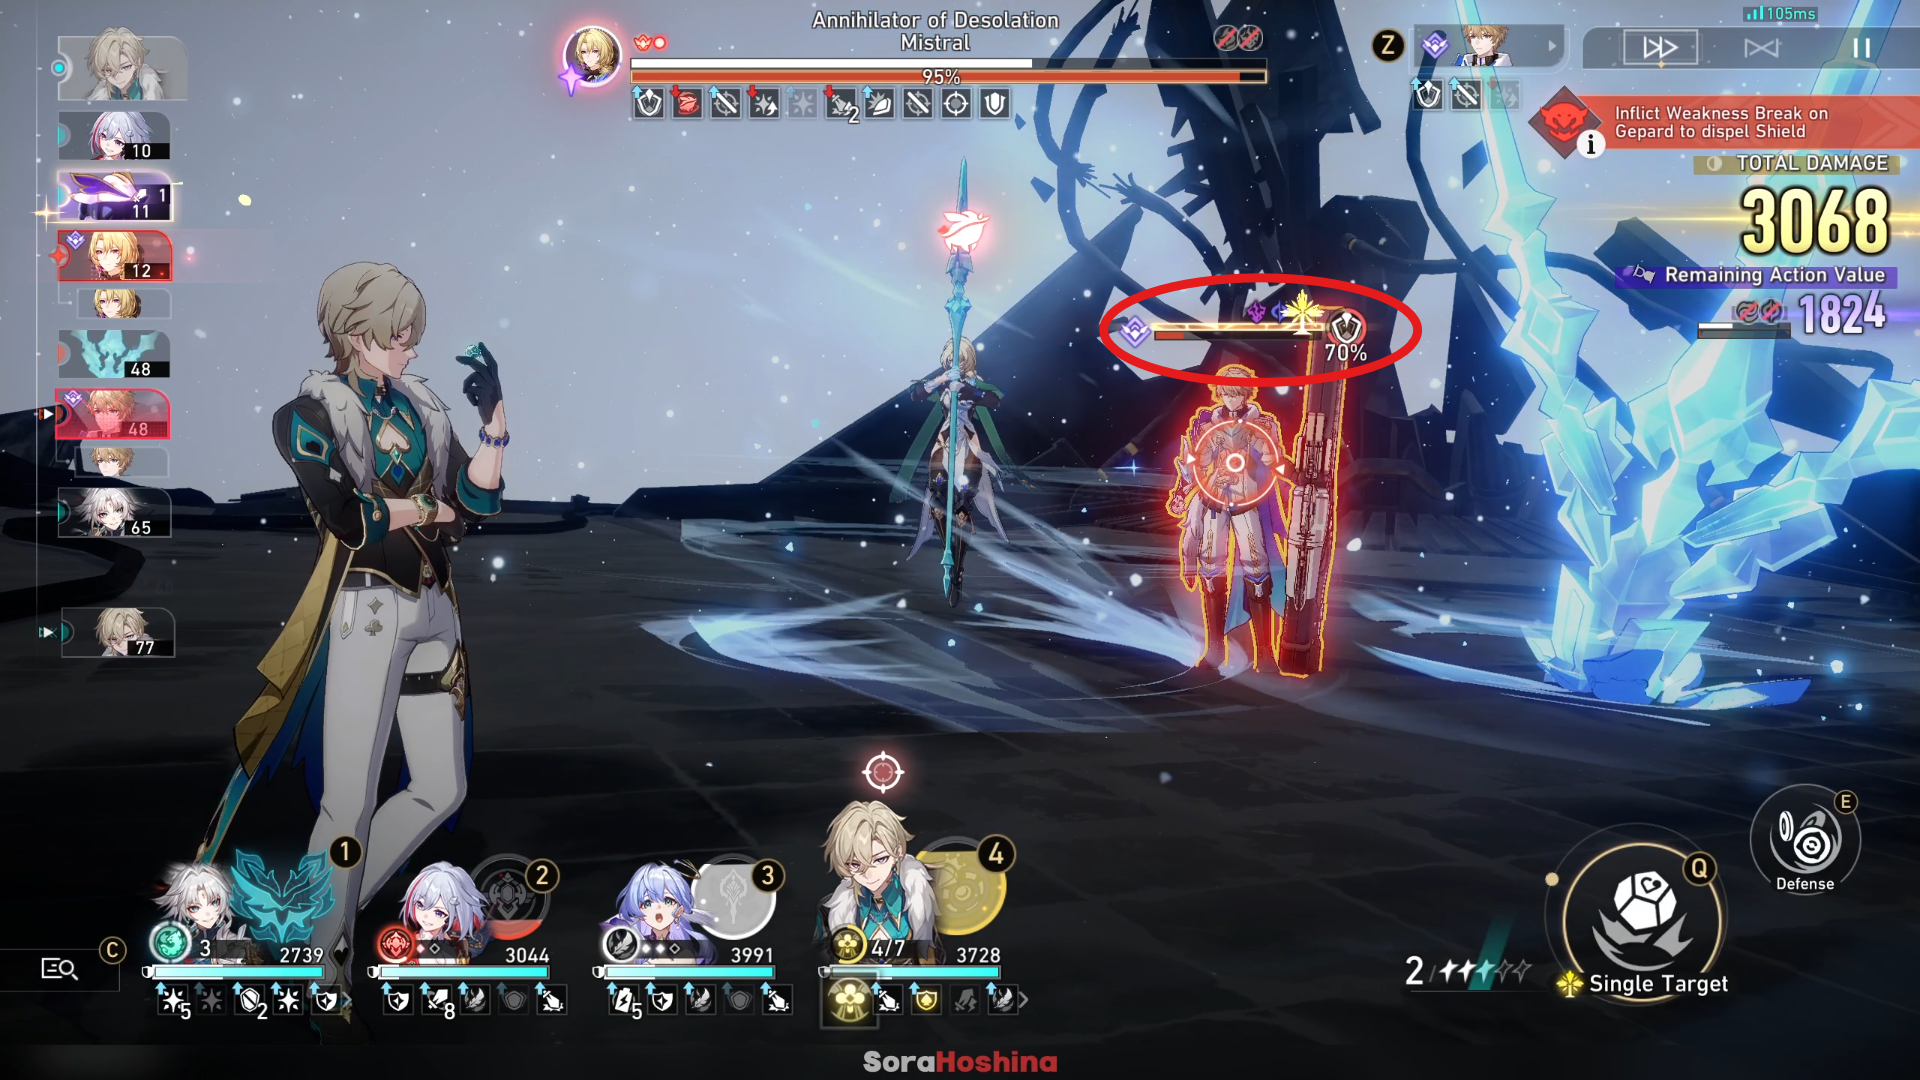
If Gepard constructs a barrier, rather than assaulting Cocolia or her summon, Overpower Gepard, enabling you to immediately shatter his shield (regardless of the remaining percentage). After that, you can go back to vanquishing summons and Cocolia.
Defeat the 4 summons to return the Weakness
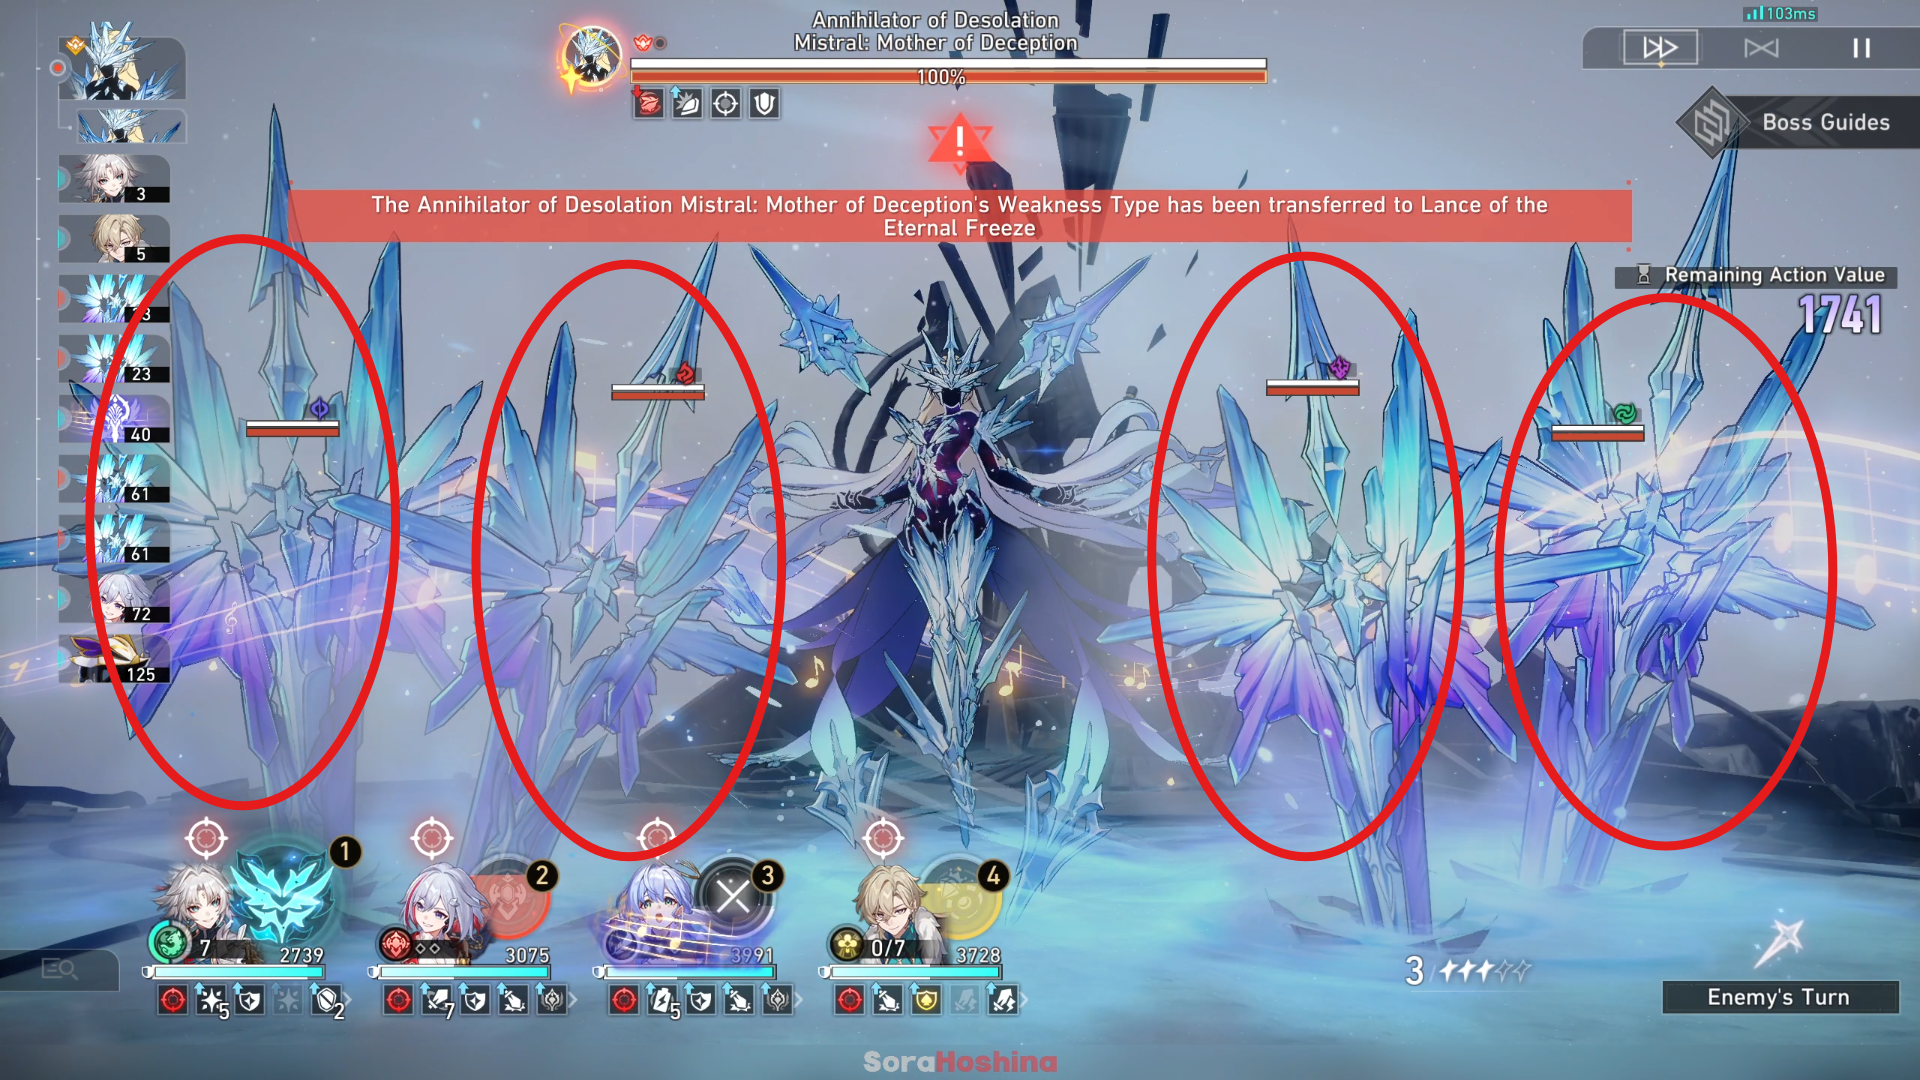
As soon as you transition to the second phase, make it your immediate priority to eliminate all the ice shards. Abstain from engaging in an attack against Cocolia since she will sustain minimal harm until her Weakness is broken.
Hinder Cocolia from using her Ultimate
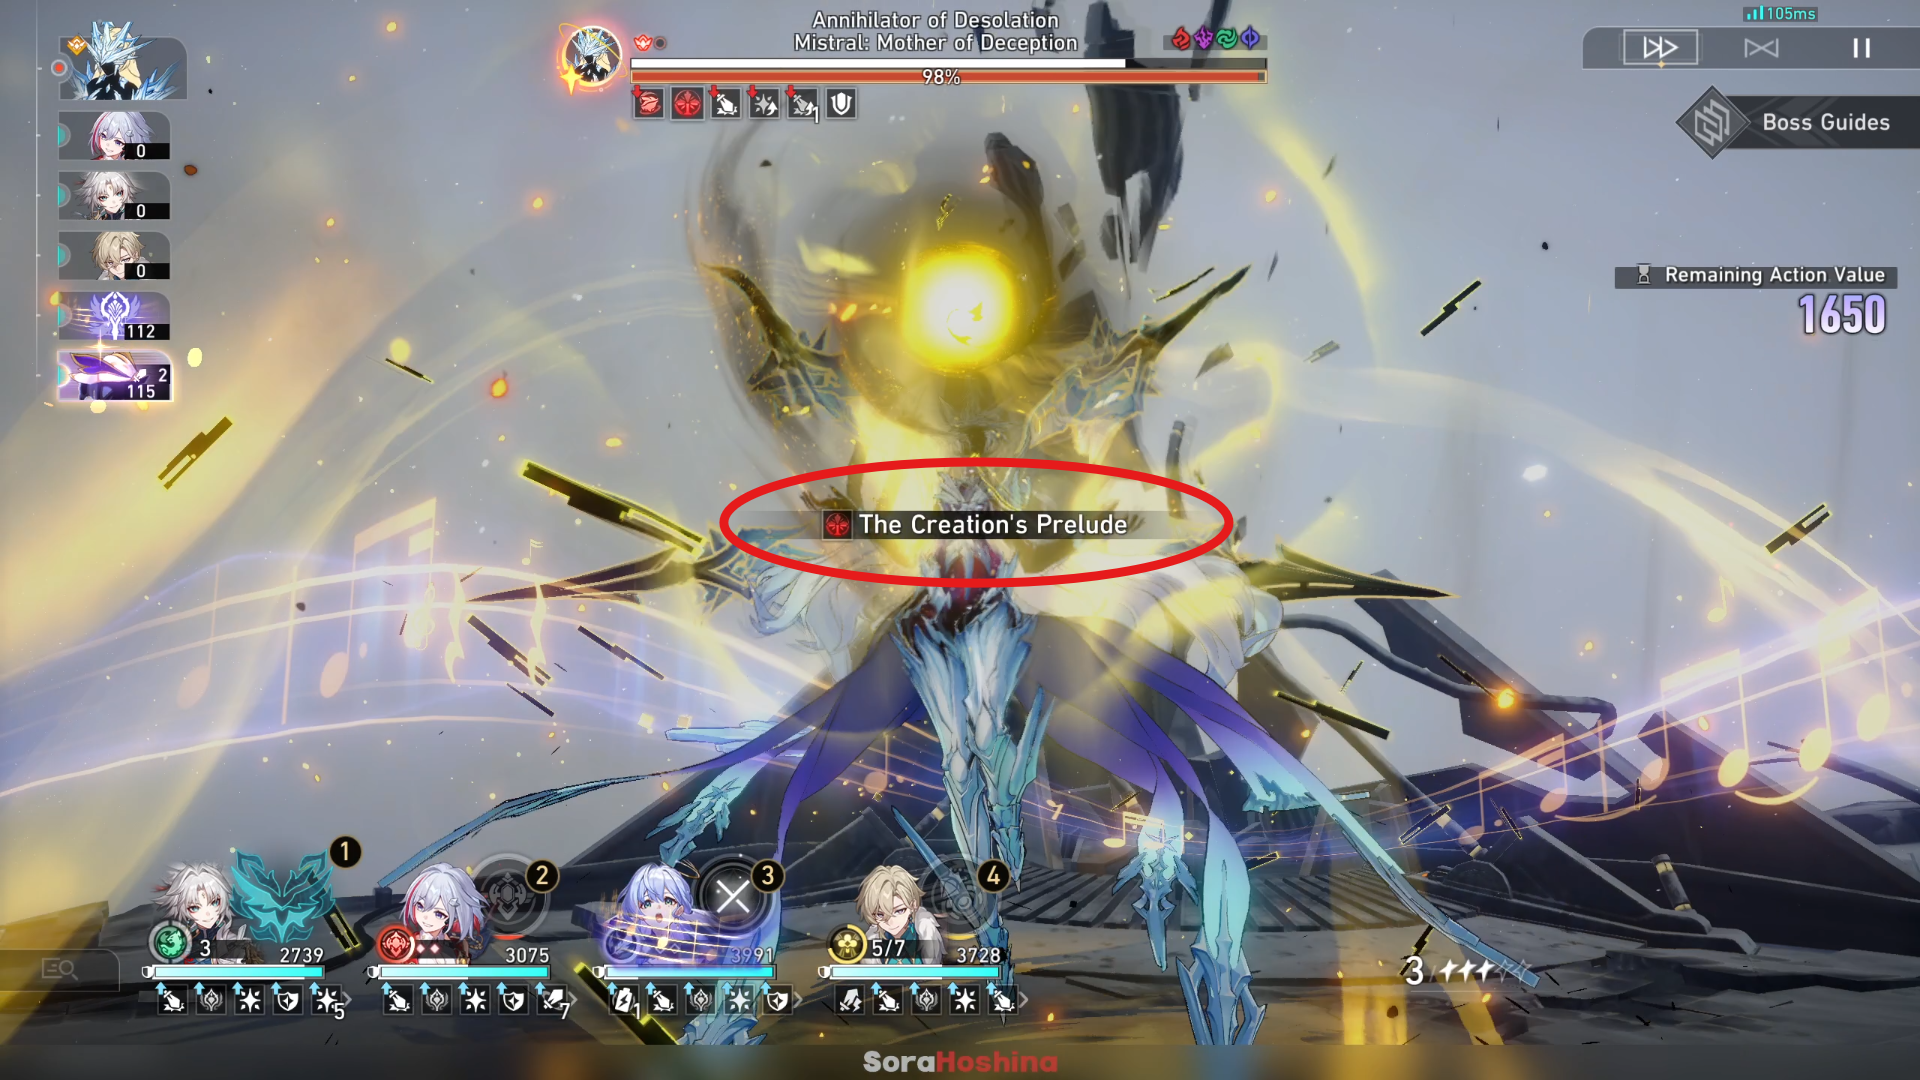
Her final attack is named Last Hymn of Genesis. To initiate it, she’ll first activate The Prelude of Creation, causing her to enter the Charge state. After that, she’ll unleash her Ultimate move. This strike inflicts massive damage and has a significant probability of imprisoning your character.
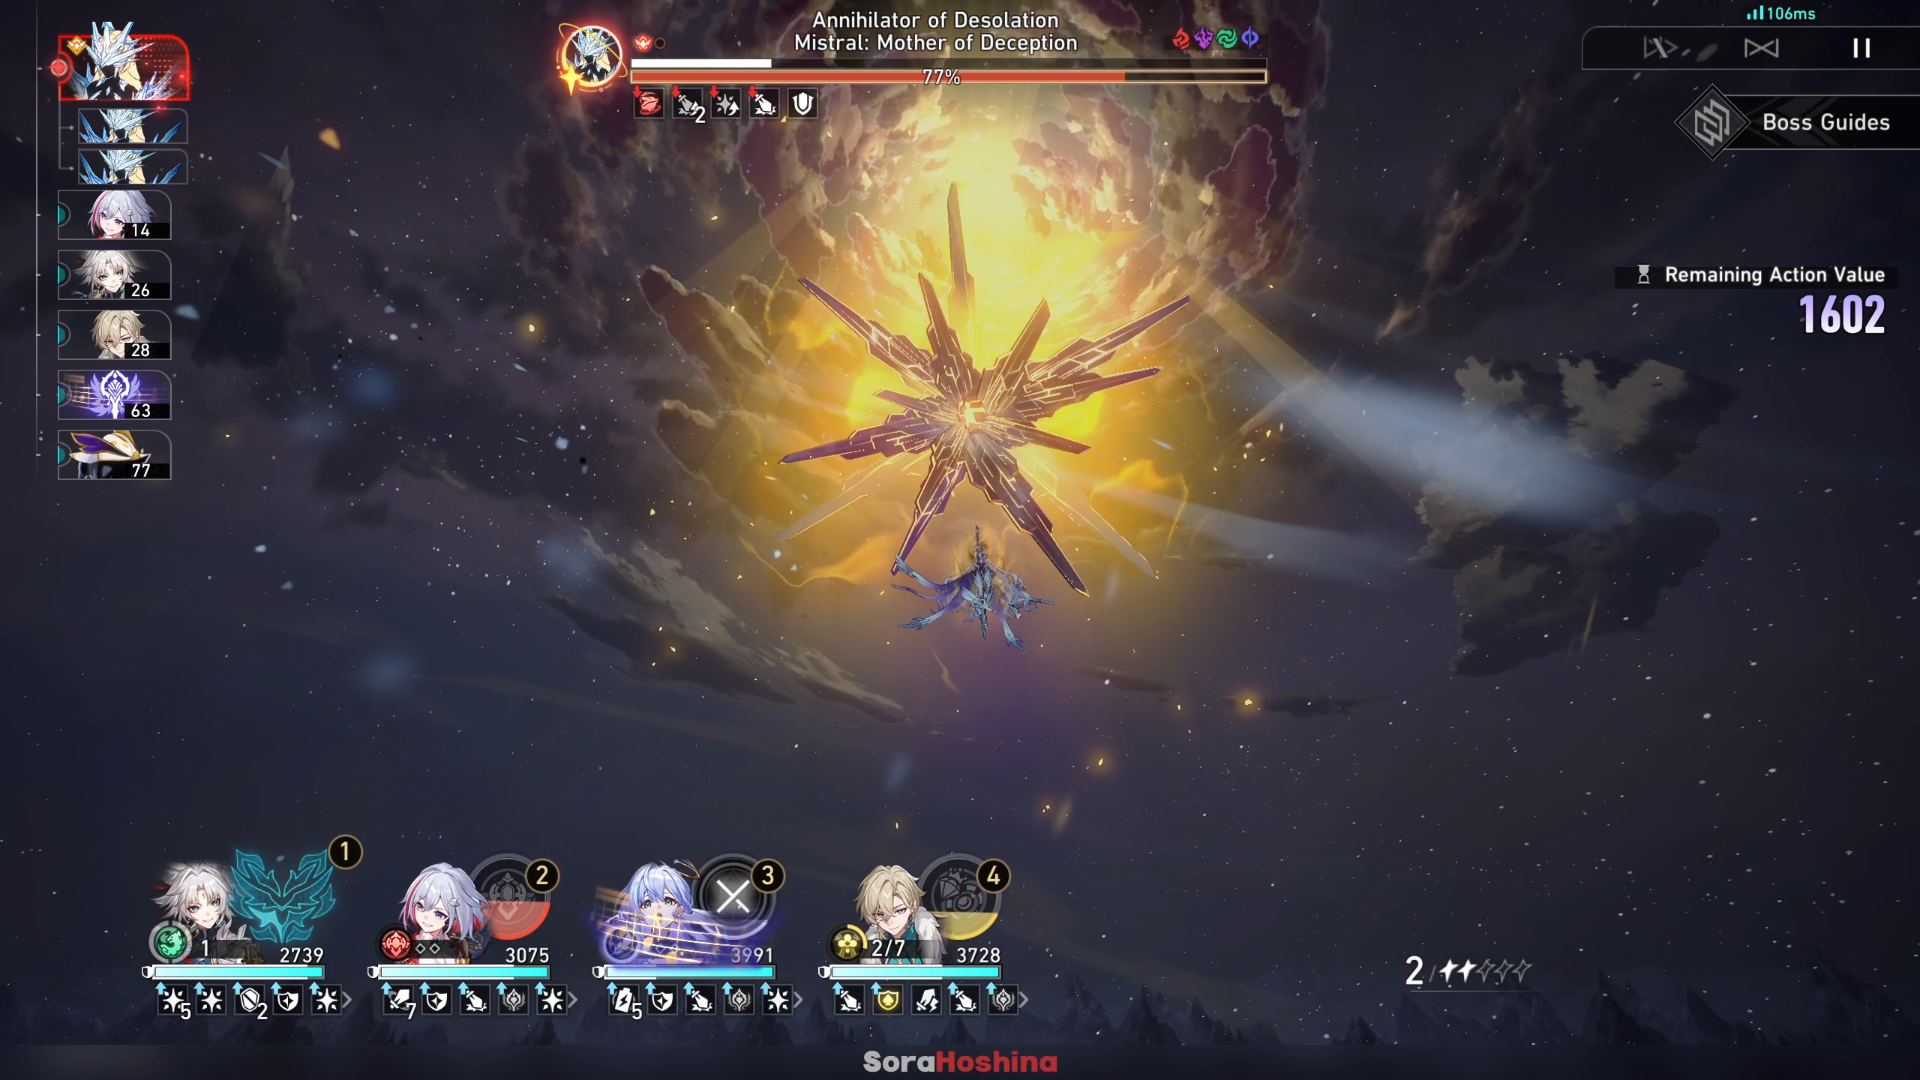
She’ll consistently employ the Ultimate move, which means if your team lacks a strong healer or protective shield that can match the pace, one of your characters may meet an untimely end.
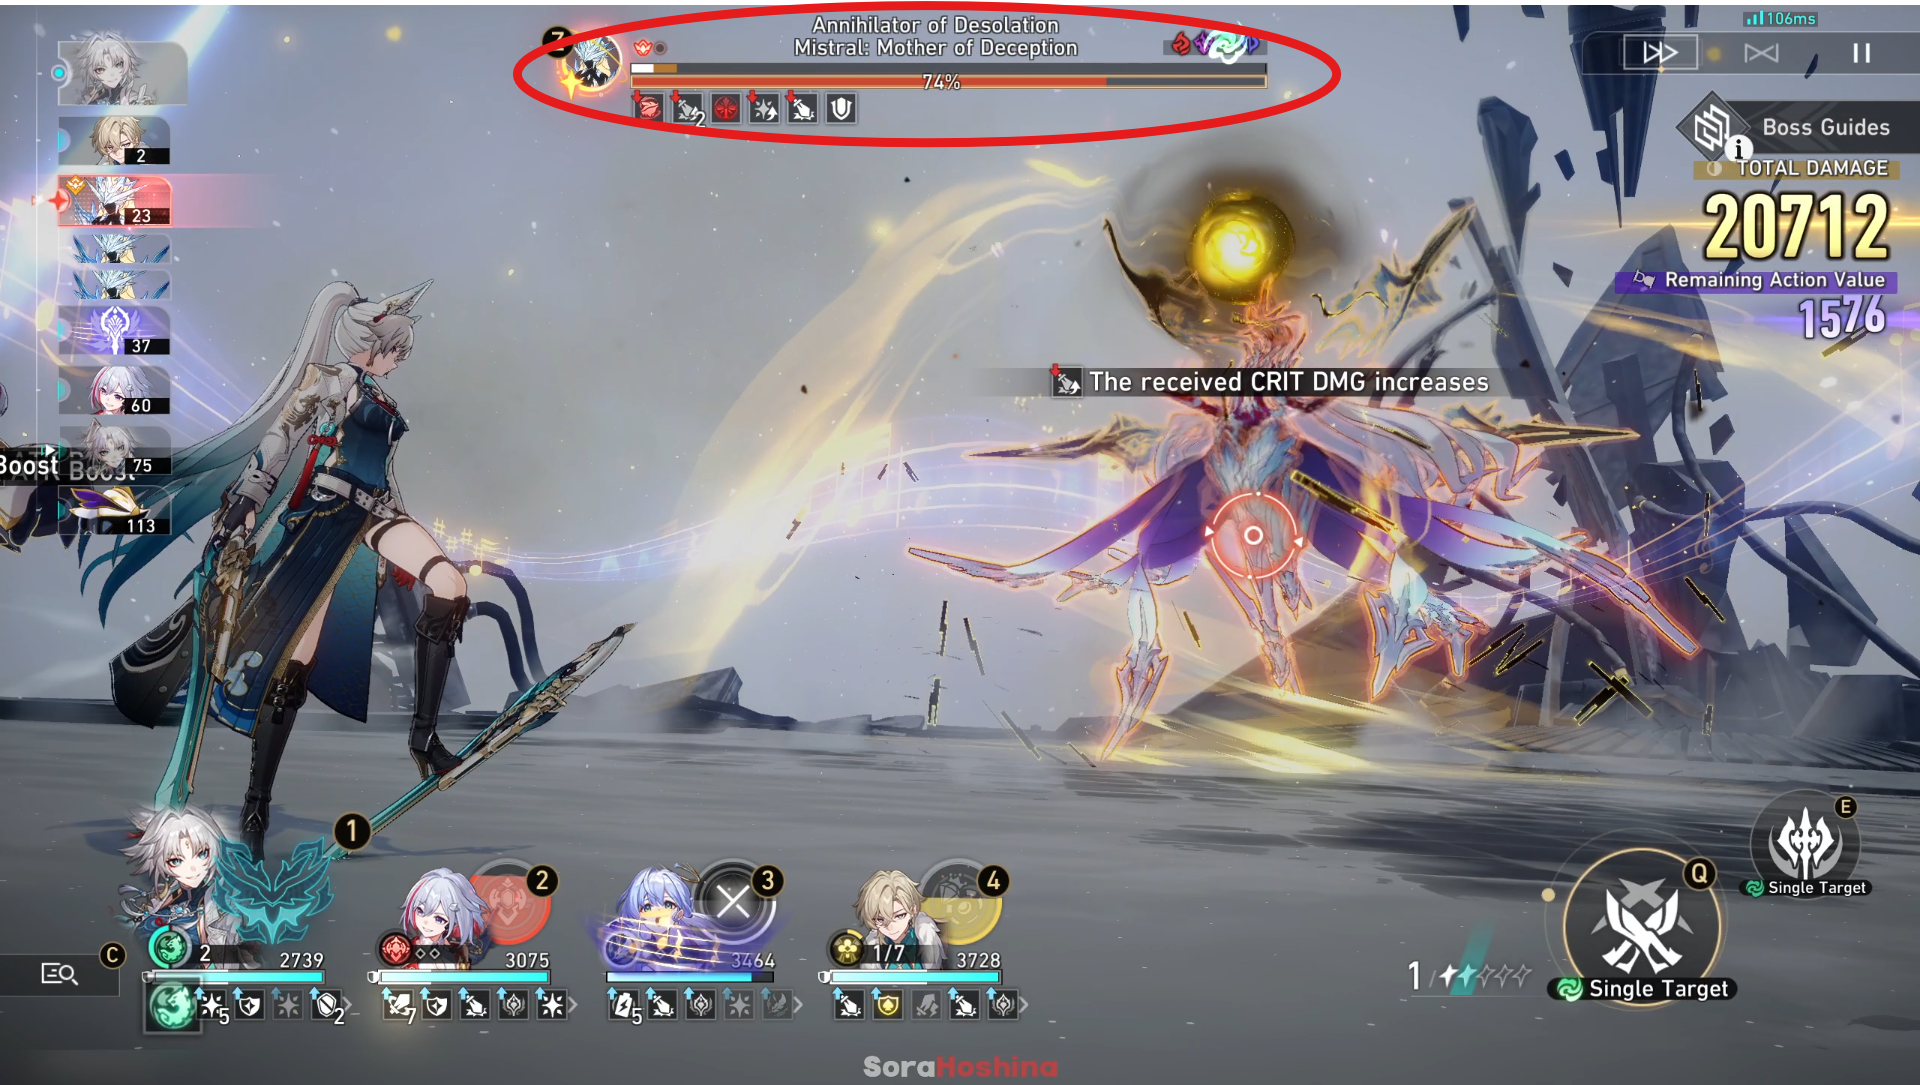
To prevent Cocolia from employing Ultimate, you need to break her weakness first. In other words, defeat the ice blades that protect her toughness bar. Once her weakness is broken, she becomes vulnerable and sustains more damage. So, use all your available attacks repeatedly, and hopefully, you can defeat her before she recovers from this state.
Boss 2: Blaznana Monkey Trick
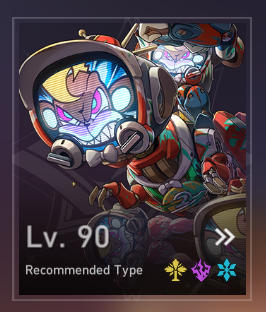
| RES | Control Effects RES |
| Recommended Type | Imaginary, Lightning & Ice |
List of Buffs

- Cheat SheetWhen using Skill or Ultimate on one ally target, increases the ability target’s ATK by 25%, lasting for 2 turns. This effect can stack up to 2 times.
- RecessIncreases Ultimate DMG dealt by all allies to Weakness Broken enemies by 70%.
- After Bell DetentionIncreases Basic ATK and Skill DMG dealt by all allies by 55%.
Team Comp & Buff Choice

| No. | Team Example | Buff |
|---|---|---|
| 1 | Acheron + Black Swan + Kafka + Lingsha | Recess |
| 2 | Rappa/Firefly + Ruan Mei + Harmony Trailblazer + Lingsha/Gallagher | After Bell Detention |
| 3 | Jing Yuan + Sunday + Ruan Mei/Robin + Lingsha/Huohuo/Aventurine | Cheat Sheet |
| 4 | Jade + Herta + Ruan Mei + Lingsha + Lingsha | After Bell Detention |
| 5 | DHIL + Sparkle + Sunday + | Breed War with War |
| 6 | Acheron + Jiaoqiu + Pela + Lingsha/Gallagher | Recess |
| 7 | Jingliu + Sunday/Sparkle/Bronya + Ruan Mei/Pela + Sustain | After Bell Detention |
Boss Trait
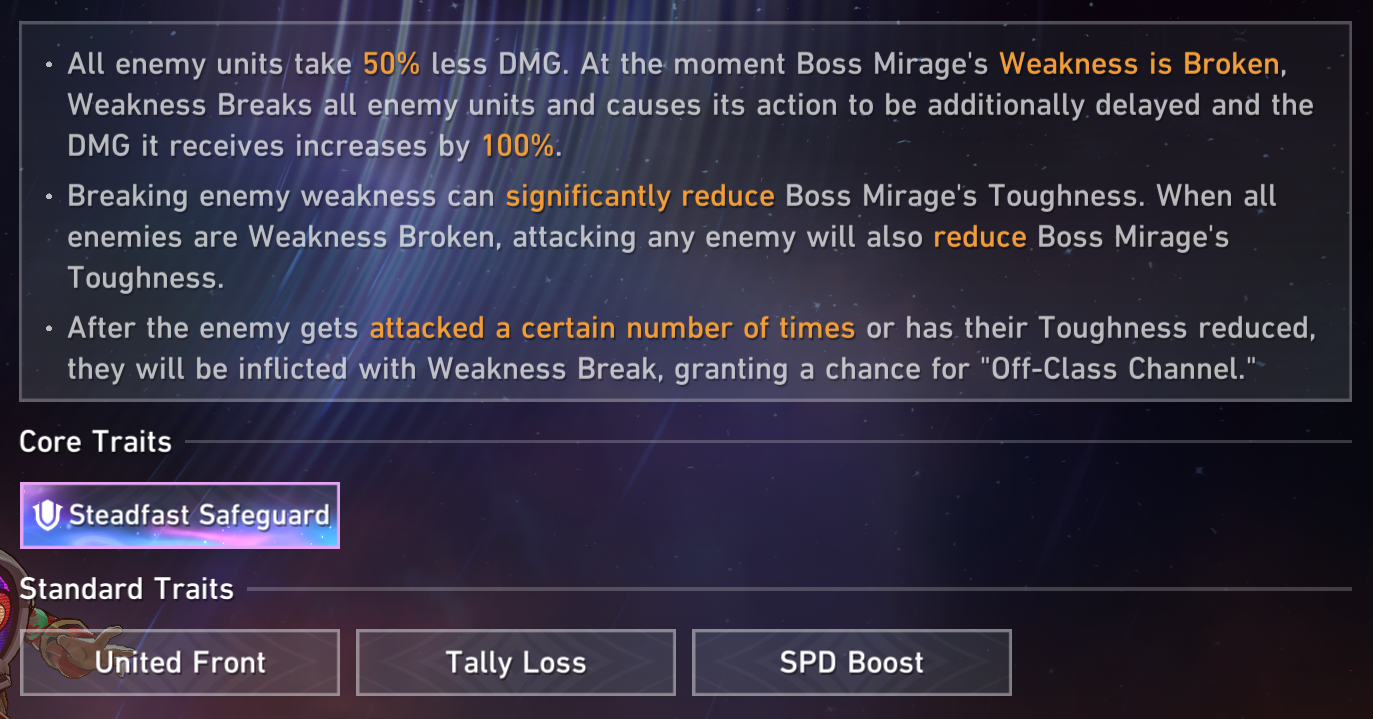
- All enemy takes 50% less DMG. After the Boss’ Weakness is broken, Weakness Breaks all the enemy units and causes its action to be delayed, and the DMG it receives increases by 100%.
- Breaking enemy weakness can significantly reduce Boss’ Toughness. When all enemies are Weakness Broekn, attaking any enemies will also reduce Boss’ Toughness.
- After the enemy gets attacked a certain number of times (stackable) or has their Toughness reduced, they will be inflicted with Weakness Break, granting a chance for “Off-Class Channel.”
Boss Trait: Steadfast Safeguard
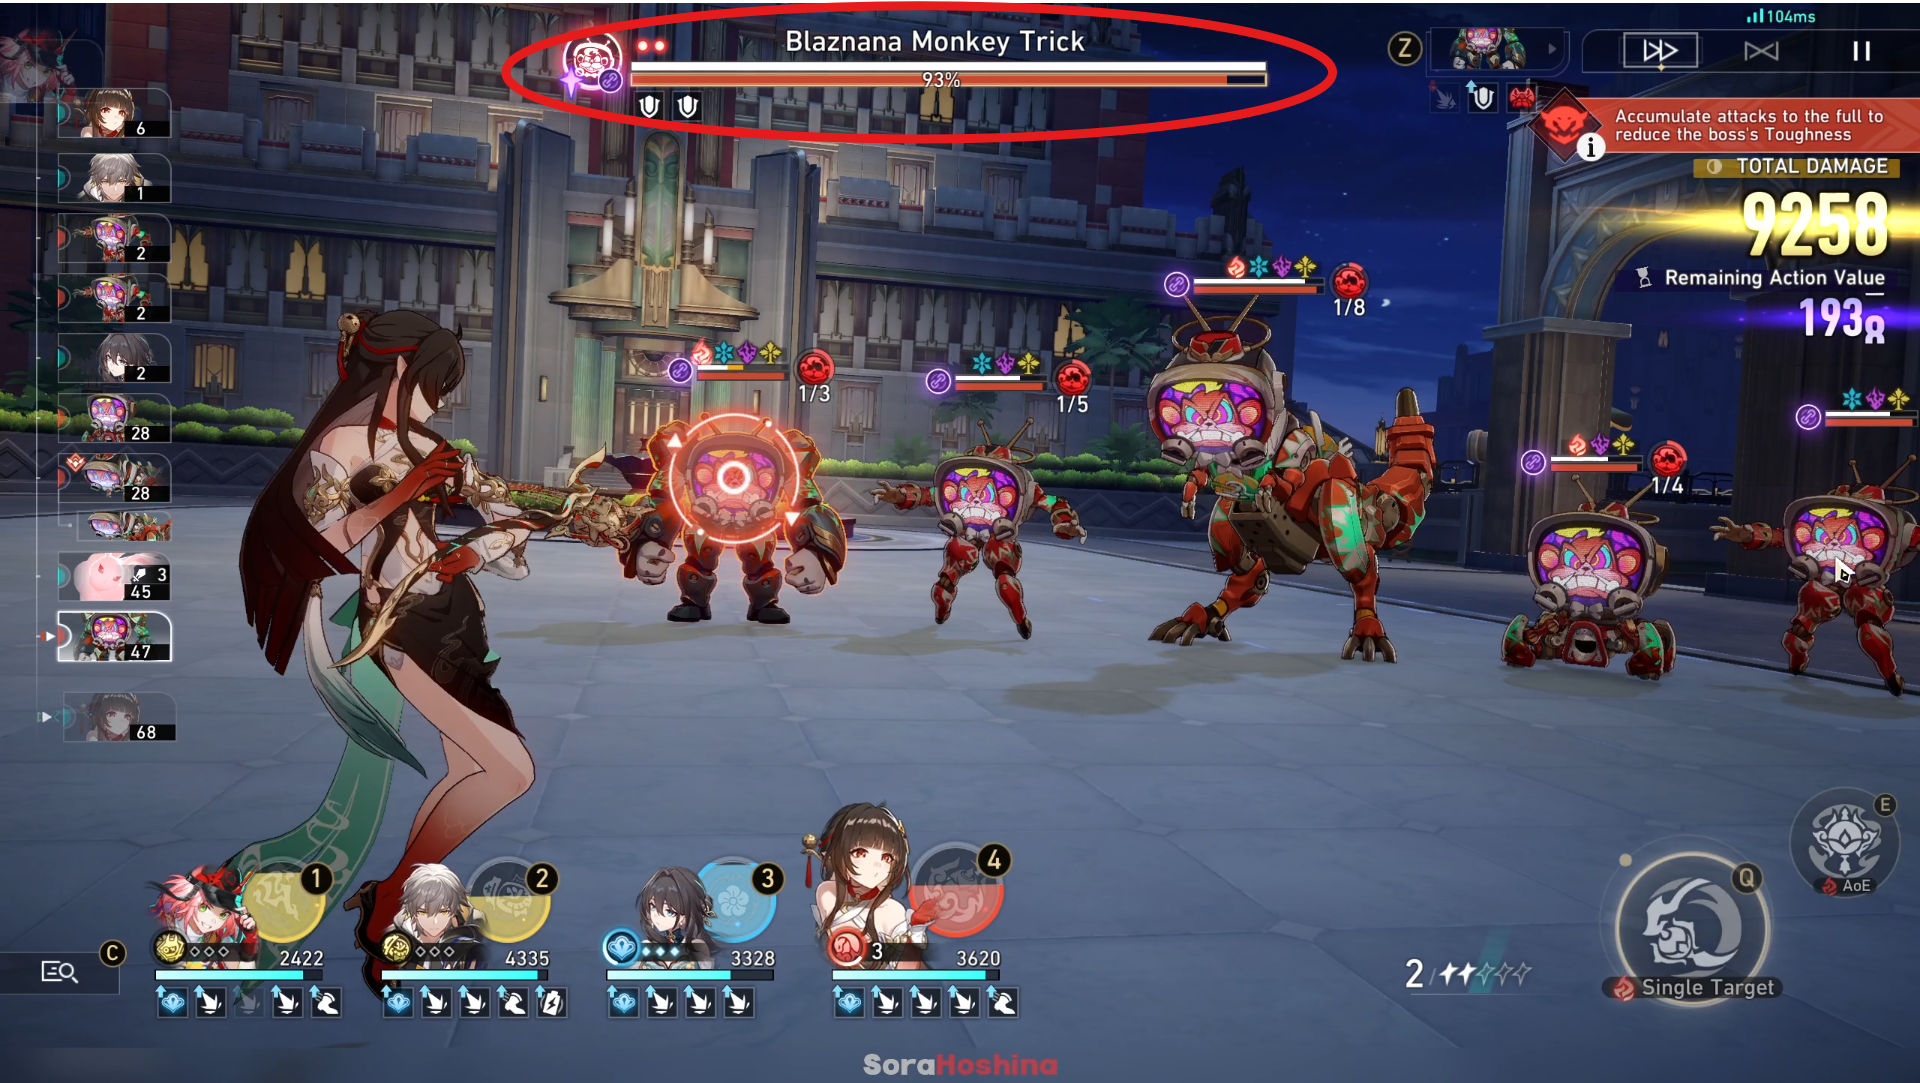
During battle, the boss’s health bar at the top will sustain 50% less damage initially. However, once its Weakness is broken and an action is delayed, it will subsequently absorb 100% more damage. To trigger Weakness Break, you must first break the Toughness Bars of the five mobs, not their individual health bars.
Boss Trait: United Front
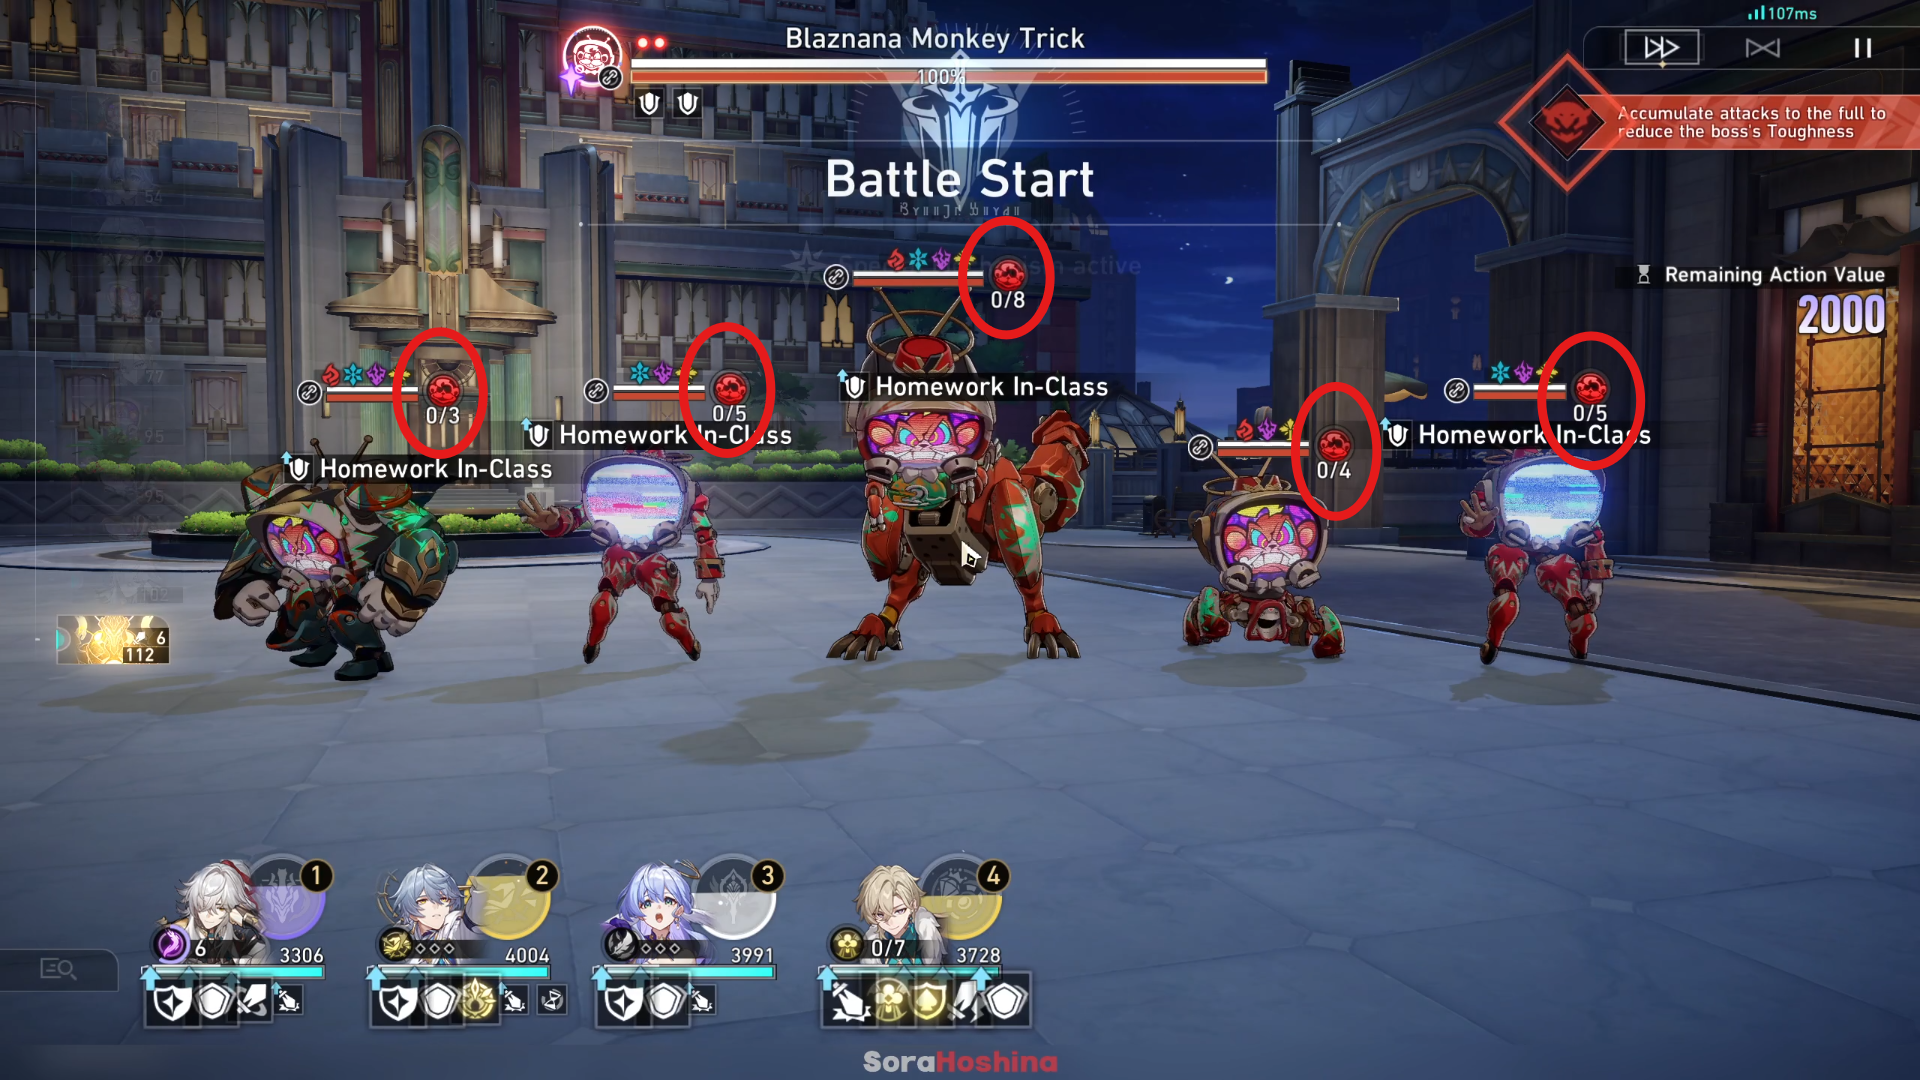
In the scenario where the screen displays an angry face, all enemy units receive 50% reduced damage and possess the Switch Tally (marked in the image above).
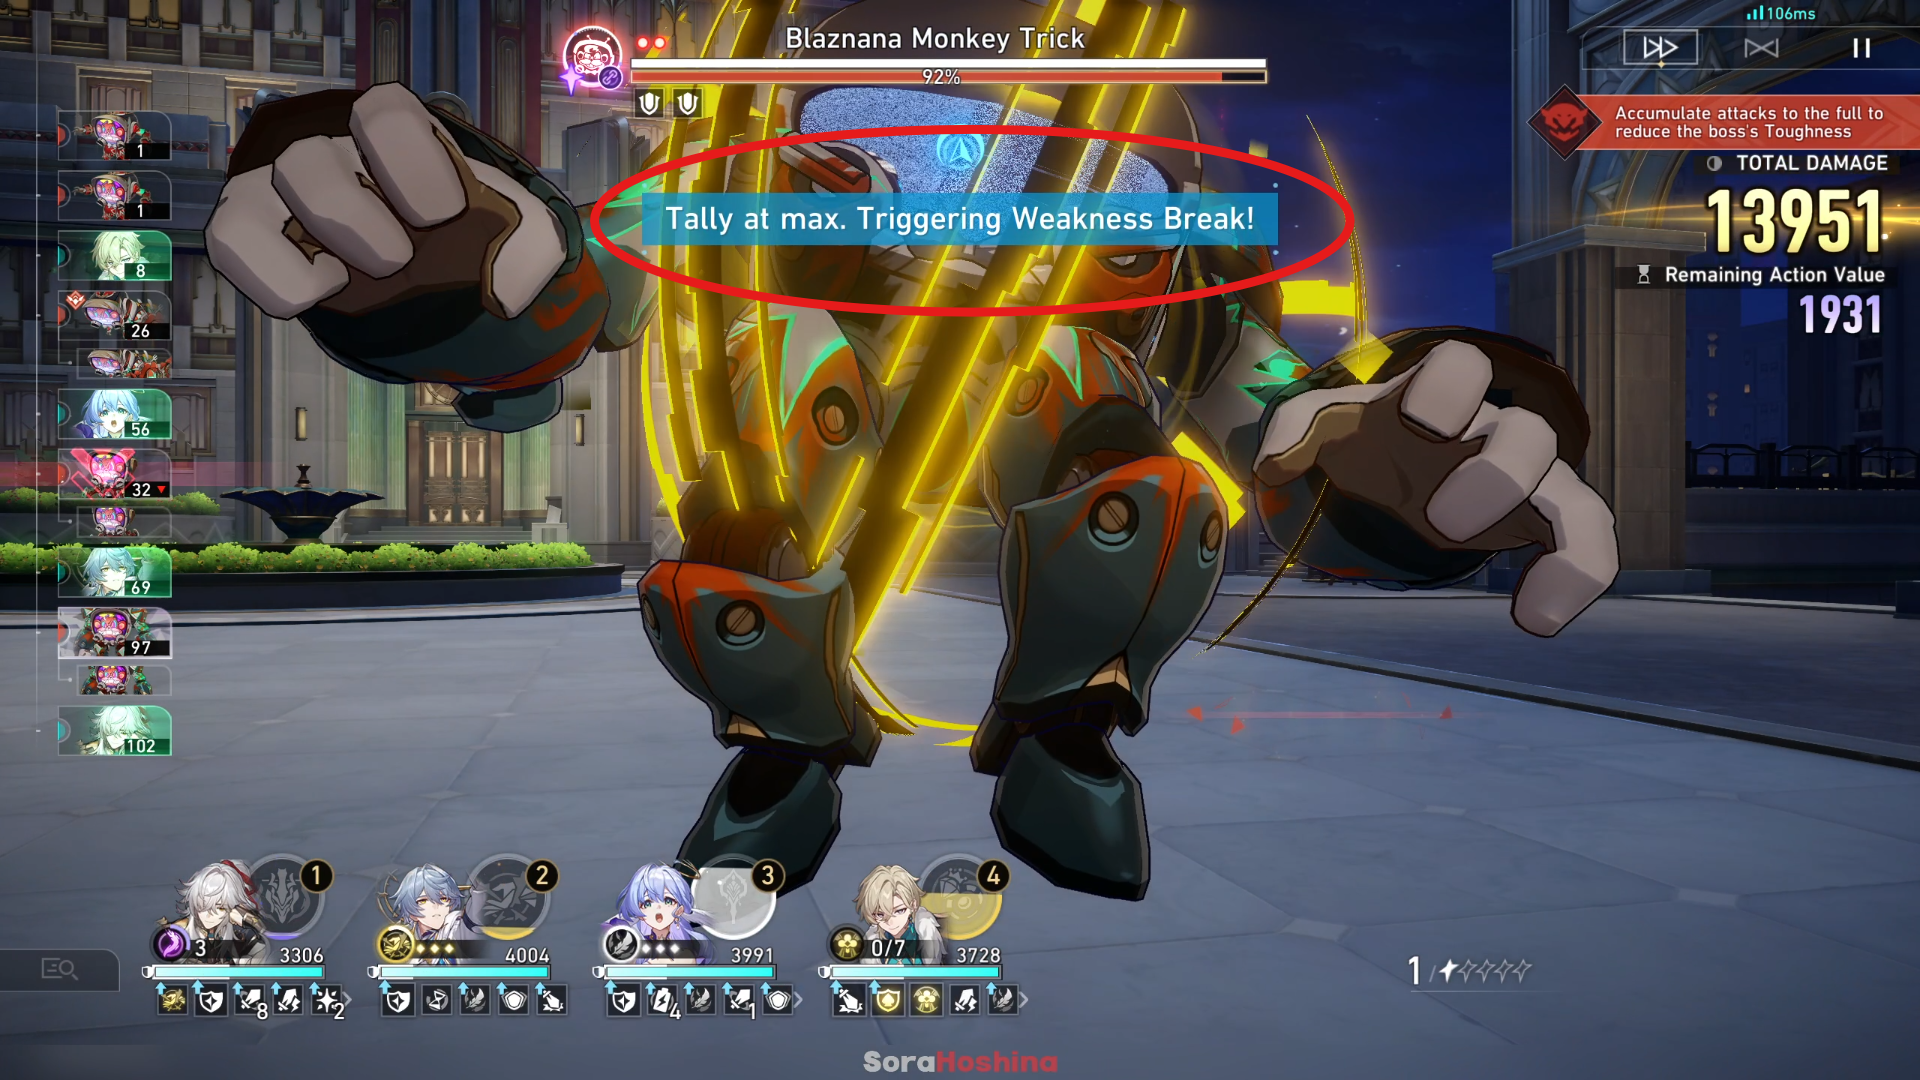
Concerning the Switch Tally, you can increase it by engaging the enemy, causing them to move from the Classroom Channel to the Off-Class Channel. Keep in mind that each enemy has a unique number of Switch Tallies (some require 3, 4, 5, or 8 hits).
Boss Trait: Tally Loss
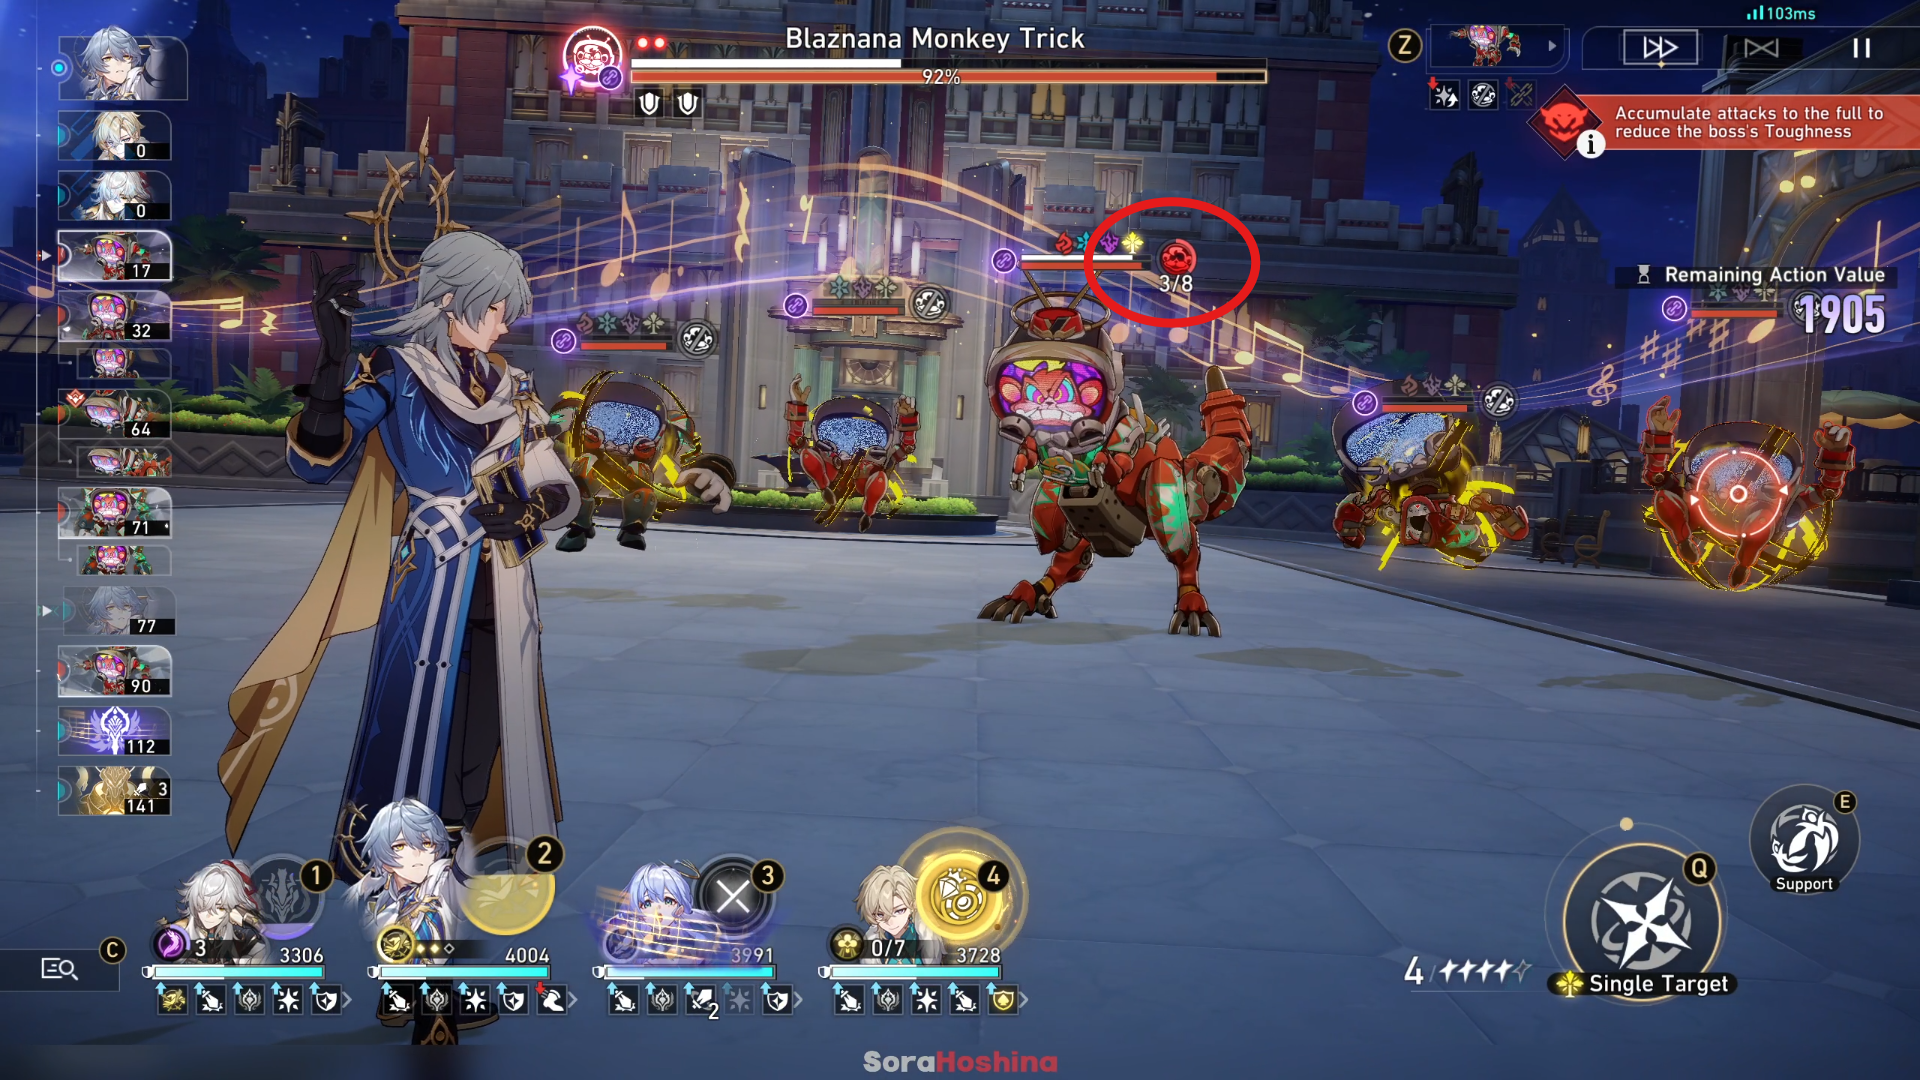
At the start of each round, an enemy unit will decrease their Switch Counter by one. This means that if an enemy in the Classroom Channel engages you in battle, they will lower their Switch Counter number from, say, 5 out of 8, to 4 out of 8.
Boss Trait: SPD Boost
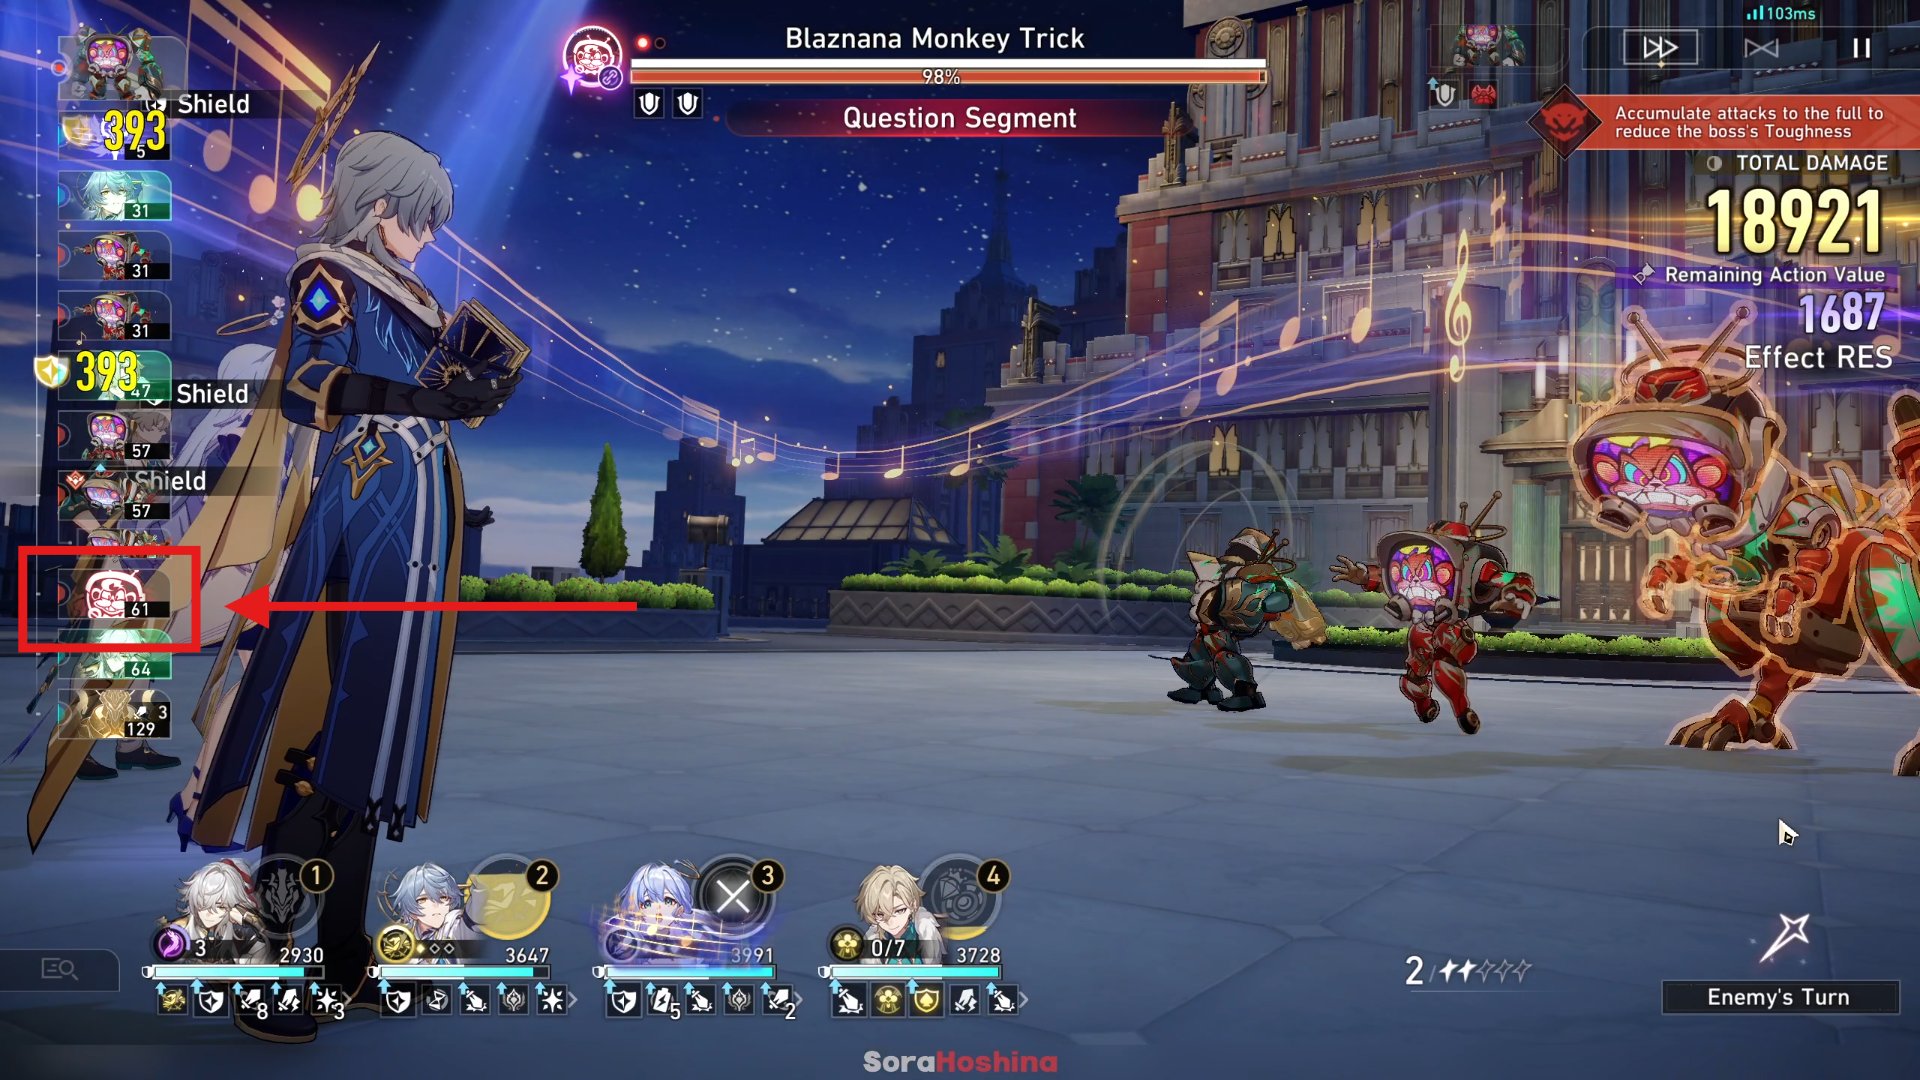
Boosts Special Power (SPD) specifically for the “Final Semester Banquet”. This powerful strike becomes accessible during the second stage, as indicated in the sequence of actions. It represents the boss’ ultimate maneuver.
Challenge Strategy
AoE attacks are the best against these enemies
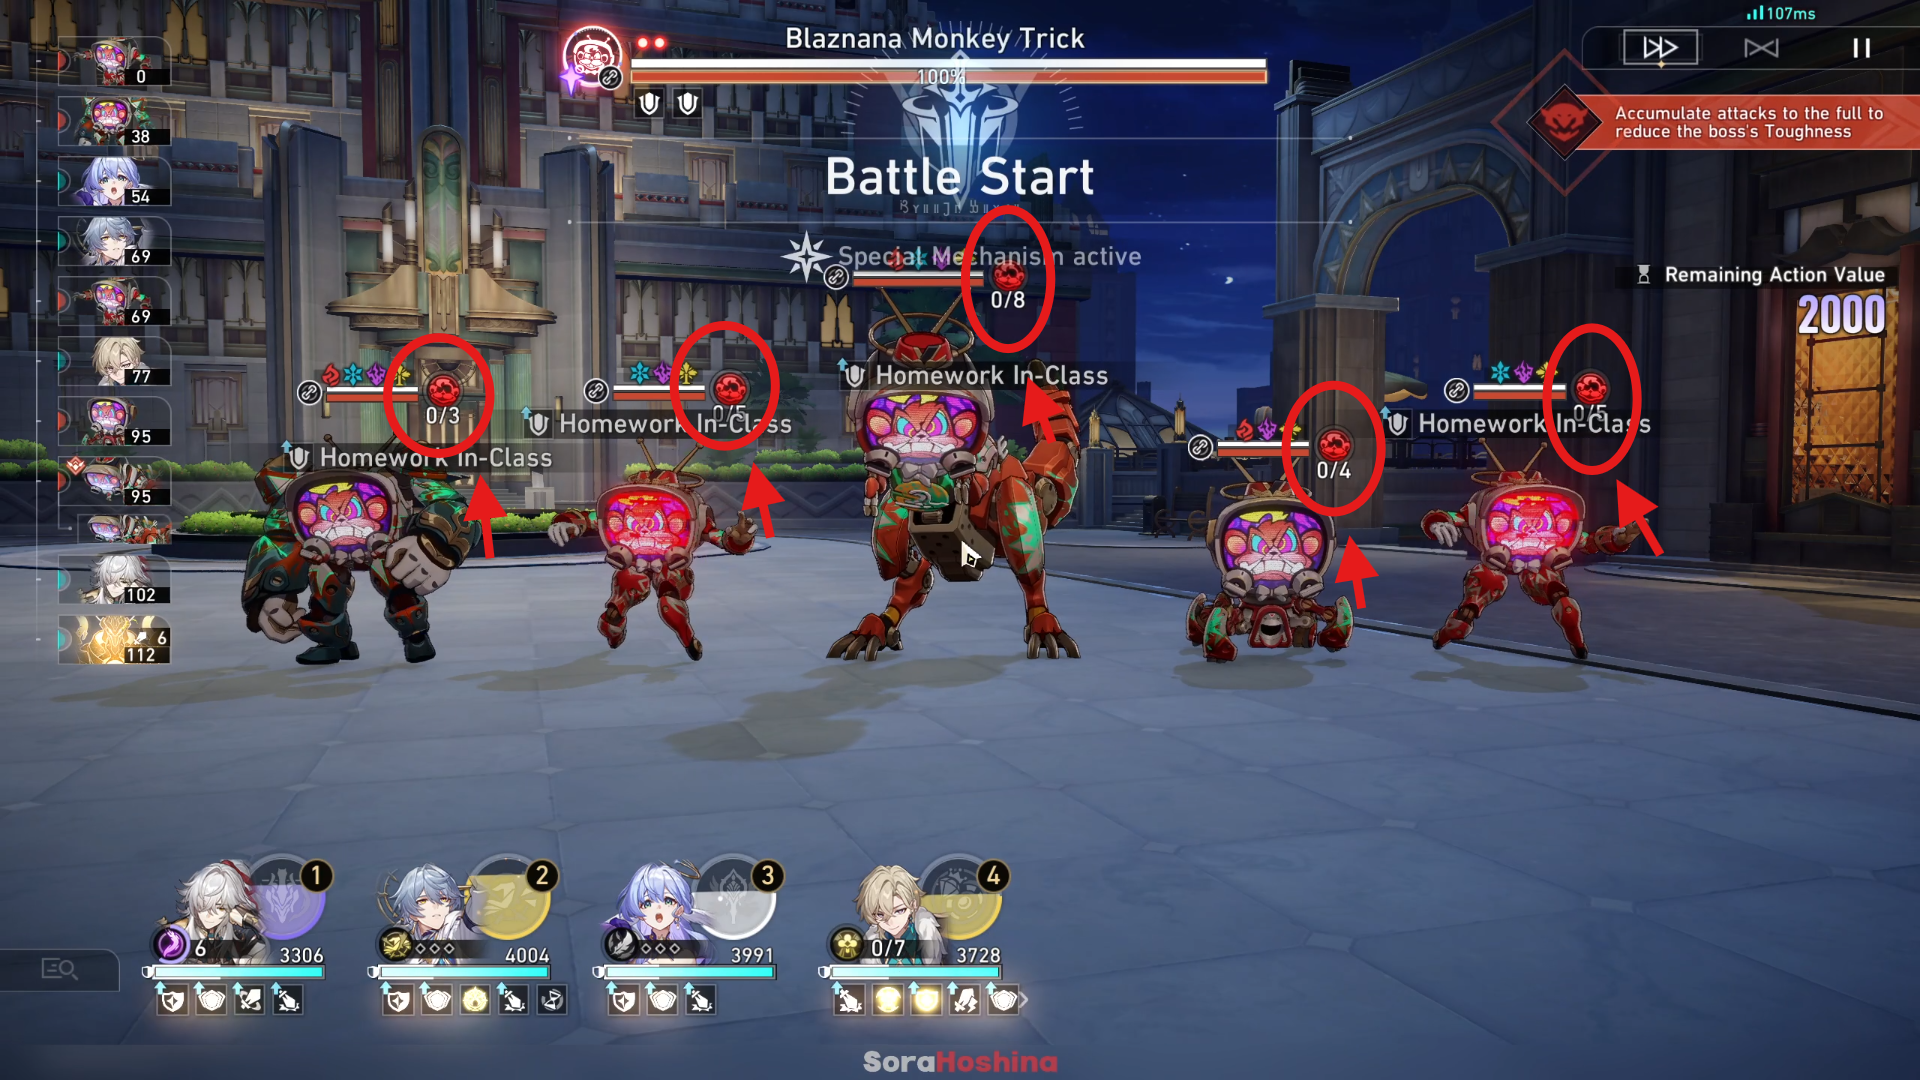
In each encounter, the enemy units may possess either a “School Setting” or an “Out-of-School Setting”. At the onset of battle, the adversaries will initially be in the “School Setting”. To build up Switch Counters for multiple enemies simultaneously, employ abilities that inflict Area-of-Effect Attack (preferably Blast Attack). Once a counter reaches its limit, the enemies transition from the “School Setting” to the “Out-of-School Setting”, bestowing your squad with assorted buffs.
Classroom Channel affects your team’s capabilities
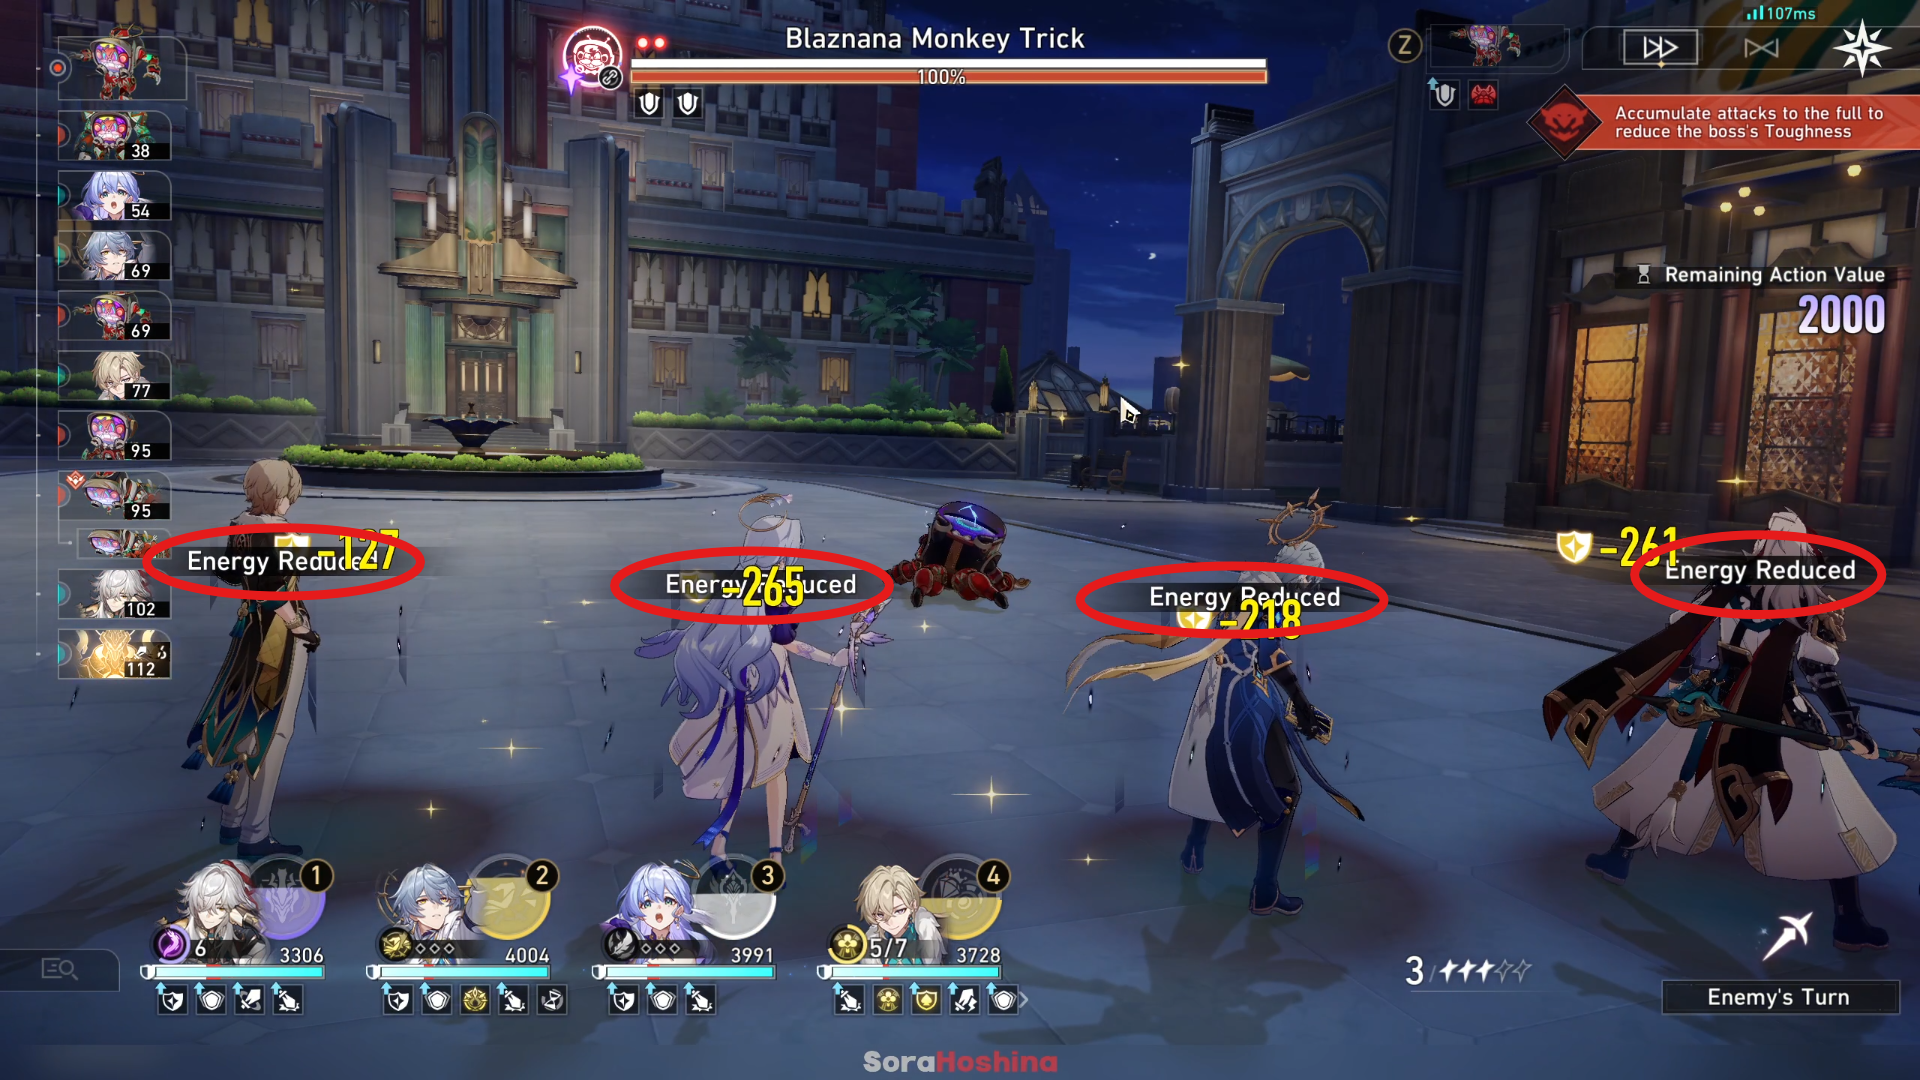
In the Classroom Channel, if any of your opponents launch an attack on you, they won’t deal a lot of damage, but what’s significant is that they weaken your team’s overall performance. This could be interpreted as:
Get the enemies to enter Off-Class Channel

When adversaries step into the Off-Class Channel (accumulate Switch Tallies by attacking them), instead they bestow your party with certain advantages. Earlier, I outlined these benefits, but for those who might have missed it:
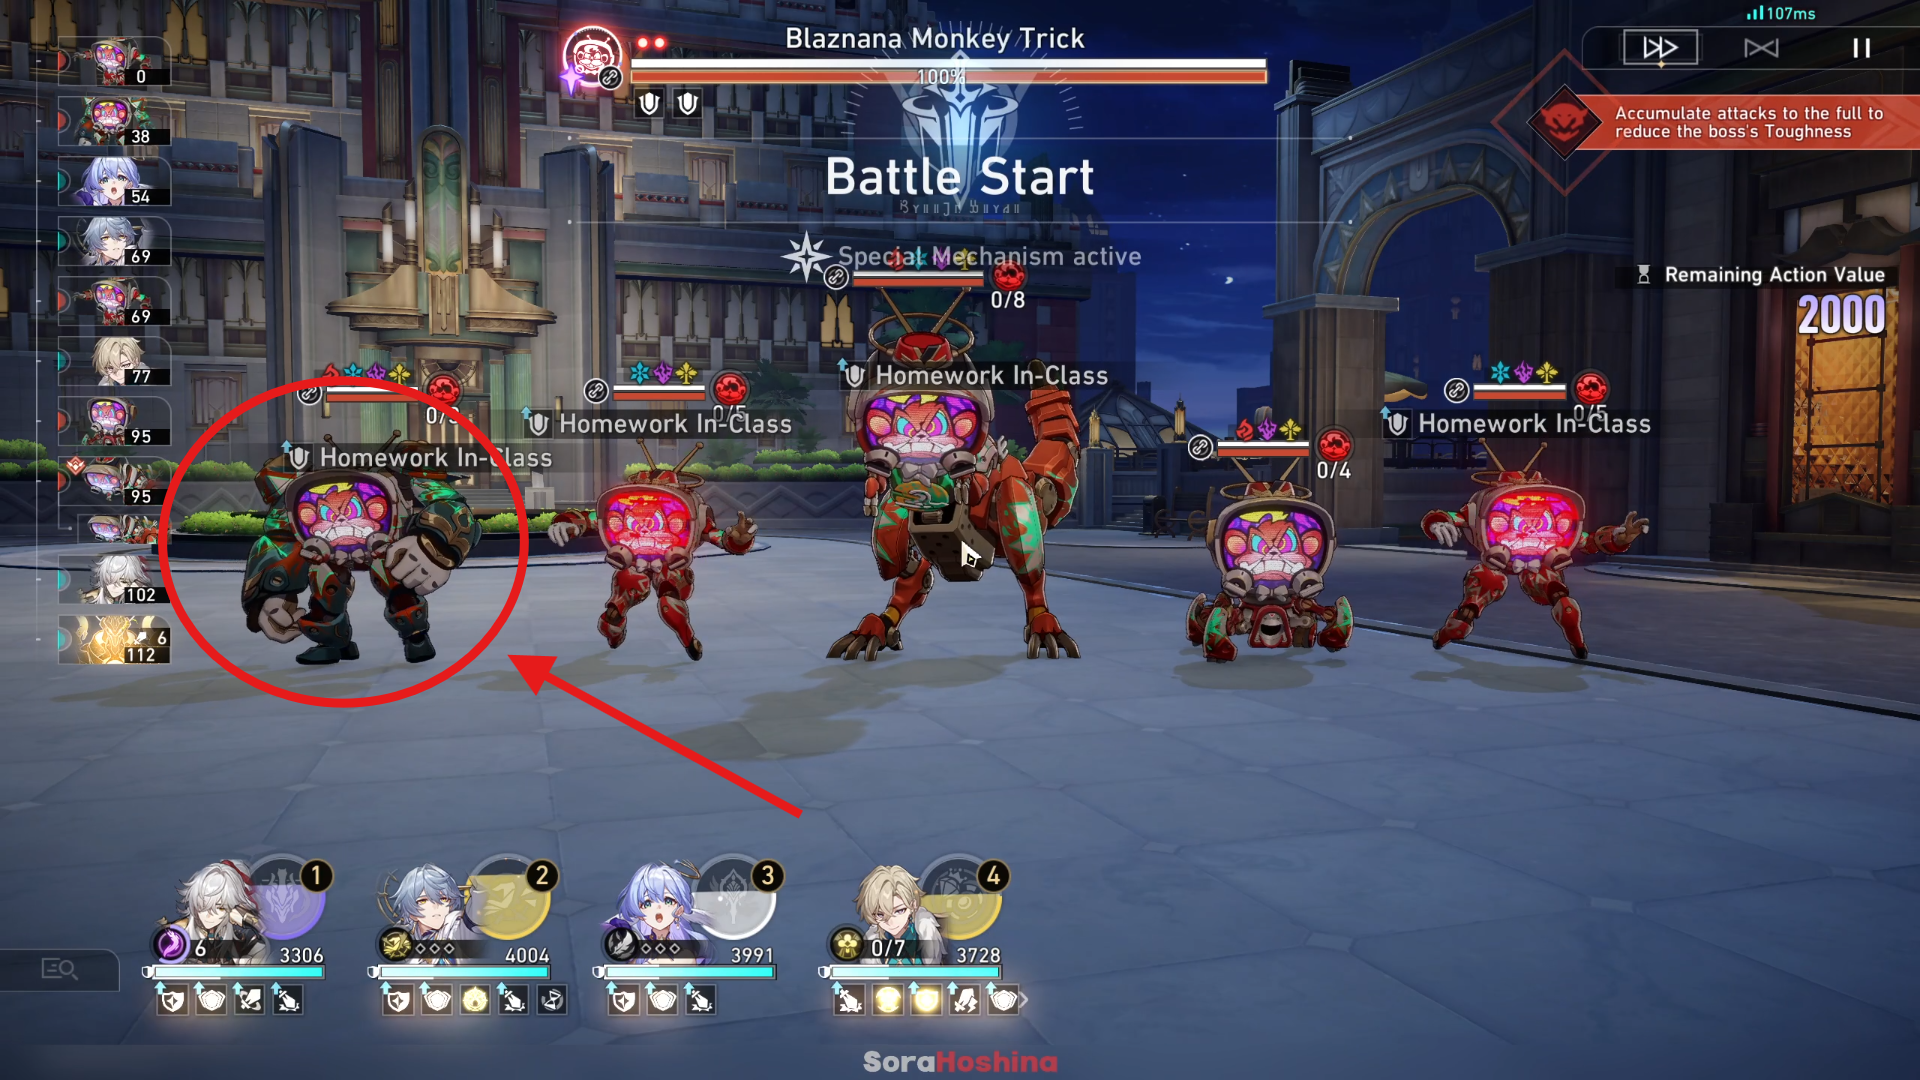
Prioritize the Dreamweaver BananAdvisor for its significant impact on advancing your team’s actions. Additionally, ensure you utilize the AssistantAnna to conserve your characters’ energy, particularly if your team heavily depends on Ultimate abilities.
Reduce Blaznana’s Monkey Trick Toughness Bar
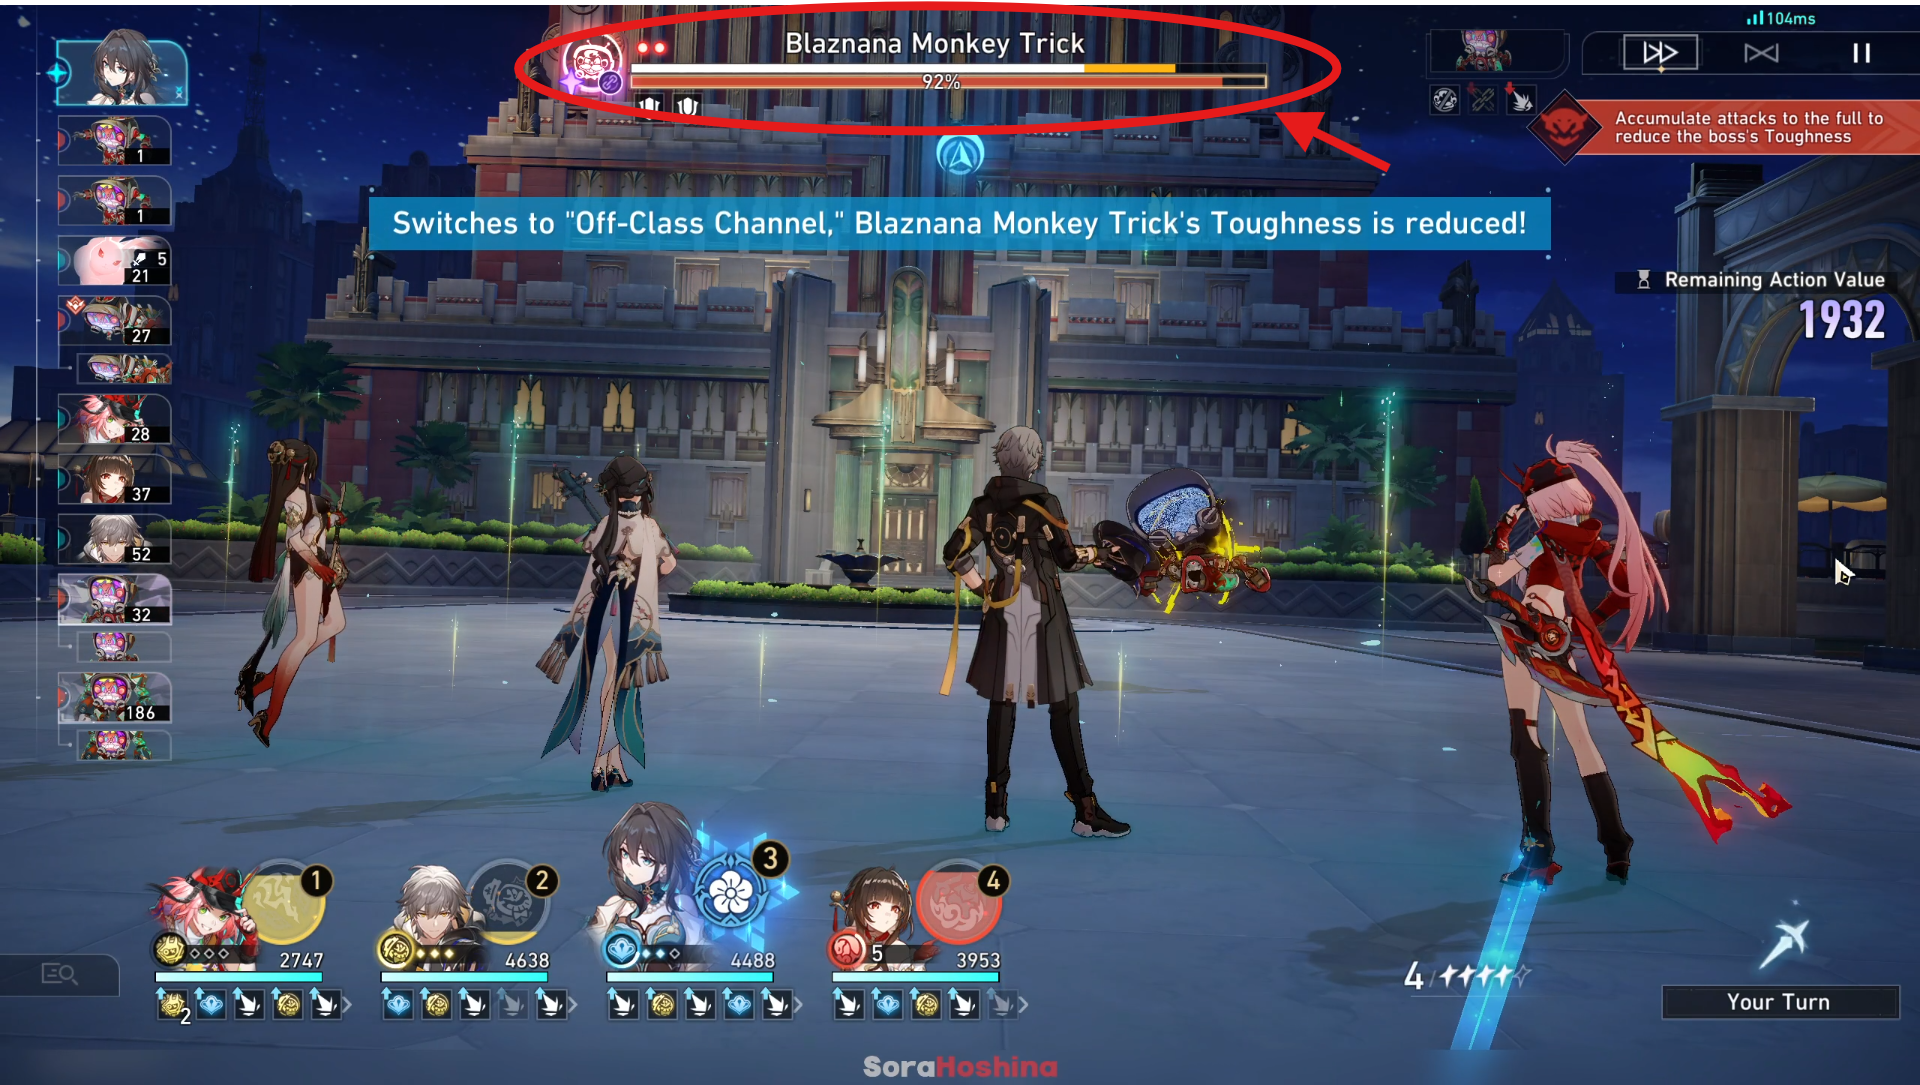
In Blaznana’s Monkey Trick, the main adversary is the ruler and it consists of one elite foe accompanied by four lesser minions. To lessen the Boss’ Durability Gauge, you must exploit a weakness in any of the five enemies. Once all enemies have been weakened, assaulting any enemy will also lower the Boss’ Durability Gauge.
Facing the End-of-Semester Dinner

The End-of-Semester Dinner is a unique action that can only be executed during the second phase of the Action Order. It’s an unavoidable event where all Crowd Control debuffs are removed, all enemies have their states on their Off-Class Channels switched, and it activates To The Doctor: Banacademic Report. In simpler terms, you can think of it as a final move that resets the statuses of all enemies during the second phase.
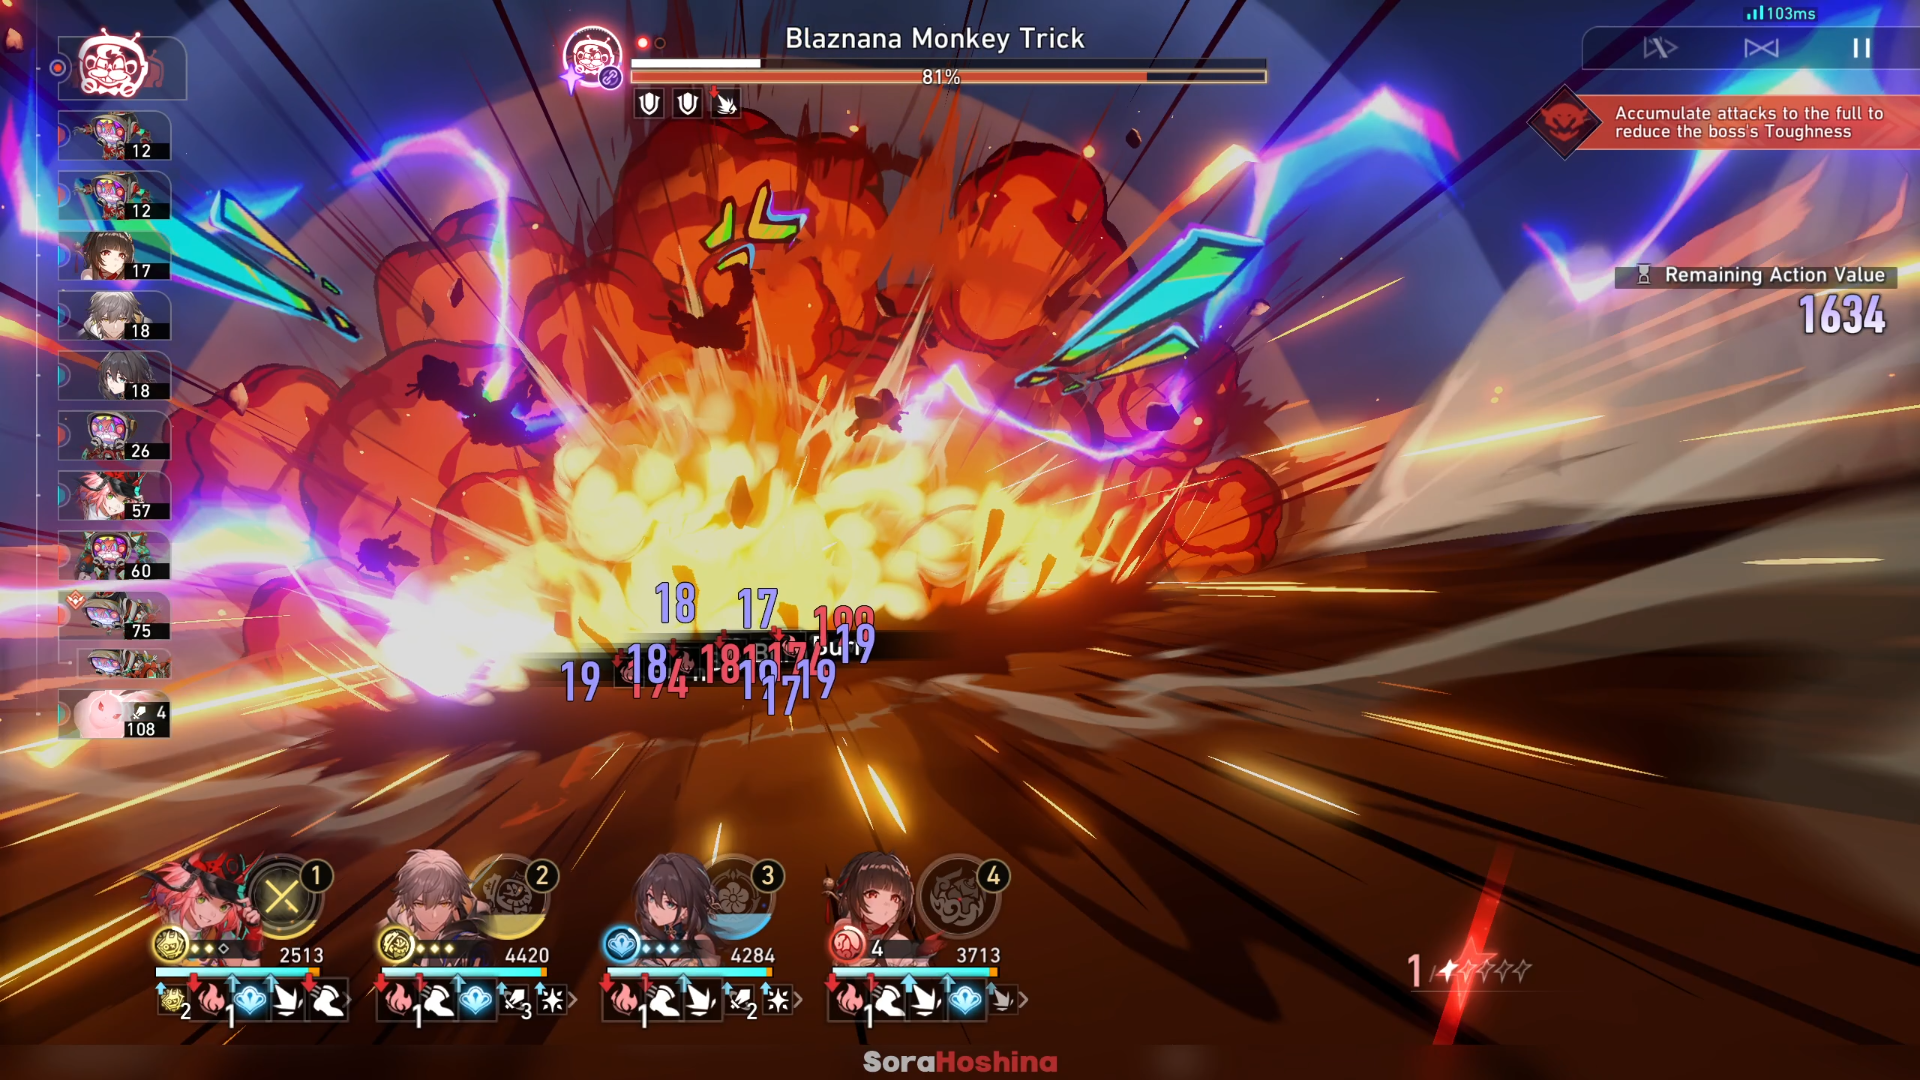
To the Doctor: Battle Report
Video Walkthrough
Read More
- FARTCOIN PREDICTION. FARTCOIN cryptocurrency
- SUI PREDICTION. SUI cryptocurrency
- Excitement Brews in the Last Epoch Community: What Players Are Looking Forward To
- The Renegades Who Made A Woman Under the Influence
- RIF PREDICTION. RIF cryptocurrency
- Smite 2: Should Crowd Control for Damage Dealers Be Reduced?
- Is This Promotional Stand from Suicide Squad Worth Keeping? Reddit Weighs In!
- Epic Showdown: Persona vs Capcom – Fan Art Brings the Characters to Life
- Persona Music Showdown: Mass Destruction vs. Take Over – The Great Debate!
- “Irritating” Pokemon TCG Pocket mechanic is turning players off the game
2024-12-11 13:37