As someone who has spent countless hours immersed in the magical world of Hyrule, I can confidently say that tackling Null in Echoes of Wisdom is no walk in the park. But fear not, fellow adventurers! With a little bit of strategy and the right companions by your side, you’ll have this boss fight licked in no time.
Just like most contemporary Zelda games, The Legend of Zelda: Echoes of Wisdom is filled with numerous items to gather, brain-teasing puzzles to conquer, and quests to accomplish. If you’re having trouble locating something or simply can’t decide where to begin, this walkthrough for The Legend of Zelda: Echoes of Wisdom offers the guidance you require.
Legend of Zelda Echoes of Wisdom Walkthrough – Quest List
Here’s a breakdown of the tasks at hand, divided into two sections for clarity. The initial section showcases the primary missions, along with the actions required to wrap them up successfully.
| Main Quest Name | How to complete |
|---|---|
| The Mysterious Rifts | Beat the Stilled Suthorn Forest rift and head to the home marked by Impa. |
| Searching for Everyone | This quest will be finished at the same time as the Jabul Waters Rift quest. |
| A Rift in the Gerudo Desert | Beat the Stilled Gyrudo Sanctum rift after completing the Ancestor’s Cave of Reset quest. |
| Ancestor’s Cave of Reset Rift | Enter the Ancestor’s Cave of Rest and speak to the Gyrudo warrior near the rift. Afterward, use Tri to move a boulder hiding a door on the left side of the room. The quest will be finished after you follow the path and light the torches by the grave. |
| The Jabul Waters Rift | To get to the Jabu Waters rift, you’ll need to complete the Chaos at Zora River Village and Rampage at Zora Cove quets. |
| Chaos at Zora River Village | Head to the upper-east part of the River Zora Village and enter the Stilled Upper Zora River Rift. Completing the Rift will finish the quest. |
| Rampage at Zora Cove | Head east of the Sea Zora Village and come across Dradd trying to move rocks from in front of a cave. Enter the cave through a small underwater hole on the right side of the island and rescue Kushara and the Sea Zora boy. |
| Still Missing | Purify the Stilled Hyrule Castle rift. |
| Lands of the Goddesses | Purify the Eldin Volcano, Faron Wetlands, and Mount Lanayru rifts. |
| Rescuing the Hero Link | Fight Null off the first time and free Link from the Crystal Prison using the Mighty Bow. |
| The Rift on Eldin Volcano | Remove the rift on Eldin Volcano. |
| Lizalfos Burrow | Defeat all of the Lizalfos in the burrow. |
| Rock-Roast Quarry | Carry two pieces of Rock Roast from the end of the cave to the Gorons at the front. |
| A Rift in the Faron Wetlands | Purify the giant rift in the Faron Wetlands. |
| Rift on Holy Mount Lanayru | Purify the rift at the top of Mount Lanayru. |
| The Prime Energy and Null | Defeat Null. |
In Echoes of Wisdom, you’ll come across numerous optional missions known as side quests. The table below provides the names of each quest, instructions on how to initiate and finish them, their locations, and the rewards you’ll receive upon completion. The order in which they appear in the table mirrors the sequence I encountered them during gameplay since some may only become accessible after specific rifts or other missions have been completed first.
| Side Quest Name | How to Get | How to Complete | Reward |
|---|---|---|---|
| Find the Flying Plant | Old Man in Suthorn Village after closing Stillborn Suthorn Forest Rift. | Summon a Peahat in front of him. | 1 Might Crystal |
| Up a Wall | Walk to the Northeastern corner of Suthorn Prairie. There will be a man hiding from Moblins on top of a pillar. | Defeat the Moblins. | 20 Rupees |
| The Blocked Road | An NPC standing by a small blocked path on the west side of the Suthorn Prairie. | Use an Ignizol to light the boxes on fire and destroy them, then push the boulders out of the way. | 20 Rupees |
| A Curious Child | A child standing in front of the leftmost home when you enter Castle Town will ask you to show him different kinds of Zols. | Summon the following Zols in front of him: – A regular Zol – A regular Ignizol – Summon a block of water, then summon the Hydrozol in it. | A Might Crystal |
| Runaway Horse | Talk to the Old Man at Hyrule Ranch. | Travel to the western part of Hyrule Field. The horse will be stranded on a small island surrounded by water. Free it and ride it back to the ranch. | You can now borrow horses from the Ranch whenever you want. |
| Recipes Please! | Talk to one of the Business Scrubs. | Use the Business Scrub to craft 10 unique smoothie recipes. | The Survey Scope |
| Recipes Please! Part 2 | Submit the first 10 smoothie recipes to one of the Business Scrubs. | Craft another 20 unique smoothie recipes. | Survey Binoculars |
| Gerudo Tag Training | Talk to the Gerudo woman on the left side of Gerudo Town. | Catch her in tag. I did so by cutting diagonally behind building and getting in her path. | 6 Chilly Cactus. |
| Elusive Tumbleweeds | Talk to the Gerudo woman on the left side of town near the Tag Training quest. | Use Tri to possess a tumbleweed, then bring it through town to the woman. | 2 Might Crystals |
| Tornado Ghost? | Talk to the Gerudo woman to the right of the Gerudo Town entrance. | Summon a Tornando in front of her. | 10 Fresh Milk |
| The Flying Tile | Talk to the Gerudo Woman by the Oasis. | Summon a flying tile in front of her. | 50 Rupees |
| Wild Sandstorms | After defeating two Lanmola in Gerudo Desert, visit the barracks in Gerudo Town to get this quest. | Defeat the Lanmola | Gold Sash |
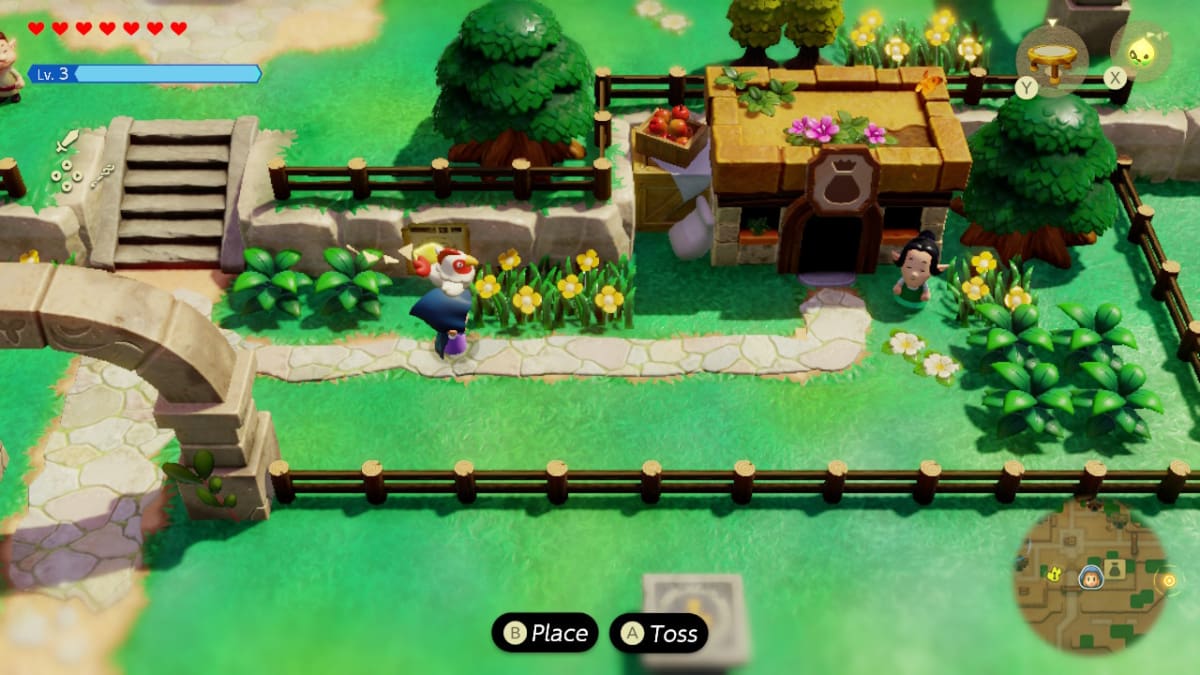
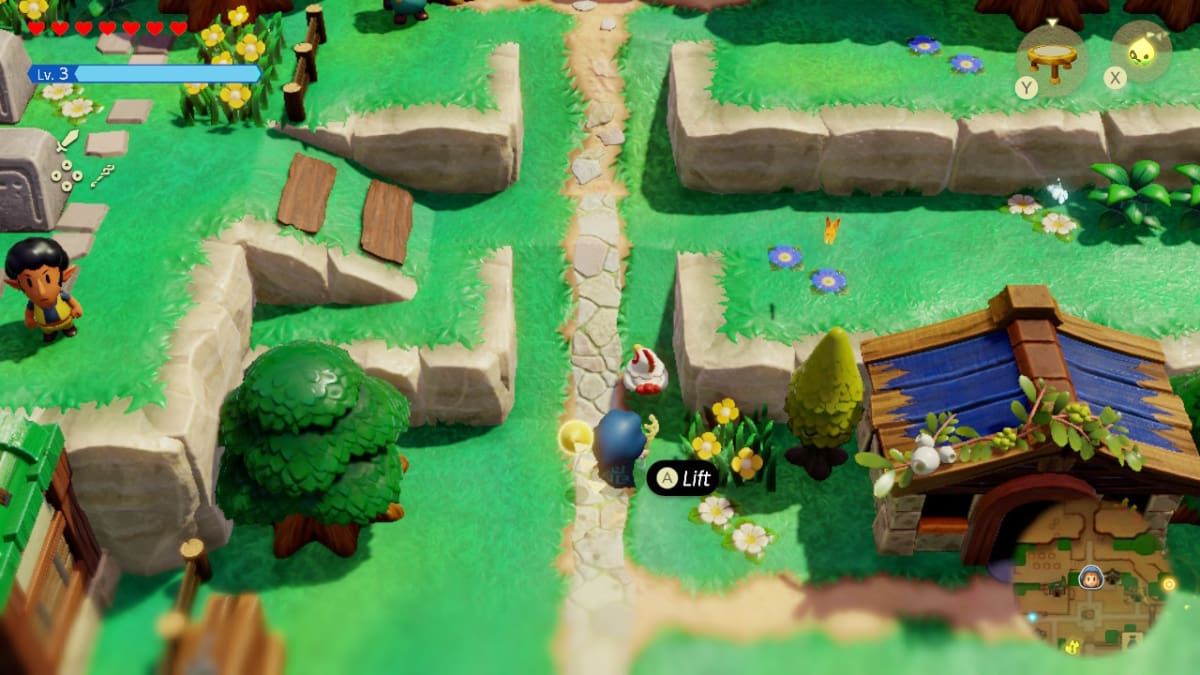
| Cucco’s on the Loose | Talk to the Kakariko villager panicking by a fenced-in yard on the left side of town. | Pick up five Cuccos around the village and throw them in her yard. | Fairy Bottle |
| Let’s Play a Game | Talk to archaelogist Sago in front of the Eastern Temple entrance. | Defeat Smog in the Eastern Temple. | Ancient Charm |
| Deliver the Grilled Fish | From a lady standing in front of a house on the Jabu Waters’ piers. | Carry the Grilled Fish to her son in the forest, then return to her for the reward. | 10 Bubble Kelp |
| Out of Bubble Kelp | The business scrub near Zora Cove. | Give the business scrub 3 Bubble Kelp. | 20 Rupees |
| Precious Treasure | The first Zora in the Sea Zora Village after completing the Stilled Jabul Waters rift. | Use Tri to drag an opened treasure chest in front of the Zora. There is one in the ocean to the southeast, but any should work. | 3 Monster Stones |
| The Zora Child’s Fate | In the River Zora Village after finishing The Jabul Waters Rift quest. | In the house left of the Zora child, speak to his mother. Afterward, summon the following monsters in front of her: – Tangler – Bombfish – Biri | Receive the Zora Scale. |
| Impa’s Gift | After destroying the Stilled Hyrule Castle rift and talking to everyone in the Throne Room, speak with Impa to get this quest. | First, purify the rift that the horse has fallen into. Afterward, use Tri to pull a carrot out of the patch to bring the horse back. | Unlock Flag Races at the ranch. |
| Automaton Engineer Dampe | After saving Hyrule Castle and going to Hyrule Ranch for Impa’s Gift, leave the ranch through the northern gate and head northeast. You’ll hear Dampe talking to a crow in a tree right after leaving. | Start by destroying the crow that has stolen Dampe’s key. Afterward, arrive at his house and show him the following monsters: – Tektite – Mothula | First, get 5 Twisted Pumpkins. When the quest is complete, you’ll unlock automatons, get the Techtite automaton, and the Clockwork Key. |
| Explosions Galore! | Read Dampe’s Diary after completing the Automaton Engineer Dampe quest to start working on this Automaton. | Show Dampe an Octorock and a Firework Echo. | Get the Tocktorok automaton. |
| Endless Stomach! | Read Dampe’s Diary after completing the Explosions Galore! quest. | Show Dampe a Bio Deku Baba. If you don’t have the Steel Trap, go play the Acorn Gathering Mini Game on the far left side of the map (beyond Hyrule Field) and get it. Afterward, talk to him, select “I want an automaton”, and choose Endless Stomach. | Get the High-Teku Baba automaton. |
| Performance Artist! | Read Dampe’s Diary after completing the Explosions Galore! quest. | Show Dampe a Zol. If you do not have the Prismatic Music Box, go do Flag Racing at Hyrule Ranch to unlock it. Afterward, speak to Dampe, select “I want an automaton”, and choose Performance Artist. | Get the Gizmol automaton. |
| Chop ’em in Two! | Read Dampe’s Diary after completing the Explosions Galore! quest. | Show Dampe a level 2 Sword Moblin. You’ll need to have the Heirloom Katana; if you don’t, go to Kakariko Village and train in the Slumber Dojo. Afterward, speak to Dampe, select “I want an automaton”, and choose Chop ‘Em in Two. | Get the Roboblin automaton. |
| Get Rich Quick! | Read Dampe’s Diary after completing the previous four automatons. | Show Dampe a crow and give him the Golden Fan awarded by playing Mango Rush at the Gerudo Oasis. | Get the Goldfinch automaton. |
| Questioning the Local Cats | From an old man in Kakariko Village after saving Hyrule Castle. | Complete the following steps: – Talk to the girl in front of the shop. – Lure the cat away with a Grilled Fish Echo. – Use a Holmill to dig up the treasure. – Talk to the old man with the Cat Clothes in your inventory. – Put on the Cat Clothes and talk to the cat on the east windmill. -Follow her directions to find the cat on top of a tree east of the village. – Talk to the old man again. | 10 Refreshing Grapes |
| The Fireworks Artist | Speak with Basa the firework maker in Goron City after destroying the rift. He’ll be in the house in the top right corner. | The Blastwork Soil will be sparkling to the left of Rock-Roast Quarry surrounded by yellow flowers. Bring it to Basa to finish the quest. | 50 Rupees |
| The Flames of Fortune | A Goron near the hot spring on the right side of the top of Eldin Volcano. | Carry the Coal down to Goron City without letting its flames go out. Use Tri to carry the coal, touching it against lava or fire monsters every time you walk by. Jumping straight down ledges will make this quest easier. | 2 Might Crystals |
| Ready? Set? Goron! | A Goron standing to the right of the Goron City entrance. | Beat the Goron to the finish line by summoning water blocks to climb the cliffs. | 50 Rupees |
| Glide Path | A young Goron next to the hot spring right of the Goron City entrance. | Use a Keese to glide from the starting line to the finish line. | 10 Rock Salt |
| Glide Path Trailblazer | Talk to the same Goron child in the same place as for the Glide Path quest. | Use a Keese to glide from the starting line to the finish line while avoiding boulders and steam vents. | 2 Might Crystals |
| A Mountainous Mystery | Meet Darston in the cave to the right of the Eldin Volcano crater. | Defeat the final monster by putting out the fire on its body with Hydrozols, then attacking its glowing weak spots. | Goron’s Bracelet |
| Secret Chief Talks | After purifying the Zora rifts, talk to Rogma on one of the islands left of the Sea Zora Village. | Talk to everyone as directed until you come to the two village chiefs. | Gold Brooch |
| Big Shot | Swim to a stalled River Zora boat southwest of Zora Cove. | Defeat the enemies surrounding the boat, then climb on top and talk to the Zora. | 10 Riverhorses |
| The Zappy Shipwreck | An old man on top of the first houseboat in Seesyde Village. | Swim to the old ship and use Tri to break the hatch covering the stairs. | Fairy Bottle |
| A Treat for my Person | Speak to the cat next to the girl fishing by Sesyde Village. | Give the cat a Warm Special Smoothie. | 1 Might Crystal |
| Beetle Ballyhoo | Talk to a Gerudo Woman in front of the house in front of the southern entrance to Gerudo Town | Destroy all of the Beelte mounds in the cave and return to talk to the Gerudo soldier. | Heart Barrette |
| Dohna’s Challenge | Talk to Dohna at the eastern entrance to Gerudo Town. | Sneak through the Treasury and open the chest undetected. | Silk Pajamas |
| One Soldier Too Many | Speak to the soldier standing guard at the gates of Castle Town. | Question all of the soldiers in Castle Town to find the echo. After talking to the soldier in the Barracks and checking their equipment, tell Beecher who the echo is. (Hint: Look at their lances!) | A Golden Egg |
| The Rain-Making Monster | A Deku Scrub to the left of the Smoothie Hut in Faron Wetlands. | Summon a Drippitune in front of them. | 8 Electro Apples |
| Cotton-Candy Hunt | After fixing the Faron Wetlands rift, walk south down the path and talk to the first Deku Scrub on your left. | Go to the southern ruins in the Faron Wetlands and fight Smog a second time. | Turns Ancient Charm into a Curious Charm |
| Looking for Bempu | From a pair of Deku Scrubs sitting next to each other left of the pond in Scrubton. | Find Bempu in his hiding spots: – Buried in the ground in front of the smoothie shop – Buried near the large flower northwest of the heart-shaped lake. – Buried on the staircase to the left of the Sweet Spot. – Buried by Blossu’s house | Fairy Fragrance |
| The Mythical Deku Snake | Given by a Deku scrub standing to the left of the smoothie shop in Faron Wetlands. | Give the scrub 3 Electro Apples | 2 Monster Stones. |
| Mobbing Mothulas! | Talk to the two Deku Scrubs to the right of the Deku Scrub lockup. You’ll have to pull one out of the ground with Tri to start the quest. | Defeat the swarm of Mothulas on the path to the right of the Hidden Ruins, then tell the Scrubs about it. | 1 Might Crystal |
| Getting it Twisted | The smoothie Business Scrub on Hebra Mountain. | Give him a Twisted Pumpkin. | 10 Warm Peppers |
| Stamp Stand Swallowed! | After seeing Conde chase his brother, travel to the right. You’ll see the Stamp Guy upset by a rift. | Purify the rift. | Stamp Guy will do a little jig and you can add the stamp to your card. |
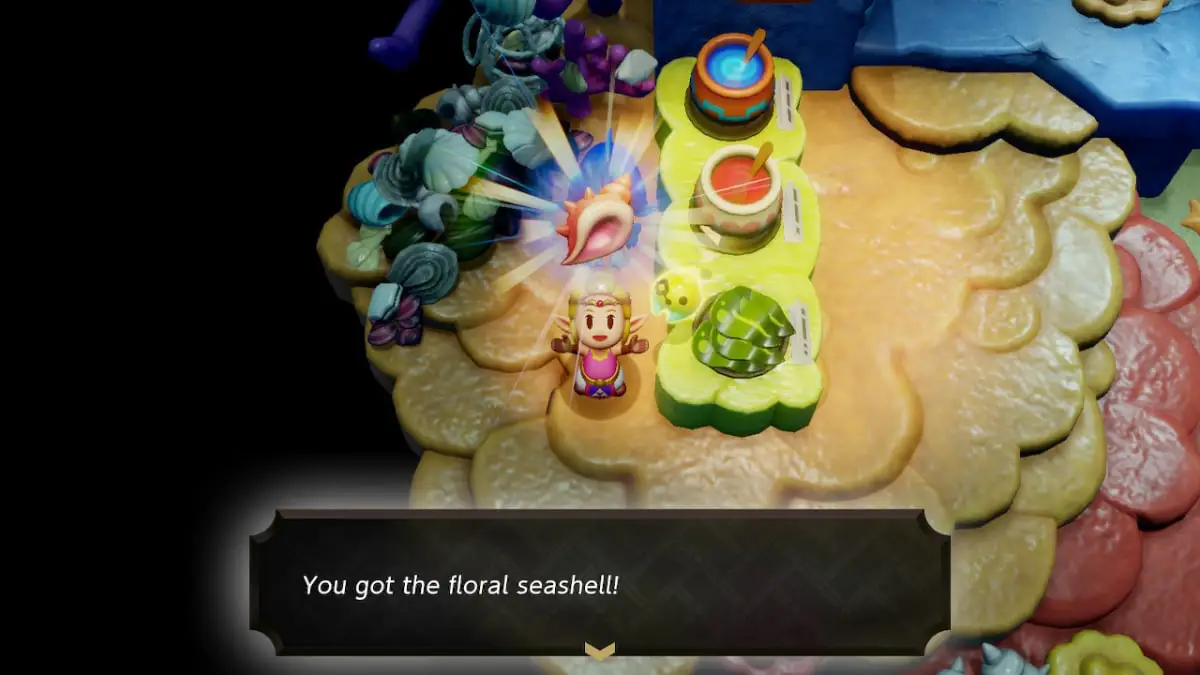
| The Great Fairy’s Request | Go to the Fairy Fountain and open the chest to trigger this quest. | First, talk to the storekeeper in Gerudo Town. Next, exchange an Unfortunate Smoothie with the Zora Cove shopkeeper for a Floral Seashell. Then go to Goron City, talk to the right storekeeper, and clear out the Lizalfos Burrow for him. Bring the materials to Gerudo Town, then take the finished pendant to the Great Fairy. | Might Bell |
| From the Heart | From a girl with her dog outside of Hyrule Castle after finishing the Lands of the Goddesses quest. | Bring the clover to the king. Afterward, join the search party, head to the new rift, and purify it. | Customary Attire |
| An Out-There Zol | The same boy in Castle Town from the A Curious Child quest. | Summon the Gizmol automaton in front of him | A Piece of Heart |
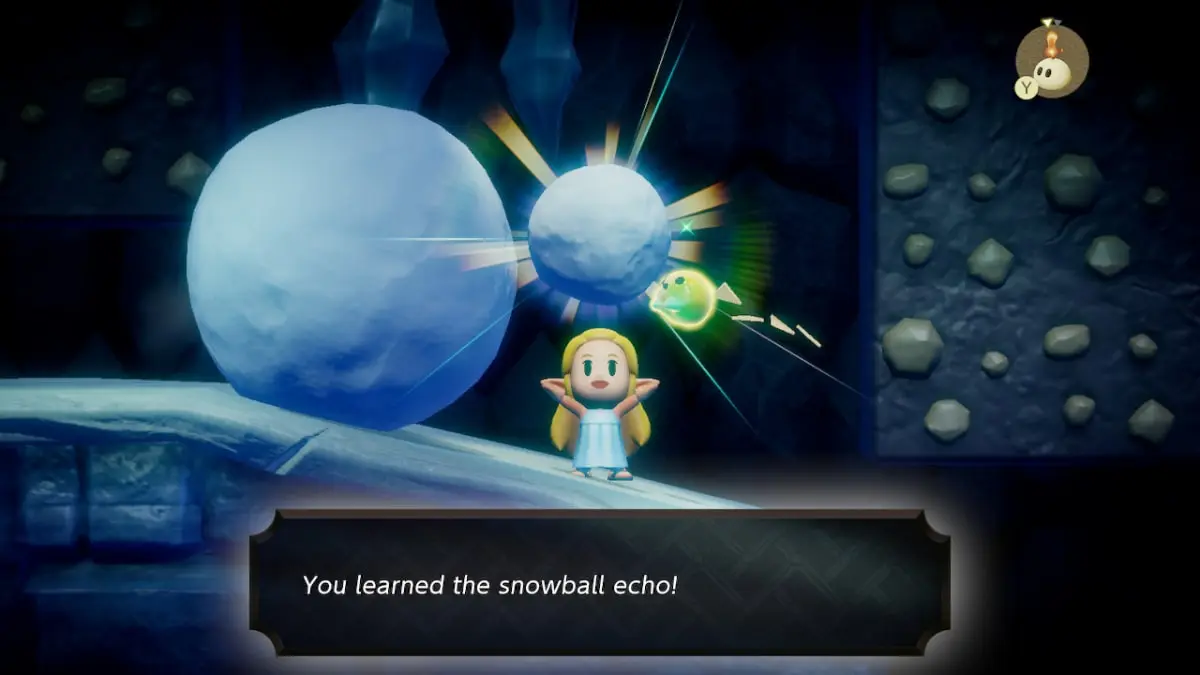
| Snowball Magic | Visit Conde in his house after clearing out the Lanayru rift. | Bring the Snowball to the pedestal shown by Conde. | A Piece of Heart. |
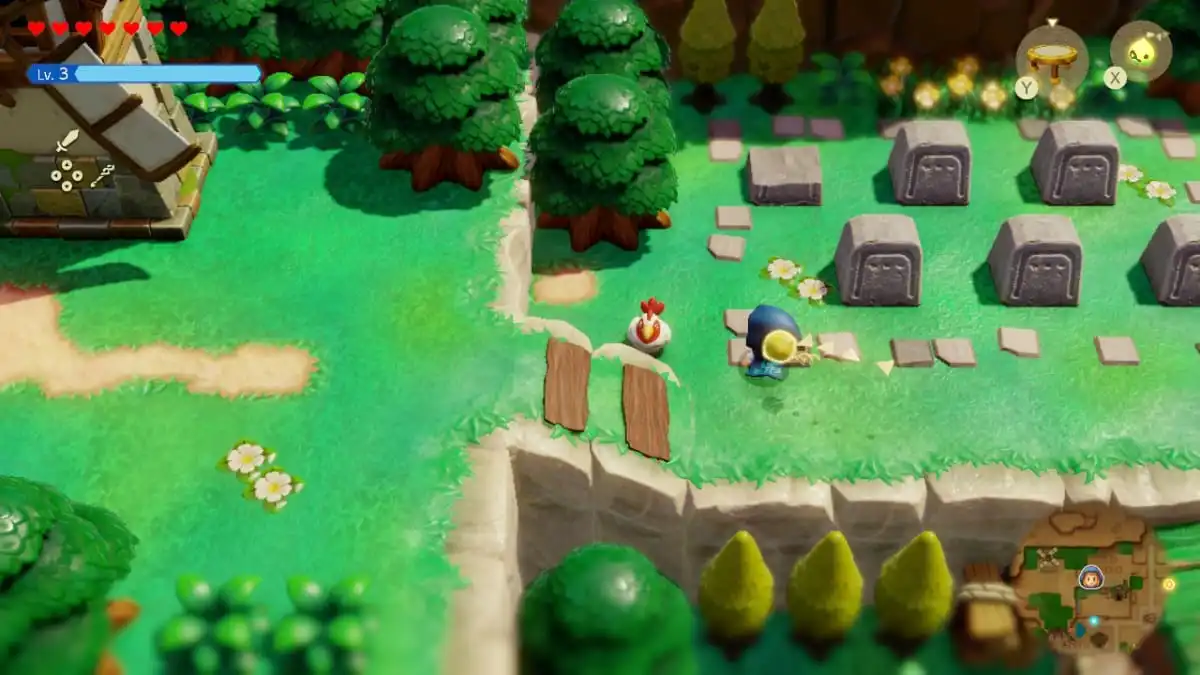
All Cucco Locations for the Cucco’s on the Loose Quest
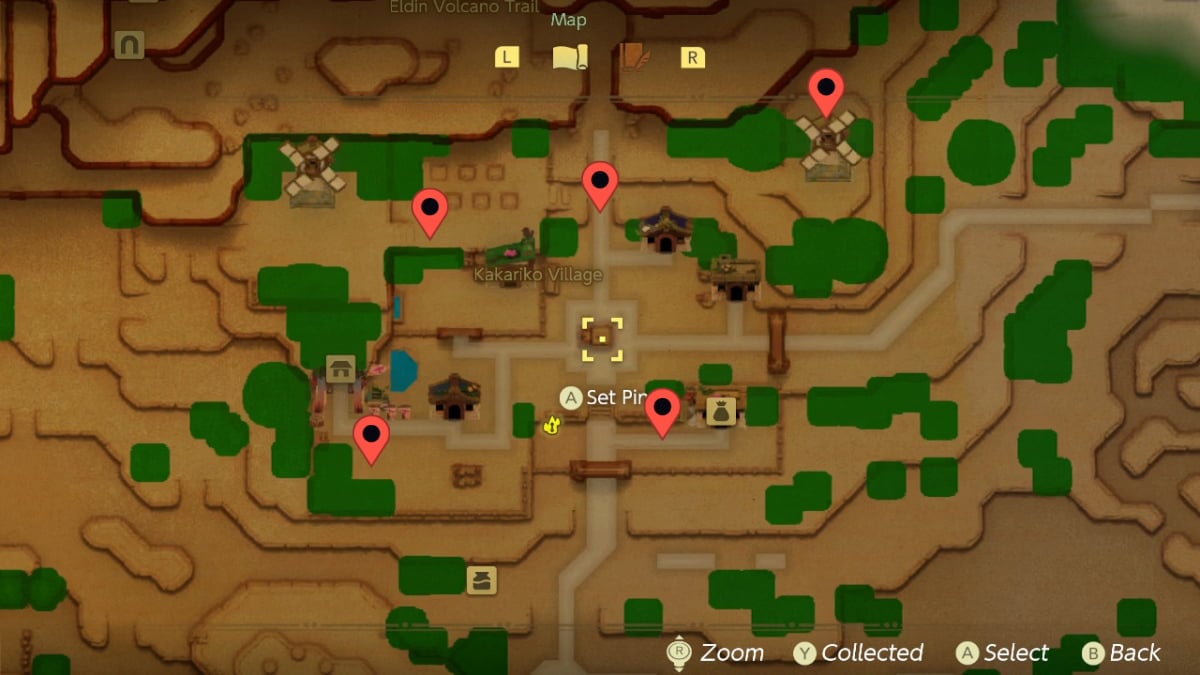

- The first Cucco is in front of the Slumber Dojo to the left of the grape vines.
- You’ll find the second one near the Kakariko Village store.
- Next, head to the pathway leading to the volcano to get the third Cucco.
- Cucco number four is on the left side of the cemetery.
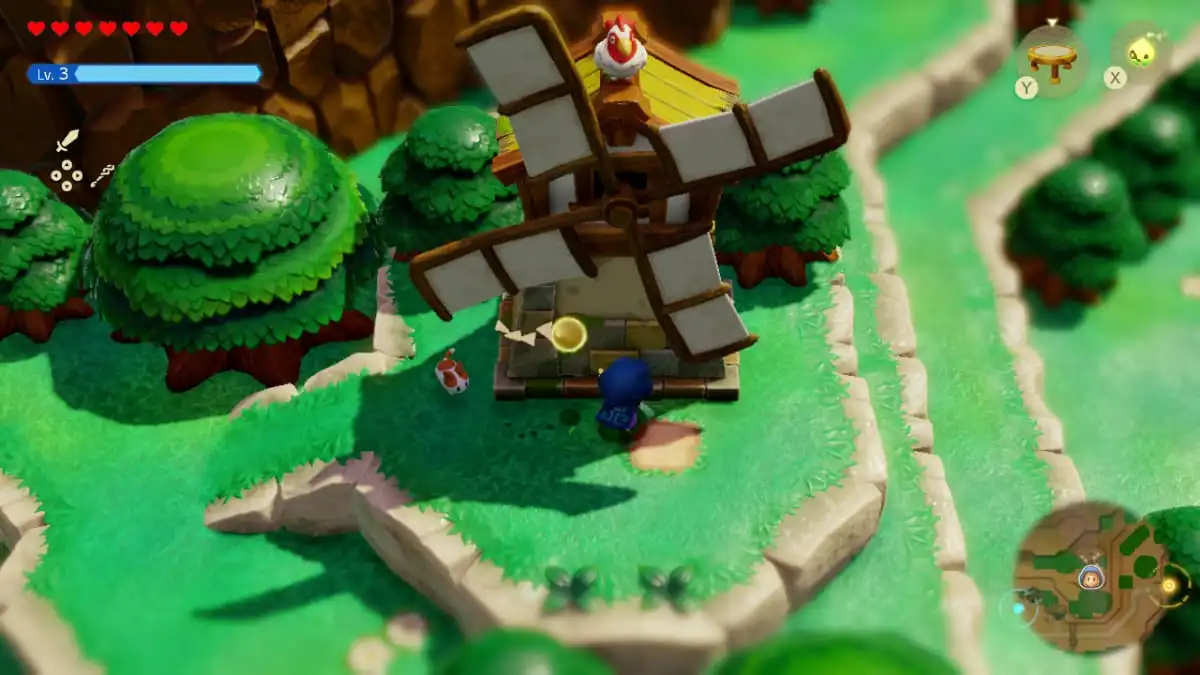
- The final Cucco is on top of the windmill on the right side of the village. Build a staircase up to the tree behind it to climb up on the roof.
How to complete the Deliver the Grilled Fish quest
Prior to embarking on this journey, it would be beneficial to visit the forest located north of Seesyde Village first and eliminate any monsters residing there. This will make the entire experience much smoother as you won’t have to worry about defending your grilled fish from monsters while engaged in combat.
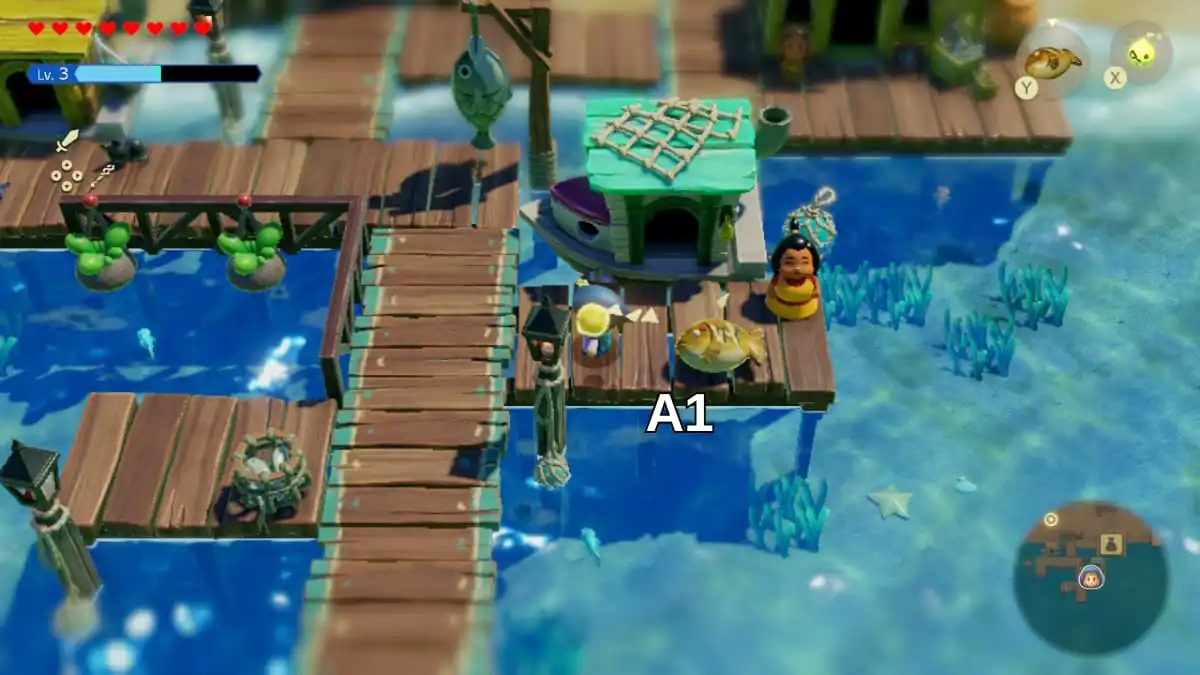
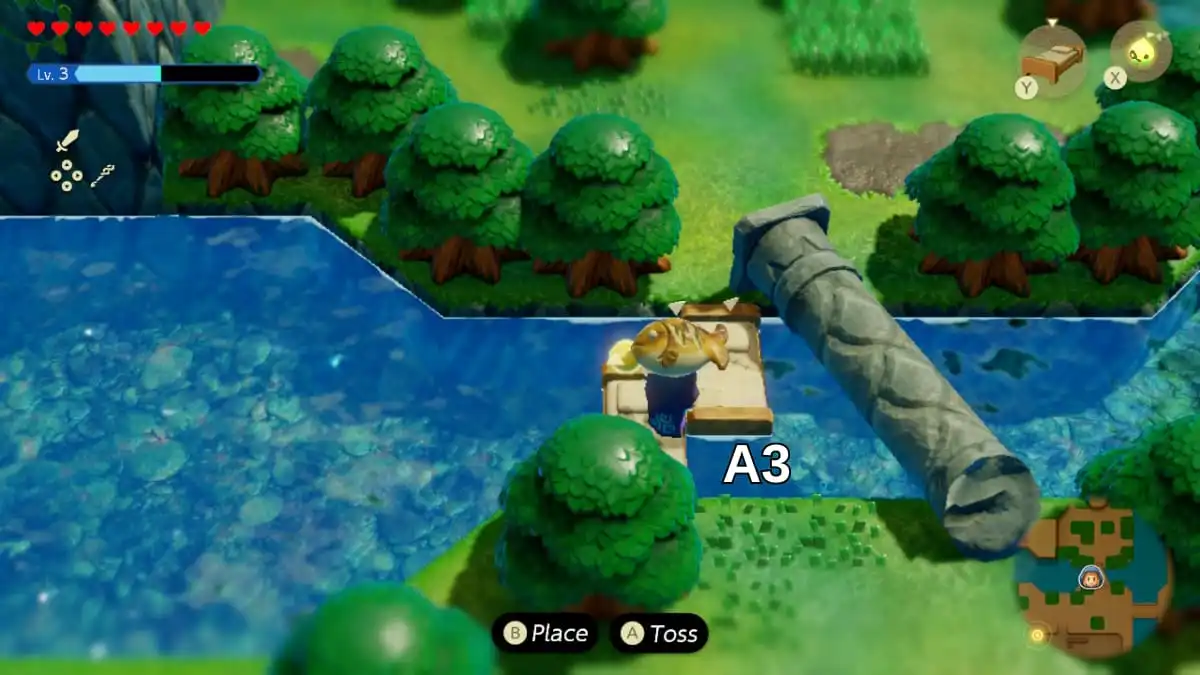
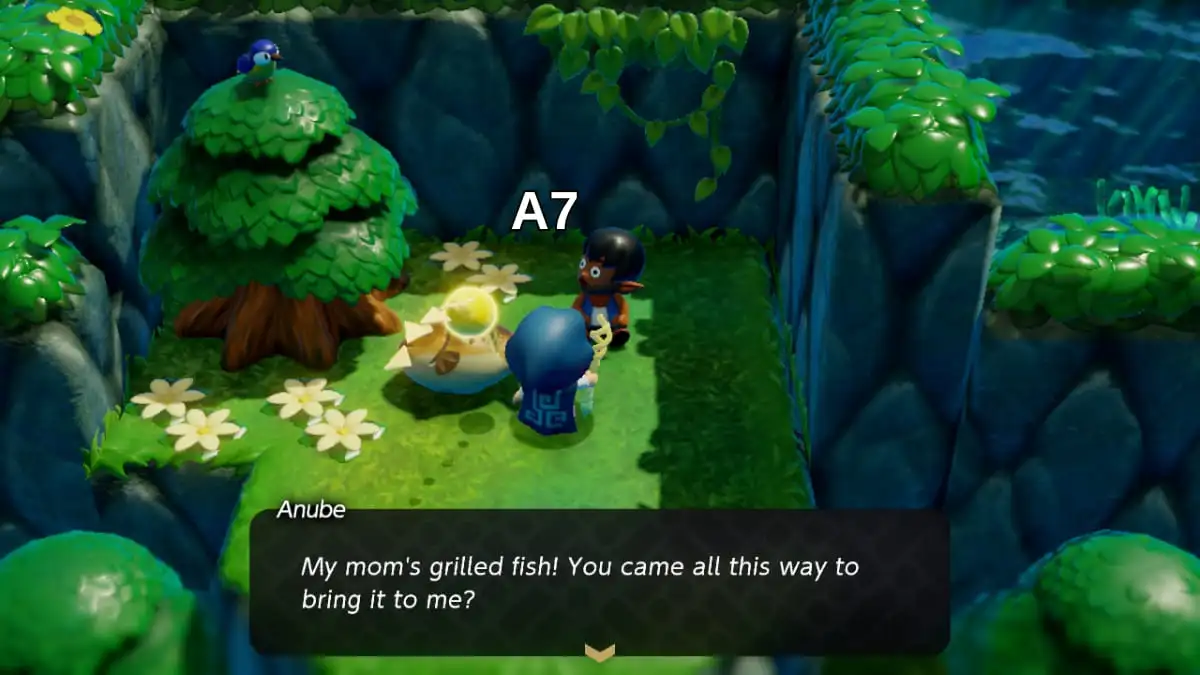
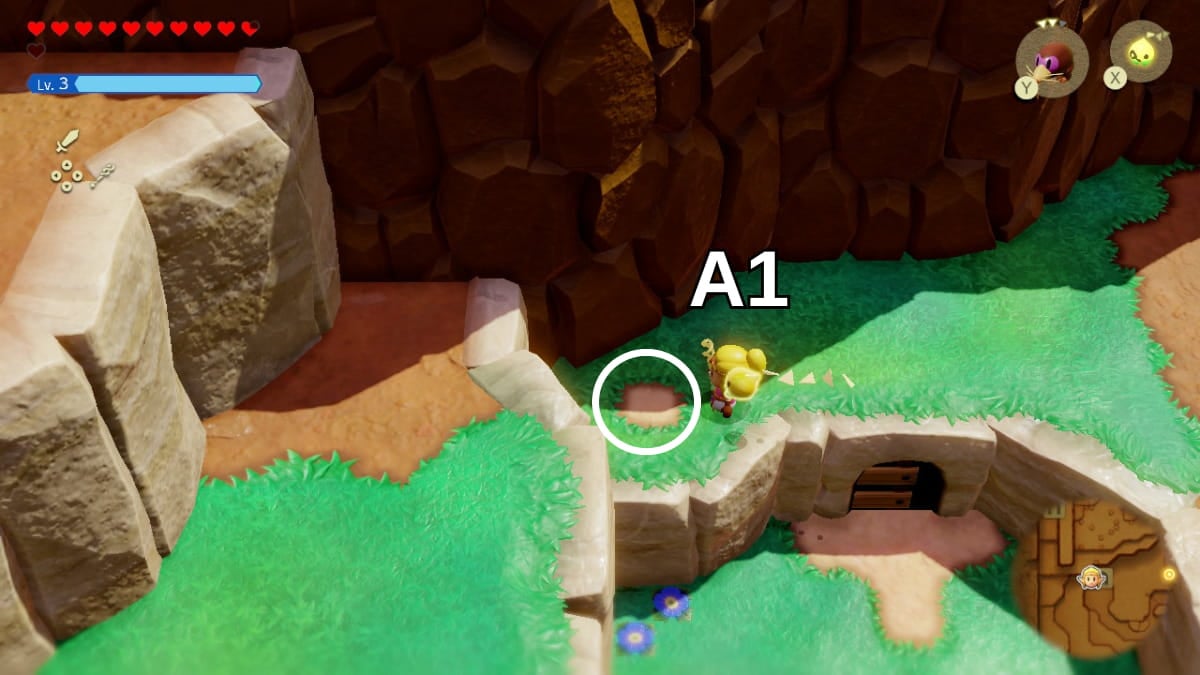
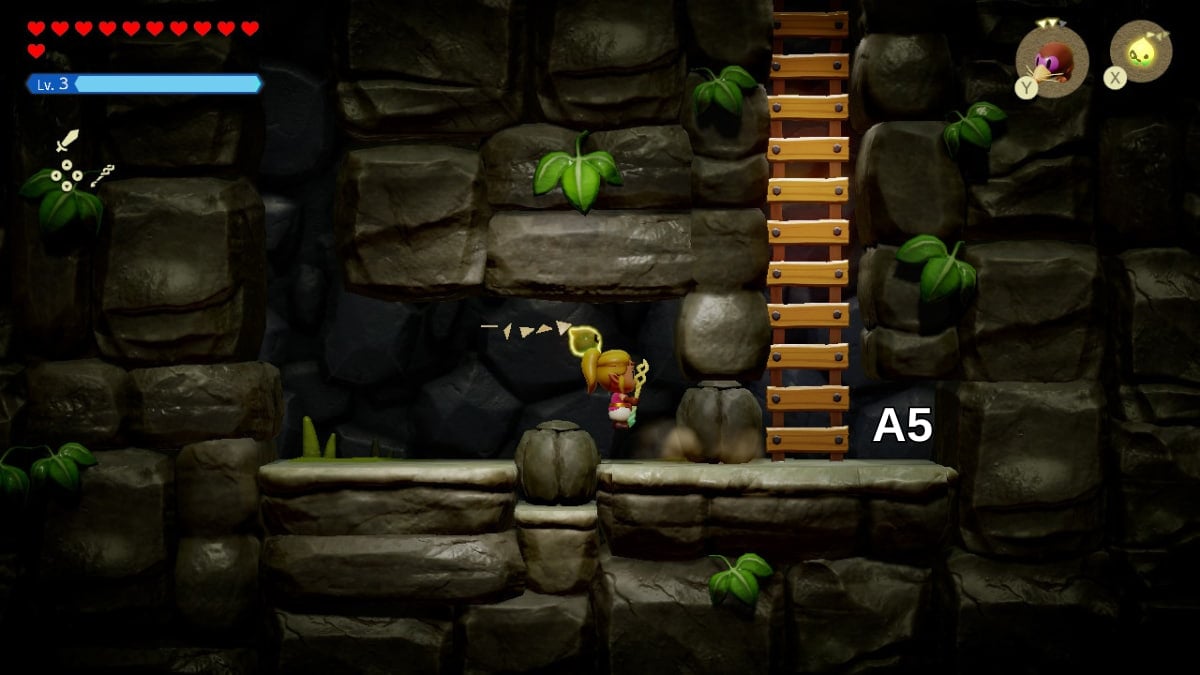
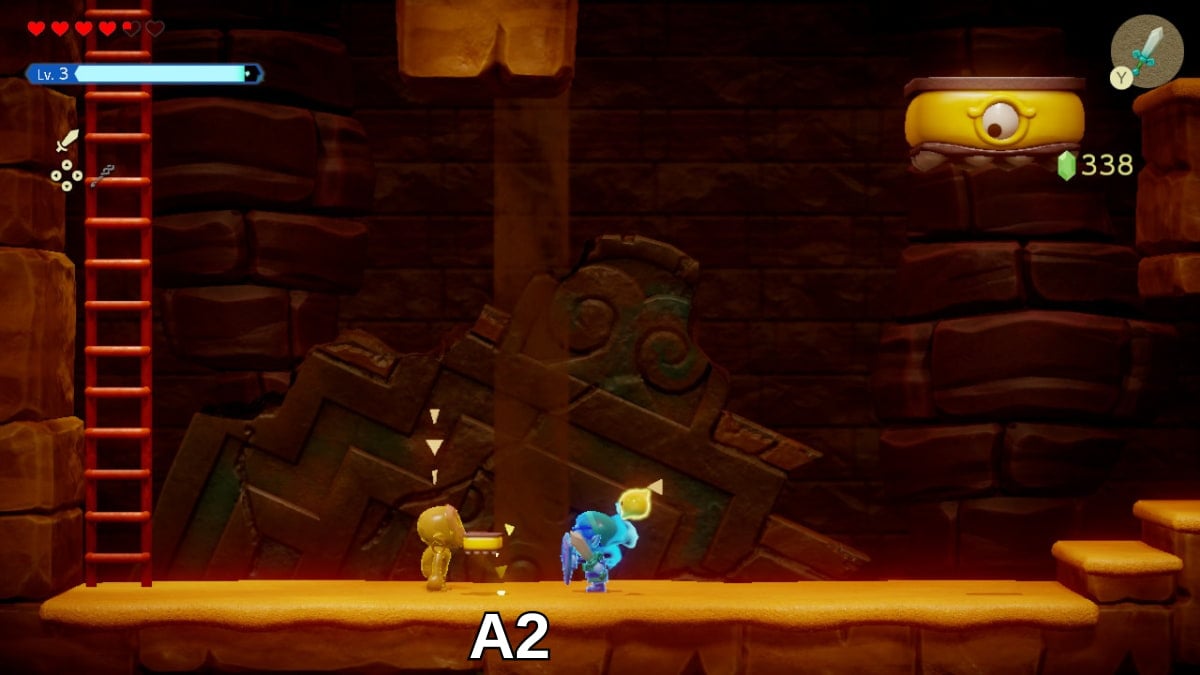
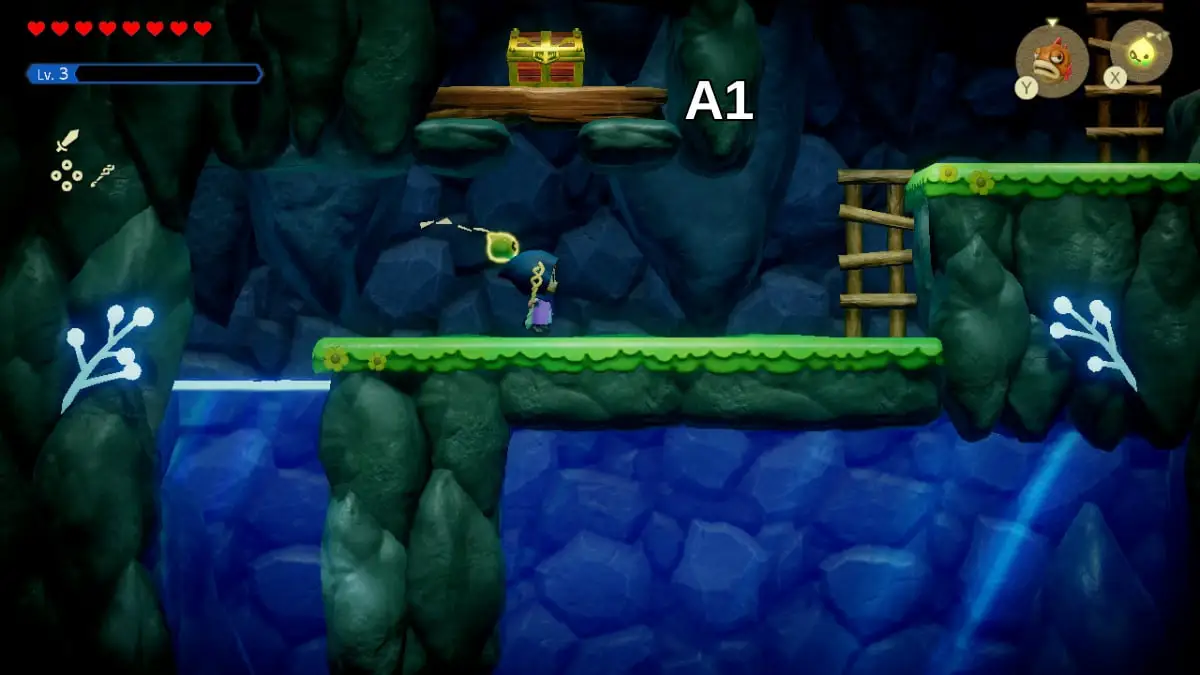
To successfully complete this task, you need to find the Grilled Fish located near the woman (A1) and personally hand it over to her son who is in the woods. Keep in mind that conjuring the grilled fish with an echo won’t work for this quest.
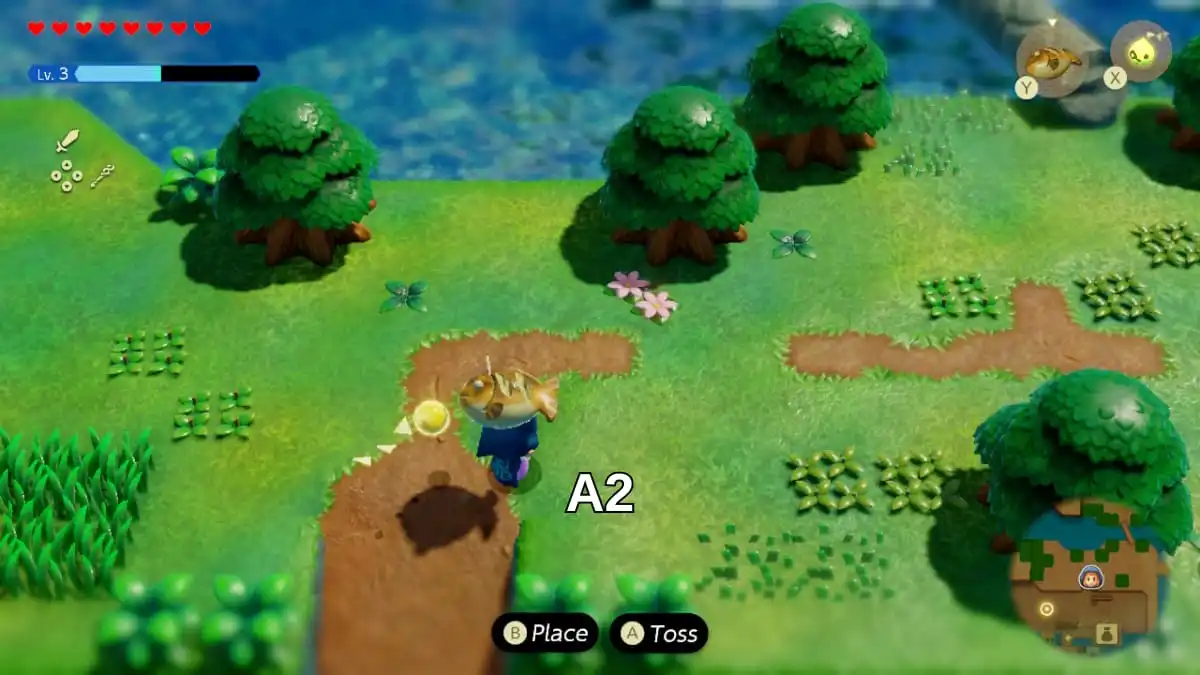
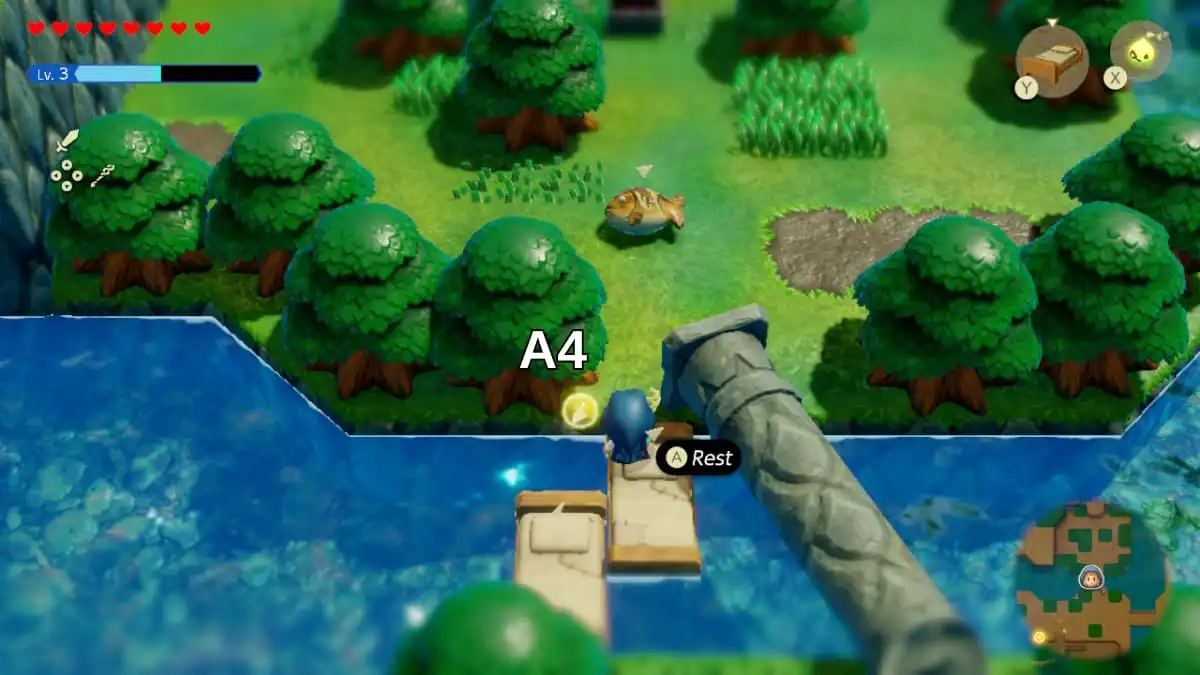
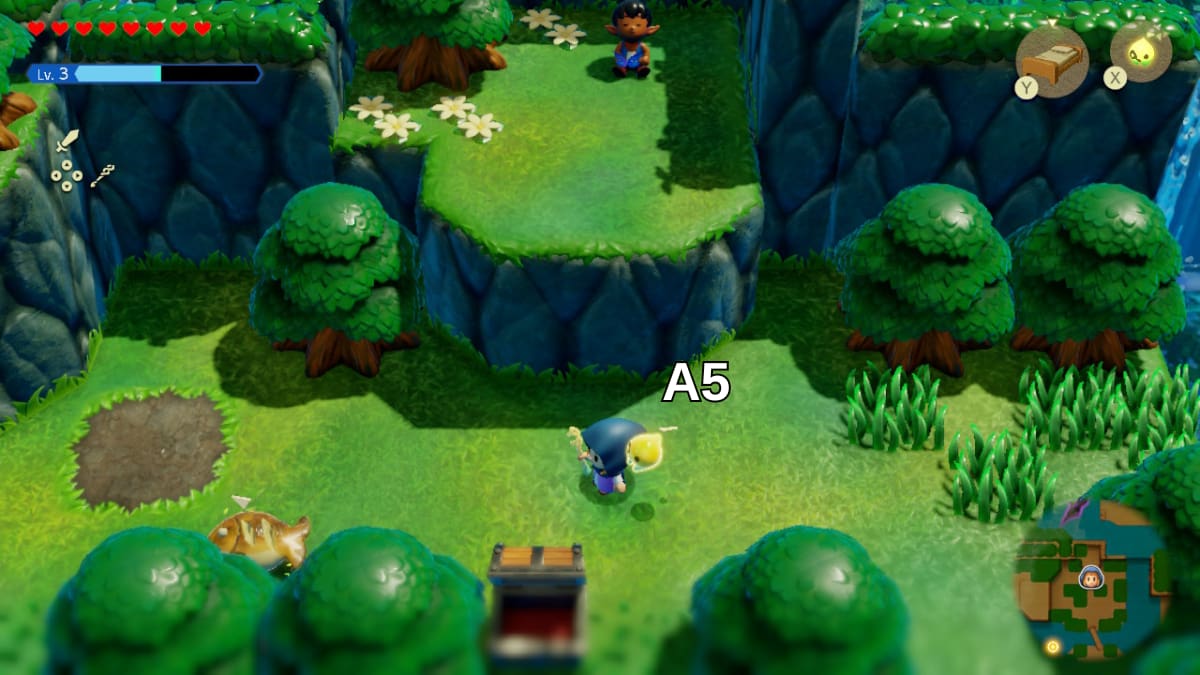
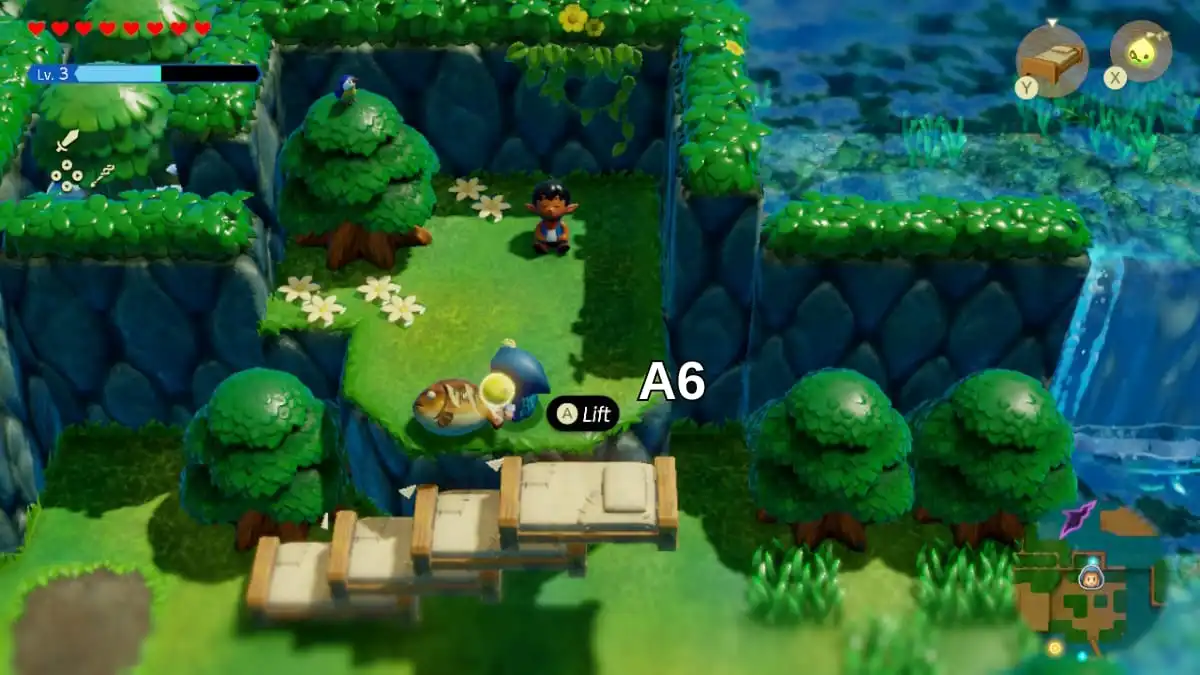
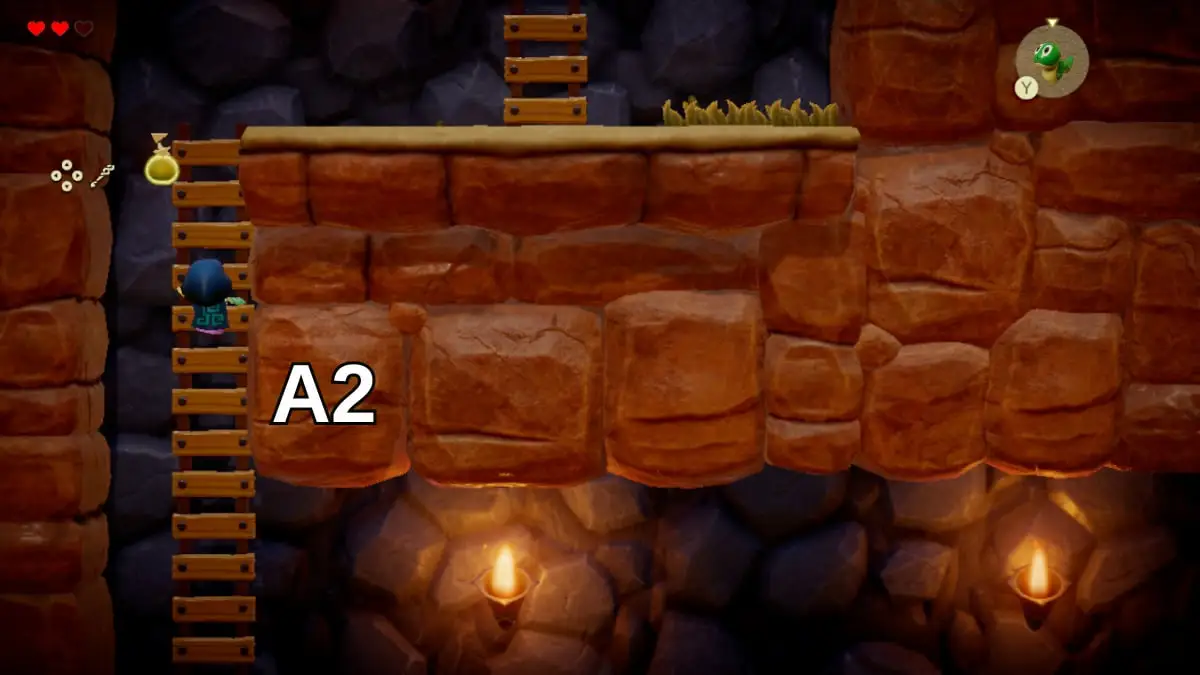
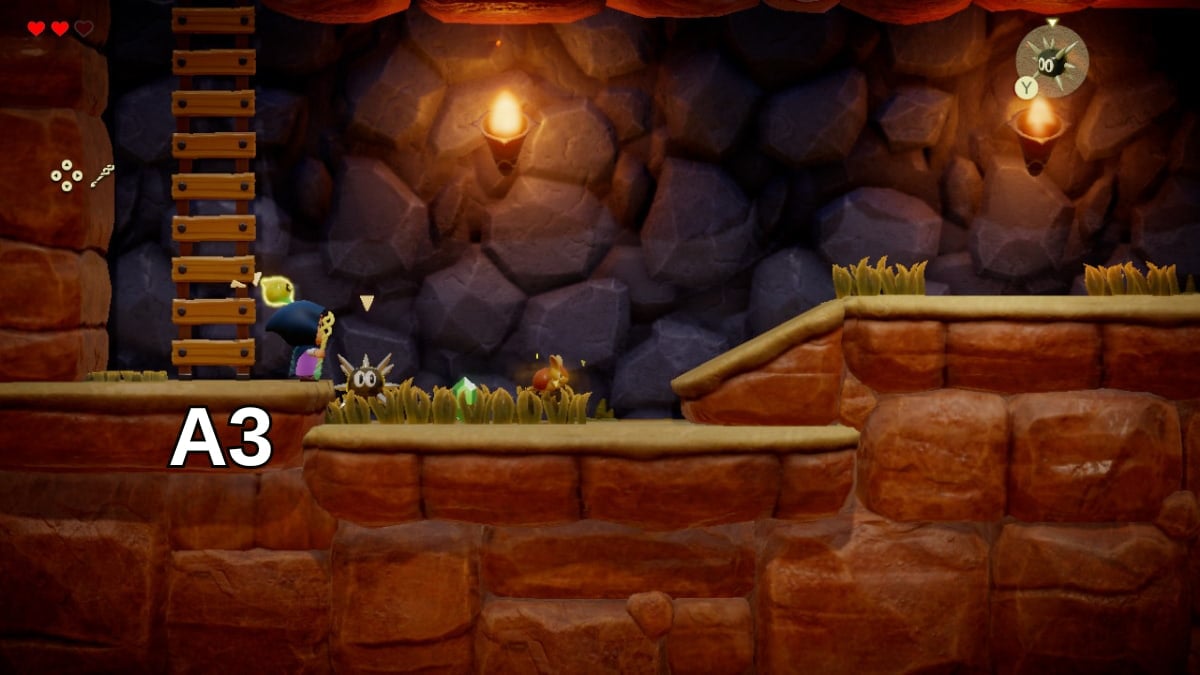
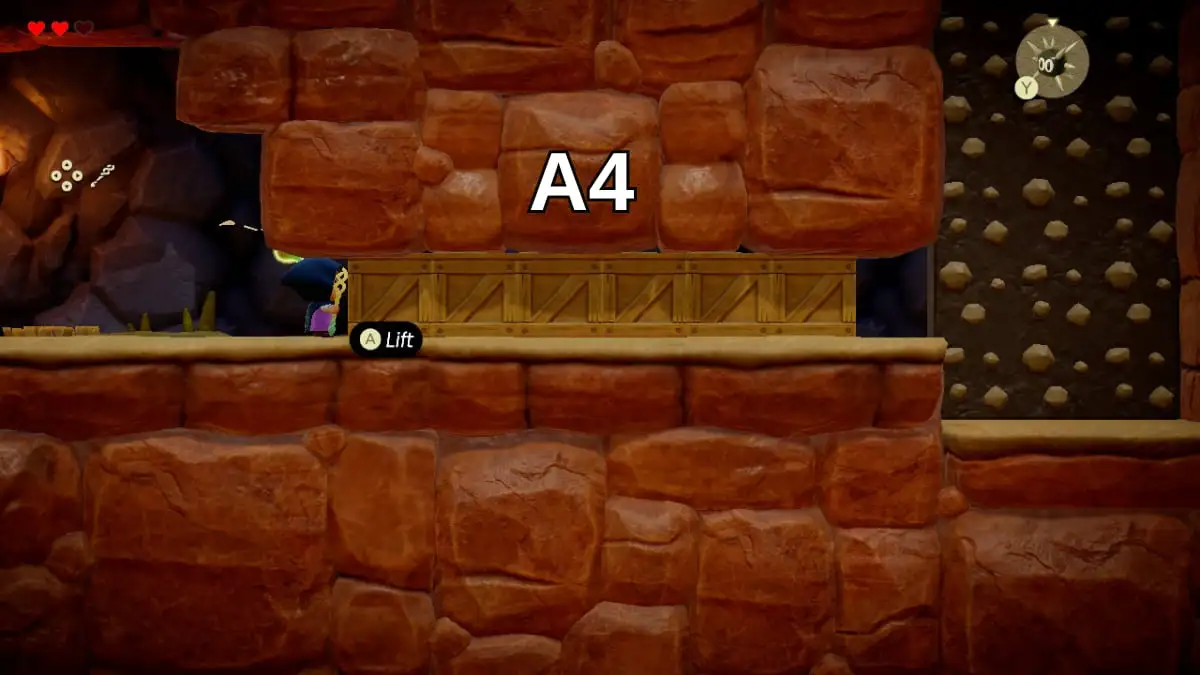
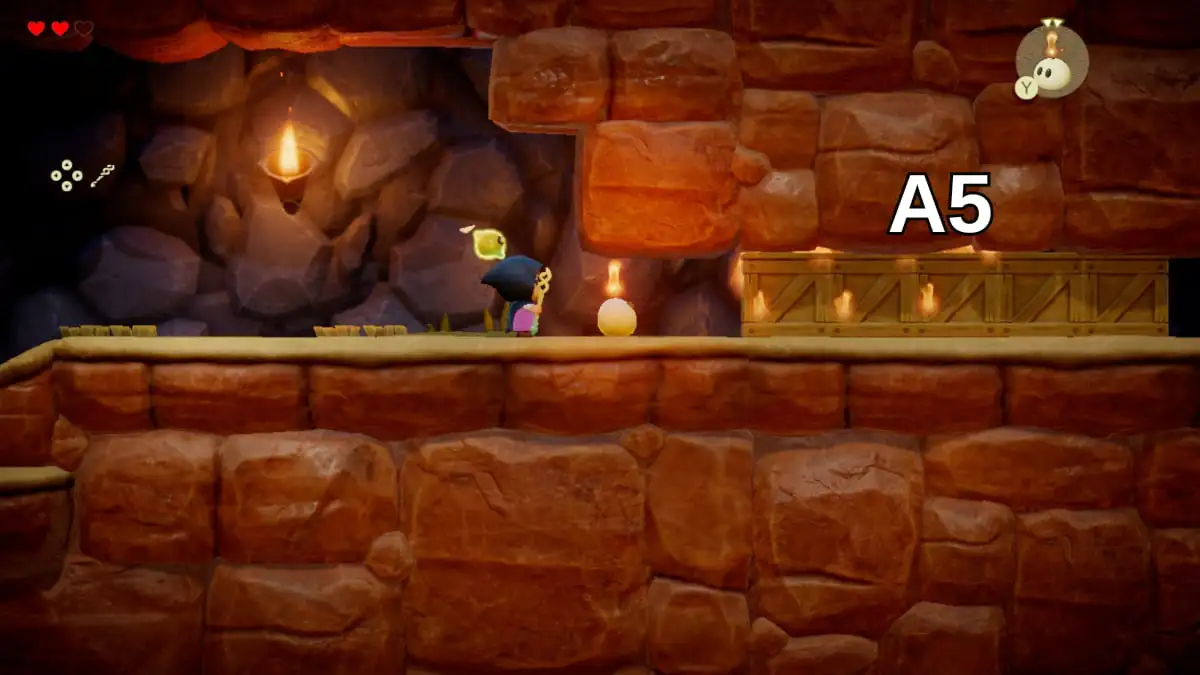
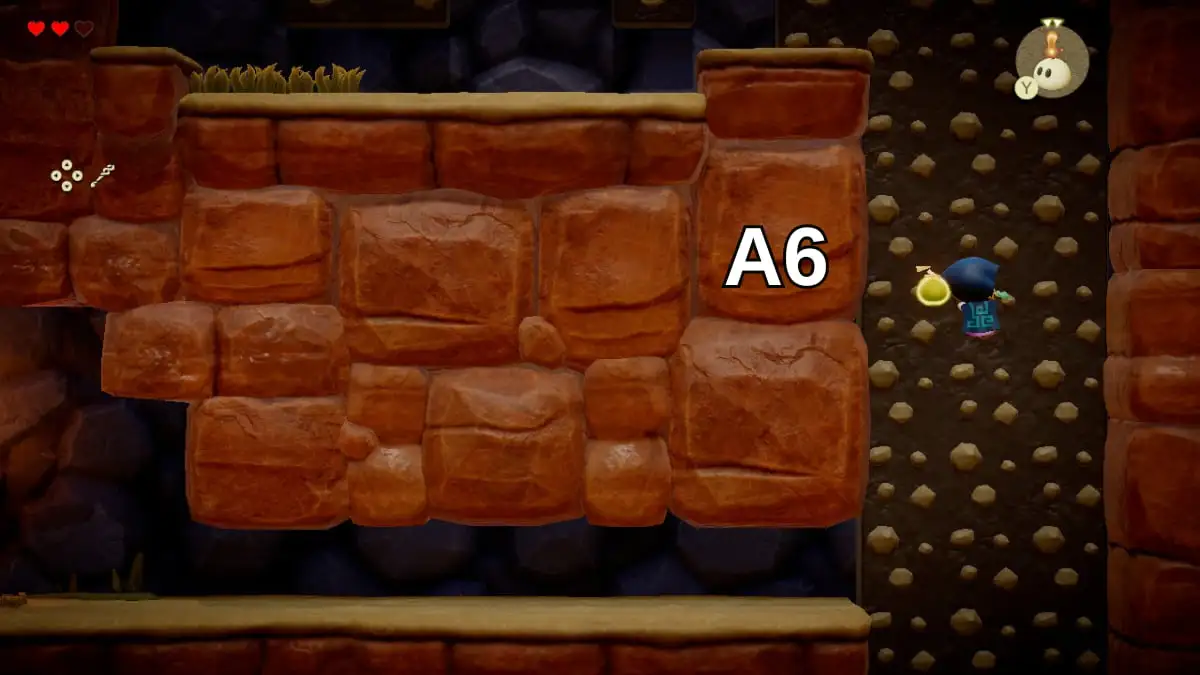
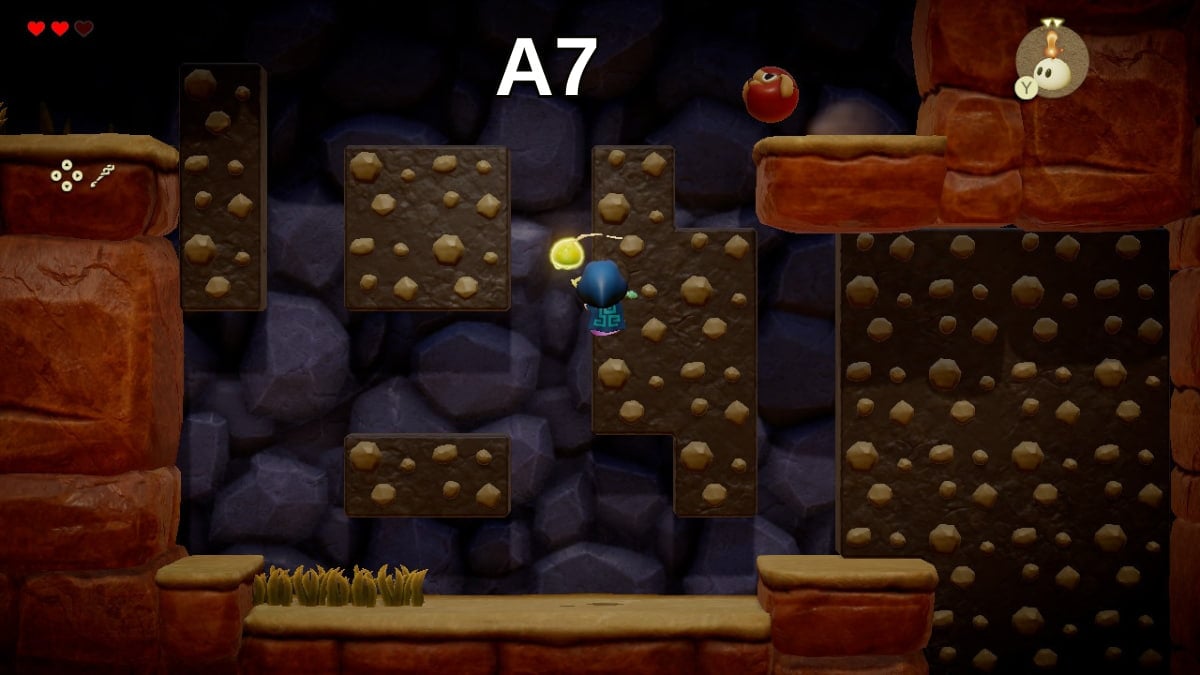
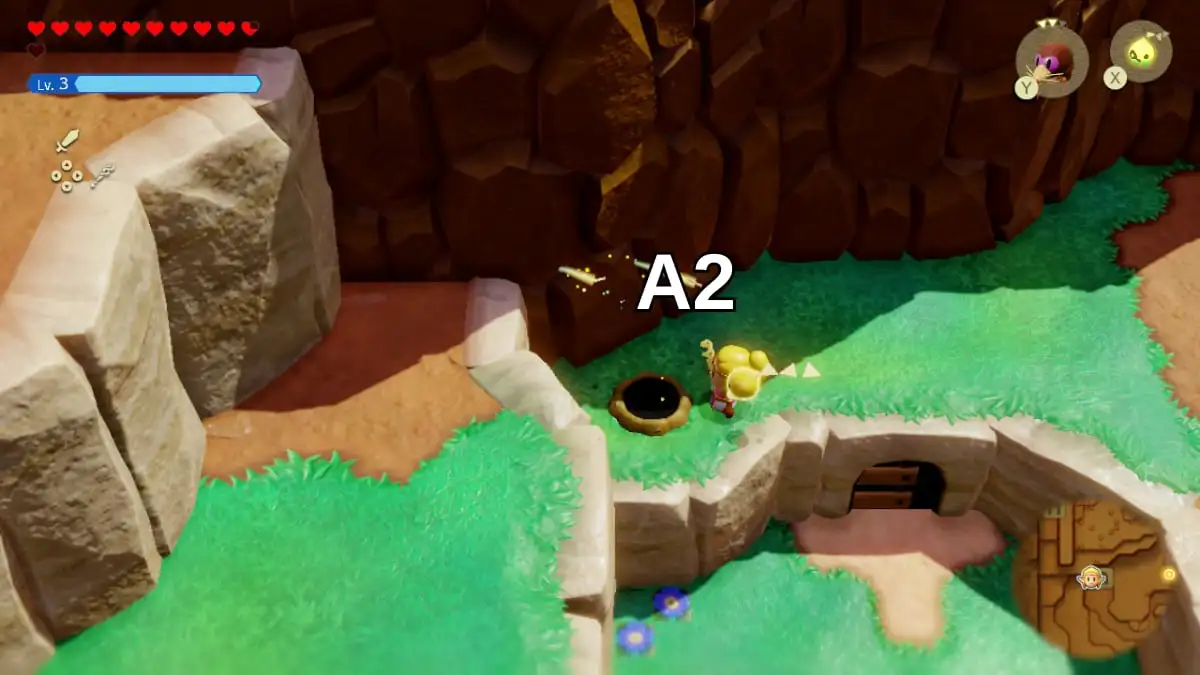
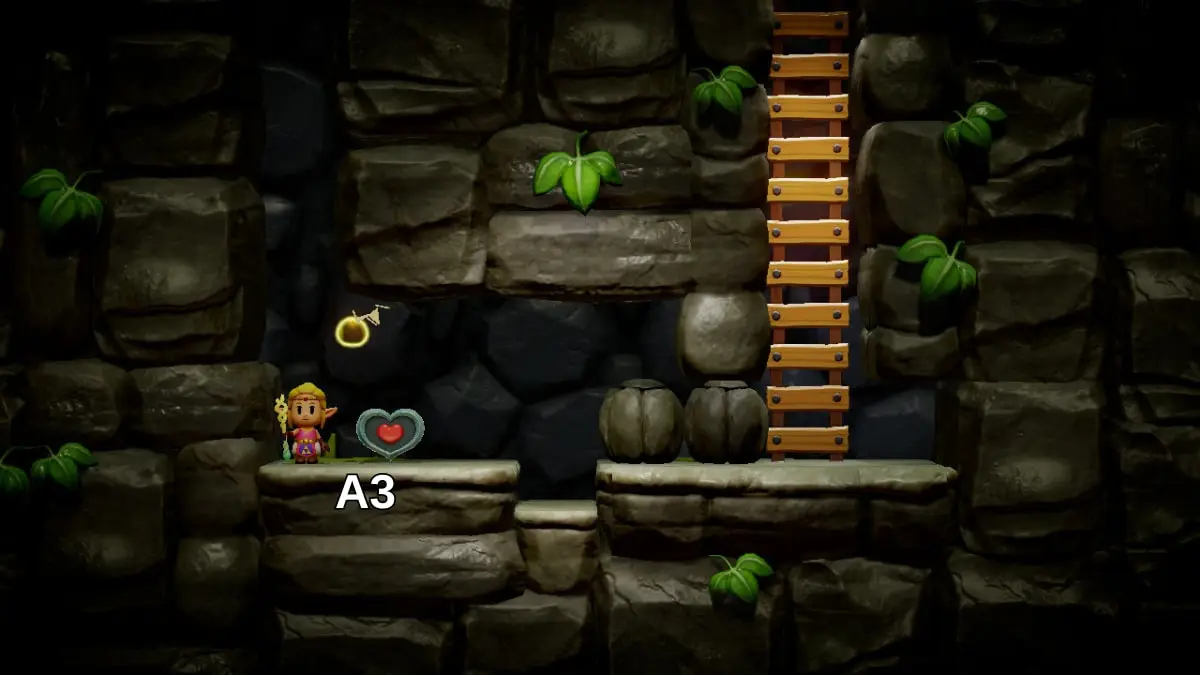
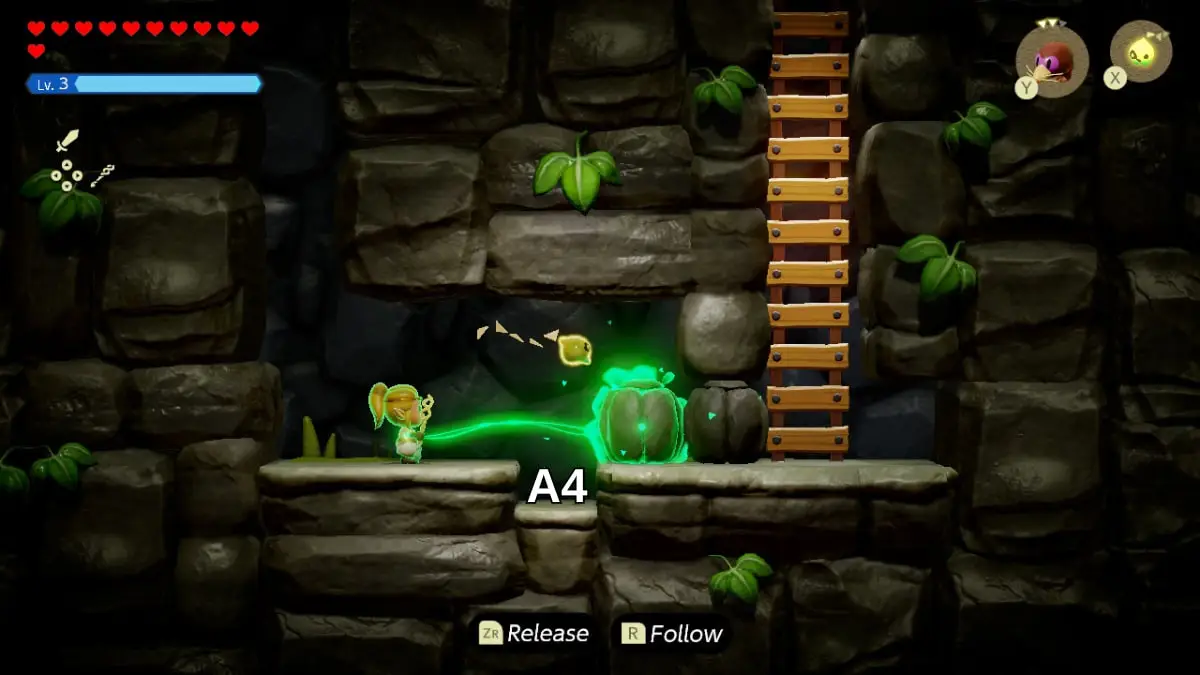
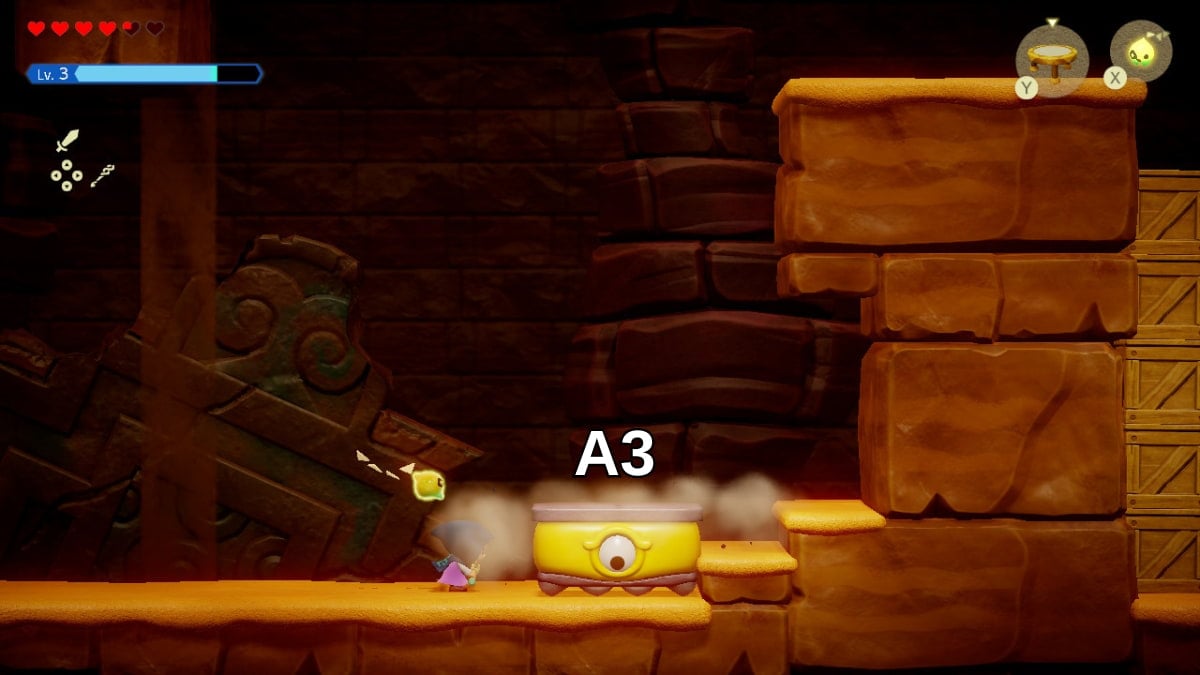
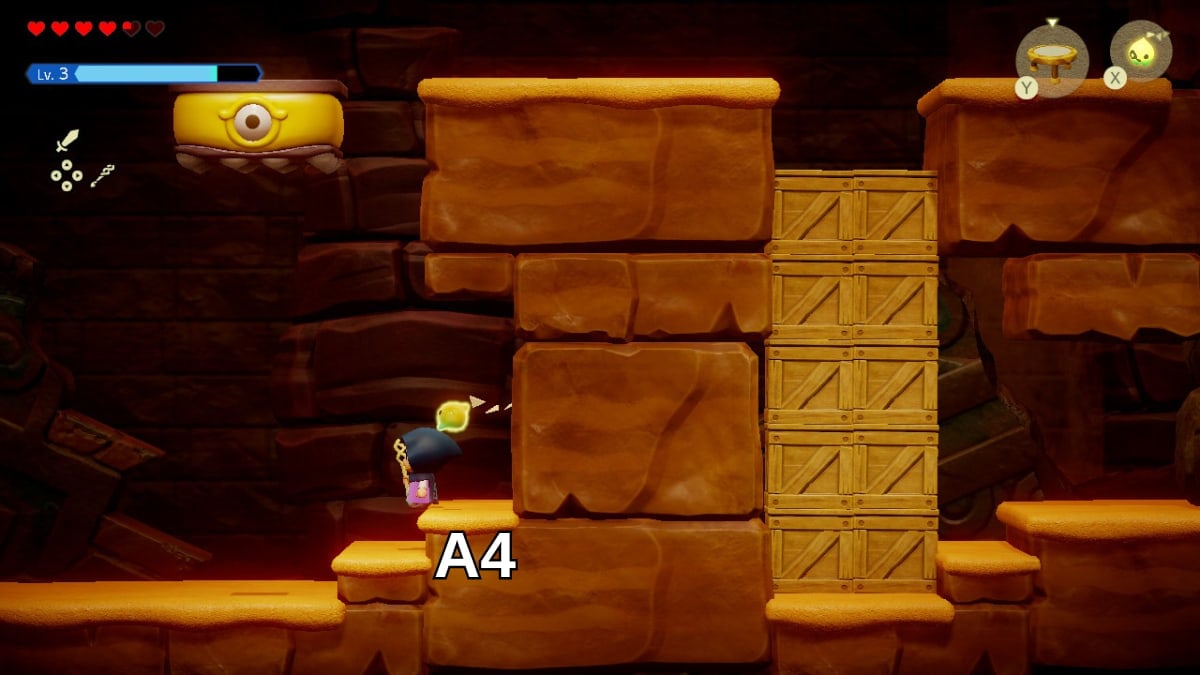
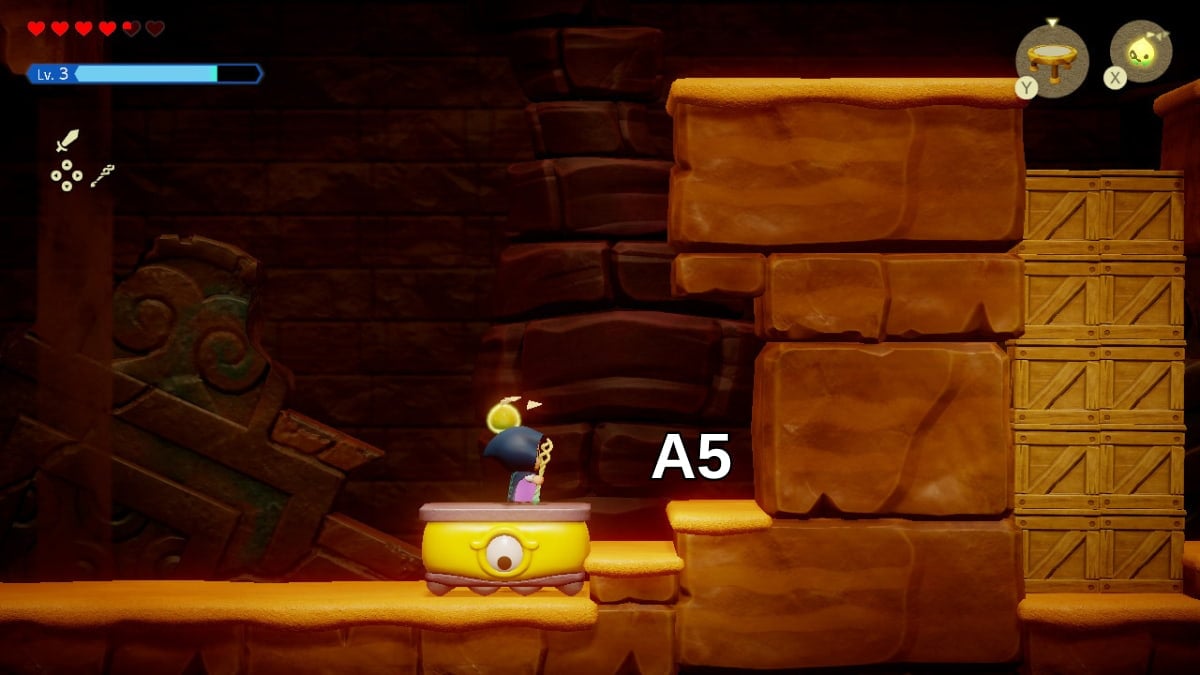
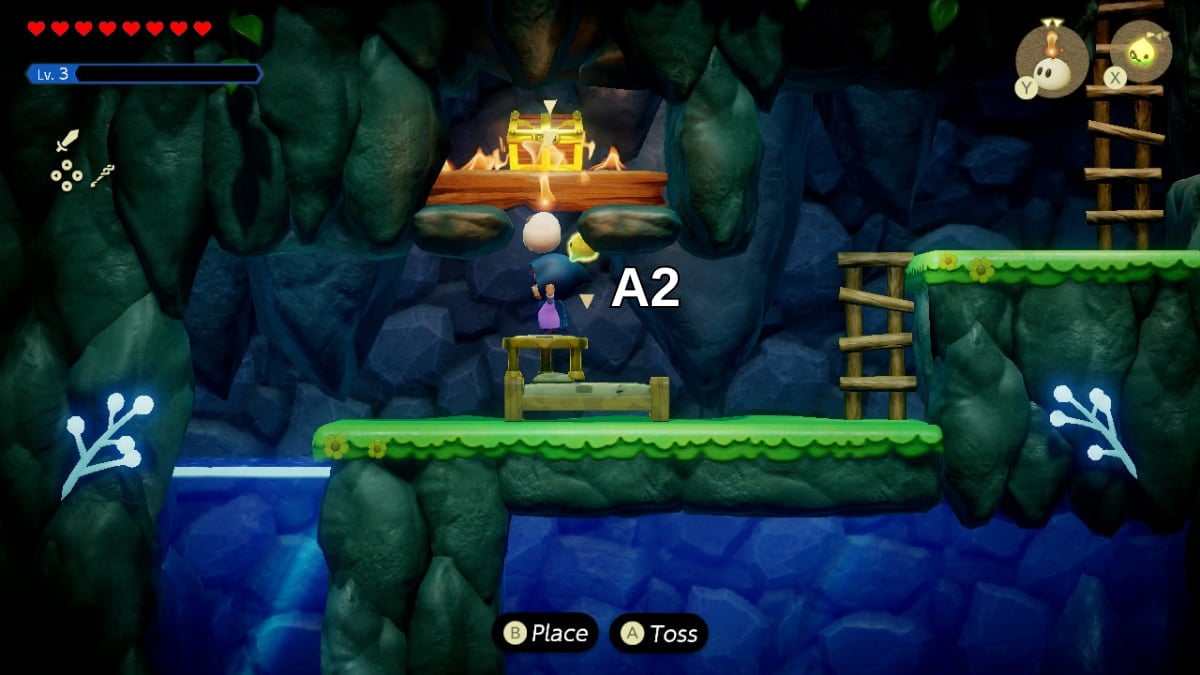
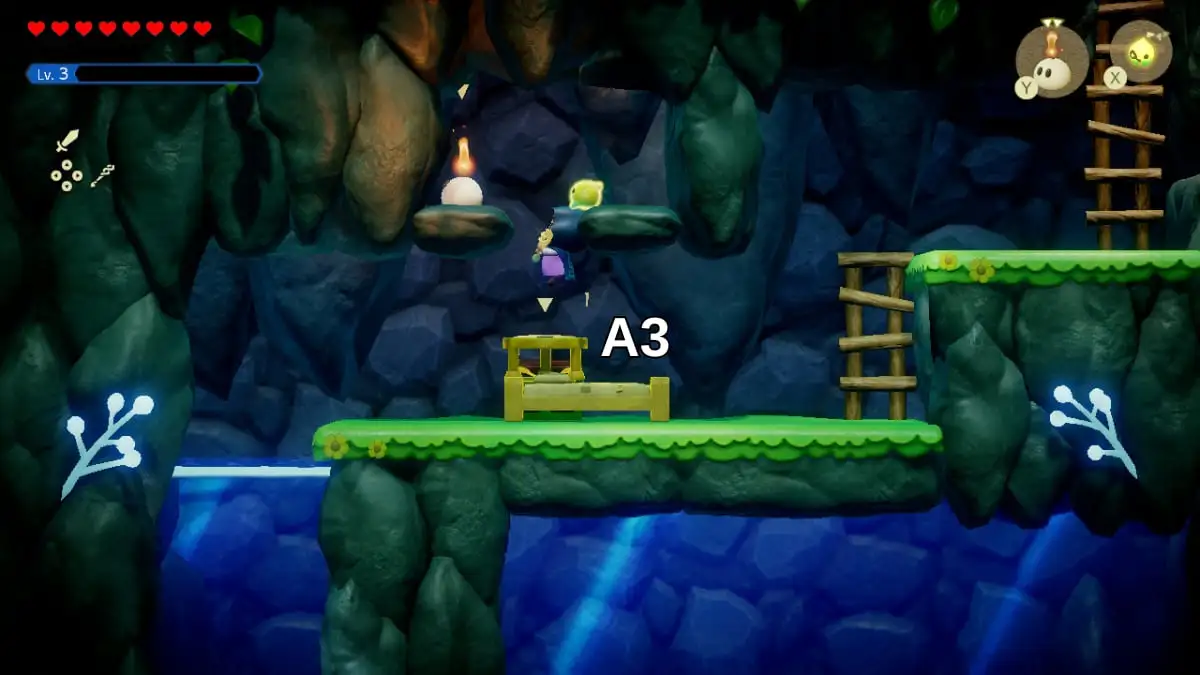
Having caught the fish, you should leave the village heading northwards (A2) and walk towards the river. I’ve discovered that the most convenient way to cross the river is by using the beds as a makeshift bridge (A3). Once across, place the Grilled Fish on the grass over there (A4). Next, take the fish to the cliff where the woman’s son is lounging (A5). Set it down there to construct a staircase (A6), then gradually toss the fish up the staircase until it reaches the top ledge (A7). Finally, put it in front of the child to complete the delivery (A8). Once done, return to Seesyde Village to claim your reward.
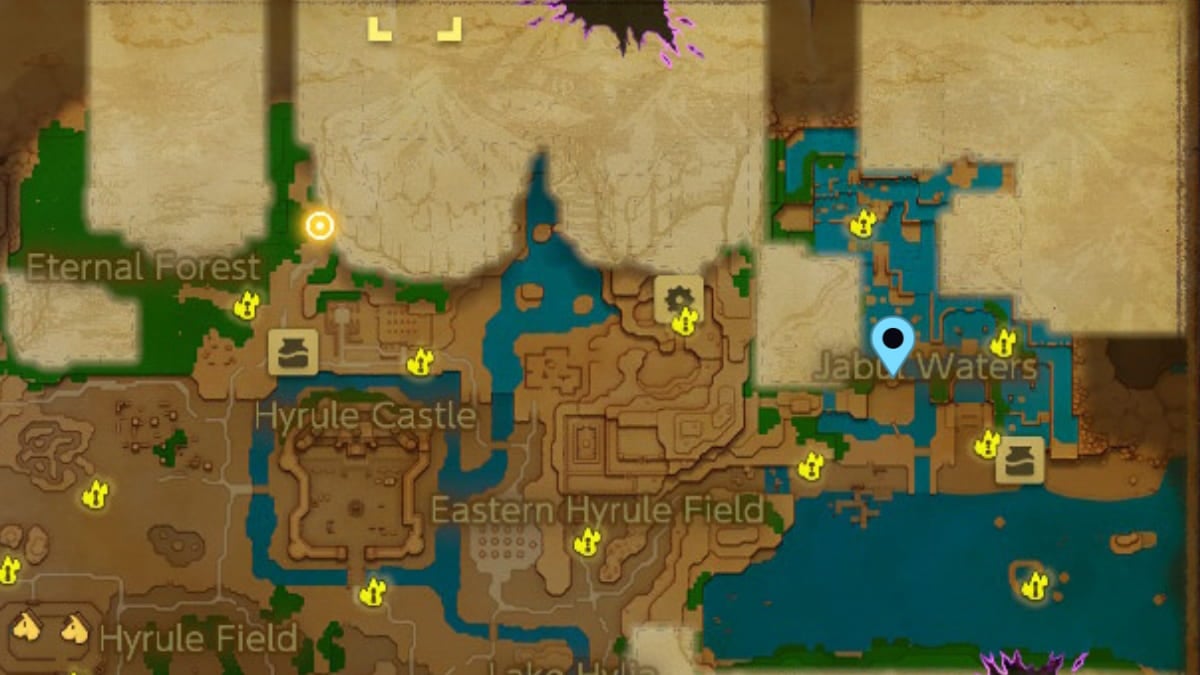
All Waypoint Locations in Echoes of Wisdom
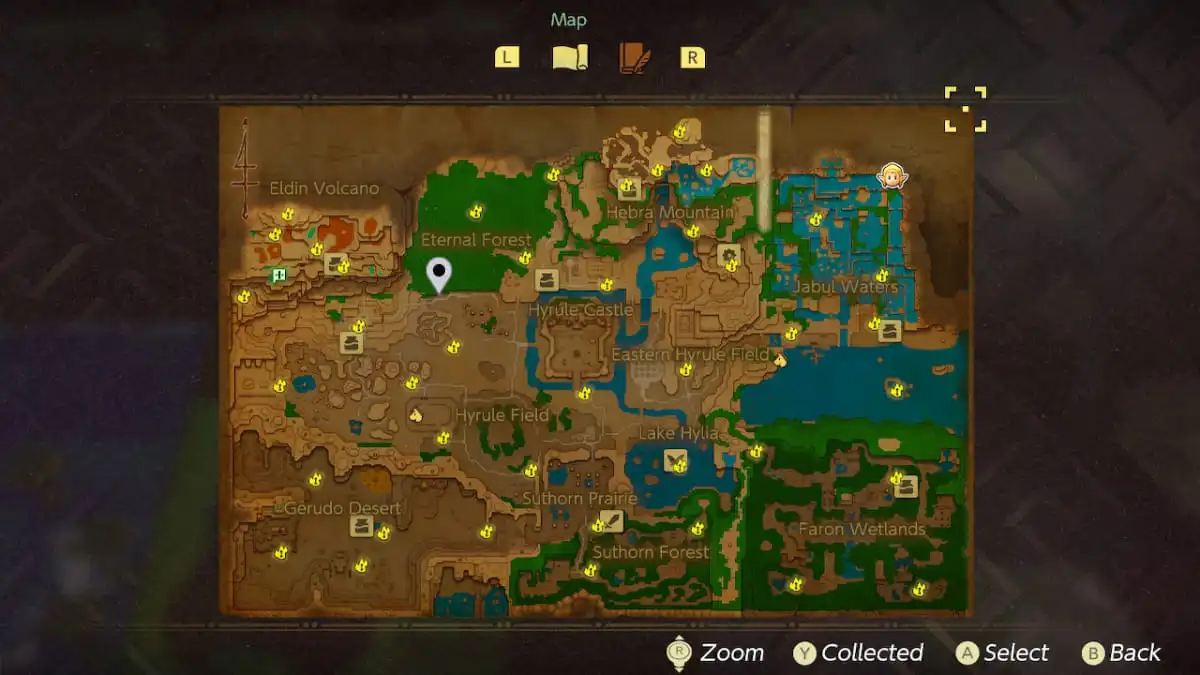
This map marks all the Waystones on the Hyrule map, each depicted by a yellow symbol that resembles them. Be sure to stop by each one during your exploration to avoid missing any. It can be frustrating to return to an area and discover you overlooked activating the nearby Waystone.
All Echo Locations in Echoes of Wisdom
rephrased version of your text:
| Echo Name | Where to get Echo |
|---|---|
| Albatrawl | Flying above the ocean south of Seesyde Village. |
| Ancient-Orb | In the Eternal Forest on your way to face Null. |
| Armos | At the entrance of the temple to the right of the smoothie stand in Faron Wetlands. |
| Aruroda | At the start of Gerudo Desert. |
| Baby Gohma | To the right of the Sweets Spot in Faron Wetlands. |
| Ball-and-Chain Trooper | In the Stilled Hyrule Castle rift. |
| Beakon | In the Faron Wetlands southeast of the Clink. |
| Beamos | In the cave east of the smoothie stand in Faron Wetlands. After breaking the Beamos, blow it up to get its Echo. |
| Beetle | In the cave north of the Gerudo Desert Oasis. |
| Beetle-mound | In the cave north of the Gerudo Desert Oasis. |
| Bio Deku Baba | In the Stilled Jabul Ruins rift. |
| Biri | Underwater in front of the exit to the Zora Cove cave where the Zora child is exploring. |
| Bombfish | In the cave to the left of Lord Jabu Jabu’s Den. Use a Tangler to explore the Bombfish. |
| Boomerang Boarblin | In northern Gerudo Desert in front of the cave with flying-tiles. |
| Boomerang Boarblin Lvl 2 | In northern Gerudo Desert in front of the cave with flying-tiles. |
| Boulder | In the Royal Family Shortcut after escaping prison. |
| Brazier | In front of the third cave in the Suthorn Forest (where you find the Peahat) |
| Buzz Blob | To the right of the Sweets Spot in Faron Wetlands. |
| Caromadillo | In the second cave in the Suthorn Forest I recommend continuously summoning Sea Urchins to take out the Caromadillo. |
| Caromadillo Lvl 2 | In the cave to the north of the Gerudo Desert entrance. |
| Carrot | Pull a carrot from the Carrot Patch in Hyrule Field. |
| Cat Statue | Stilled Gyrudo Sanctum. |
| Chompfin | In the Stilled Jubal Waters rift. |
| Cloud | In Stilled Hebra Mountain. |
| Club Boarblin | In northern Gerudo Desert in front of the cave with flying-tiles. |
| Club Boarblin Lvl 2 | In northern Gerudo Desert in front of the cave with flying-tiles. |
| Crawltula | Crawling on the pillars in the Southern Prairie. |
| Crow | On a large tree to the north of Lake Hylia. |
| Darknut | In the Stilled Suthorn Forest rift. |
| Darknut Lvl 2 | In the Stilled Hyrule Castle rift. |
| Darknut Lvl 3 | In the temple southeast of the smoothie stand in Faron Wetlands. |
| Decorative Shrub | In the room after meeting Impa while escaping the Hyrule Prison. |
| Deku Baba | In the Stilled Suthorn Forest rift. |
| Deku Baba Lvl 2 | In the Faron Wetlands southeast of the smoothie stand. |
| Drippitune | At the start of the Faron Wetlands |
| Electric Keese | In the Stilled Faron Wetlands. |
| Electric Wizzrobe | On a tree to the south of the pond with two pillars in Faron Wetlands. |
| Elephant Statue | Stilled Gyrudo Sanctum. |
| Fire Keese | In the Lizalfos Burrow on Eldin Volcano. |
| Fire Octo | In the lava outside of the Lizalfos Burrow on Eldin Volcano. |
| Fire Wizzrobe | Guarding a small key in the Stilled Eldin Volcano rift. |
| Firework | Accept Dampe’s Explosions Galore! quest and go to the fireworks maker’s home in Goron City. |
| Flying-Tile | In the northern cave in Gerudo Desert. |
| Freezard | After finding the Ice Octos, travel to the left across the icy waters to discover the cave containing Freezards. (Place an Ignizol on their head to take them out faster) |
| Freeze Slug | In Stilled Hebra Mountain. |
| Gerudo Pots | In Gerudo Town. |
| Gibdo | In the cave to the east of the Gerudo Desert Sanctum. |
| Gibdo Lvl 2 | In the cave to the east of the Gerudo Desert Sanctum. |
| Ghini | In the small dungeon beneath the large tombstone in the Hyrule Cemetary (north of Castle Town) |
| Ghini Level 2 | In the small dungeon beneath the large tombstone in the Hyrule Cemetary (north of Castle Town) |
| Ghirro | In a cave on the Eldin Volcano Trail. |
| Giant Goponga Flower | In the river south of the Clink in Faron Wetlands. |
| Goo Specter | In front of the temple to the right of the Smoothie Stand. |
| Grilled Fish | Received from the lady with the Deliver the Grilled Fish quest in Seesyde Village. |
| Guay | In Hyrule Field to the south of Castle Town (near a buried treasure chest) |
| Gustmaster | In the Stilled Hyrule Castle rift. |
| Hawk Statue | Stilled Gyrudo Sanctum. |
| Hoarder | At the start of the Faron Wetlands. |
| Holmill | In the left room behind the bolder in Gerudo Desert’s Ancestor’s Cave of Rest. |
| Hydrozol | From the Sea Zora Village, swim all the way to the end of the ocean on the left. There will be a small cave entrance against a cliff. You’ll find the Hydrozols inside here. |
| Hyrule Castle Pot | While escaping Hyrule Prison. |
| Ice-Block | In the cave hidden behind the ice shards on the left side of Hebra Mountain |
| Ice Keese | On the starting path up Hebra Mountain. |
| Ice Octo | In the icy waters at the top of Hebra Mountain. |
| Ice Wizzrobe | On the right side of the icy waters where you first encounter the Ice Octos on Hebra Mountain. |
| Ignizol | In the first cave you find in Suthorn Forest. Use the Sea Urchin or throw rocks to defeat. |
| Keese | In the cave at Suthorn Beach Throw rocks to defeat. |
| Lava-Rock | On the lava outside of the Rock-Roast Quarry. |
| Leever | On the path up Hebra Mountain. |
| Lizalfos | On the Eldin Volcano Trail. |
| Lizalfos Lvl 2 | In the Lizalfos Burrow on Eldin Volcano. |
| Lizalfos Lvl 3 | Underwater in the westernmost cave of Faron Wetlands. |
| Lynel | In the Enchanted Forest. Speak to the Priest at the Northern Sanctuary. Ask him for other tales, ask about the dangerous monster, then head into the woods. You’ll find a path of footprints that can be followed to find the Lynel. |
| Meat | In the first house on the left when entering Suthorn Village. |
| Mini-Moldorm | On the far left side of the map near one of the Acorn Gathering games. |
| Moa | On the upper left side of Hebra Mountain. |
| Mothula | Stilled Gyrudo Sanctum. |
| Mothula Lvl 2 | Along the path going southeast from Scrubton. |
| Needlefly | Flying above the water southwest of the River Zora Village. |
| Octorock | In the water in the southwest corner of Suthorn Prairie. |
| Old Bed | While escaping Hyrule Prison. |
| Pathblade | In the cave to the east of the Gerudo Desert Sanctum. The Peahat can easily take out the Pathblades here. |
| Peahat | In the third Suthorn Forest Cave (the entrance has two braziers) |
| Piranha | In the Faron Wetlands south of the Clink and the Stamp Station |
| Platboom | Climb onto the cliff above the largest building in Gerudo Town. There will be a small ladder on the right side of the cliff. Climb down to find a room with Platbooms. Bait it to hit the ground, then attack it with your sword. |
| Poe | Stilled Gyrudo Sanctum. |
| Pot | In the first house on the right when you enter Suthorn Village |
| ReDead | In Gerudo Desert southeast of large rift. |
| Ribbitune | On the cliffs west of Hyrule Cemetary |
| Rock | On the beach after escaping prison through the Royal Family Shortcut. |
| Rock-Roast | In Rock-Roast Quarry. |
| Rope | Hiding in the grass in Suthorn Forest. |
| Sand Crab | On the path to Seesyde Village. |
| Sand Piranha | In the center of the Gerudo Desert. |
| Sea Urchin | In front of the Suthorn Beach cave. Throw rocks at them to defeat. |
| Sign | To the west of Suthorn Village. |
| Snake Statue | Stilled Gerudo Sanctum |
| Snomaul | At the start of Hebra Mountain. |
| Snowball | In the cave at the top of Hebra Mountain. |
| Soft Bed | In the tent by Gerudo Oasis. |
| Spark | Inside the entrance of the Eastern Temple. |
| Spear Moblin | In the area past the second Suthorn Forest cave. |
| Spear Moblin Lvl 2 | Outer left side of the Eastern Temple in the Eastern Hyrule Field. |
| Spiked Roller | In the cave on the north end of eastern Hyrule Field against the Eternal Forest. |
| Strandtula | In the Stilled Suthorn Forest rift. The easiest way to beat them is to drop a boulder on top of them, and then summon a monster to attack them. The boulder will prevent them from spinning a web and climbing up it. |
| Stuffed Toy | In the small dungeon beneath the large tombstone in the Hyrule Cemetary (north of Castle Town) |
| Sword Moblin | In the Sword Moblin camp to the west of the Suthorn Prairie. |
| Sword Moblin Lvl 2 | In a Moblin Camp east of Castle Town. |
| Sword Moblin Lvl 3 | In the Eternal Forest. |
| Table | While escaping Hyrule Prison. |
| Tangler | In Lake Hylia. Use Sea Urchins to beat. |
| Tangler lvl 2 | In the cave off the shore of Zora Cove. Use Sea Urchins to beat. |
| Tektite | On the surface of Lake Hylia. |
| Tektike Lvl 2 | In Lanayru Temple after Stilled Hebra Mountain. |
| Tempter Tweelus | In the cave at the top of Hebra Mountain. |
| Torch Slug | On the Eldin Volcano Trail. |
| Tornando | In a secret chamber in the cave southwest of the Gerudo Desert rift. When you reach the room with all of the sand piles, use the Wind Cannon to blow them all away and reveal a secret door. |
| Trampoline | To the right of the well in Suthorn Village. |
| Tweelus | On the lava-filled path to the right of Goron City. |
| Water-block | Stilled Jabul Waters rift. |
| White Wolfos | In Lanayru Temple after Stilled Hebra Mountain. |
| Wind-Cannon | In the cave southwest of the Gerudo Desert rift. |
| Wolfos | In Western Hyrule Field. |
| Wooden Box | While escaping Hyrule Prison. |
| Zelda’s Bed | From Zelda’s Bedroom after clearing the Hyrule Castle rift. |
| Zirro | On the Eldin Volcano Trail. |
| Zol | On Suthorn Beach. |
All Key Item Locations in Legend of Zelda Echoes of Wisdom
Essential Items can help advance in the game; it’s not necessary to collect all of them, but I advise picking up even those that appear insignificant to make your gaming experience smoother. Some will be provided automatically as part of the main storyline, while others may require you to deviate from the main path or complete additional quests.
| Equipment Name | Location |
|---|---|
| Tri Rod | Meet Tri in the Prison. |
| Clockwork Key | Used to make Automatons move. |
| Lockup Key | In the Deku Scrub jail. |
| Membership Card | Received from Blossu in the Faron Wetlands. |
| Sword of Might | Defeat the imposter Link in the Stilled Suthorn Forest rift. |
| Bow of Might | Defeat the imposter Link in the Stilled Gyrudo Sanctum. |
| Bombs of Might | Defeat the imposter Link in the Stilled Eldin Volcano rift. |
| Fairy Bottle 1 | In a chest in the first cave in Suthorn Forest. |
| Fairy Bottle 2 | Solve the Cucco’s on the Loose side quest in Kakariko Village. |
| Fairy Bottle 3 | Complete the Thrilling Stamp Card. |
| Fairy Bottle 4 | Complete The Zappy Shipwreck quest. |
| First Stamp Card | Talk to the Stamp Guy when you find his first stamp stand. |
| Exciting Stamp Card | Given by the Stamp Guy after finishing the First Stamp Card. |
| Thrilling Stamp Card | Given by the Stamp Guy after finishing the Exciting Stamp Card. |
| Exhilarating Stamp Card | Given by the Stamp Guy after finishing the Thrilling Stamp Card. |
| Final Stamp Card | Given by the Stamp Guy after finishing the Exhilarating Stamp Card. |
| Din’s Sanction | Purify the rift on Eldin Volcano. |
| Nayru’s Sanction | Purify the rift on Mount Lanayru. |
| Farore’s Sanction | Purify the rift in the Faron Wetlands. |
All Equipment Locations in Echoes of Wisdom
In Echoes of Wisdom, Zelda has the ability to don gear that assists her in locating particular items, minimizes threats, and offers additional advantages. She also has the option to switch outfits, some of which possess unique abilities. To start, the following table provides an overview of all the accessories available for Zelda to wear.
| Accessory Name | Use | Location |
|---|---|---|
| Ancient Charm | Reduces the damage you take. | Complete the Let’s Play a Game quest. |
| Charging Horn | Powers up the charges of any horse you ride while equipped. | Master the Long Course of the Flag Races at Hyrule Ranch. |
| Climbing Band | Lets you climb ladders and rock walls faster. | In the Kakariko Village shop for 500 Rupees. |
| Clockwork Bangle | Lets you wind the Clockwork Key faster. | Trade with Dampe for 5 Monster Parts after building all available automatons. |
| Curious Charm | Greatly decreases the damage you take while equipped. | The reward for the Cotton-Candy Hunt quest. |
| Energy Belt | Increases the chance of dark monsters dropping more energy when defeated. | At Conde’s house, walk south and take the small path to the Moblin camp. From there, you’ll find a narrow path in the northeastern corner of the camp. The Energy Belt will be in the cave at the end of this path and is guarded by a level 3 Sword Moblin. |
| Energy Glove | Increases the odds of energy appearing after defeating dark monsters. | In northern Gerudo Desert in front of the cave with flying-tiles. |
| Fairy Flower | Chance for cut grass and plants to drop fairies. | On the far left side of the Eldin Volcano Trail. It will be to the left of the Lizalfo camp and the Waystone hidden behind a crack in the wall, which can be blown up by a Bombfish. |
| Fairy Fragrance | Increases the chance that fairies appear when you cut grass or plants. | The reward for the Looking for Bempu quest. |
| Final Mastery | Slows energy loss while in Swordsman for even more Second Mastery. | Received after completing 14 Trainings at the Slumber Dojo. |
| First Mastery | Slightly slows energy loss while in Swordsman form. | Complete four trainings at the Slumber Dojo. |
| Frog Ring | Lets you jump higher. | In the chest to the left of the boss key in the Stilled Hyrule Castle rift. |
| Gerudo Sandals | Prevents wearer from sinking in quicksand. | In the Gerudo Town shop for 400 Rupees. |
| Gold Brooch | Rupees will appear more often when breaking objects and defeating monsters. | Complete the Secret Chief Talks quest. |
| Gold Sash | Protects you from being blown away. | Complete the Wild Sandstorms quest. |
| Goron’s Bracelet | Carry things faster. | Complete the A Mountainous Mystery quest. |
| Heart Barette | Makes hearts appear more often | Complete the Beetle Ballyhoo quest. |
| Heart Pin | Increases how often hearts appear. | In the chest after fighting the imposter version of Link in the Stilled Suthorn Forest. |
| Ice Spikes | Prevents you from slipping on ice while you wear them. | In a secret cave chest on Hebra Mountain. To reach it, you’ll need to climb up a tall cliff on the left side of the broken bridge leading to Conde’s house. I did this later in the game, so I found it easiest to use Cloud echoes. |
| Might Bell | Rings when a Might Crystal is nearby. | The reward for the Great Fairy’s Request quest. |
| Second Mastery | Slows energy loss while in Swordfighter form even more than First Mastery. | Complete eight Trainings at the Slumber Dojo. |
| Silver Brooch | Breaking objects and defeating monsters will drop Rupees more often. | Go to the home of the River Zora chief, then walk left toward the cliff. Build a bridge up to the top of the cliff and explode a Bombfish next to the crack in the wall. The Silver Brooch will be in the chest hidden in this wall. |
| Spin Brace | When you hit foes with a spin, knock them back. | In the temple southeast of the smoothie stand in Faron Wetlands. |
| Stone Anklet | Reduces knockback. | Prevents the wearer from sinking in quicksand. |
| Survey Scope | Smoothie ingredients and monster parts appear more often. | Complete the first part of the Recipes Please! quest |
| Survey Binoculars | Increases how often smoothie ingredients and monster stones drop when defeating monsters and breaking objects. | Complete the first part of the Recipes Please! quest Survey Scope Upgrade. |
| Zora’s Flippers | Makes you swim faster. | Sold in the River Zora Shop for 350 Rupees. |
| Zora Scale | Allows you to spend more time breathing underwater. | Complete The Zora Child’s Fate side quest. |
In the following table, you’ll find all the outfits that Zelda can wear in Echoes of Wisdom. The initial eight can be accessed within the game itself, whereas the final three necessitate scanning an Amiibo for their acquisition.

| Outfit Name | Special Use | Location |
|---|---|---|
| Disguise | N/A | Start the game with this. |
| Royal Travel Attire | N/A | Given after completing the Still Missing quest. |
| Cat Clothes | Allows you to talk with cats. | Given in the Questioning the Local Cats quest. |
| Silk Pajamas | Your health recovers faster when resting on a bed. | Complete the Dohna’s Challenge quest. |
| Customary Attire | N/A | Reward for the From the Heart quest. |
| Green Tunic | N/A | Received after completing the Final Titans’ Gathering training in the Slumber Dojo |
| Dancing Outfit | Increases your spin area. | Harvest at least 60 Tough Mangoes in the Ultimate Seed version of Mango Rush |
| Stamp Suit | N/A | Get from the Stamp Guy after collecting all 25 stamps. |
| Blue Attire | N/A | Scan a Zelda Amiibo |
| Red Tunic | N/A | Scan a Link Amiibo. |
| Black Cat | Speak with cats while wearing. | Scan an Amiibo of any other Legend of Zelda character. |
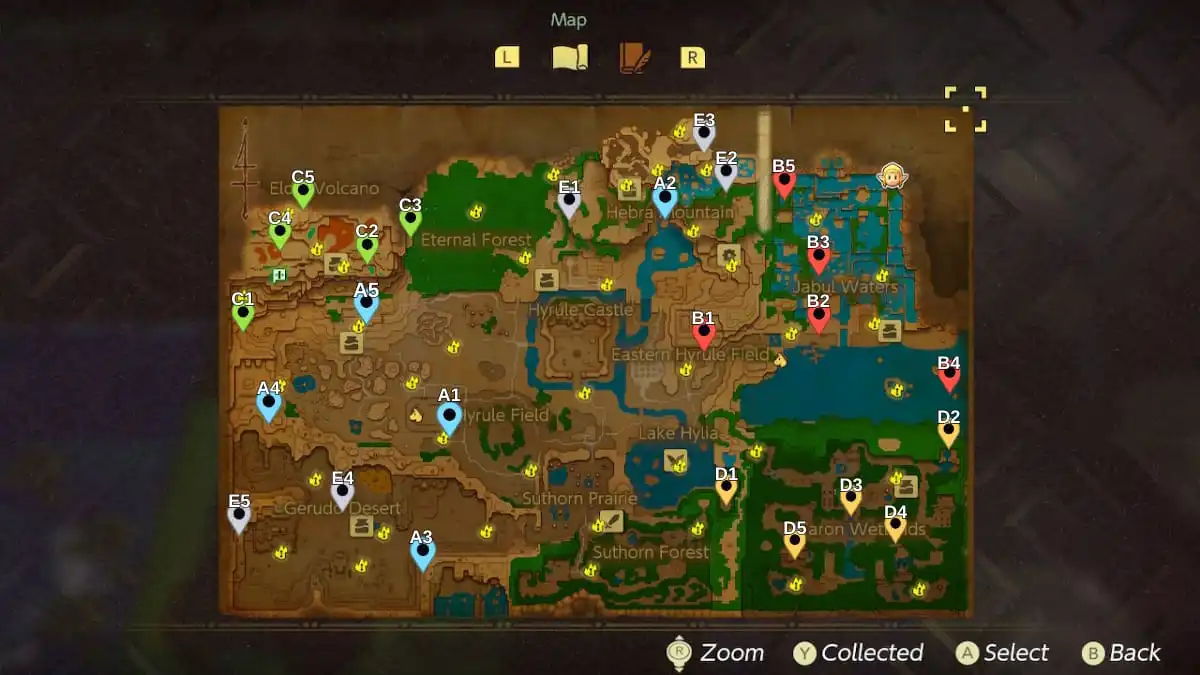
All Stamp Rally Locations in Echoes of Wisdom
In Echoes of Wisdom, to claim all of Stamp Guy’s rewards, you must accomplish five distinct Stamp Cards. Each card requires being stamped a total of five times to be fully completed. To achieve this, you will need to check-in at 25 unique locations across Hyrule. The map provided indicates the position of every Stamp Rally stand in Hyrule. I’ve organized them into five categories according to their order of appearance within the game, so your discovery order may differ from mine.
- Stamp Station 1 (A1) – In front of the southern entrance to Hyrule Ranch.
- Stamp Station 2 (A2) – On an island in the river to the right of the North Sanctuary.
- Stamp Station 3 (A3) – On a cliff to the right of the large Gerudo Rift.
- Stamp Station 4 (A4) – On the cliffs between the Gerudo Desert and the leftmost Acorn Gathering game.
- Stamp Station 5 (A5) – In front of Kakariko Village.
- Stamp Station 6 (B1) – To the right of the stairs leading up to the Eastern Temple in Eastern Hyrule Field.
- Stamp Station 7 (B2) – At the entrance to Seesyde Village.
- Stamp Station 8 (B3) – Floating in the water to the left of Lord Jabu Jabu’s Den.
- Stamp Station 9 (B4) – On a small circular island east of the Sea Zora Village.
- Stamp Station 10 (B5) – On the tall cliffs left of the River Zora Chief’s home. Reach it by climbing the waterfalls and walking along the river to the left.
- Stamp Station 11 (C1) – South of the Waystone on the Eldin Volcano Trail.
- Stamp Station 12 (C2) – Next to the hot spring in front of the Goron City Entrance.
- Stamp Station 13 (C3) – On the western side of Eldin Volcano.
- Stamp Station 14 (C4) – On a lava pool south of the Rock-Roast Quarry on Eldin Volcano.
- Stamp Station 15 (C5) – On top of Eldin Volcano.
- Stamp Station 16 (D1) – On a small patch of land in the southeast corner of Lake Hylia.
- Stamp Station 17 (D2) – Above the waterfall to the right of the Sweet Spot in Faron Wetlands.
- Stamp Station 18 (D3) – On the waterfall south of the Clink in Faron Wetlands.
- Stamp Station 19 (D4) – On the cliff north of the small pond with two pillars in the Faron Wetlands.
- Stamp Station 20 (D5) – On a cliff north of the heart-shaped lake in Faron Wetlands.
- Stamp Station 21 (E1) – On the starting path up Hebra Mountain.
- Stamp Station 22 (E2) – Hidden in a patch of trees to the left of the Hebra Mountain Moblin Camp, which is located right of Conde’s house.
- Stamp Station 23 (E3) – Toward the top of Hebra Mountain where you complete the Stamp Stand Swallowed! quest.
- Stamp Station 24 (E4) – Northwest of the Oasis in Gerudo Desert.
- Stamp Station 25 (E5) – On a cliff west of Gerudo Town in Gerudo Desert.
Completing each Stamp Card gives you the following rewards:
- First Stamp Card – 10 Fresh Milk
- Exciting Stamp Card – 3 Golden Eggs
- Thrilling Stamp Card – Fairy Bottle
- Exhilarating Stamp Card – 5 Monster Stones
- Final Stamp Card – Stamp Suit
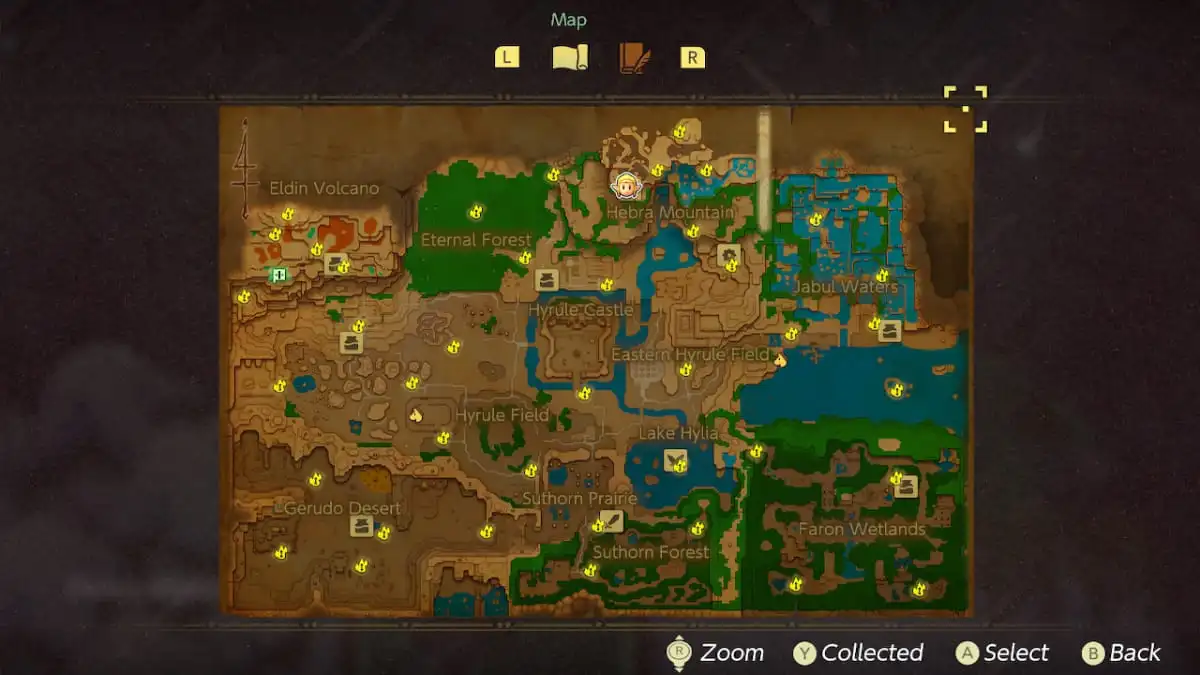
All Heart Pieces Locations in Echoes of Wisdom
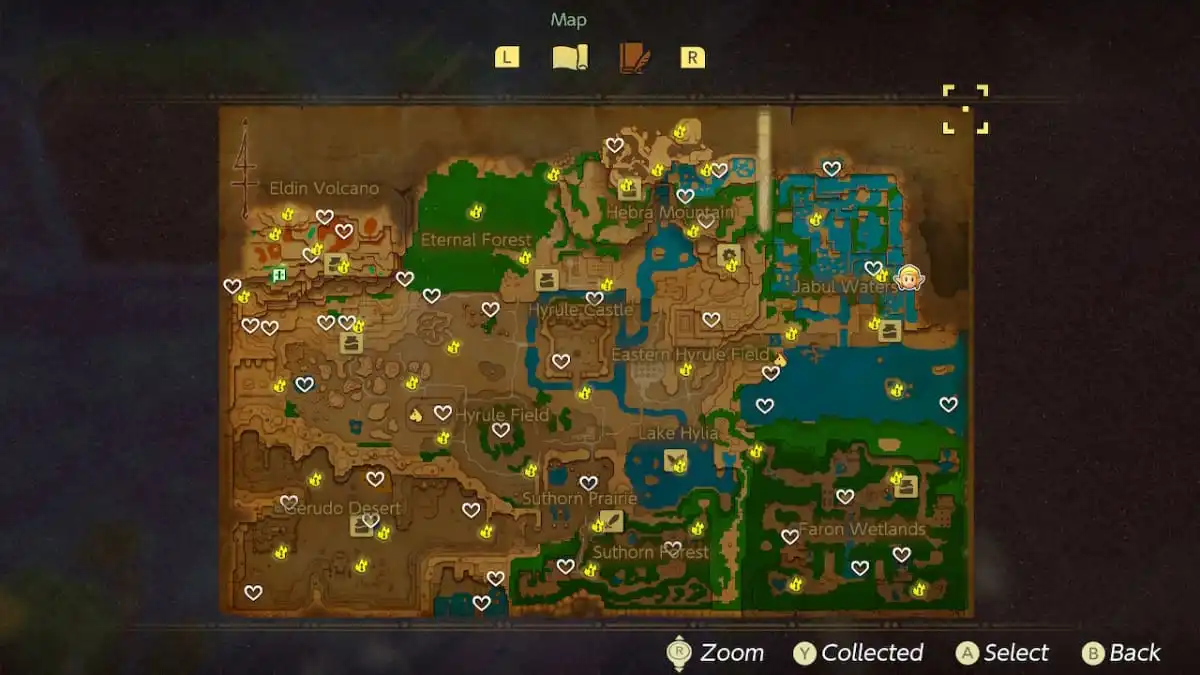
Players can collect four hearts scattered throughout the game to acquire a fresh health heart in Echoes of Wisdom. Here’s a map showing the location of all 40 Heart Pieces in the game for your convenience.
| Piece of Heart Location | Tips for grabbing |
|---|---|
| In a chest on the central cliff in Suthorn Beach. | Build a bridge out of boxes. |
| In the Suthorn Beach Cave on a lower ledge blocked by boxes. | Summon boulders from the higher ledge and drop them onto the boxes. |
| In the Suthorn Village shop for 80 Rupees. | N/A |
| At the end of the second cave in Suthorn Forest. | Check out our guide below, titled “Suthorn Forest Heart Piece Cave” |
| On the tallest pillar in the Suthorn Prairie. | Build bridges made of Old Beds between pillars. |
| Behind the Northwest corner of Castle Town. | N/A |
| On a pillar in the part of Hyrule Field west of Castle Town (above and slightly to the left of a rift). | N/A |
| In the maze area in Hyrule Field. | N/A |
| On a pillar in the center of a small lake in West Hyrule Field. | Take out the enemies before building to the heart piece. |
| On a pillar in the quicksand pit in Gerudo Desert. | Build a bridge of beds to reach the ledges against the cliff behind the piece of heart. From there, build another bridge to the pillar holding it. |
| At the end of the cave above Gerudo Town in Gerudo Desert. | Check out our guide below, titled “Gerudo Desert Heart Piece Cave above Gerudo Town” |
| In the Sleepy Dojo in Kakariko Village. | Complete two of the Sleepy Dojo trainings. |
| Defeat Smog in the Eastern Temple. | When Smog is divided into small sections, use blocks to block his paths and force the sections into each other. When he is complete, summon long-range monsters and use your bow to take him out. |
| In the ocean southeast of the Sea Zora Village near a circular island. | Use a Bombfish to blow up a cracked rock on the bottom of the sea floor. The Piece of Heart is hidden in the gap beneath it. |
| At the end of the cave containing Hydrozols. | To complete the cave, use Hydrozols to put out the Braziers. |
| On the pillar to the right of Lord Jabu Jabu’s Den. | Get on top of the den, then bridge over to the Heart Piece. |
| Master the Middle Course of the Flag Race at Hyrule Ranch. | Use your speed boost on the longer, straight parts of the course. |
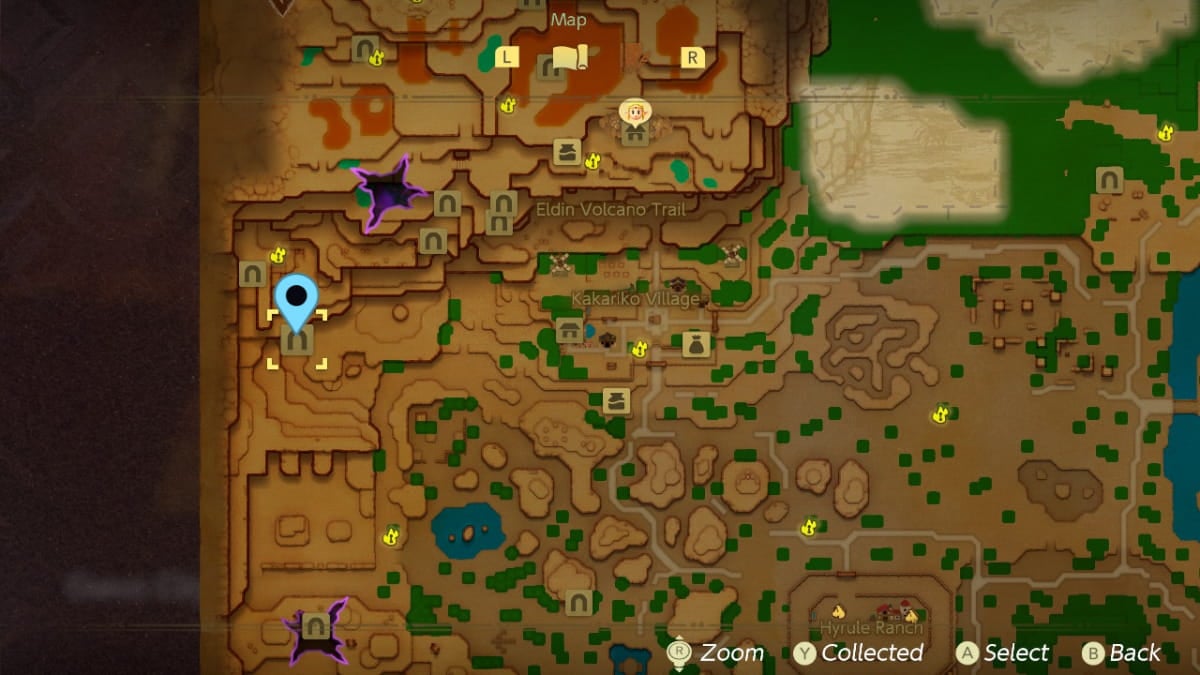
| In a cave south of the Eldin Volcano Waystone (to the right of a Stamp Station). | Check out our guide below, titled “Holmill Western Hyrule Field Heart Piece” |
| Underneath a large rock in eastern Hyrule Field (to the right of the previous Heart Piece). | Check out our guide below, titled “Hyrule Field Boulder Heart Piece” |
| On the left side of the Eldin Volcano Trail past the Waystone. | Build a bridge out of beds to reach it. |
| On the cliff to the left of the Lizalfos Burrow. | Climb to the Rock-Roast Quarry, walk to the right, and use water blocks to reach the cliff. |
| Defeat the monster in the cave during the A Mountainous Mystery quest. | Use Hydrozols to put out the fire on its body, then attack its highlighted weak spots with everything you’ve got. |
| In the pool of water at the top of the River Zora’s domain. | Use water blocks to build up to the pool. |
| Defeat the monster in the shipwreck during The Zappy Shipwreck quest. | Take out the smaller jellyfish first, then attack the main body. |
| In a Faron Wetlands cave southwest of the pond with two pillars. | Use a mob or potion to light your way. The Heart Piece is on a ledge to the left of the entrance. |
| In the westernmost cave in Faron Wetlands. | Armors are vulnerable to attacks from behind. Do what yo can to get either yourself or your summons behind them. |
| In the Deku Scrub’s Clink after restoring Blossu’s house. | Armors are vulnerable to attacks from behind. Do what you can to get either yourself or your summons behind them. |
| Beat Smog in the Faron Wetland ruins during the Cotton-Candy Hunt quest. | Summon blocks and use Tri to direct the small bits of Smog into each other. |
| On a pillar between the lanes where giant snowballs roll down near the top of Hebra Mountain. | Throw Ignizols at the rolling snowballs to break them if you cannot dodge. |
| At the top of the cliff on the right of the Waystone after Conde’s house (left of where you find the Ice Wizzrobe). | Use the Frog Ring while building your way up so you can do it with less Echoes. |
| Defeating the Lanmola in the Desert Sandstorms quest. | Check out our Lanmola section below |
| In the Sleepy Dojo in Kakariko Village. | Complete 11 total trainings. |
| On the square island floating in the southwest corner of the Ice Octo lake on Hebra Mountain. | N/A |
| Beneath a mound of sand in the southwest corner of Gerudo Desert. | Use the Wind Cannon to blow away the sand. |
| On the small island east of the Lizalfos’ Burrow. | N/A |
| The reward for gathering every acorn in less than 25 seconds at the Acorn Gathering Game next to the Eternal Forest. | Use the Frog Ring to make jumping on trees easier. |
| In the cave on the north end of Hyrule Field against the Eternal Forest. | Use a Holmill to dig into the chamber containing the Piece of Heart. |
| Complete the An Out-There Zol quest. | N/A |
| Collect all 70 Mangoes while playing the Ultimate Seed Version of Mango Rush | The Dancing Outfit and Tornando echoes will make this easier. |
| Complete the Snowball Magic quest for Conde. | Use the ledges by where you pick up the glittering snowball to raise it above your head. This makes it easier to avoid hitting rolling snowballs because you only have to worry about Zelda’s hitbox. When you reach the platform after, use the follow button (R) to gently drop the snowball before you release it. |
In addition to the pieces of heart, you’ll also get Heart Containers for doing the following:
- Defeating Seismic Talus.
- Defeat Mogryph.
- Beat Vocavor.
- Beating Ganon in the Stilled Hyrule Castle.
- Beating Volvagia.
- Defeating Gohma.
- Taking out Skorchill.
Suthorn Forest Heart Piece Cave

Delving into the second cavern nestled within Suthorn Forest, a Heart Piece awaits – a treasure to be claimed by those who can conquer its trials. To secure it, begin by descending the ladder on your left at the entrance (A2). Engage in battle with the Caromadillo lurking in the pit below (A3). For an effective strategy, consider dropping Sea Urchins into the hole; the Caromadillo will tirelessly charge into them, eventually succumbing to defeat.
As I venture forth, I’ll stumble upon a narrow pathway barricaded with crates – marked as A4. To clear the way, I’ve got an Ignizol handy which can torch those crates right up – that’s A5 for ya. Once they’re out of the picture, I can move on to the climbing wall ahead – yep, you guessed it, A6.
Holmill Western Hyrule Field Heart Piece
Instead of entering the cave with the Heart Piece directly, first locate the sandy area at its summit within Hyrule Fields. This marked spot is identified as A1. Dig a hole here using Holmill, denoted as A2. Jump into this hole to descend directly onto the Heart Piece, which is referred to as A3. To exit the cave, move the first bolder with Tri into an opening in the floor, noted as A4. Then, jump over it and shift the second bolder into a gap to the right of the ladder, identified as A5. This will allow you to leave the cave easily.
Holmill Cave Heart Piece Between Hyrule Fields and Eternal Forest

The entrance to this Heart Piece’s hiding spot is located where Hyrule Fields meet the Eternal Forest. To access it, find a ledge above the cave and use a Holmill on a sandy spot to create an entryway. This opening will lead you directly into the chamber containing the Heart Piece. Once you’ve collected it, employ another Holmill to excavate deeper into the main part of the cave.
Hyrule Field Boulder Heart Piece

The Heart Piece is located under a rock to the right of the cave that contains another Heart Piece. Begin by constructing a set of steps on one side of the rock, then utilize Tri to lift it (Step A1). Afterward, ascend the stairs while holding the rock (Step A2). This action will shift the rock onto a nearby ledge, enabling you to reach the concealed Heart Piece.
Gerudo Desert Heart Piece Cave above Gerudo Town

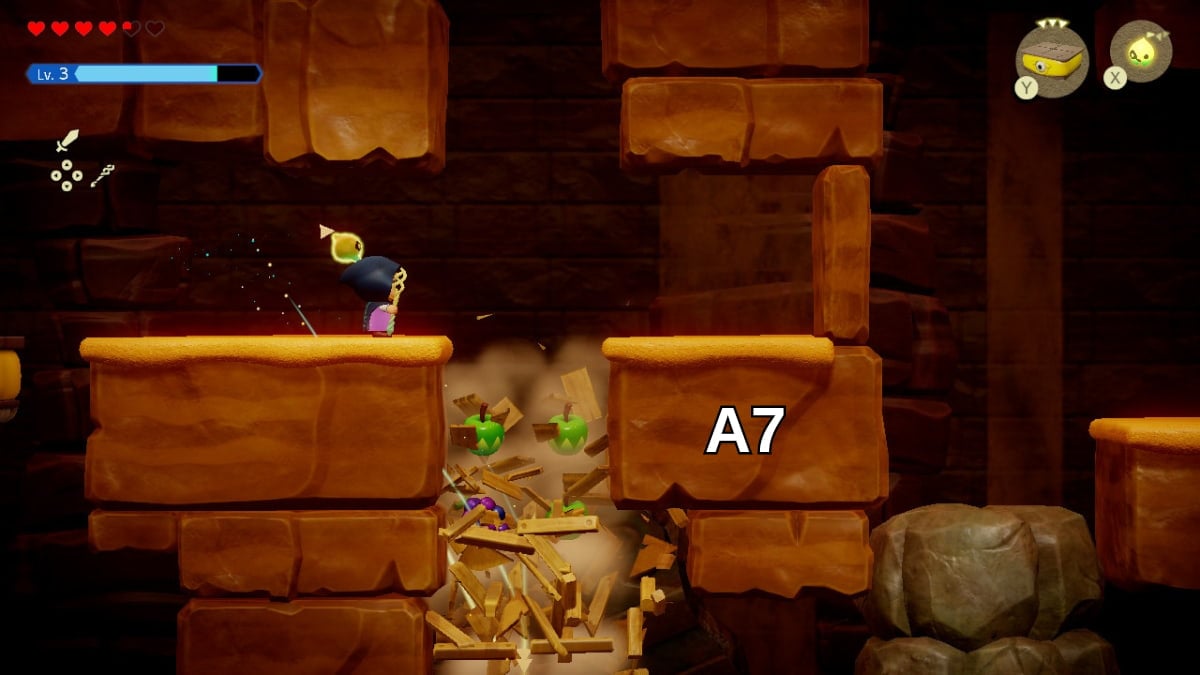
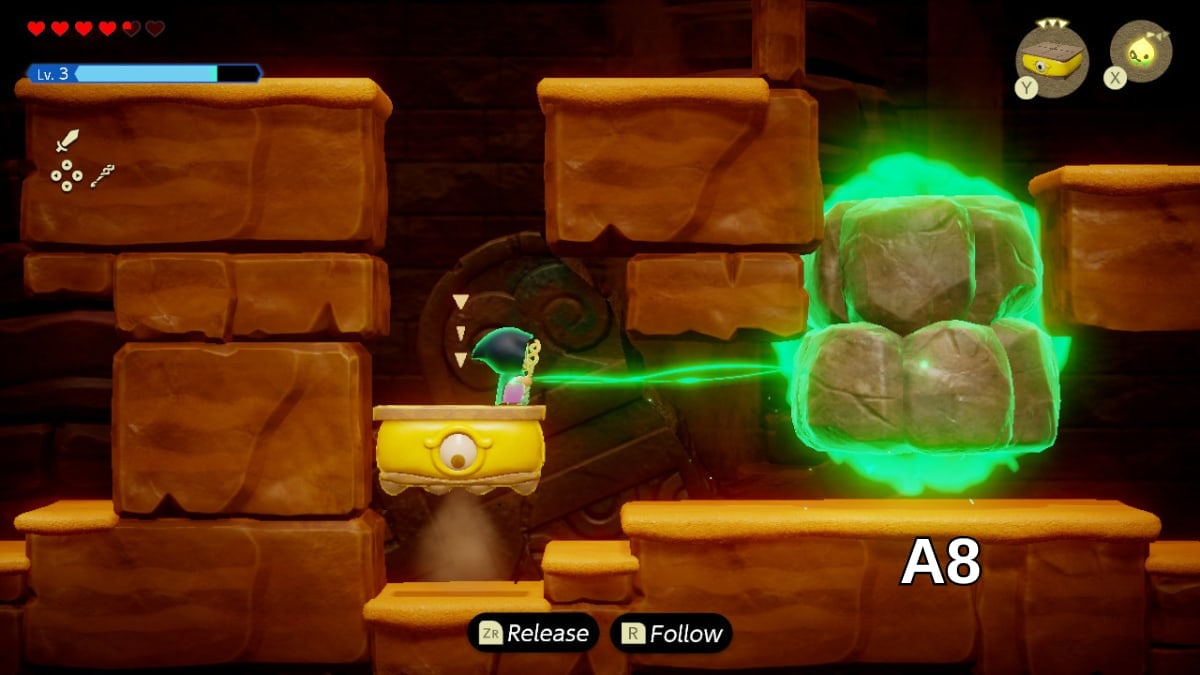
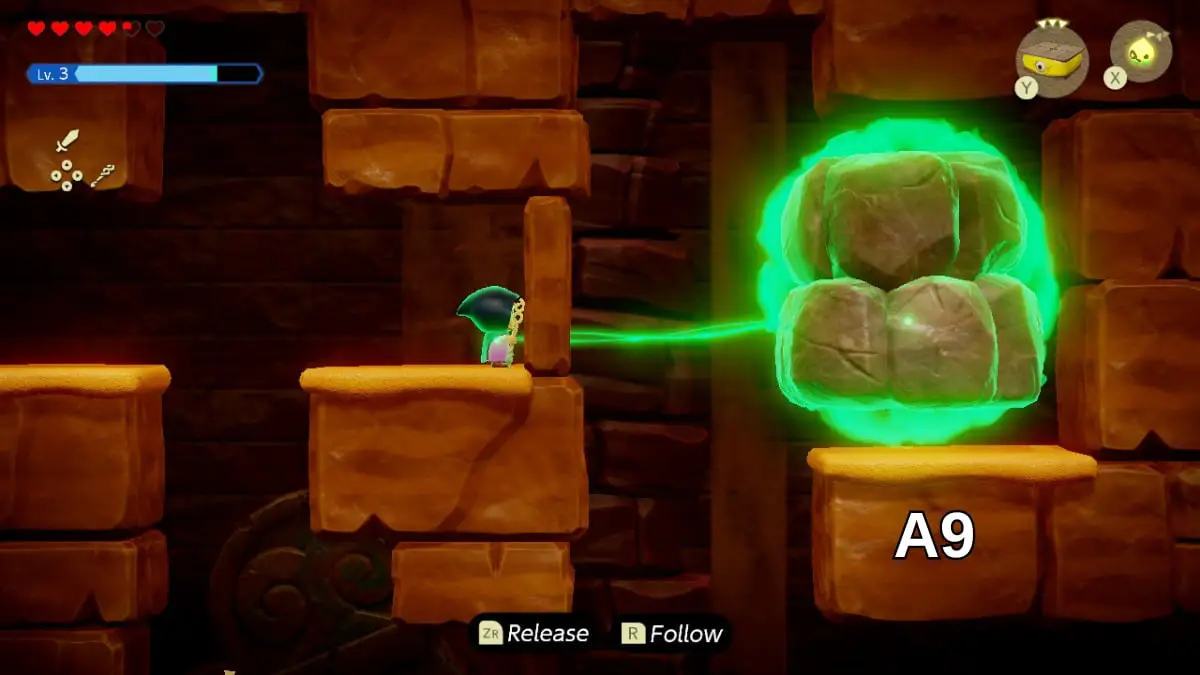
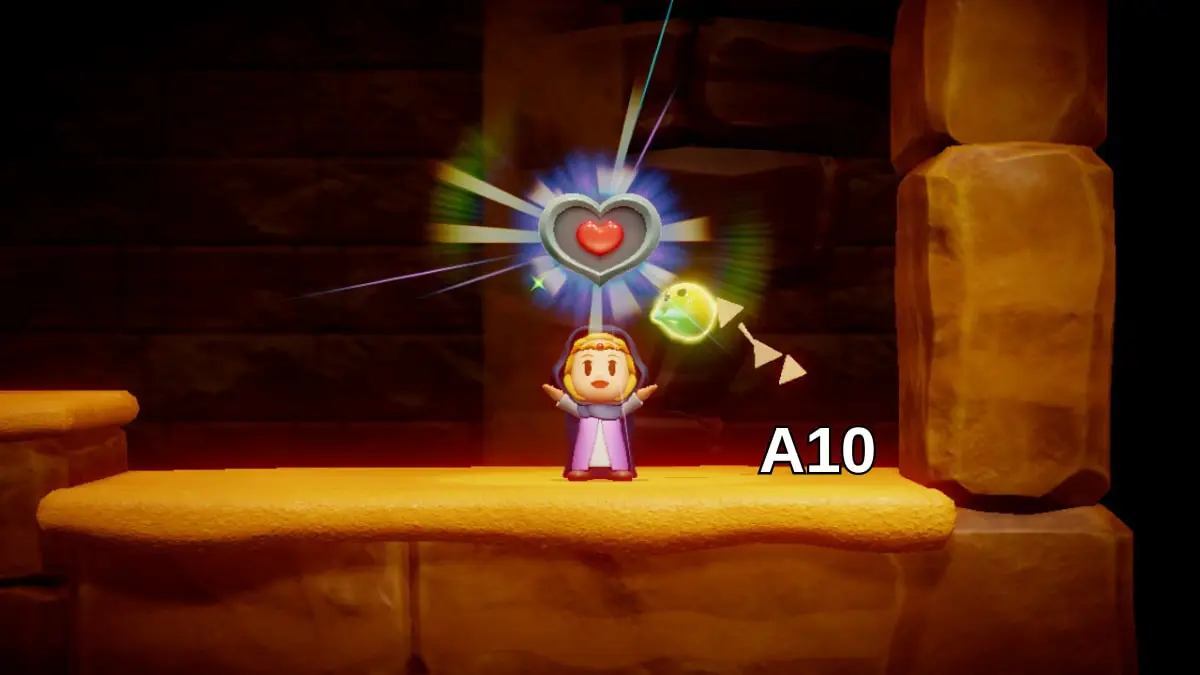
The cave containing the Heart Piece is on the cliff behind the largest building in Gerudo Town (A1). After entering the cave, walk under the first Platboom to make it fall and take it out with your sword (A2). Next, bait the second Platboom to the ground (A3). Walk by it to the stairs on the right (A4), bait it again, and hop on top of it (A5). Ride it to the top of the ledge (A6) and summon your own Platboom to crush the boxes in the way (A7). While still on the Platboom, use Tri to grab the big boulder in the way (A8). Ride the Platboom to the top and walk forward to place the Boulder on the edge (A9). This frees up the path, giving you the ability to walk up and grab the Heart Piece (A10).
All Smoothie Recipes in Legend of Zelda Echoes of Wisdom
In Echoes of Wisdom, there are more than 60 unique smoothie recipes to discover, giving you ample room for experimentation to uncover them all. If you’ve grown weary of testing or require additional recipes for the “Recipes Please!” quest, this table compiles every single recipe available in the game. They are arranged similarly to the business scrubs’ shops by number. To access your collected recipes within the game, simply converse with a business scrub, choose the smoothies option and press ‘Y’.
| Smoothie Name | Number | Effect | Sell Price (Rupees) | Ingredient 1 | Ingredient 2 |
|---|---|---|---|---|---|
| Sweet Smoothie | 1 | +2 Hearts | 20 | Floral Nectar | Floral Nectar |
| Milky Sweet Smoothie | 2 | +15 Hearts + 3 Bars Energy | 45 | Floral Nectar | Fresh Milk |
| Refreshing Smoothie | 3 | +5 Hearts | 25 | Refreshing Grapes | Refreshing Grapes |
| Refreshing Mixed Smoothie | 4 | +7 Hearts | 25 | Refreshing Grapes | Chilly Cactus Electro Apple Radiant Butter Riverhorse Rock Salt Tough Mango |
| Sweet Refreshing Smoothie | 5 | +10 Hearts | 30 | Refreshing Grapes | Floral Nectar |
| Refreshing Milky Smoothie | 6 | +13 Hearts | 30 | Refreshing Grapes | Fresh Milk |
| Milky Smoothie | 7 | +7 Hearts | 25 | Fresh Milk | Fresh Milk |
| Mixed Milky Smoothie | 8 | +13 Hearts | 30 | Fresh Milk | Chilly Cactus Electro Apple |
| Salted Milky Smoothie | 9 | +10 Hearts +4 Energy Bars | 30 | Fresh Milk | Rock Salt |
| Tough Smoothie | 10 | +7 Hearts Damage Reduction for 1 minute | 25 | Tough Mango | Tough Mango |
| Mixed Tough Smoothie | 11 | +15 Hearts Damage Reduction for 1 minute | 50 | Tough Mango | Bubble Kelp Chilly Cactus Electro Apple Radiant Butter |
| Sweet Tough Smoothie | 12 | +15 Health Damage Reduction for 3 minutes | 50 | Tough Mango | Floral Nectar |
| Milky Tough Smoothie | 13 | +18 Hearts Damage Reduction for 1 minute | 50 | Tough Mango | Fresh Milk |
| Salted Tough Smoothie | 14 | +6 Energy Recovery Chill-proof for 1 minute | 50 | Tough Mango | Rock Salt |
| Cactus Smoothie | 15 | +2 Hearts Fire-proof for 1 minute | 25 | Chilly Cactus | Chilly Cactus Floral Nectar Riverhorse Twisted Pumpkin |
| Salted Cactus Smoothie | 16 | +2 Energy Recovery +3 minutes fire-proof | 25 | Chilly Cactus | Rock Salt |
| Warm Smoothie | 17 | +2 Energy Recovery Chill-proof for 1 minute | 25 | Warm Pepper | Warm Pepper |
| Warm Mixed Smoothie | 18 | +3 Energy Bars Chill-proof for 1 minute | 30 | Warm Pepper | Chilly Cactus Twisted Pumpkin |
| Warm Rocktato Smoothie | 19 | +3 Energy Recovery Chill-proof for 3 minutes | 35 | Warm Pepper | Rocktato |
| Warm Mixed Special | 20 | +4 Bars Energy Recover Chill-proof for 1 minute | 35 | Warm Pepper | Electro Apple Fresh Milk Refreshing Grapes Tough Mango |
| Apple Smoothie | 21 | +2 Hearts Lightning-proof for 1 minute | 25 | Electro Apple | Electro Apple |
| Mixed Apple Smoothie | 22 | +2 Hearts Lightning-proof for 1 minute | 25 | Electro Apple | Chilly Cactus Floral Nectar Riverhorse Rocktato |
| Salted Apple Smoothie | 23 | +4 Bars Energy Recovery Lightning-proof for 1 minute | 25 | Electro Apple | Rock Salt |
| Bubble Smoothie | 24 | +2 Hearts Dive time increased for 1 minute | 25 | Bubble Kelp | Bubble Kelp |
| Mixed Bubble Smoothie | 25 | +5 Hearts Dive time increased for 1 minute | 30 | Bubble Kelp | Electro Apple Refreshing Grapes Rocktato |
| Pumpkin Bubble Smoothie | 26 | +10 Hearts Dive Time up for 1 minute | 45 | Bubble Kelp | Twisted Pumpkin |
| Milky Bubble Smoothie | 27 | +10 Hearts Dive time increased for 1 minute | 45 | Bubble Kelp | Fresh Milk |
| Salted Bubble Smoothie | 28 | +3 Bars Energy Recovery Dive time increased for 1 minute | 25 | Bubble Kelp | Rock Salt |
| Rapid Smoothie | 29 | +5 Hearts Swim Speed up for 1 minute | 30 | Riverhorse | Bubble Kelp Floral Nectar Riverhorse Rock Salt Rocktato Tough Mango Warm Pepper |
| Milky Rapid Smoothie | 30 | +10 Hearts Swim Speed up for 1 minute | 45 | Riverhorse | Fresh Milk |
| Climbing Smoothie | 31 | +2 Hearts +5 Hearts Wall climbing speed up for 1 minute | 25 | Rocktato | Rocktato |
| Mixed Climbing Smoothie | 32 | +5 Hearts Wall climbing speed up for 1 minute | 30 | Rocktato | Chilly Cactus Radiant Butter Refreshing Grapes |
| Sweet Climbing Smoothie | 33 | +5 Hearts Wall Climbing Speed Up for 3 Minutes | 35 | Rocktato | Floral Nectar |
| Milky Climbing Smoothie | 34 | +10 Hearts Wall climbing speed up for 1 minute | 45 | Rocktato | Fresh Milk |
| Mango Climbing Smoothie | 35 | +15 Hearts Wall-Climbing speed up for 3 minutes | 50 | Rocktato | Tough Mango |
| Salted Climbing Smoothie | 36 | +3 Energy Recovery Wall-Climbing speed up for 1 minute | 25 | Rocktato | Rock Salt |
| Radiant Smoothie | 37 | +2 Hearts Glow for 1 minute | 25 | Radiant Butter | Bubble Kelp Radiant Butter |
| Apple Radiant Smoothie | 38 | +5 Hearts Glow for 1 minute | 30 | Radiant Butter | Electro Apple |
| Mixed Radiant Smoothie | 39 | +5 Hearts Glow for 1 minute | 30 | Radiant Butter | Chilly Cactus |
| Sweet Radiant Smoothie | 40 | +5 Hearts Glow for 3 minutes | 35 | Radiant Butter | Floral Nectar |
| Pumpkin Radiant Smoothie | 41 | +10 Hearts Glow for 1 minute | 45 | Radiant Butter | Twisted Pumpkin |
| Milky Radiant Smoothie | 42 | +10 Hearts Glow for 1 minute | 45 | Radiant Butter | Fresh Milk |
| Salted Radiant Smoothie | 43 | +3 Bars Energy Glow for 1 minute | 30 | Radiant Butter | Rock Salt |
| Twisty Smoothie | 44 | +5 Hearts Winding Speed Up for 1 minute | 30 | Twisted Pumpkin | Twisted Pumpkin |
| Mixed Twisty Smoothie | 45 | +10 Hearts Winding Speed Up for 1 minute | 45 | Twisted Pumpkin | Electro Apple Refreshing Grapes Riverhorse Rocktato |
| Sweet Twisty Smoothie | 46 | +10 Hearts Winding Speed Up for 3 minutes | 45 | Twisted Pumpkin | Floral Nectar |
| Milky Twisty Smoothie | 47 | +13 Hearts Winding Speed Up for 1 minute | 45 | Twisted Pumpkin | Fresh Milk |
| Mango Twisty Smoothie | 48 | +15 Hearts Winding Speed Up for 3 minutes | 50 | Twisted Pumpkin | Tough Mango |
| Salted Twisty Smoothie | 49 | +6 Energy Recovery Winding Speed Up for 1 minute | 35 | Twisted Pumpkin | Rock Salt |
| Golden Smoothie | 50 | +20 Hearts | 75 | Golden Egg | Floral Nectar Fresh Milk Golden Egg Refreshing Grapes Rock Salt |
| Golden Tough Smoothie | 51 | +20 Hearts Damage Reduction up for 5 minutes | 75 | Golden Egg | Tough Mango |
| Golden Chilly Smoothie | 52 | +20 Hearts Fire-Proof for 5 minutes | 75 | Golden Egg | Chilly Cactus |
| Golden Piping-Hot Smoothie | 53 | +20 Hearts Ice-Proof for 5 minutes | 75 | Golden Egg | Warm Pepper |
| Golden Electro Smoothie | 54 | +20 Hearts Lightning-proof for 5 minutes | 75 | Golden Egg | Electro Apple |
| Golden Bubble Smoothie | 55 | +20 Hearts Dive Time increased for 5 minutes | 75 | Golden Egg | Bubble Kelp |
| Golden Rapid Smoothie | 56 | +20 Hearts Swim Speed up for 5 minutes | 75 | Golden Egg | Riverhorse |
| Golden Climbing Smoothie | 57 | +20 Hearts Wall-Climb Speed up for 5 minutes | 75 | Golden Egg | Rocktato |
| Golden Radiant Smoothie | 58 | +20 Hearts Glow for 5 minutes | 75 | Golden Egg | Radiant Butter |
| Golden Twisty Smoothie | 59 | +20 Hearts Winding Time up for 5 minutes | 75 | Golden Egg | Twisted Pumpkin |
| Tough Potion | 60 | Damage Reduction for 5 minutes | 35 | Monster Guts | Tough Mango |
| Chilly Potion | 61 | Fire-Proof for 5 minutes | 35 | Monster Guts | Chilly Cactus |
| Warming Potion | 62 | Chill-Proof for 5 minutes | 35 | Monster Fang | Warm Pepper |
| Piping-Hot Potion | 63 | Ice-Proof for 5 minutes | 35 | Monster Guts | Warm Pepper |
| Electro Potion | 64 | Lightning-proof for 5 minutes | 35 | Monster Guts | Electro Apple |
| Bubble Potion | 65 | Dive time up for 5 minutes | 35 | Monster Fang | Bubble Kelp |
| Rapid Potion | 66 | Swim Speed up for 5 minutes | 35 | Monster Fang | Riverhorse |
| Climbing Potion | 67 | Wall-Climb Speed up for 5 minutes | 35 | Monster Fang | Rocktatoe |
| Radiant Potion | 68 | Glow for 5 minutes | 35 | Monster Fang | Radiant Butter |
| Twisty Potion | 69 | Winding Speed up for 5 minutes | 35 | Monster Fang | Twisty Pumpkin |
Trying out smoothie mixes not listed here might lead to an Unlucky Smoothie. Once you’ve discovered them all, the Shrewd Janitor will reward you with 10 Golden Eggs.
All Great Fairy Rewards in Echoes of Wisdom
In the heart of Lake Hylia, I stumbled upon the magnificent Fairy Fountain. After paying a visit, this benevolent fairy proposes a deal: for some good old rupees, she’ll let me adorn myself with fancy accessories!
- Give her 100 Rupees to raise your accessory limit by 1.
- Give her 300 Rupees to raise your accessory limit by 1.
- Give her 500 Rupees to increase your accessory limit by 1.
- Give her 1,000 Rupees to add another accessory slot.
All Flag Race Rewards
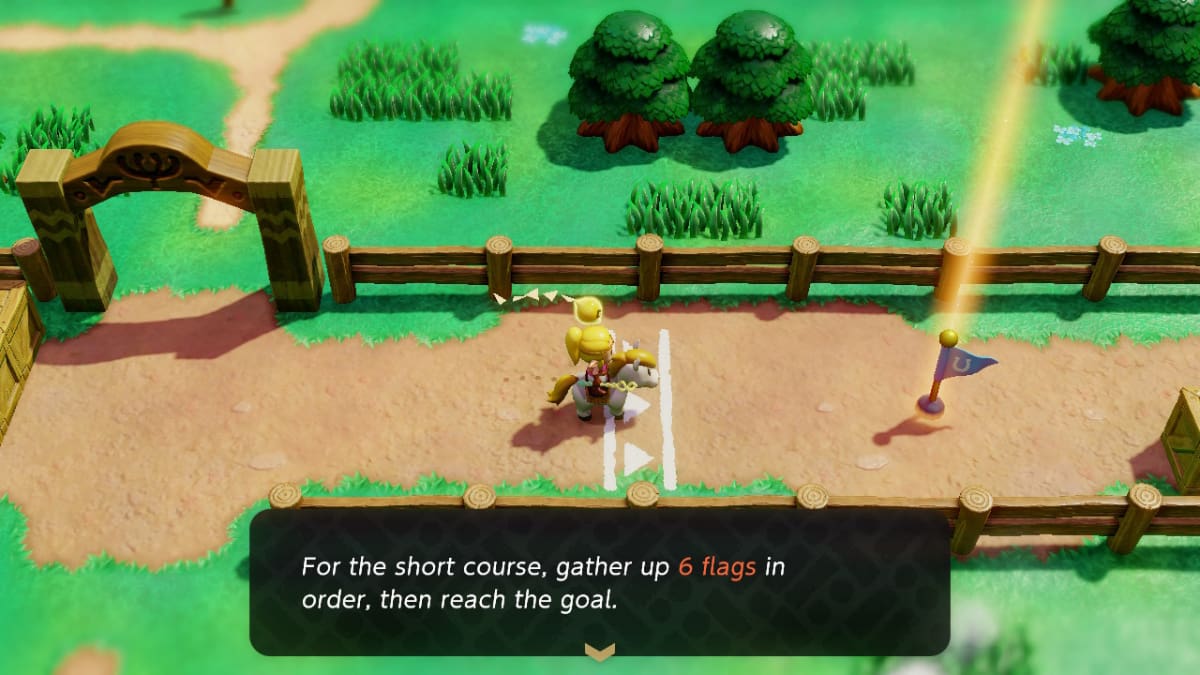
Upon finishing Impa’s Gift quest, you’ll gain access to Flag Racing at the Hyrule Ranch. Each Flag race offers four rewards: achieving the goal time for the first time, consistently meeting the goal time thereafter, defeating the Master for the first time, and subsequently beating the Master’s time.
The prizes for the Small Course are:
- 20 Rupees for beating 23 seconds the first time.
- One Radiant Butter for beating the course in under 23 seconds afterward.
- Finishing the course in under 17 seconds gives you 3 Mighty Crystals the first time.
- Afterward, beating the course in under 17 seconds gives you two Radiant Butters.
The Middle Course has the following rewards:
- The first time you beat the race in under 25 seconds, you’ll get the Prismatic Music Box.
- Afterward, beating 25 seconds will give you two Fresh Milk.
- The first time you beat the course in under 20 seconds, your reward is a Piece of Heart.
- Afterward, finishing the course in less than 20 seconds gives you three Fresh Milk.
Completing the Long Course will give you the following four rewards:
- Complete the course in under 50 seconds for the first time to get 50 Rupees.
- Afterward, complete the course in less than 50 seconds to get three Fresh Milk.
- The first time you complete the course in less than 40 seconds, you’ll be given a Charging Horn.
- Afterward, finishing in less than 40 seconds will give you 5 Fresh Milk.
All Slumber Dojo Rewards
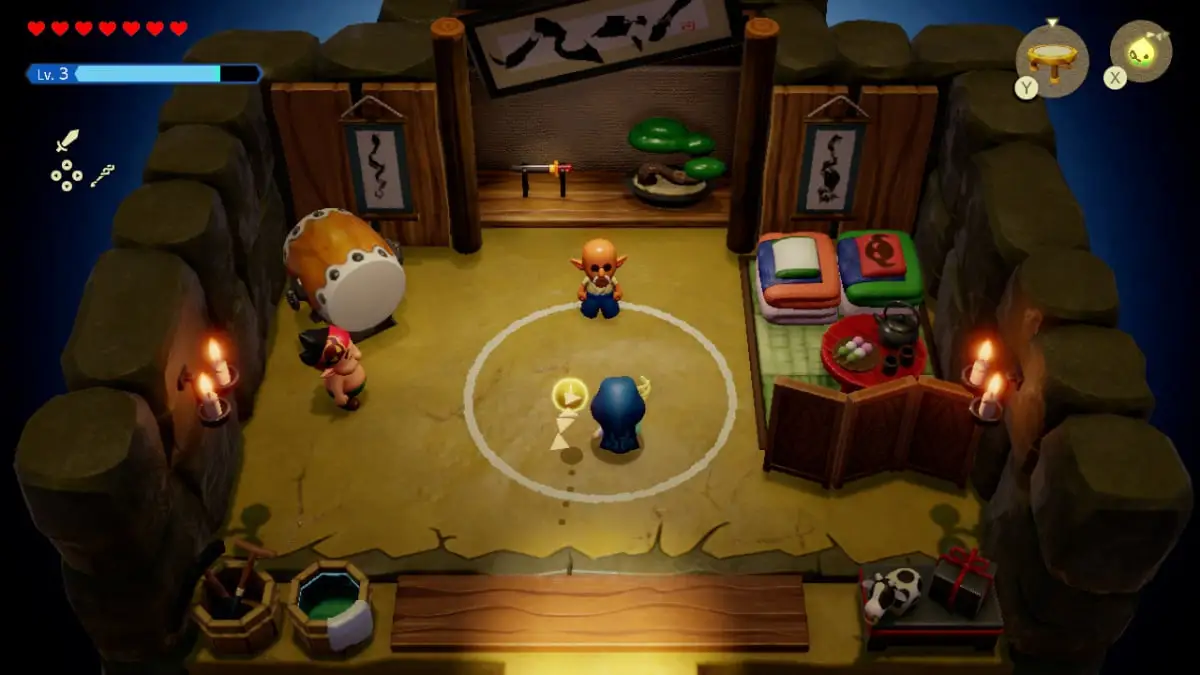
At the Sleep Sanctuary located in Kakariko Village, there are incentives for successfully completing a training session for the first time, mastering it, and for the total number of trainings you have finished. I will detail all the rewards to help you determine if it’s worth investing your time.
| Training Name | Completion Reward | Mastery Reward |
|---|---|---|
| A Shock in the Dark | 8 Monster Guts | 7 Electro Apples |
| Blank-Slate Battle | 5 Electro Apples | 3 Floral Nectar |
| Blank-Slate Battle: Final | 3 Golden Eggs | 7 Monster Fangs |
| Blank-Slate Battle: Ice | 8 Radiant Butter | 7 Twisted Pumpkins |
| Blank-Slate Battle: Wind | 5 Chilly Cactus | 5 Warm Peppers |
| Caromadillos’ Revenge | 5 Monster Fangs | 3 Refreshing Grapes |
| Floating on Fire | 3 Monster Stones | 7 Rocktatoes |
| Flow of Battle | 5 Bubble Kelp | 5 Riverhorses |
| Moblins’ Revenge | 20 Rupees | 3 Monster Stones |
| Revenge from the Skies | 8 Twisted Pumpkins | 7 Chilly Cactus |
| The Titans Gather Again | 5 Monster Stones | 7 Fresh Milk |
| Titans’ Gathering | 5 Fresh Milk | 7 Radiant Butter |
| Trial of Flames and Ice | 5 Golden Eggs | 7 Rock Salt |
| Wizzrobe Gathering | 50 Rupees | 7 Monster Guts |
| The Final Titans’ Gathering | Green Tunic | 2 Golden Eggs |
You’ll also get the following rewards when you complete a specific number of trainings:
- Complete 2 trainings – Piece of Heart.
- Complete 4 trainings – First Mastery accessory.
- Complete 6 trainings – Heirloom Katana.
- Complete 8 trainings – Second Mastery accessory.
- Complete 11 Trainings – Piece of Heart.
- Complete 14 Trainings – Final Mastery accessory.
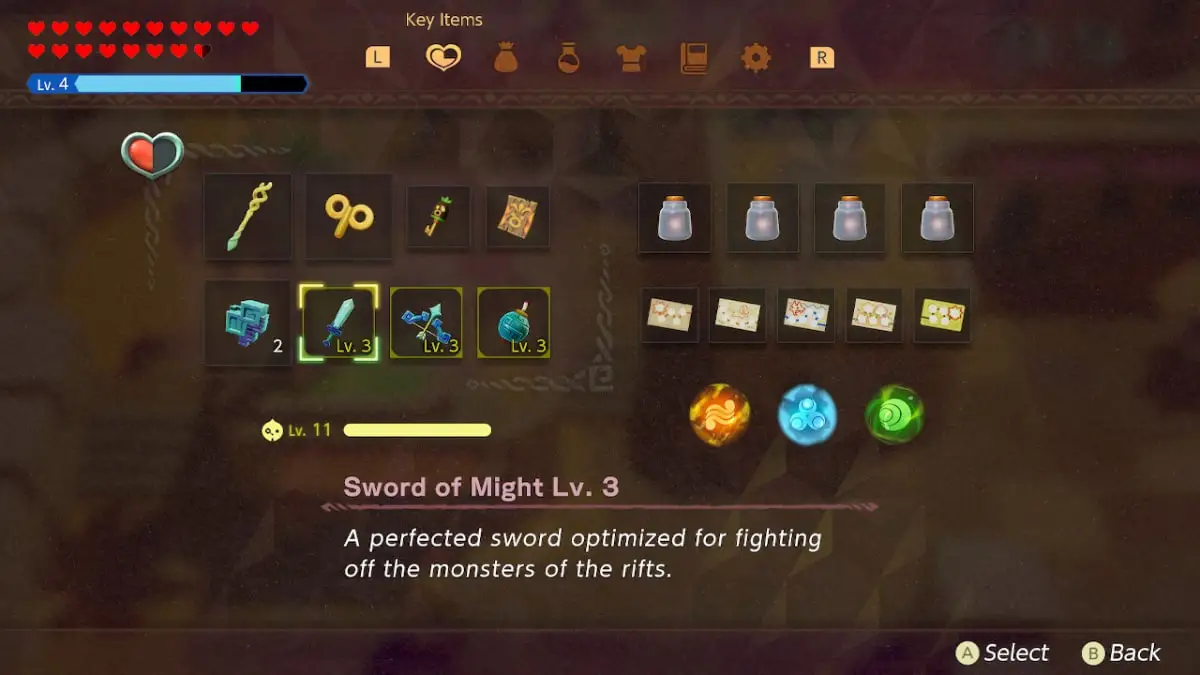
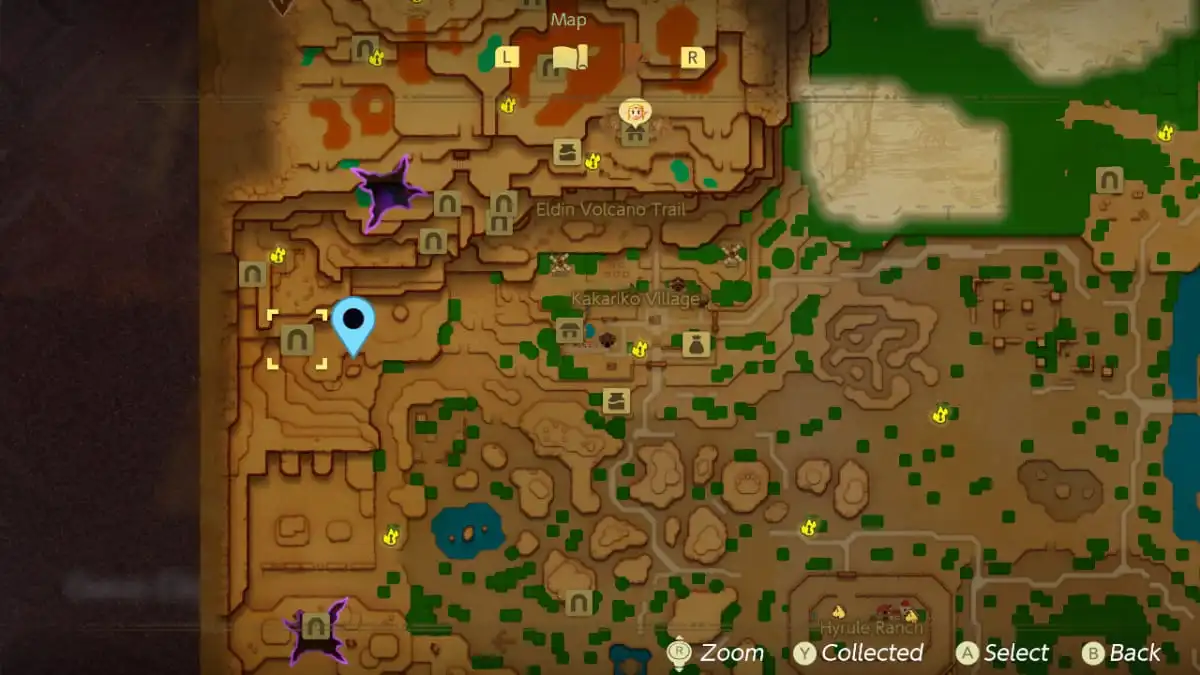
How to get Might Crystals
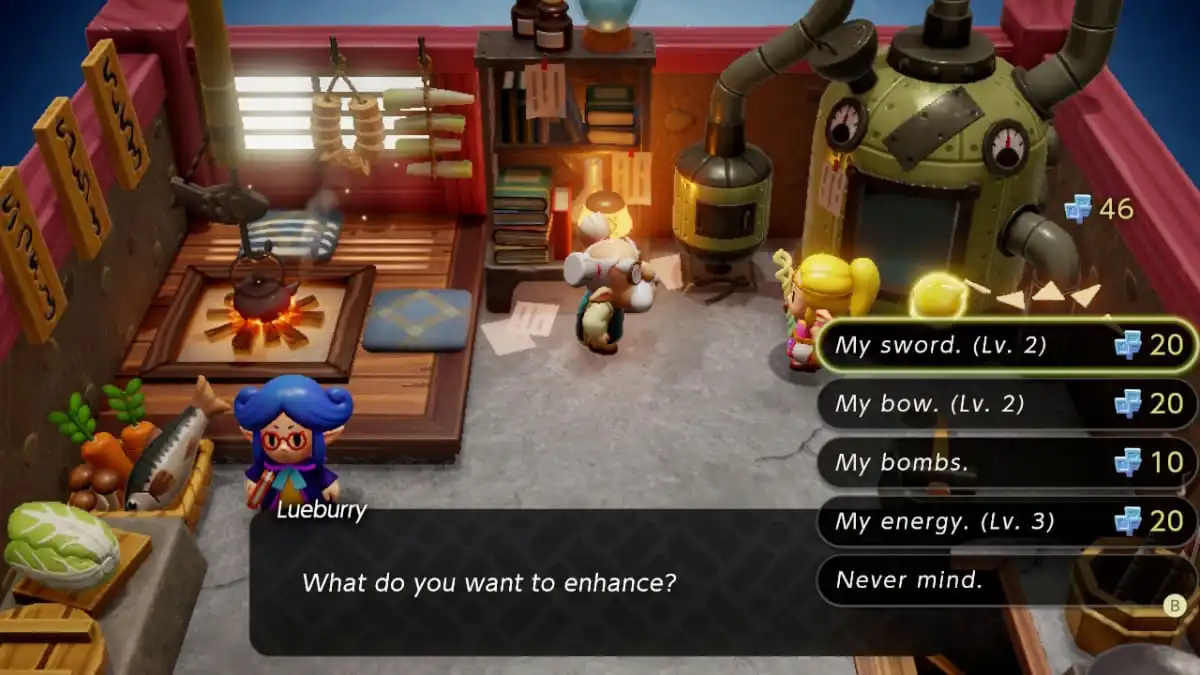
At Lueburry’s residence, Crystals are employed for enhancing your energy and weapon levels. Initially, you can only make a limited number of enhancements, but as you progress in the game, more upgrades become available for your weapons. However, the challenge lies in accumulating sufficient Might Crystals to finish all the upgrades. The game provides several methods to acquire them, such as:
- Removing both small and large rifts.
- Completing certain side quests.
- Hidden in chests around the world.
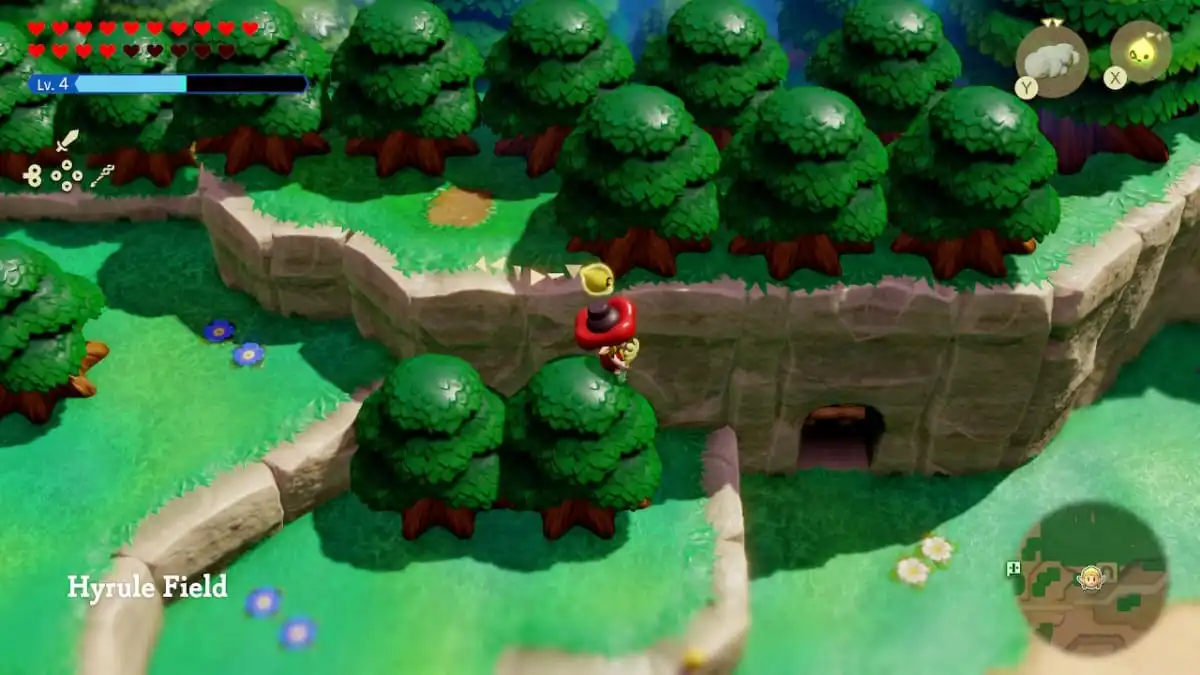
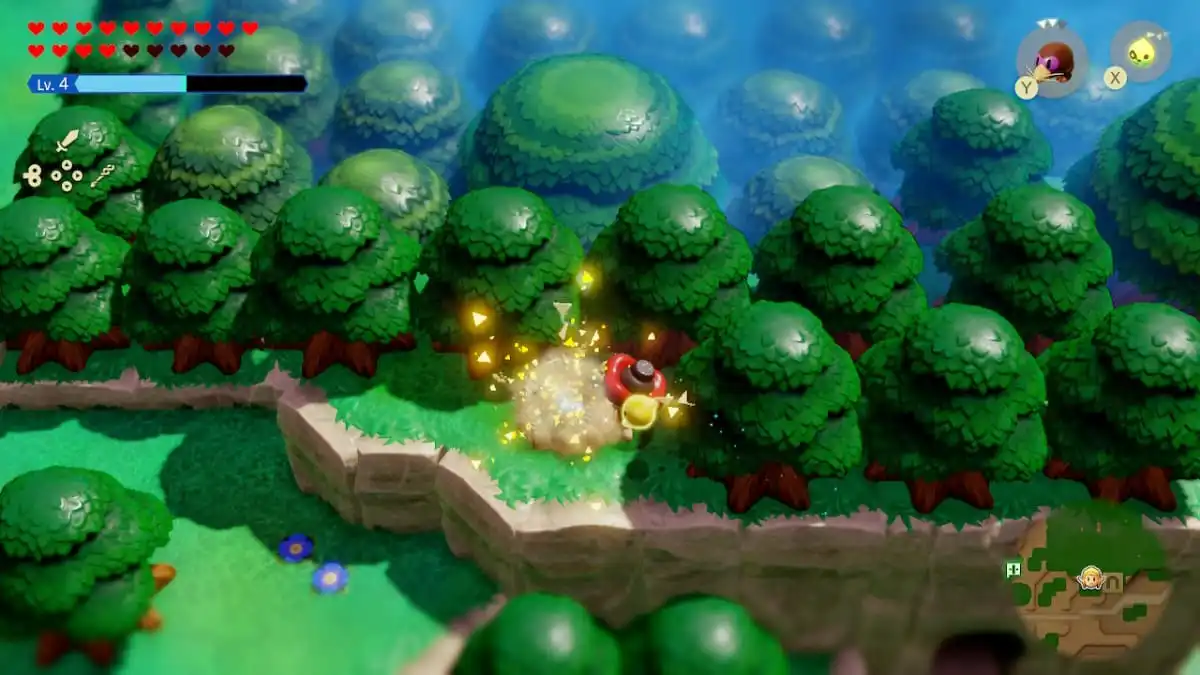
- Beneath interestingly-placed rocks and grass around Hyrule.
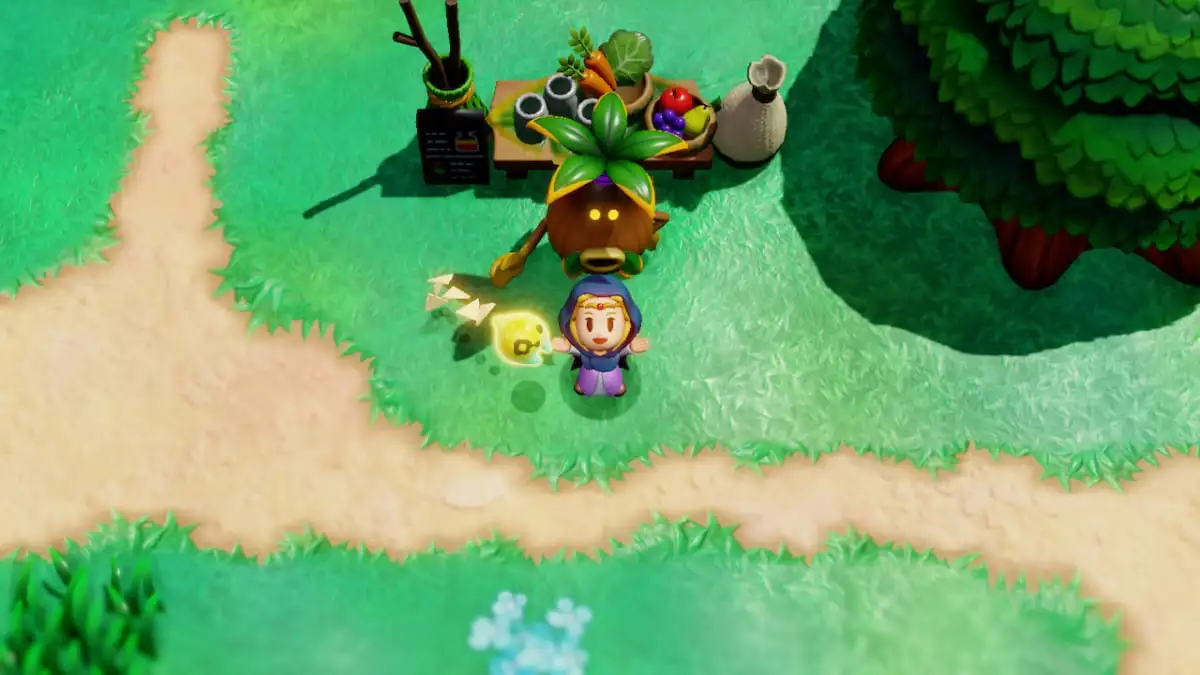
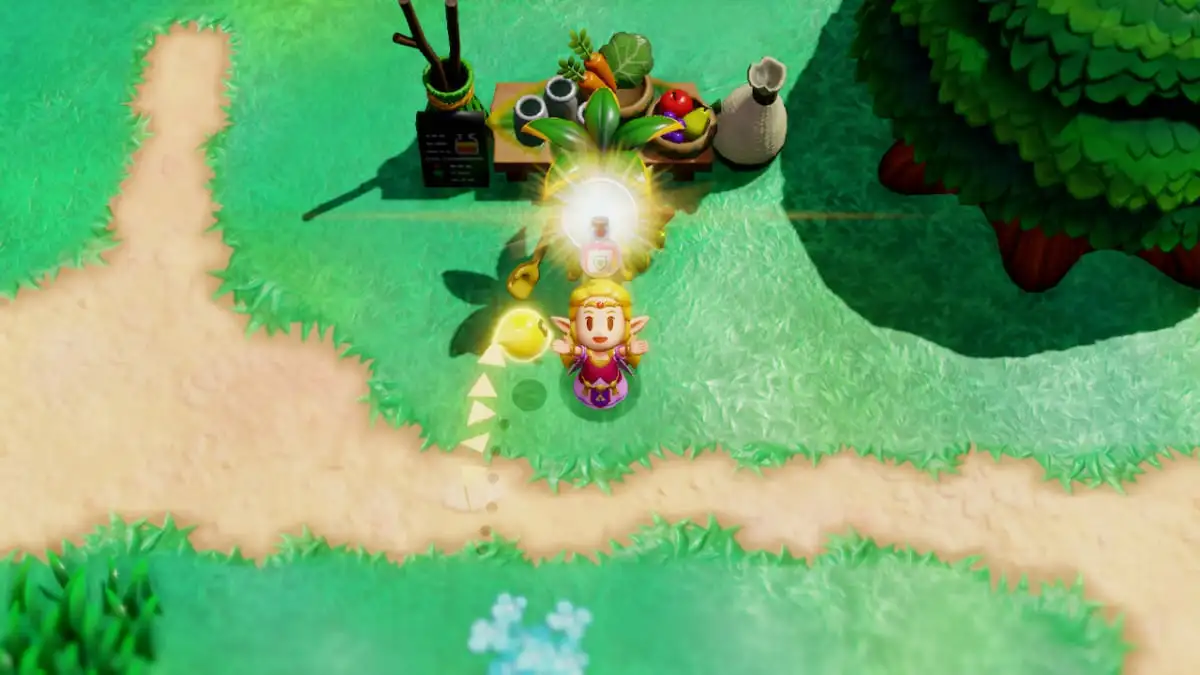
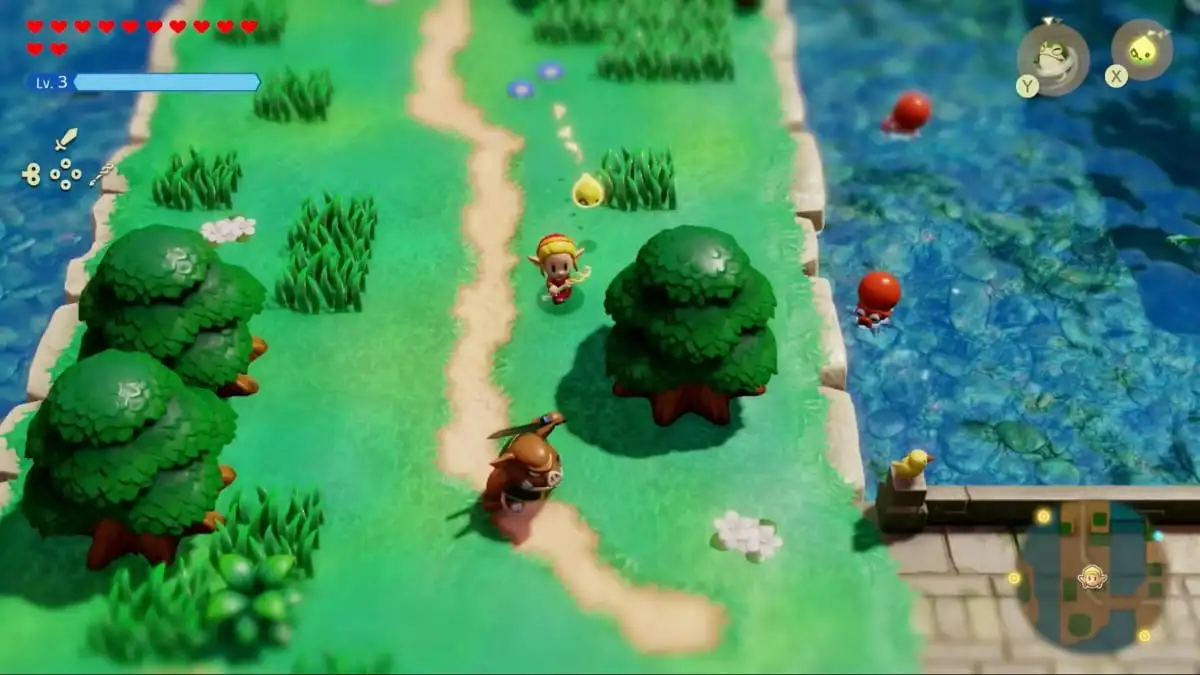
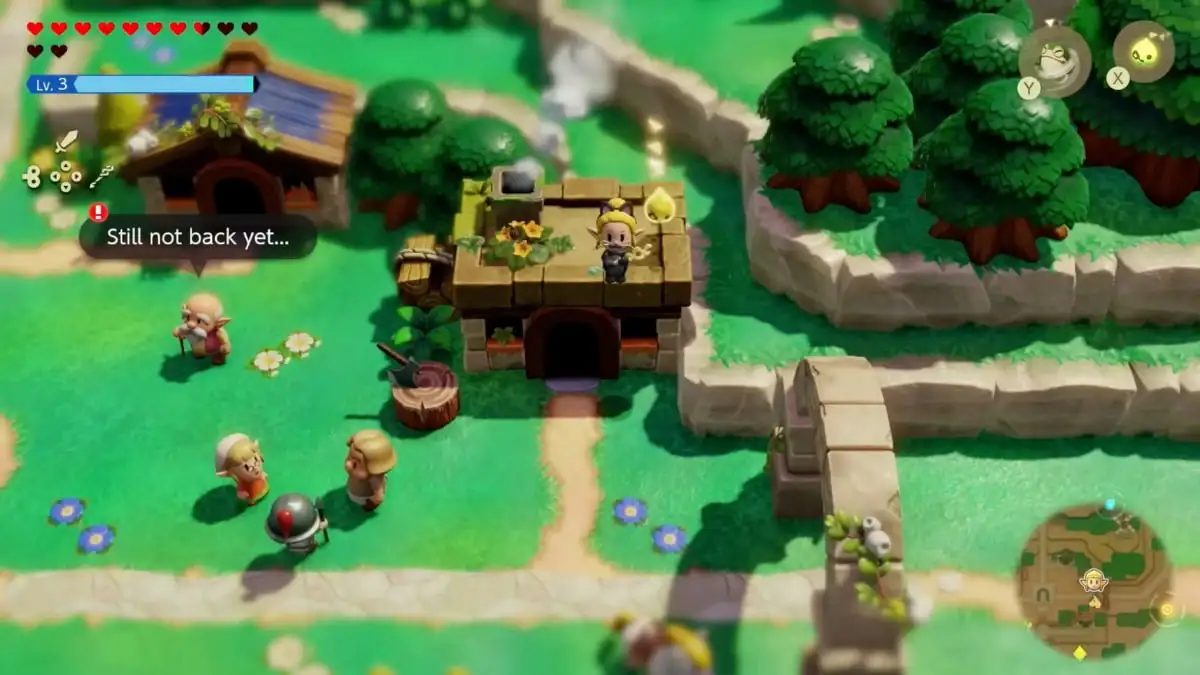
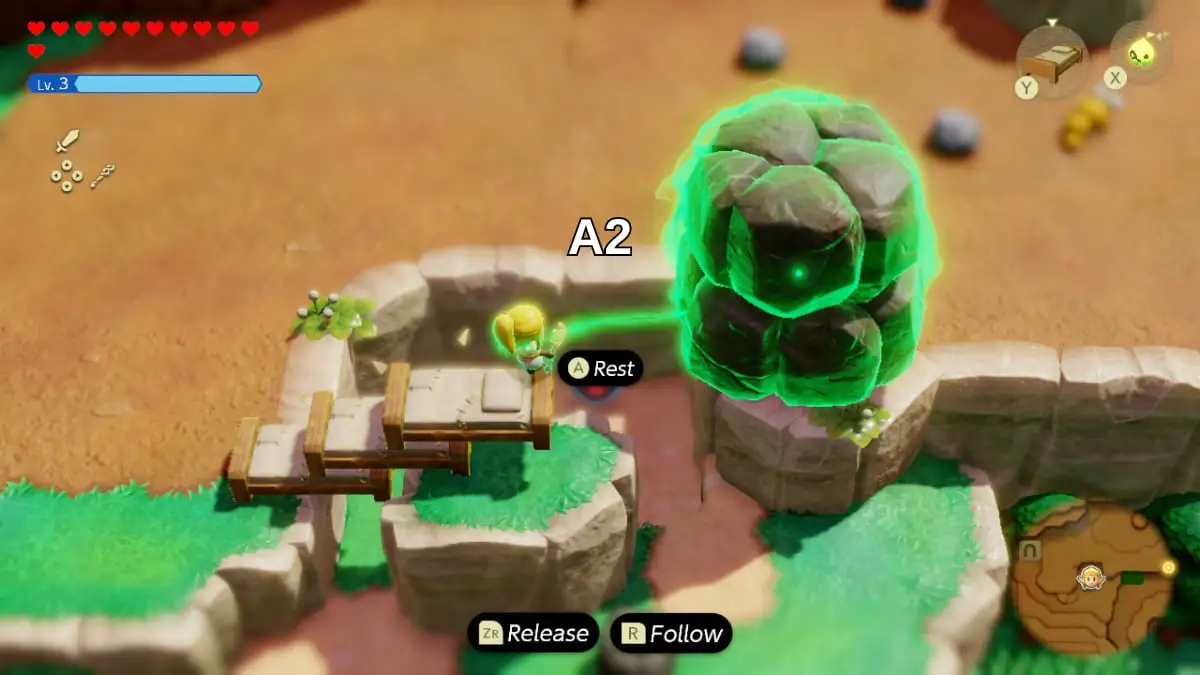
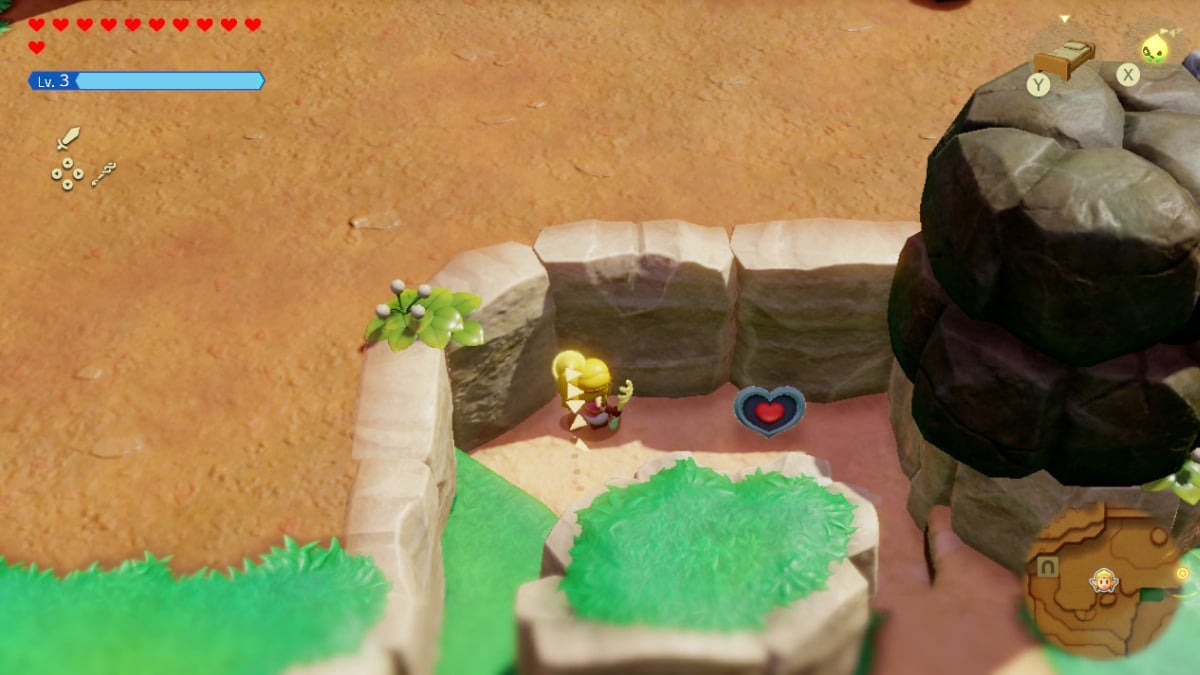
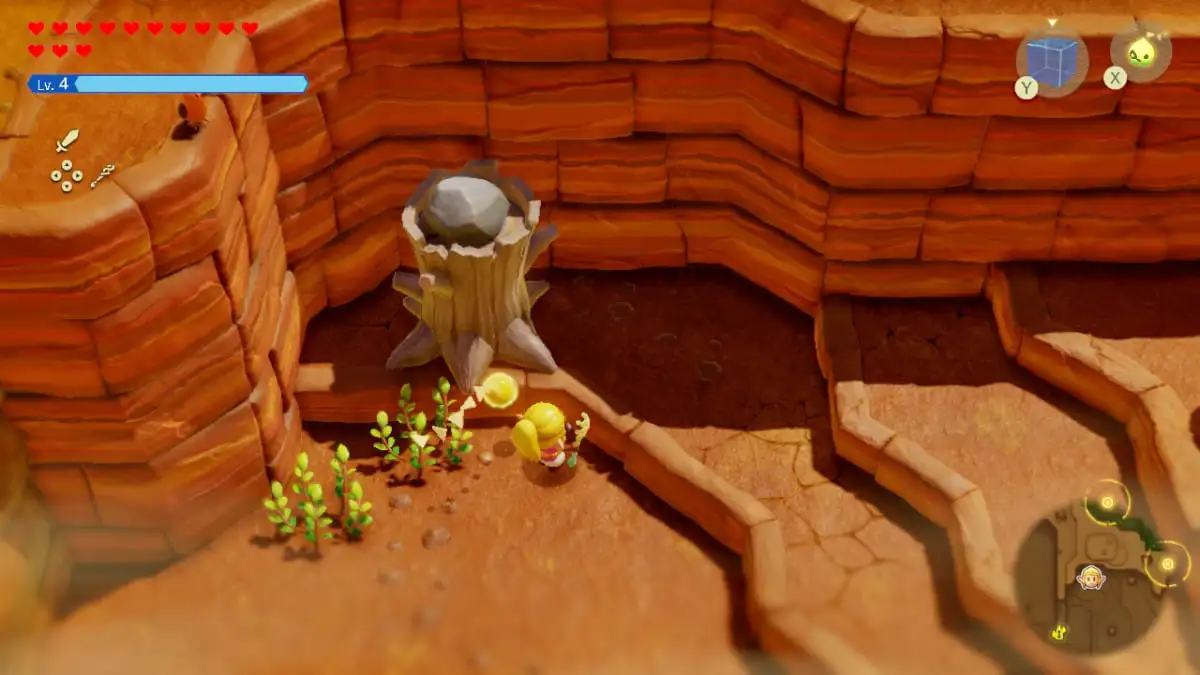
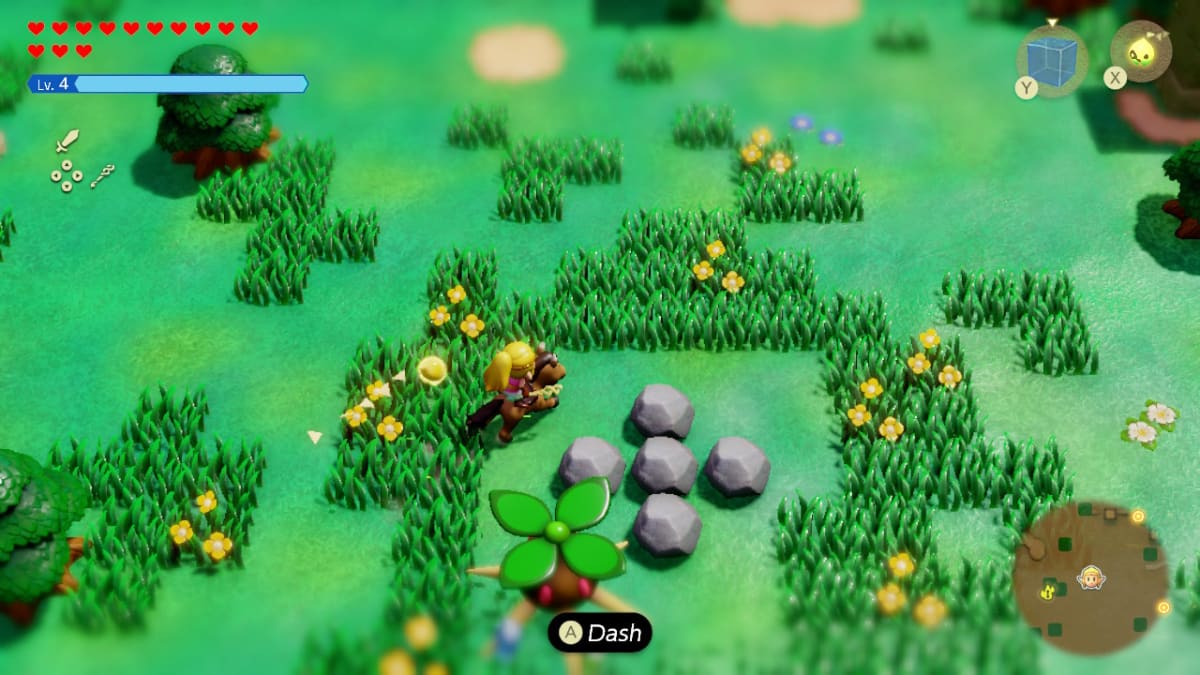
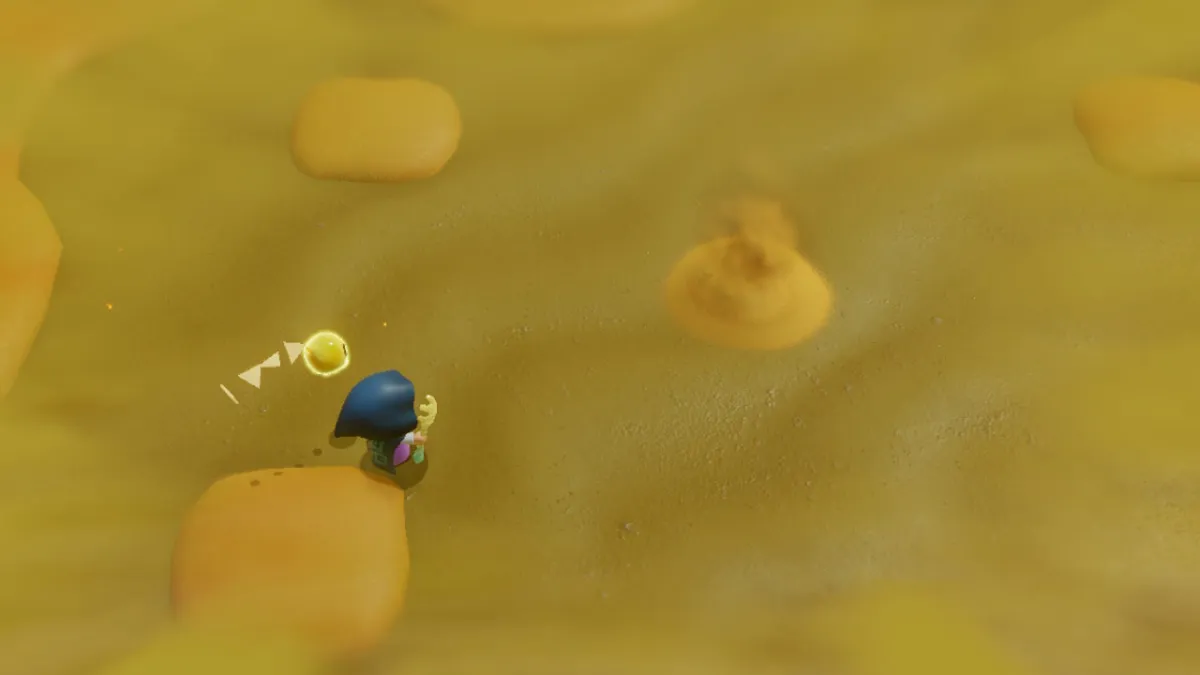
“The specific method, in particular, is an effective approach for gradually collecting Might Crystals, despite appearing challenging at first. The game cleverly distinguishes these crystal-bearing rocks and patches of grass from others by their strategic placement and surroundings. For instance, I discovered one Might Crystal nestled beneath a clump of grass near a V-shaped patch of grass indicating its location. Another Crystal was concealed under a rock perched atop a tree stump. I’ve added a few example images to help you identify them.
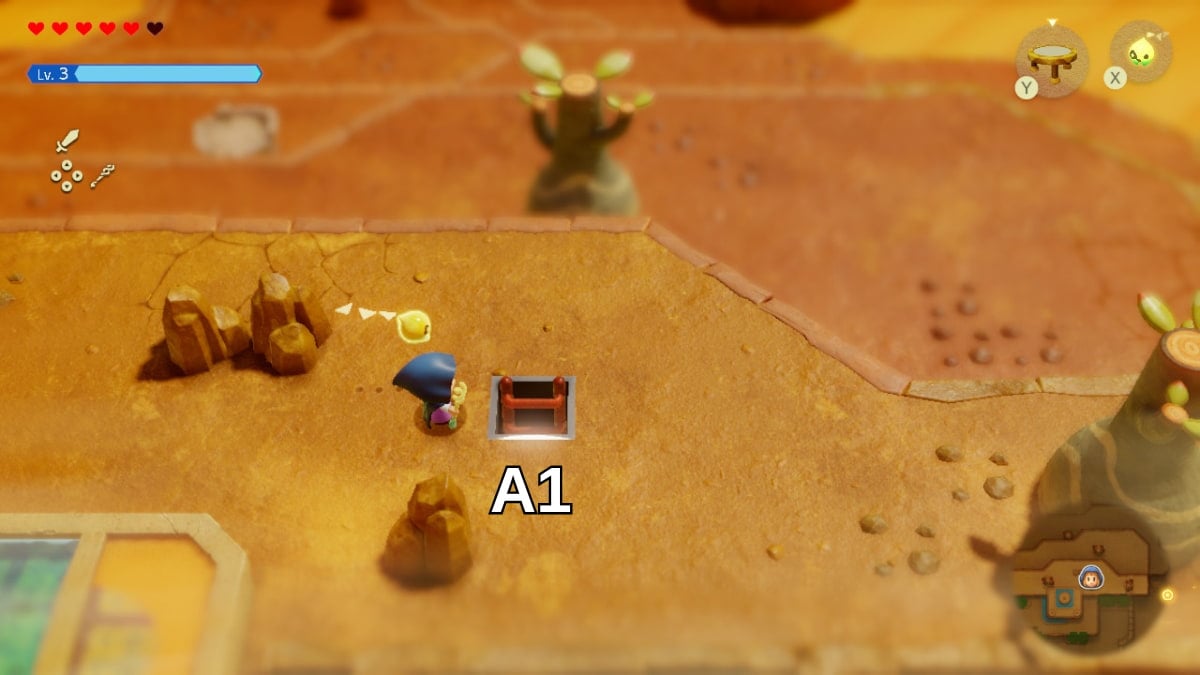
How to dig up buried treasure chests
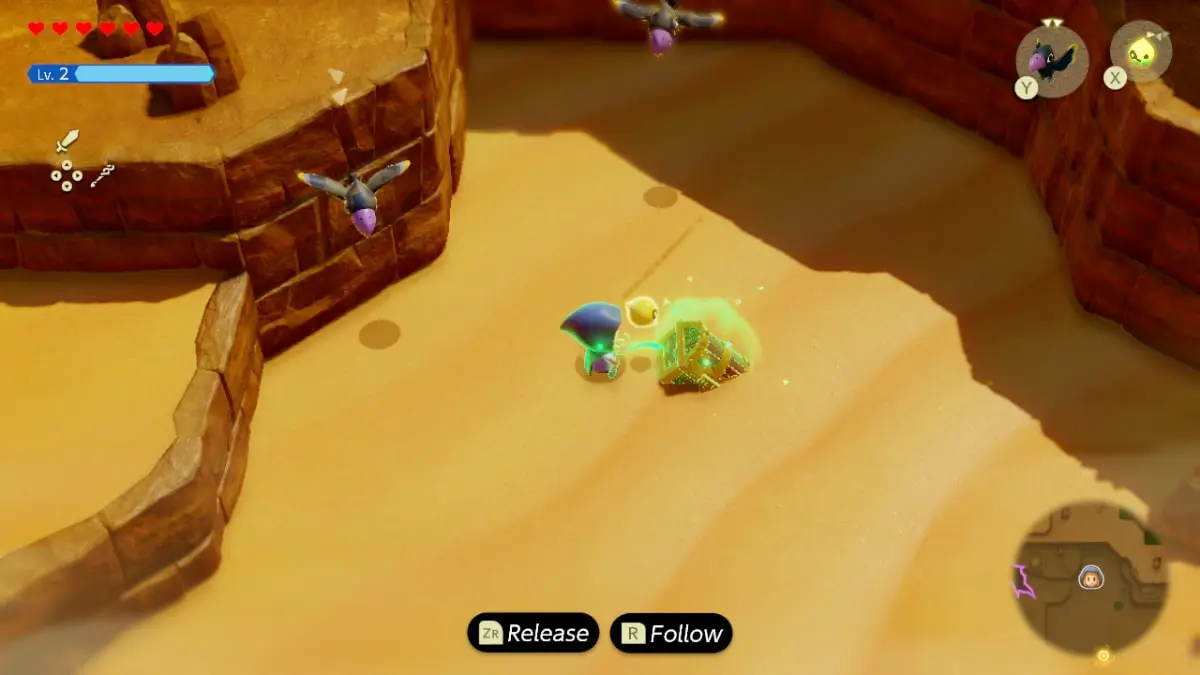
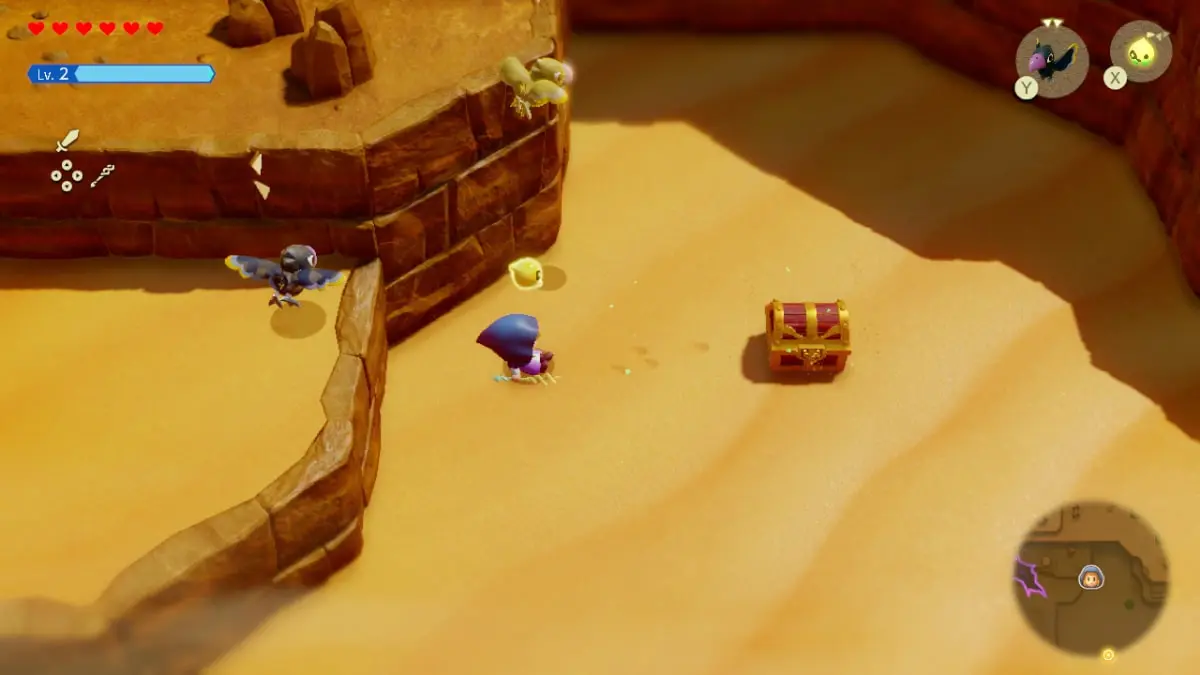
To unearth a hidden treasure chest, dispatch Tri towards it. Once he’s inside, start walking backwards keeping the chest attached to you. Eventually, the chest will rise from the ground, allowing you to open it up and access its contents.
How to beat a Lanmola in Echoes of Wisdom

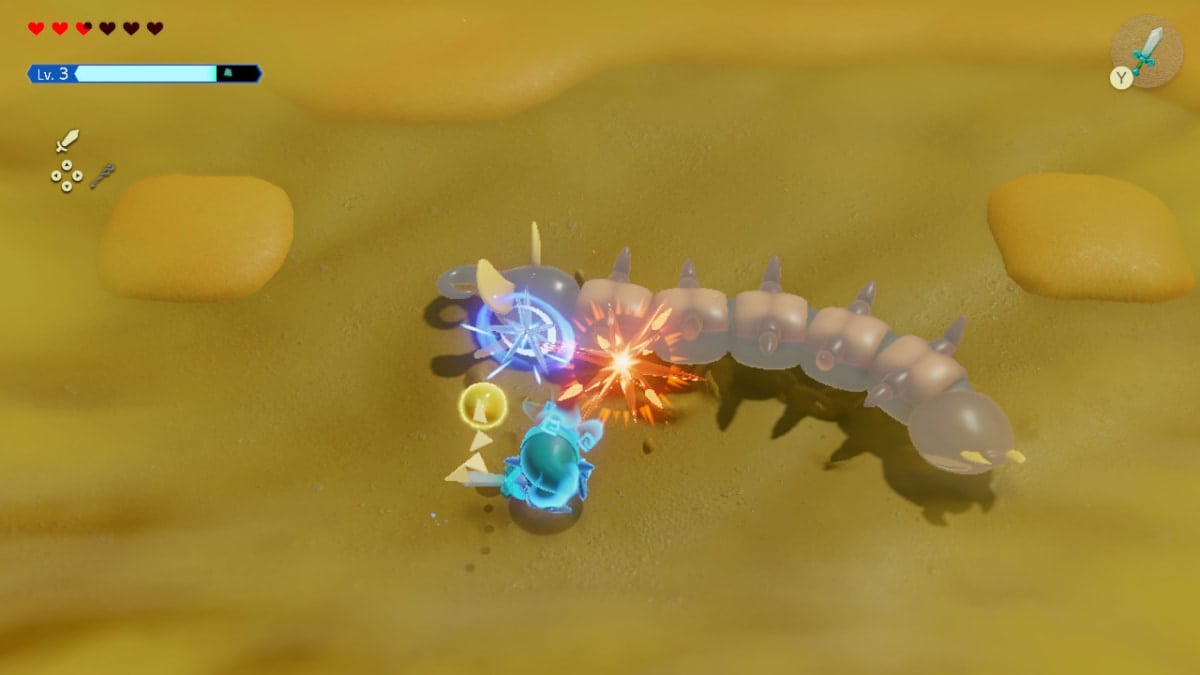
As I traverse through the sands of Gerudo Desert, I stumbled upon a hidden menace – the elusive first Lanmola. This beast lies tucked away northeast of Gerudo Town, lurking amidst the tempestuous sandstorms. Prior to its emergence from the ground, you’ll notice a mound spewing sand, like a restless volcano. Once the centipede-like creature slithers out, keep an eye on its tail. With Tri in hand, seize the moment when the tail becomes visible and tug it back. The Lanmola will flip onto its back, exposing itself to my relentless attacks.
In the eastern part of Gerudo Desert, you’ll encounter the second instance of Lanmola, which you can battle in a manner similar to before. However, beware that the Wild Sandstorms quest area is where you’ll find this Lanmola, and it requires extra caution during combat. The fight will still follow the same strategy, but it’s more challenging as smaller enemies pop up throughout the battle, making it trickier to flip the Lanmola on its back. It might take several attempts in succession. To increase your chances of success, recharge your energy before engaging, stock up on potions that replenish energy, and consider using a couple of AOE abilities (Area of Effect) to clear out the smaller enemies while dealing damage to Lanmola simultaneously.
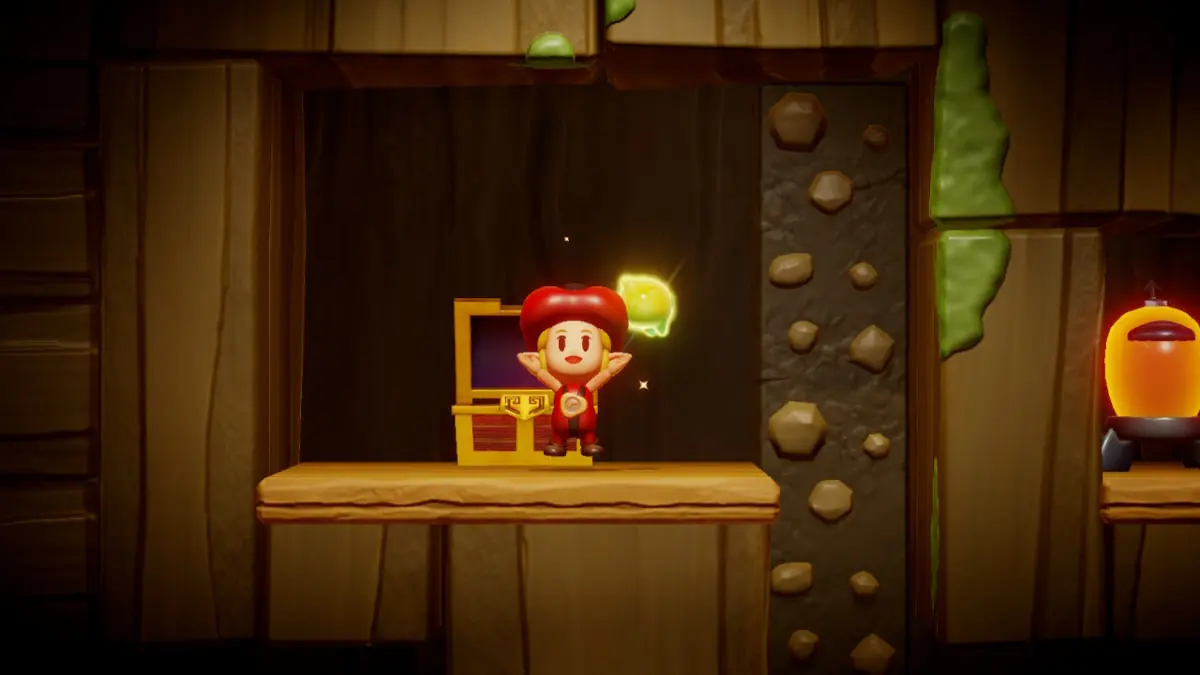
How to get the Bombfish Cave chest in Echoes of Wisdom
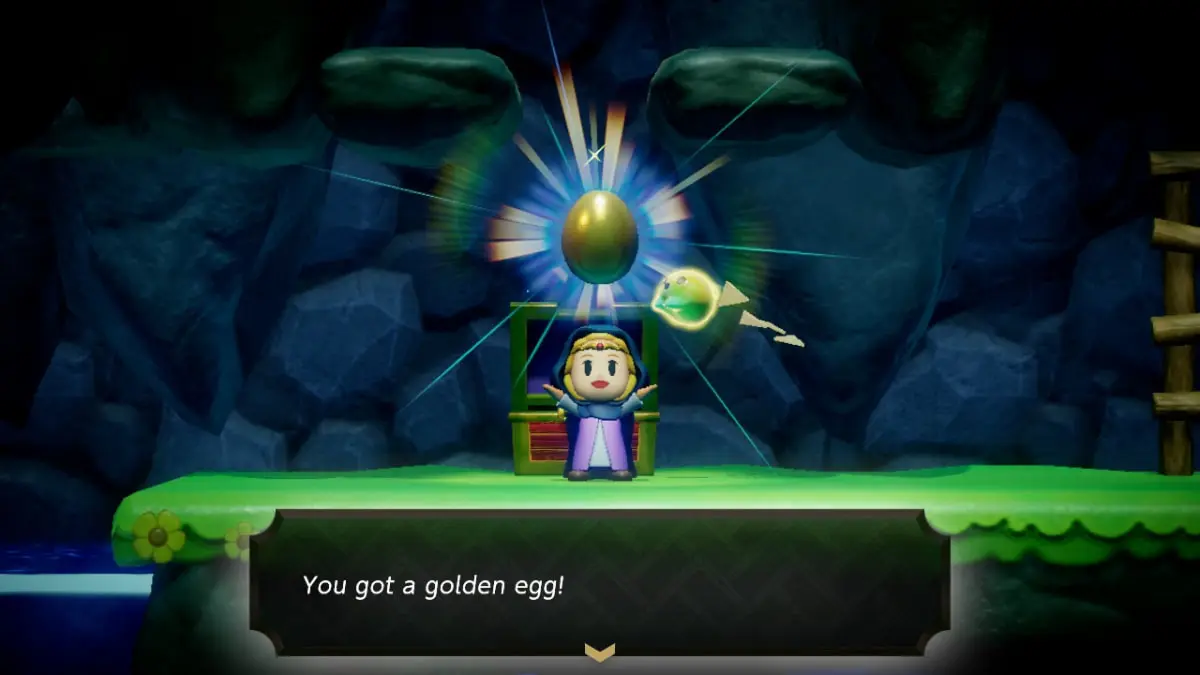
At the cave’s entrance, you’ll find a chest packed with Bombfish, precariously perched on a wooden beam high above. To retrieve it, construct a set of steps and call upon an Ignizol. The Ignizol will ignite the plank, causing it to break and releasing the chest. After that, you can open it to get a Golden Egg.
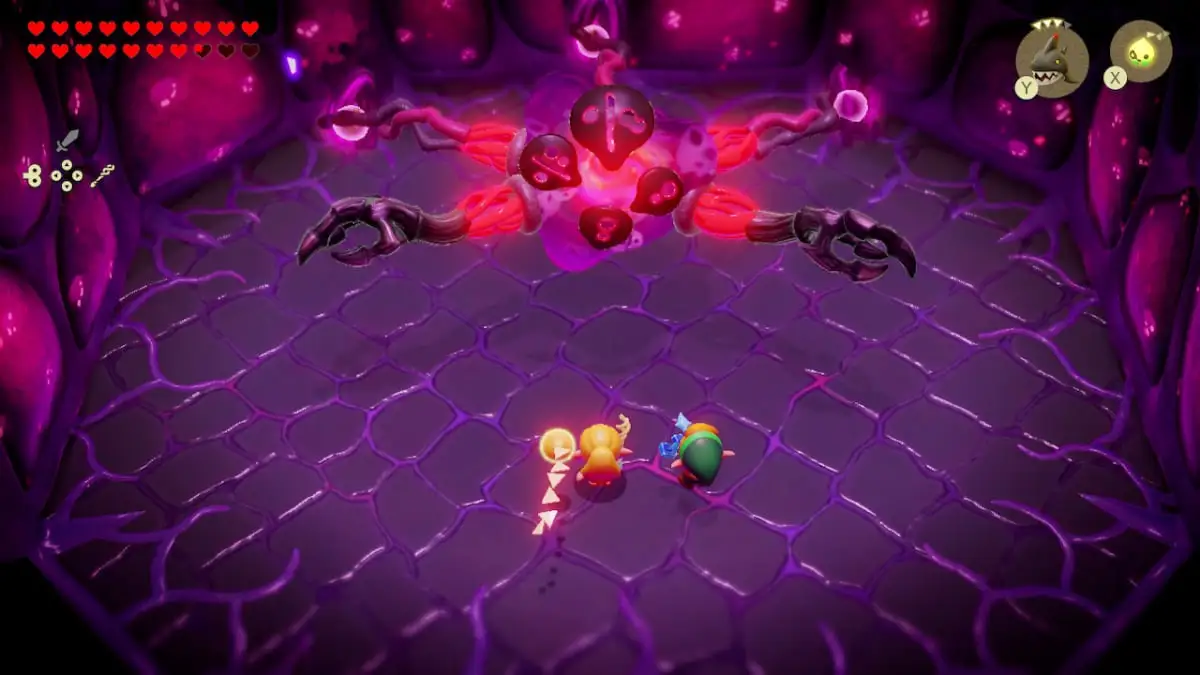
How to beat Null in Echoes of Wisdom
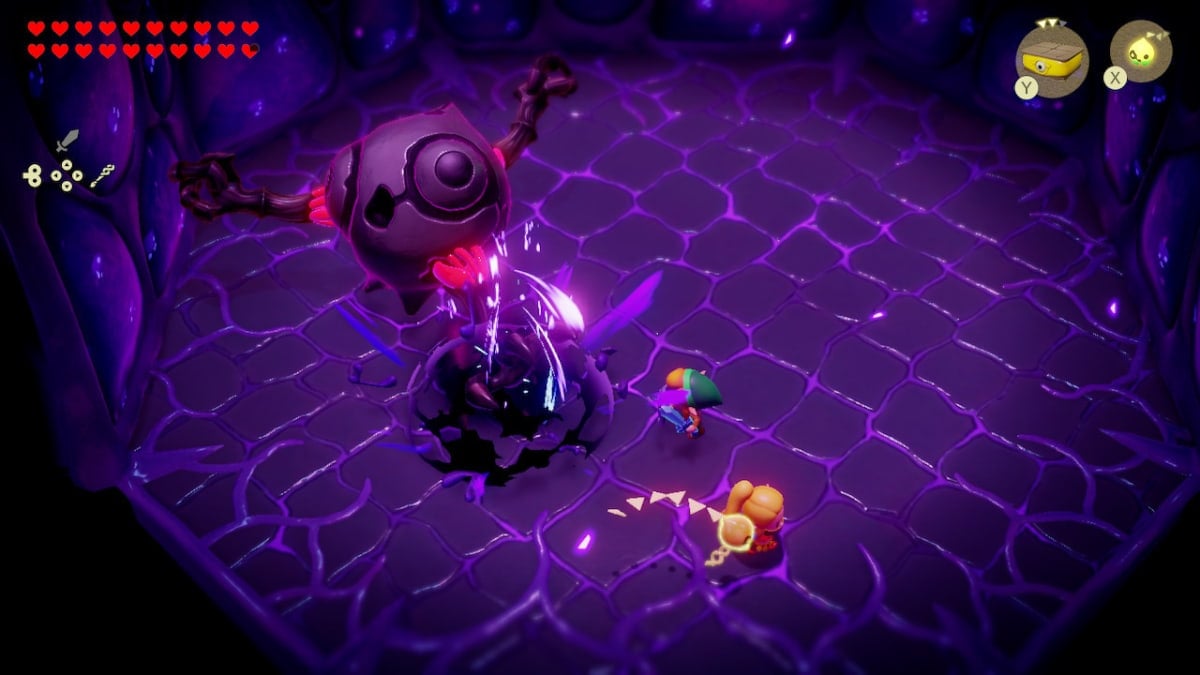
Null’s boss fight takes place over three phases. In the first phase of the fight, you want to take out all of Null’s arms so you can attack their body freely. One of my favorite summons for this fight is the Pathblade because it will keep hitting Null’s arms back and forth. To accompany the Pathblade, summon a longer-range enemy like a Wizzrobe to deal extra damage. If you don’t mind constantly re-summoning, use a close-range attacker like the Level 3 Sword Moblin. When Null’s arms have been destroyed, summon the Level 3 Sword Moblin to throw some heavy attacks at them.
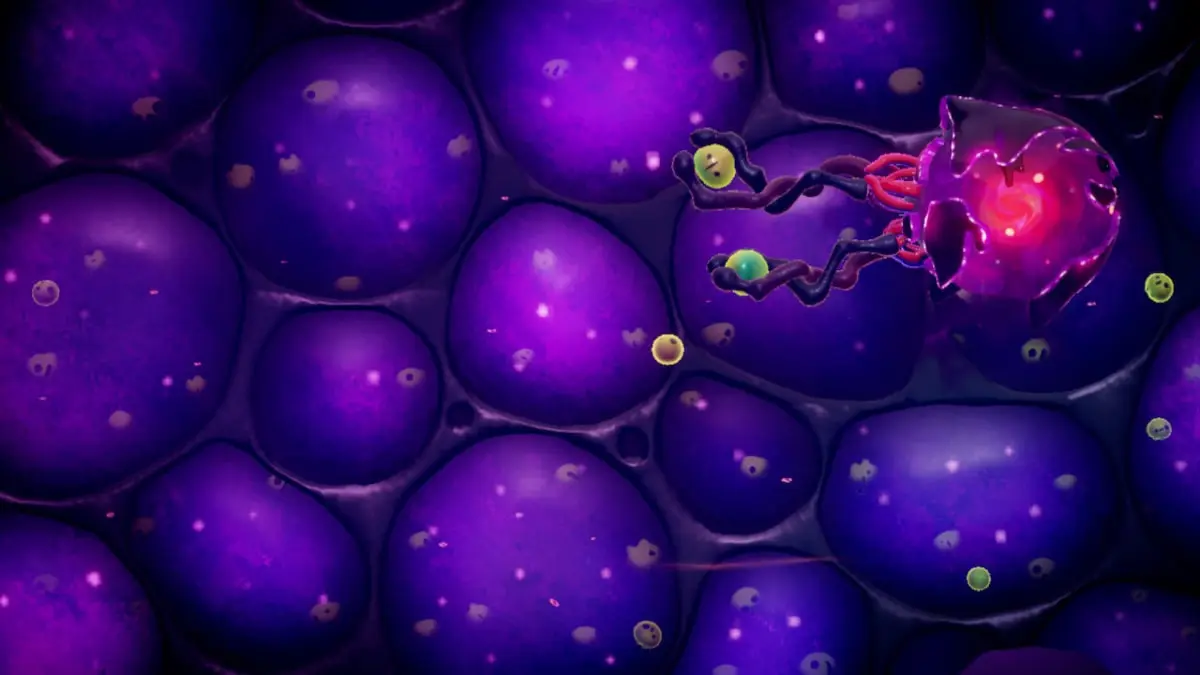
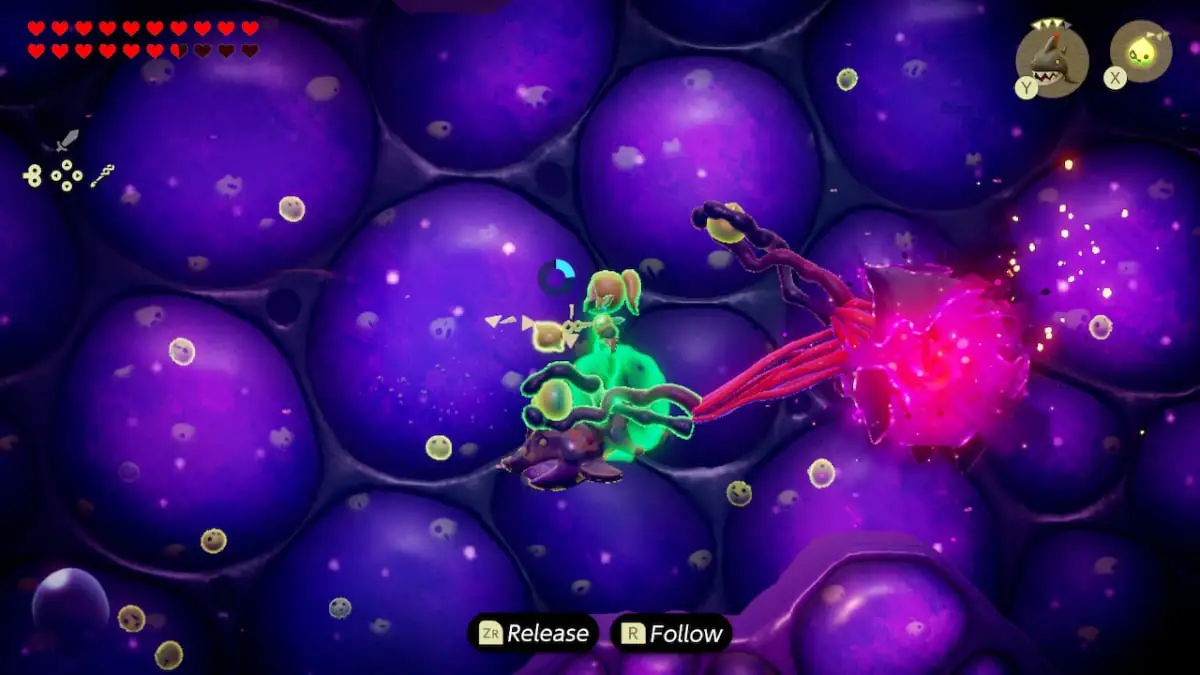
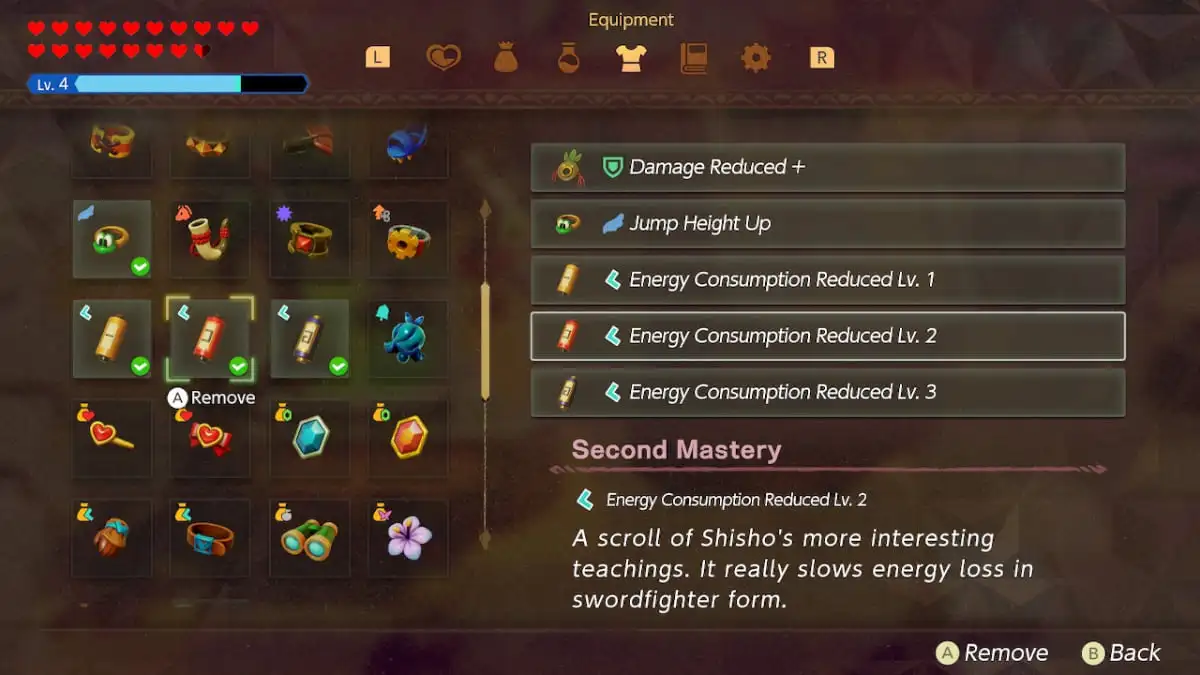
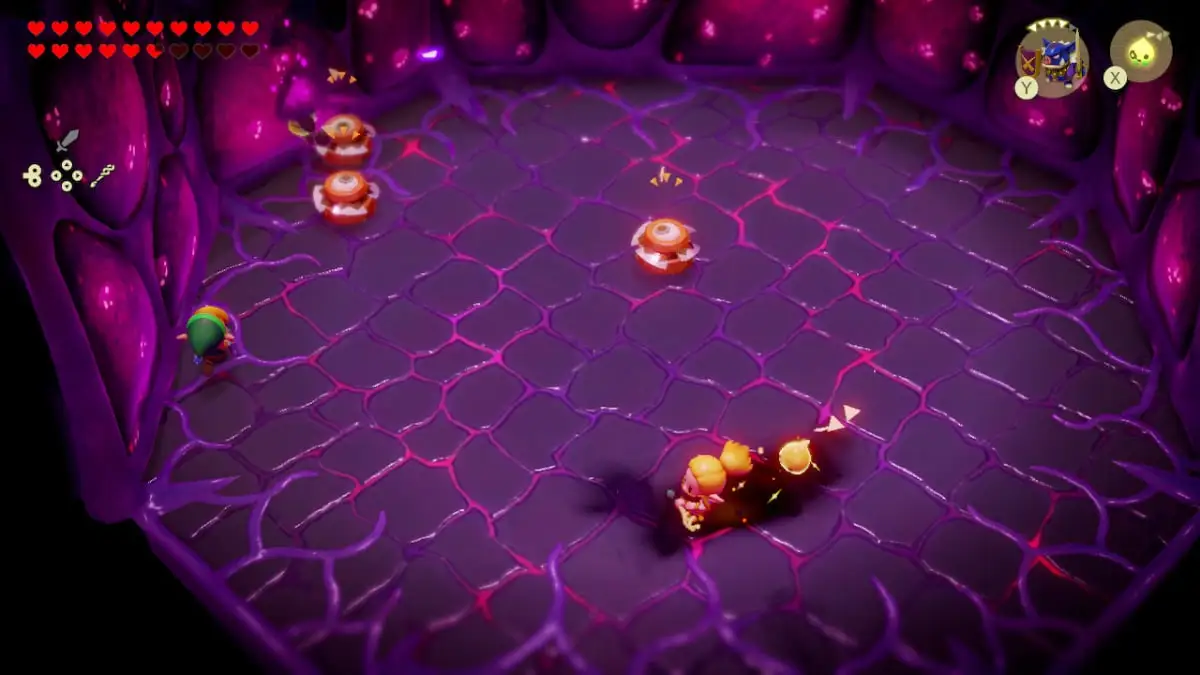
In the second part of the battle, the action shifts underwater, where Link is absent. Before proceeding further, navigate to your equipment menu and equip the Zora’s Flippers and Zora Scale for better mobility while dealing with Null. The Chompfin is an ideal companion for this confrontation. It can swiftly move towards Null, nibbling on its trailing tails, which helps to calm it down. To expedite the battle, call two Chompfins and then use the Tri button to latch onto Null’s tail. While attached, swim backward and let the Chompfins handle the rest of the task. However, remember to reset and resummon the Chompfins when Null summons Vocavor, as dodging their attacks will be effortless with the Zora equipment.
The third phase of the Null fight is similar to the first, but with added difficulty. Make sure to swap out your Zora accessories for something more fitting, like the Golden Sash or the Stone Anklet. During this fight, Null will summon Echoes of the bosses you’ve fought previously. They will always use the same attacks, so seeing them once is all you need to get a handle on them. The thing you do need to look out for is when Null disappears and a shadow on the ground follows underneath Zelda. Move quickly to avoid this shadow or you will be grabbed by Null and stuck in its hand until either Link or your Summons free you. Otherwise, I recommend using the same summons you did in the first phase of the fight.
We have upgraded our commenting platform! Existing comments will be imported over the next few weeks.
Read More
- ACT PREDICTION. ACT cryptocurrency
- W PREDICTION. W cryptocurrency
- PENDLE PREDICTION. PENDLE cryptocurrency
- NBA 2K25 Review: NBA 2K25 review: A small step forward but not a slam dunk
- How to Handle Smurfs in Valorant: A Guide from the Community
- Unlocking Destiny 2: The Hidden Potential of Grand Overture and The Queenbreaker
- ESO Werewolf Build: The Ultimate Guide
- Mastering Destiny 2: Tips for Speedy Grandmaster Challenges
- Rainbow Six Siege directory: Quick links to our tips & guides
- Exploring Izanami’s Lore vs. Game Design in Smite: Reddit Reactions
2024-10-04 18:24