During my search for fast-paced shooter games similar to Vampire Survivors, the game Jotunnslayer: Hordes of Hel piqued my interest. This top-down survival RPG is inspired by Norse mythology and features you battling waves of enemies using your unique abilities while completing various tasks. In this beginner’s guide, I’ve compiled essential information to help new players get started with Jotunnslayer.
Jotunnslayer Hordes of Hel Beginner’s Guide
Exploring Jotunnslayer: Hordes of Hel – An Early Access Game
The action-packed game, Jotunnslayer: Hordes of Hel, is now available in early access. While it offers a more compact content experience currently, the creative minds behind the development have exciting plans to roll out updates regularly until its full release. You can grab your copy for $10 on both Steam and Epic Games storefronts. Let’s delve into the gameplay and mechanics!
Jotunnslayer: Hordes of Hel, an action game currently in early access, will receive more content updates over time before its final launch. You can buy it for $10 on Steam or Epic Games storefronts right now. Let’s explore the gameplay and mechanics together!
All Character Class in Jotunnslayer Hordes of Hel
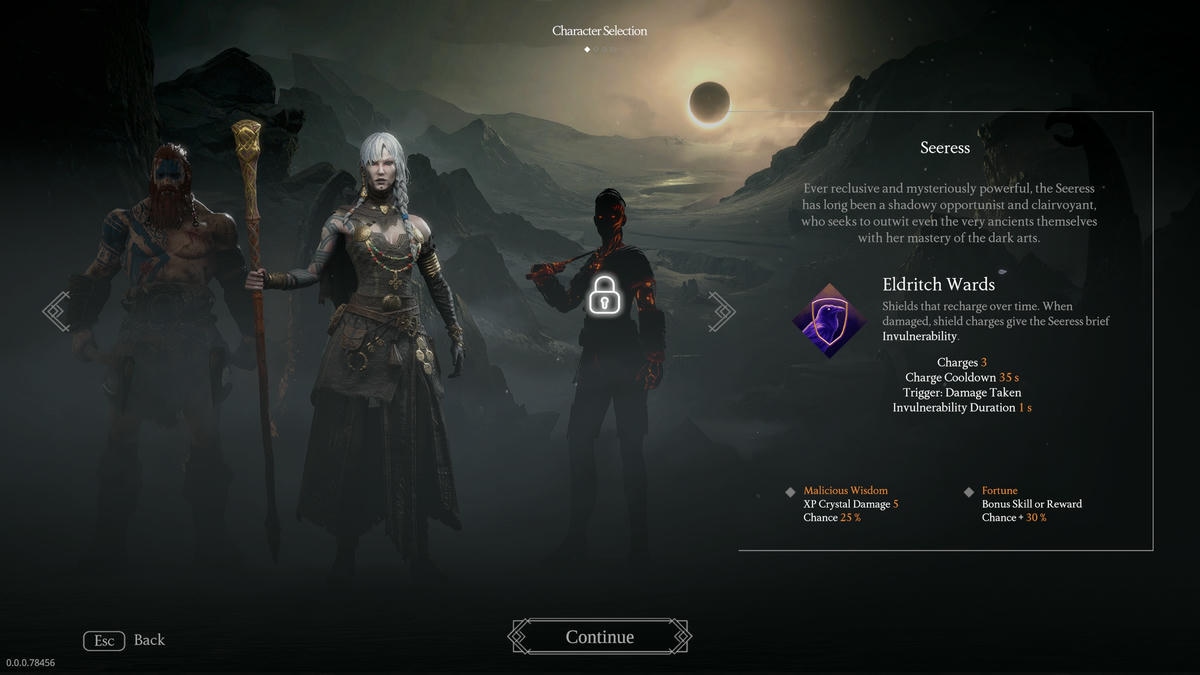
At present, Jotunnslayer Hordes of Hel features four playable characters: Berserker, Seeress, Flame Sister, and Revenant. Each character possesses a distinct set of skills known as Class Traits which activate or become effective during gameplay. The game developers plan to introduce additional characters in future updates.
The Berserker, much like Flame Sister, is equipped primarily with an axe, excelling in close-quarter battles. On the other hand, Seeress and Revenant favor a staff and bow, respectively, making them ideal for players seeking a class that specializes in ranged attacks. For a comprehensive look at each character and their unique Class Traits, please refer to the table provided below.
| Class | Class Traits |
|---|---|
| Berserker | Rage: Attacks can trigger his full violent potential. (HP Regeneration +3/s, Damage +20%) Hot Blood: As the Berserker loses health, his attacks become increasingly faster. (Attack Speed +0.5% per 1% of missing health) Survivor: Berserker can withstand intense punishment. (HP Regeneration +1/s, Maximum Health +100) |
| Seeress | Eldritch Wards: Shield charges give invulnerability when taking damage. (Charge Cooldown 35s, Invulnerability Duration 1s) Malicious Wisdom: Experience Crystals can inflict damage on nearby enemies. (Damage 5, Chance 25%) Fortune: You can see the future. (Bonus Skill or Reward Chance 25%) |
| Flame Sister | Blazing Soul: Ever-burning soul randomly bursts into nearby enemies dealing damage. (Damage 26, Heal 20 HP) Dasher: A bonus ability to escape from any danger. (Dash Charge +1, Evasion +20%) Inferno: A fiery attack with the potential to inflict burn damage. (Burn Chance 15%) |
| Revenant | Haunting Wolf: Release a wolf spirit to hunt down enemies. (Damage 25, Cooldown 5s) Ethereal Arrows: Arrows have a chance to transform into a pass-through version. (Passthrough Chance 15%) Ghostwalk: You enter a protective ghost form when dashing (Damage Reduction 50%) |
Class Customization

Once you’ve decided on the character you’d like to role-play, you can personalize your hero in several ways. To start, you can pick from a range of weapons suitable for their class. For example, the Revenant has three distinct types of bows, each with its unique skill set and additional ability. The starting weapon is ideal for newcomers since the others require unlocking using gems.
After that, you can choose to personalize your character even more by selecting Skins. These are decorative items and won’t affect gameplay, but they do allow you to enter the battlefield with a unique style. If you have some extra funds, consider purchasing the Odin’s Legendary Armor Pack which includes themed skins for all four classes.
All Locations in Jotunnslayer Hordes of Hel
At first, players will encounter only two distinct realms within Jotunnslayer Hordes of Hel: Niflheim and Muspelheim. The chilling Niflheim is shrouded in eternal darkness, while the scorching Muspelheim is a barren wasteland of fire. However, additional worlds such as Jotunheim, Svartalfheim, and Helheim will be introduced through upcoming content updates, each offering unique creatures that are native to their respective environments.
Location Customization
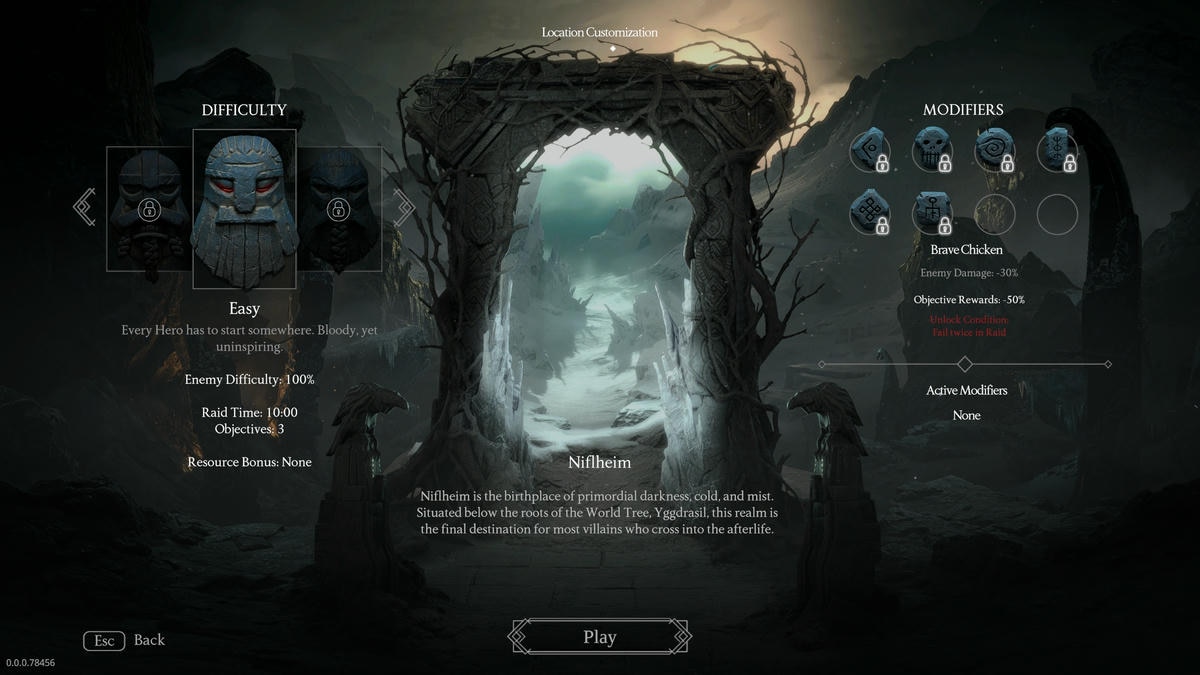
Prior to starting a game, you have the option to adjust the scene by selecting the Level of Challenge and Adjustments. Here are all the varying degrees of difficulty in Jotunnslayer Hordes of Hel, along with their respective characteristics:
This way, the text is more conversational and easier to understand for a wider audience.
| Difficulty | Enemy Difficulty | Raid Time (min) | Objectives | Resource Bonus |
|---|---|---|---|---|
| Easy | 100% | 10:00 | 3 | 0% |
| Normal | 150% | 15:00 | 4 | 35% |
| Hard | 200% | 17:00 | 5 | 70% |
| Insane | 250% | 20:00 | 6 | 120% |
To unlock the tougher levels, you need to successfully finish the easier one initially. Each realm provides certain Modifiers, each with their advantages and disadvantages. You’re free to select some that suit your preferred gameplay approach. Here are the Modifiers you can find in Niflheim:
This version maintains the original meaning but aims to make it more engaging and easier for readers to understand.
| Modifier | Attributes | Unlock Condition |
|---|---|---|
| Brave Chicken | Enemy Damage -30% Objective Rewards -50% | Fall twice in Raid |
| Evil Dead | Invulnerability Duration 5s Chance 5% Trigger: Death Resource Bonus +30% | Kill 150 Wraiths in Niflheim |
| Time Rush | Movement Speed +10% Cooldown -10% Attack Speed +10% Resource Bonus +30% | Complete Niflheim with Evil Dead activated |
| Greedy Masochist | Enemy Damage +30% Resource Bonus +30% | Complete Niflheim on Hard Difficulty |
| Bad Cards | One less Skill or Reward Resource Bonus +30% | – |
| Talentless Child | Experience Gained -25% Resource Bonus +30% | – |
Attack Preferences Setting in Jotunnslayer Hordes of Hel
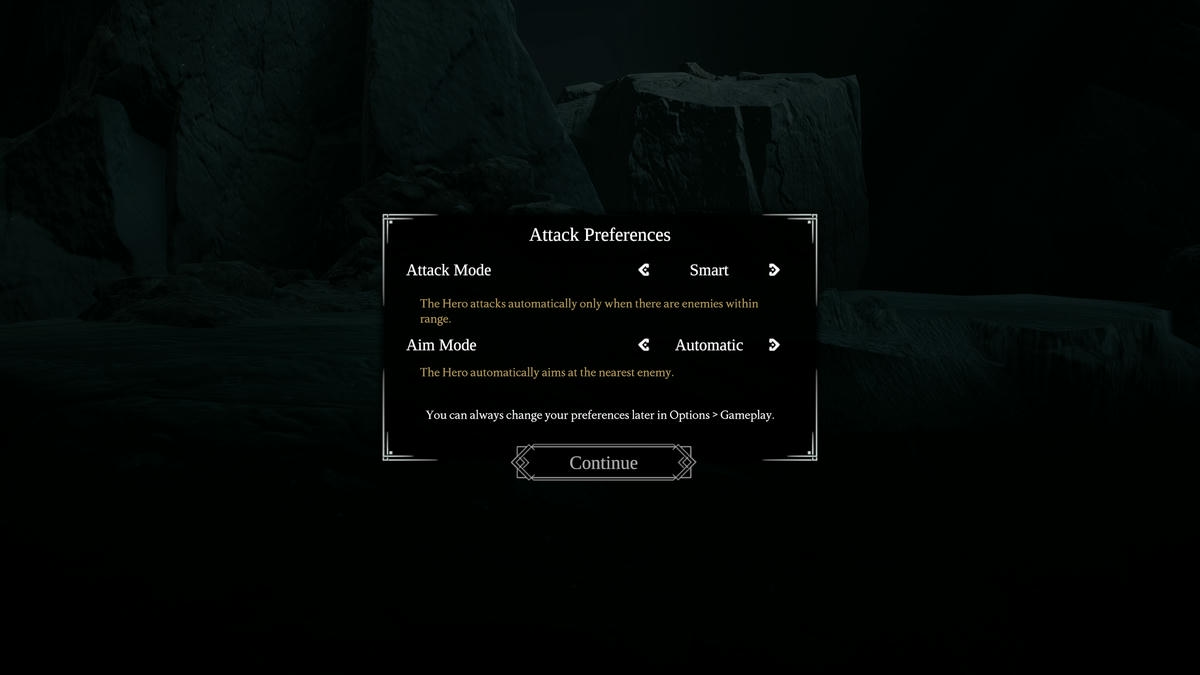
After deciding on your character and location, newcomers to Jotunnslayer Hordes of Hel should familiarize themselves with the Attack Preferences setting before jumping into gameplay. This option controls how the attacks in the game behave. Below is a breakdown of the available choices and their functions:
1. “Default”: This mode follows traditional RPG attack mechanics, where your character will automatically engage enemies within a certain range.
2. “Manual”: In this mode, you control each individual attack. You’ll need to manually target enemies and initiate attacks.
3. “Aggressive”: Characters in this mode will actively seek out enemies to attack without being explicitly targeted.
4. “Defensive”: This mode focuses on defense, reducing the frequency of attacks but increasing the character’s survivability.
5. “Balanced”: This option offers a middle ground between offense and defense, providing a more strategic gameplay experience.
- Attack Mode
- Smart: Attack automatically only when there are enemies within range.
- Automatic: Attack constantly even when the enemies aren’t around.
- Manual: Press the attack button manually each time to attack.
- Aim Mode
- Automatic: Automatically aim at the nearest enemy.
- Manual: You control the Hero’s aim using the mouse or the right stick on the gamepad.
I recommend that newcomers start with two default settings: Smart Assault Mode and Auto-Aim Mode to maintain ease of play. Primarily, you’ll need to concentrate on moving, dodging, and evading enemies. Once you’ve built up some skill, consider experimenting with Manual Attack Options for a more engaging experience catering to players seeking a challenge, who prefer having greater control over their character’s attack maneuvers.
Jotunnslayer Hordes of Hel Gameplay Explained
After being deployed, your objective in this challenging environment filled with adversaries is to endure, upgrade your character, and accomplish tasks. There’s ample opportunity to finish these tasks, particularly for newcomers playing on Easy or Normal modes. Initially, your character will possess the standard attack, characteristics specific to their class, and a basic weapon skill, all of which we’ve discussed before.
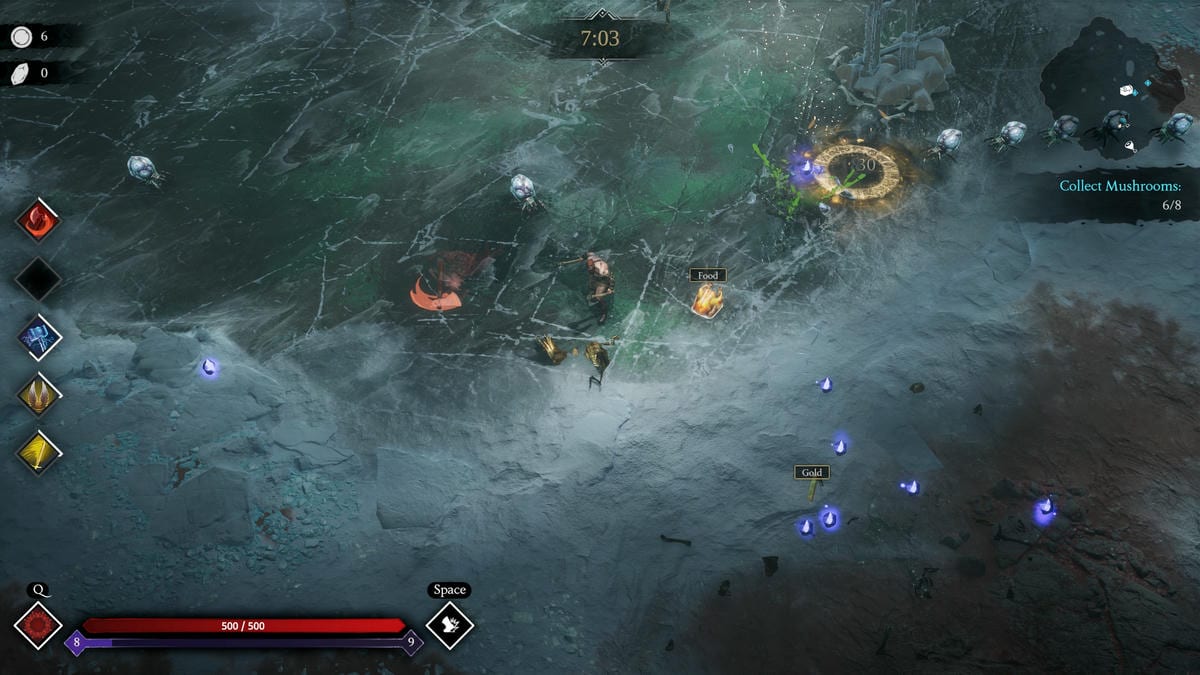
Keep a good amount of space between you and the ever-growing, formidable groups of foes during the raid. These fallen enemies will drop valuable Crystals that you must approach to gather. Gathering these Crystals will aid in increasing your hero’s level, granting new powers and combat skills.
Pay close attention to the Health Meter located at the bottom left and be prepared to retreat when your life is in danger. If necessary, wait for your health to regenerate naturally or quickly restore it by consuming items dropped by enemies that resemble a meat symbol on the minimap situated at the top right corner.
Make certain to gather Gold by slaying golden foes, defeating bosses, and fulfilling objectives. This currency can be employed to buy fresh weapons for your characters from the main menu. Continuously advance your class, repel enemy assaults, and accomplish tasks within the specified time until you reach the final boss battle. Slaying the Jotunn will conclude the raid, granting access to the main prize.
Objectives
In the realm of Niflheim, the goals provided for Easy and Normal difficulty raids were quite clear-cut. Here’s a breakdown of some objectives within Jotunnslayer Hordes of Hel and their functioning:
1. Defeat X number of enemies: This objective requires you to eliminate a specific number of opponents within a given timeframe or during a particular battle phase.
2. Protect the Valkyrie: In this objective, you’ll need to safeguard a Valkyrie from enemy attacks for a specified duration or until she reaches her destination.
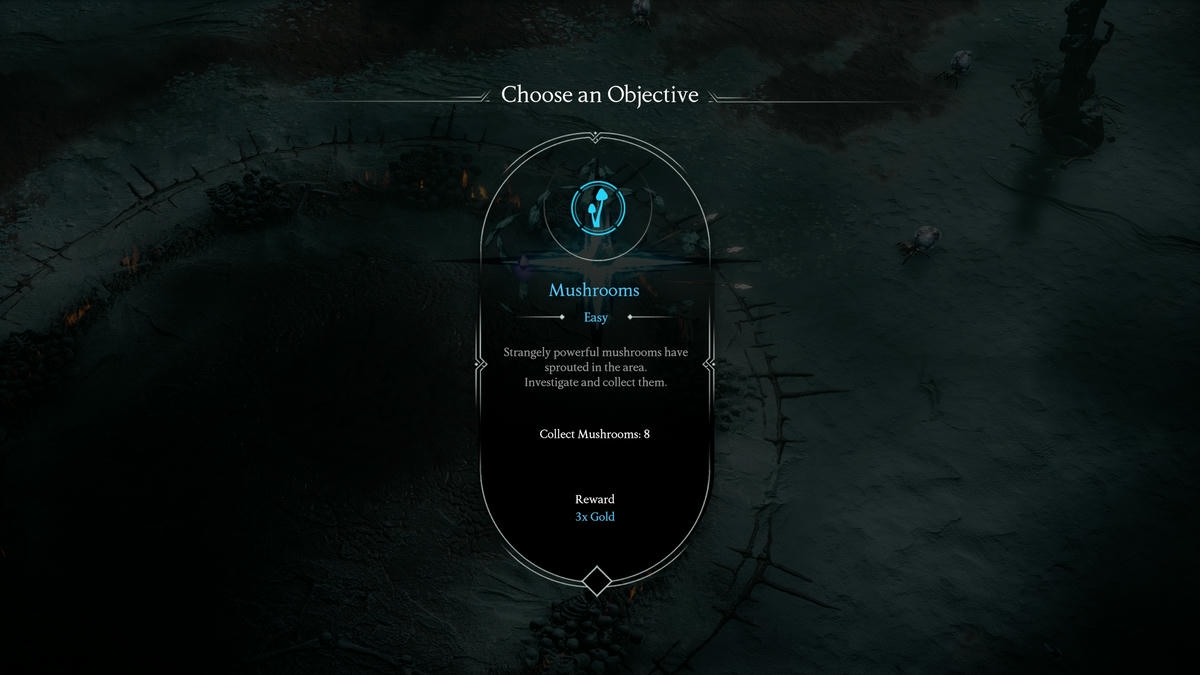
3. Collect X items: This task involves gathering a certain number of specific items scattered throughout the battlefield within a given timeframe or when certain conditions are met.
4. Destroy Y objectives: In this objective, you’ll need to demolish a specific number of targets or structures within the battlefield, often as part of a larger strategy or during specific phases of the raid.
5. Survive X waves/phases: This goal requires you to endure multiple enemy attacks or waves over a given period, ensuring that your team remains alive and intact until the objective is complete.
- Mushrooms: You have to collect eight fungi scattered across the map for this objective. Each mushroom is marked on the minimap and you stand atop each one for a second to collect them.
- Graves of Chieftains: Summon the giant Chieftains by standing over their graves and defeat them to unlock rewards. These bosses are easy to kill, just make sure to keep some distance and dash to dodge their attacks.
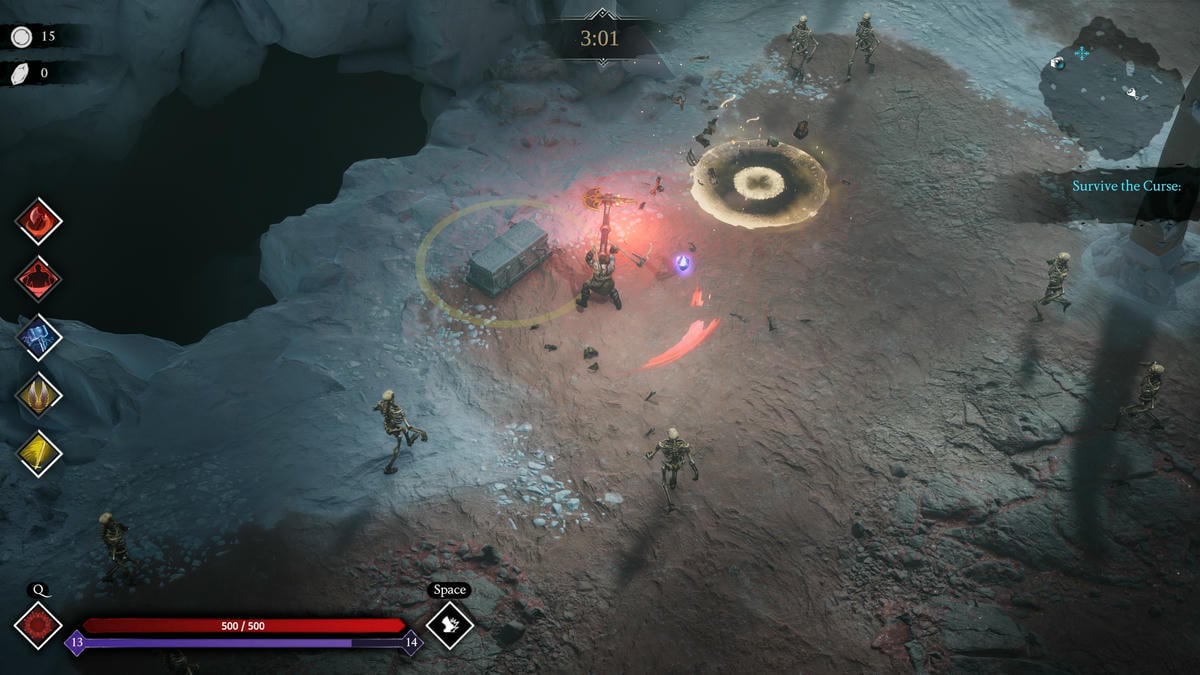
- Survive the Curse: The frozen world of Niflheim will see a one-minute blizzard in which your movement speed slows down but the enemies become agitated and attack in numbers. Make it through the curse period to complete the objective.
Achieving each of the tasks at the Easy level (and four more at Normal) will signify the gateway that leads to the climactic battle against the primary antagonist, often referred to as Summoning the Jotunn.
Level Up – Choose Skill Type
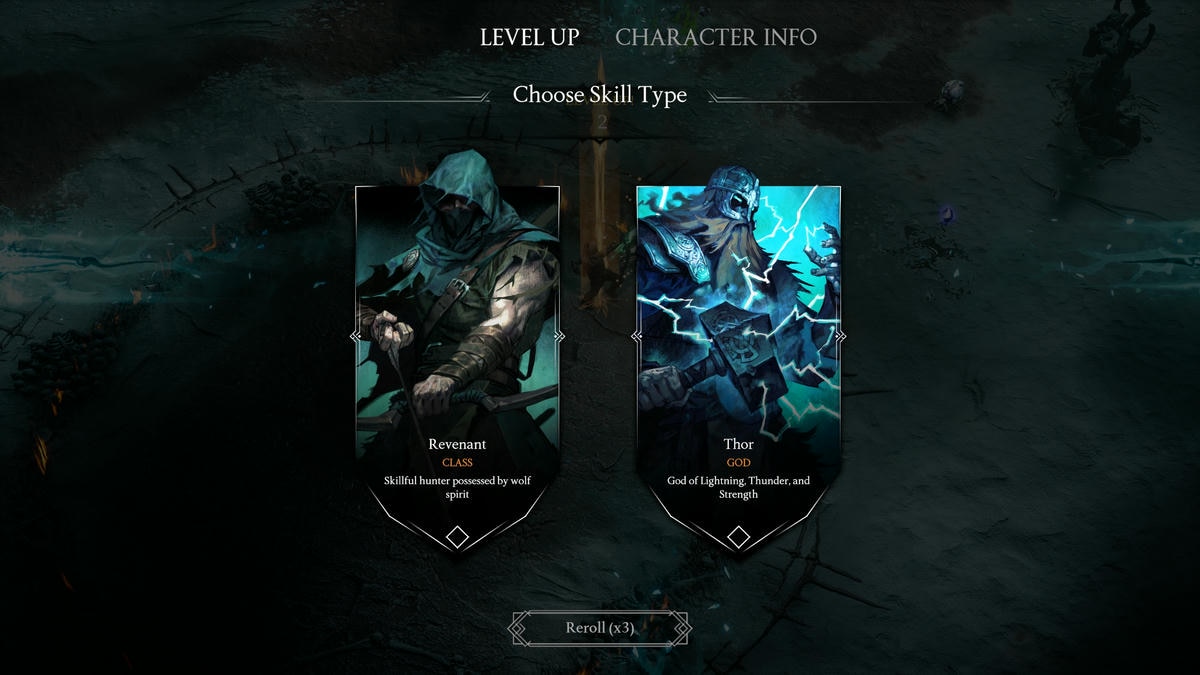
As you advance in your gameplay, a window will appear prompting you to select your Skill Category. You can either choose according to your character class, which will correspond to the hero you’re currently using in the match, such as Revenant, or opt for one of four Gods: Thor, Loki, Freya, or Odin.
Each time you level up while playing and gathering crystals, a new menu will appear. Don’t stress about missing particular power-ups because you’ll have numerous opportunities to obtain them during the raid. Initially, I recommend choosing a God Skill Type first, as these abilities can empower your attack moves significantly. Later on, you can unlock the Class Skill Type to enhance your hero’s fundamental skills.
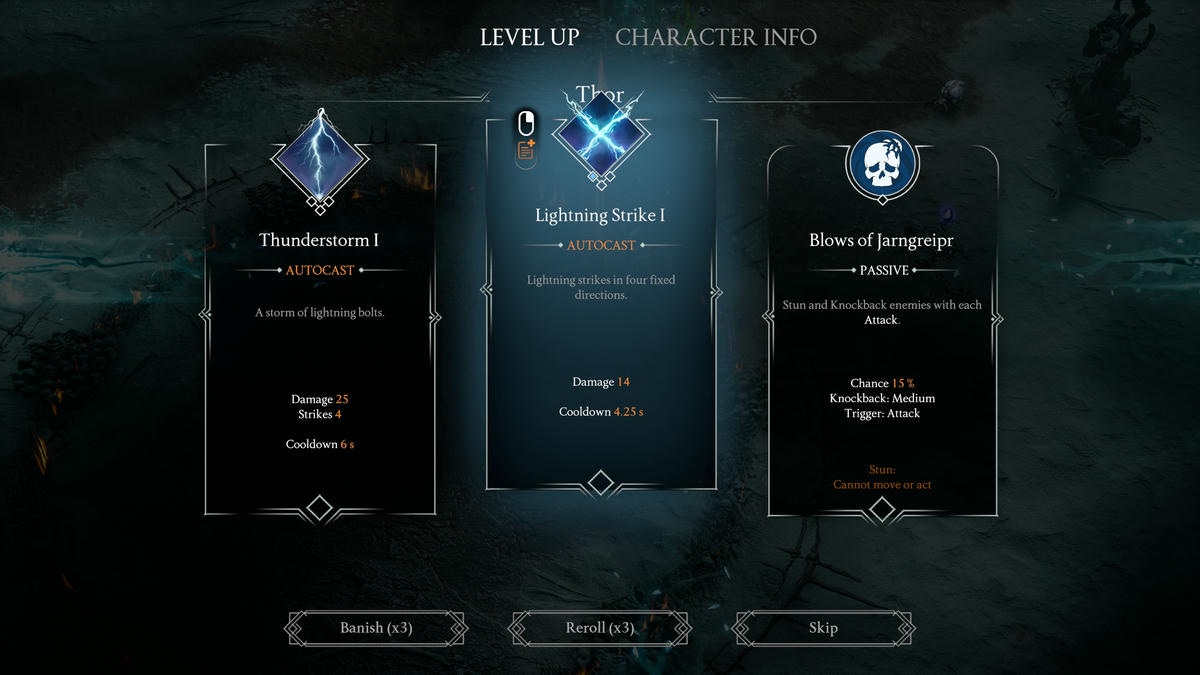
As a gamer, leveling up my skill type grants me access to up to three divine Autocasts and two class-specific Autocasts. These autocasts work in tandem with my hero’s basic moves, serving as powerful additional attacks. I can also obtain up to six passive abilities that provide ongoing buffs to my character. Both the Autocasts and Passives can be improved by leveling them up for increased effectiveness. If I’m not satisfied with the Skill Type I’ve been assigned, I can use the Reroll option to try again, or the Banish option to remove them temporarily during that round.
Level Up – Choose a Subclass
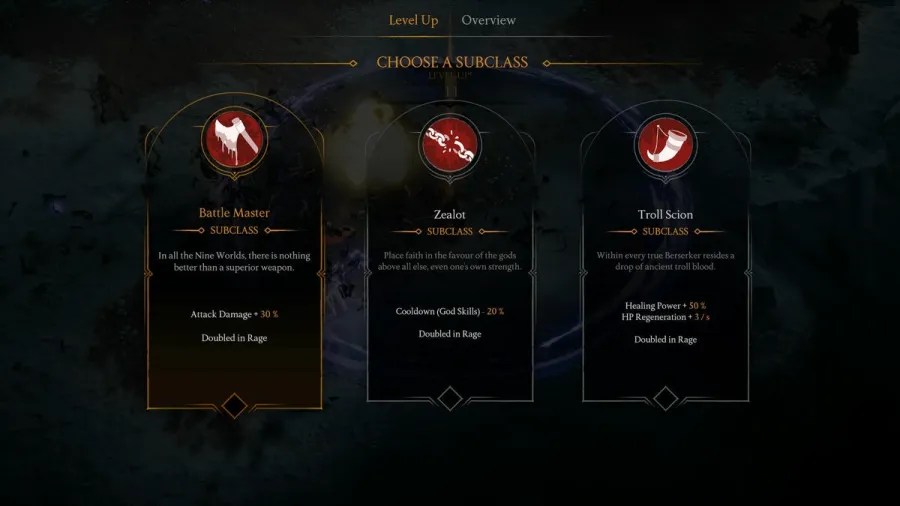
As your character progresses through their leveling process, you’ll encounter an opportunity to select a Subclass. This choice is crucial, considering it can bestow upon you a potent advantage that regular passives don’t offer. For example, I opted for the Zealot subclass while playing as Berserker in my gameplay because I had amassed many God Skills, and this Subclass noticeably reduced the cooldown on those abilities.
Treasure Chest
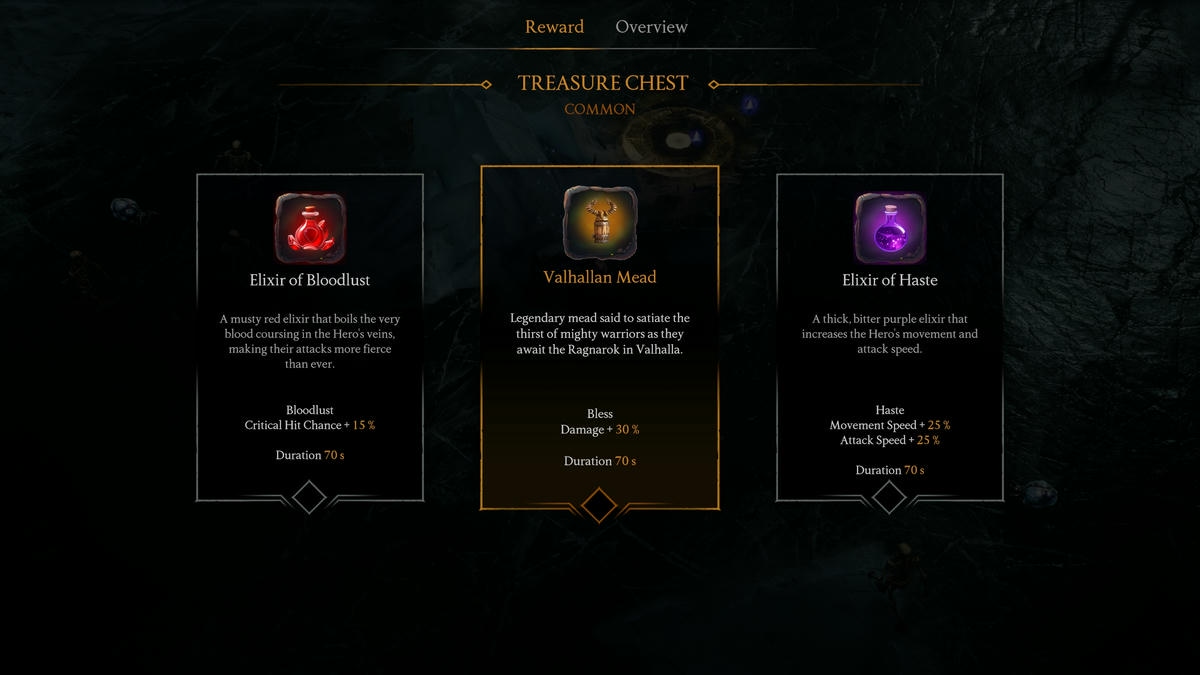
Occasionally, Treasure Chests will show up on your mini-map as well. Be sure to spot and open them whenever you can. These chests contain temporary but potent abilities that can be incredibly helpful when battling swarms or bosses (take a look at the image provided above). Here are some frequent rewards found in Treasure Chests within Jotunnslayer Hordes of Hel:
- Elixir of Bloodlust: Critical Hit Chance +15%, Duration 70s
- Valhallan Mead: Bless Damage +30%, Duration 70s
- Elixir of Haste: Movement Speed +25%, Attack Speed +25%, Duration 70s
- Urd’s Dice: +3 Rerolls
- Magnet: Draw XP Crystals from further away
- Charm of Giants: Max HP +100
- Charm of Aesir: Damage God Skills +20%
- Charm of the Elves: Movement Speed +7%
The final three perks listed previously originate from Freya’s Divine Chest, meaning their influences are permanently bestowed upon your character and can be accumulated or combined.
Boss Fight
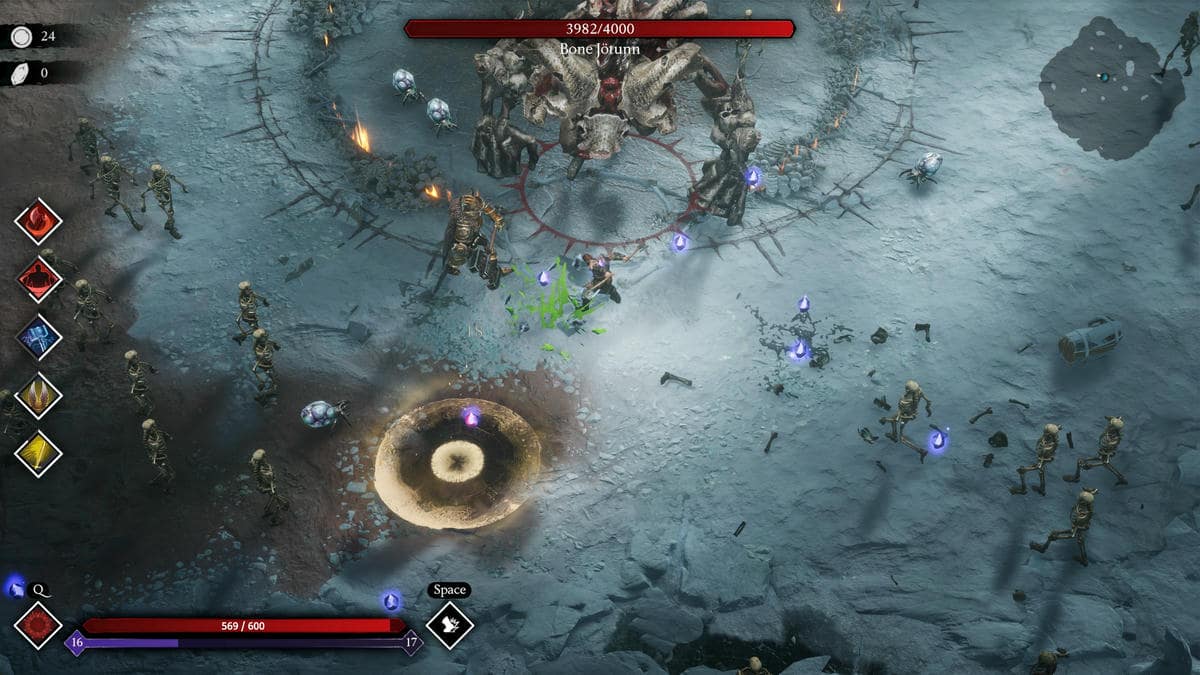
Previously noted, you’ll be able to engage in the final battle once you’ve accomplished all required tasks, tailored to your chosen level of challenge. To summon the Jotunn, simply position yourself at the designated spot on the ground. This location will be indicated on your minimap. Following a brief cutscene (which can fortunately be skipped), the monster will materialize.
In your selected game, the health and attack power of the boss will depend on the level of challenge you’ve chosen. Don’t fret if you’re a beginner; the monster isn’t overly formidable in Easy or Normal settings. Approach with caution though, as it may unleash a powerful smash and a flurry of rocket attacks. The dangerous zone will be marked in red, so make sure to stay clear to minimize damage. Remember you can use the dashing move to dodge. Engage the boss tactically to ensure your survival throughout the battle, and once victorious, you’ll reap the rewards.
Jotunnslayer Hordes of Hel Skill Tree
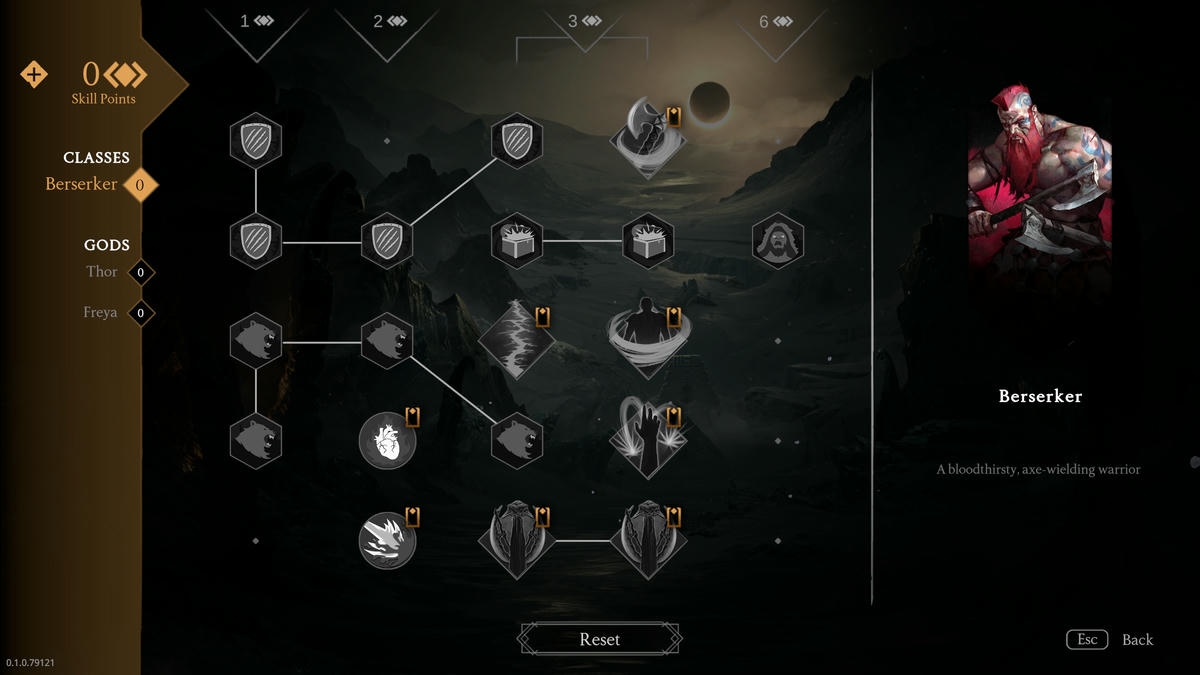
In the game Jotunnslayer Hordes of Hel, what was originally referred to as Virtues has now been transformed into a Skill Tree. While the method of unlocking ability boosts may not be as straightforward, this transformation mirrors the conventional skill tree system found in many other games. Each Class and God in the game has its own unique skill tree. For newcomers, it’s recommended to begin by enhancing the Skill Tree for your preferred divine power, meaning the God whose weapons you find yourself frequently using. As you progress, you can simultaneously level up and acquire skills for your favorite Class to create a robust build suitable for higher difficulty raids in Jotunnslayer.
If you’ve played Vampire Survivors before, don’t miss the chance to learn how to defeat Slogra and Gaibon in the Vampire Survivors tribute game, Ode to Castlevania, over at GamerTop!
Read More
- INJ PREDICTION. INJ cryptocurrency
- SPELL PREDICTION. SPELL cryptocurrency
- How To Travel Between Maps In Kingdom Come: Deliverance 2
- LDO PREDICTION. LDO cryptocurrency
- The Hilarious Truth Behind FIFA’s ‘Fake’ Pack Luck: Zwe’s Epic Journey
- How to Craft Reforged Radzig Kobyla’s Sword in Kingdom Come: Deliverance 2
- How to find the Medicine Book and cure Thomas in Kingdom Come: Deliverance 2
- Destiny 2: Countdown to Episode Heresy’s End & Community Reactions
- Deep Rock Galactic: Painful Missions That Will Test Your Skills
- When will Sonic the Hedgehog 3 be on Paramount Plus?
2025-01-21 23:21