
In Battlefield 6, the Assault class is essential for leading your team to victory. While Recon, Support, and Engineer all play important roles – spotting enemies, reviving teammates, and taking out vehicles – it’s the Assault player who takes the initiative and secures the win.
Since the very beginning of Battlefield, with the original Battlefield 1942 and its American assault troops armed with BARs, this class has always been about breaking through enemy lines. Their job is to create an opening so the team can advance and secure the area.
When the Assault class was first created, players didn’t need to customize their gear because the game didn’t offer much customization at all. But in Battlefield 6, players will have to actively build and choose their Assault class loadout.
Role Expectations

Before you get ready to play, it’s important to understand your role. Let’s begin by discussing what’s expected of an offensive player.
The Assault class is designed to capture and control territory, making it best suited for players who like to be aggressive. While it encourages a direct, action-packed style of play, it’s still important to stay aware of your surroundings and avoid unnecessary risks.
Assault players have special tools that let them really control how their team approaches and captures objectives. They can set up ladders for easier access, or even blast new openings through walls to create pathways.
Since you’re often among the first to reach objectives, or the last to leave, you’re frequently a key respawn point for your team. Remember, your teammates can’t rejoin the fight if you’re constantly getting injured, so think carefully before taking risky chances.
Best Assault Class Loadouts In Battlefield 6
Different maps require different weapon setups – what’s effective in one area, like Manhattan, won’t be in another, such as Liberation Peak. Assuming you’re using either an assault rifle or carbine as your main weapon (since dedicated weapon servers exist), these loadouts will help you succeed.
These weapons aren’t required, but they offer a great balance of range, speed, and power, making them effective in both close-up fights and over long distances.
These suggestions are a great place to begin, but remember that the best gear and how you play really depend on your own preferences. Feel free to adjust things as you experiment! Good luck out there.
The Assault class is unique because it’s the only one that can carry two main weapons. However, equipping two weapons cuts the ammo each weapon can hold in half, so consider how much you expect to shoot before making your choice.
The Well-Rounded Teamplayer
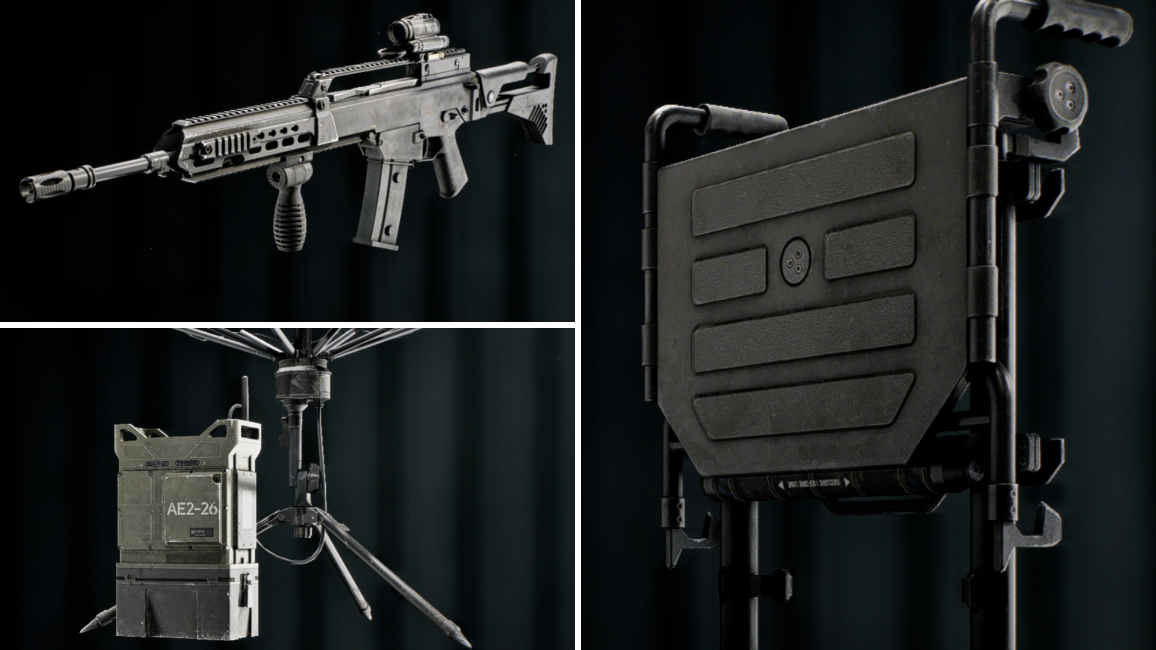
| Primary | AR or Carbine |
|---|---|
| Gadget 1 | Assault Ladder |
| Gadget 2 | Deploy Beacon |
| Throwable | Frag Grenade |
| Melee | Sledgehammer |
This Assault Class setup is simple and reliable – it just works! The rifle provides plenty of power against enemy soldiers, and you can easily customize it for different maps with different sights if you need to shoot targets from a distance.
To succeed, focus on teamwork. When approaching buildings, pause just outside, place your respawn point in a safe, hidden location, and use ladders to prop open doors, allowing your team to enter, secure strong positions, and hold them.
This version doesn’t have long-range explosives, but you can break through walls and floors with the sledgehammer if you need to force your way in. Use the frag grenade to clear out any enemies inside.
Near, Far, Wherever You Are
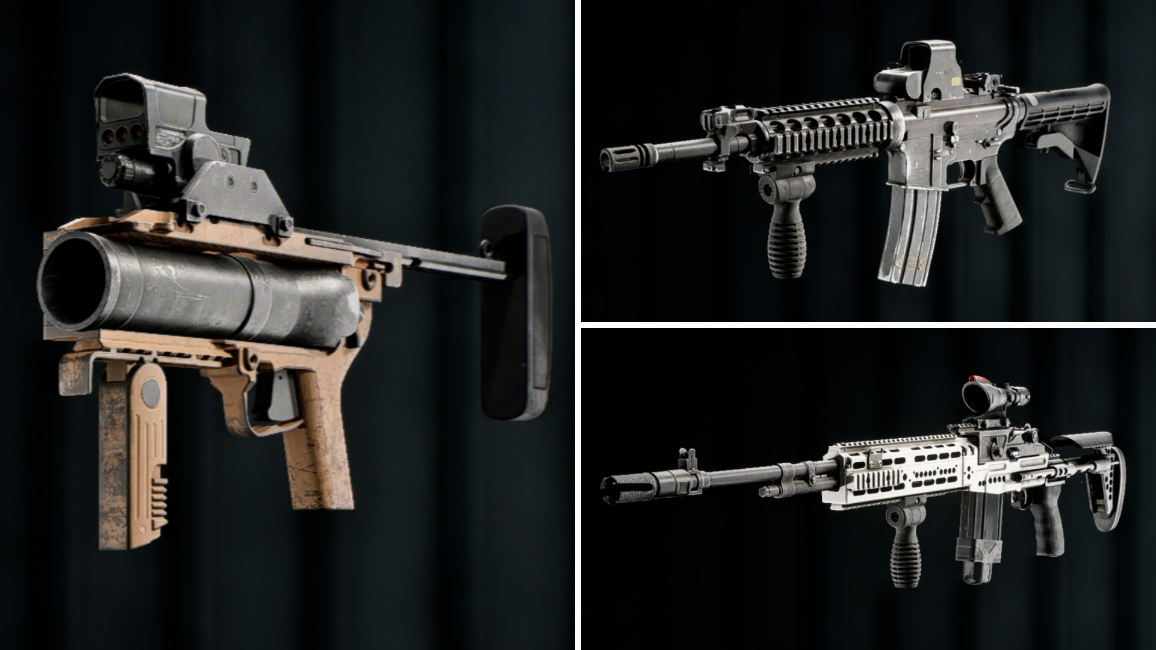
| Primary | AR or Carbine |
|---|---|
| Secondary | DMR |
| Gadget | M320A1 HE |
| Throwable | Stun Grenade |
| Melee | Knife |
Even on bigger maps like Operation Firestorm, you’ll occasionally encounter close-quarters combat, but you’ll likely be taken out by snipers – often many of them – before you even reach a building. Having your own snipers provide support is helpful, but it’s also important to be able to handle threats on your own.
This kit focuses on versatility with a rapid-fire rifle for close combat and a designated marksman rifle for longer distances. Instead of throwing grenades, the M320A1 launcher provides accurate fire from a safe range. You can even attach it directly under your main weapon for quick access, depending on your preferred rifle.
The strategy is straightforward: use a DMR to move between safe spots, then switch to an assault rifle for close-quarters combat. If you want to carry more ammo for your main weapon, you can use a gadget instead and stick with a long-range rifle and scope. Weapons like the AK4D, M417 A2, or M39 EMR work well for this approach.
Breacher Up
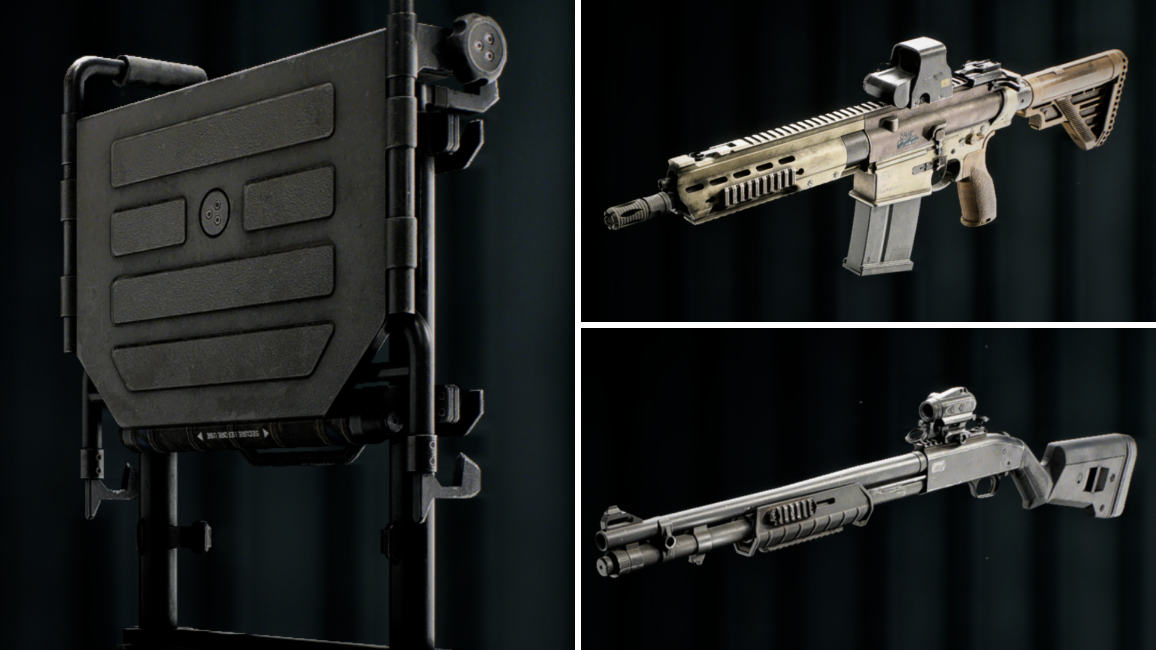
| Primary | AR or Carbine |
|---|---|
| Secondary | Shotgun |
| Gadget | Assault Ladder |
| Throwable | Frag Grenade |
| Melee | Sledgehammer |
Although every class can be effective, the Assault class really excels on smaller maps. Its unique gadgets, combined with the adrenaline boost, make you a powerful force in close-range combat – as long as you know how to use your equipment.
While Assault operators have useful gadgets, their most effective weapon for close-quarters combat is the classic 12-gauge shotgun. Few things resolve a tense situation faster than a blast of buckshot. However, shotguns aren’t effective at longer ranges, so it’s important to also carry a rifle to engage enemies beyond 20 meters with sustained automatic fire.
Okay, so I’ve been running the Assault Ladder with my 12-gauge, and it’s a killer combo. The 12-gauge really shines when you’re right on top of enemies, and the Ladder is perfect for getting past those dangerous killzones and into close combat. Plus, the Sledgehammer is amazing for breaking through walls and making new entry points, or even just creating a quick firing position with some cover. It really opens up the map for aggressive plays.
Hell in a Small Place
| Primary | Shotgun |
|---|---|
| Gadget 1 | M320A1 Thermobaric |
| Gadget 2 | Breaching Projectile Launcher |
| Throwable | Stun Grenade |
| Melee | Knife |
Have you ever seen the movie Falling Down with Michael Douglas? It’s about an ordinary person who completely loses it after a series of small frustrations build up. Depending on how a Battlefield 6 match is going, I sometimes really feel like that guy!
It’s easy to get overwhelmed when dealing with tough opponents or unsupportive colleagues. The usual advice is to take a break, go outside, and relax… but sometimes you just don’t *want* to.
This setup is perfect for aggressively taking on opponents when you’re in a competitive mood. It works best on smaller maps, but it’s really fun to use in any situation.
Okay, so I’ve been running the shotgun as my main weapon, and honestly, the extra ammo makes a huge difference. It actually feels good to use! The key is to play super aggressively. Instead of trying to snipe with a rifle from far away, I’ve been spamming grenades to mess up the enemy’s positioning. That creates openings for me to rush in and get up close – that’s where the shotgun really shines. It’s all about getting into that close-quarters combat!
This kit performs best when used with the M1014 shotgun, letting you fire more quickly. You can also use slug rounds for better accuracy at longer distances.
Read More
- United Airlines can now kick passengers off flights and ban them for not using headphones
- Crimson Desert: Disconnected Truth Puzzle Guide
- All 9 Coalition Heroes In Invincible Season 4 & Their Powers
- Mewgenics vinyl limited editions now available to pre-order
- Grey’s Anatomy Season 23 Confirmed for 2026-2027 Broadcast Season
- Viral Letterboxd keychain lets cinephiles show off their favorite movies on the go
- The Boys Season 5 Spoilers: Every Major Character Death If the Show Follows the Comics
- Assassin’s Creed Shadows will get upgraded PSSR support on PS5 Pro with Title Update 1.1.9 launching April 7
- Does Mark survive Invincible vs Conquest 2? Comics reveal fate after S4E5
- How to Get to the Undercoast in Esoteric Ebb
2025-10-17 20:41