The latest update to Infinity Nikki, called Terra’s Call (2.0), introduces Itzaland, giving stylists a brand new area to discover and lots of fresh outfits to collect. Plus, a new chapter has been added to Nikki’s Expedition Handbook, letting you document your adventures with unique photos.
Want to complete your Expedition Handbook? You’ll need to discover all the best places to take photos. Here’s a complete guide to all the locations in Itzaland, along with a quick explanation of how the Handbook works.
How to Complete Your Expedition Handbook in Infinity Nikki
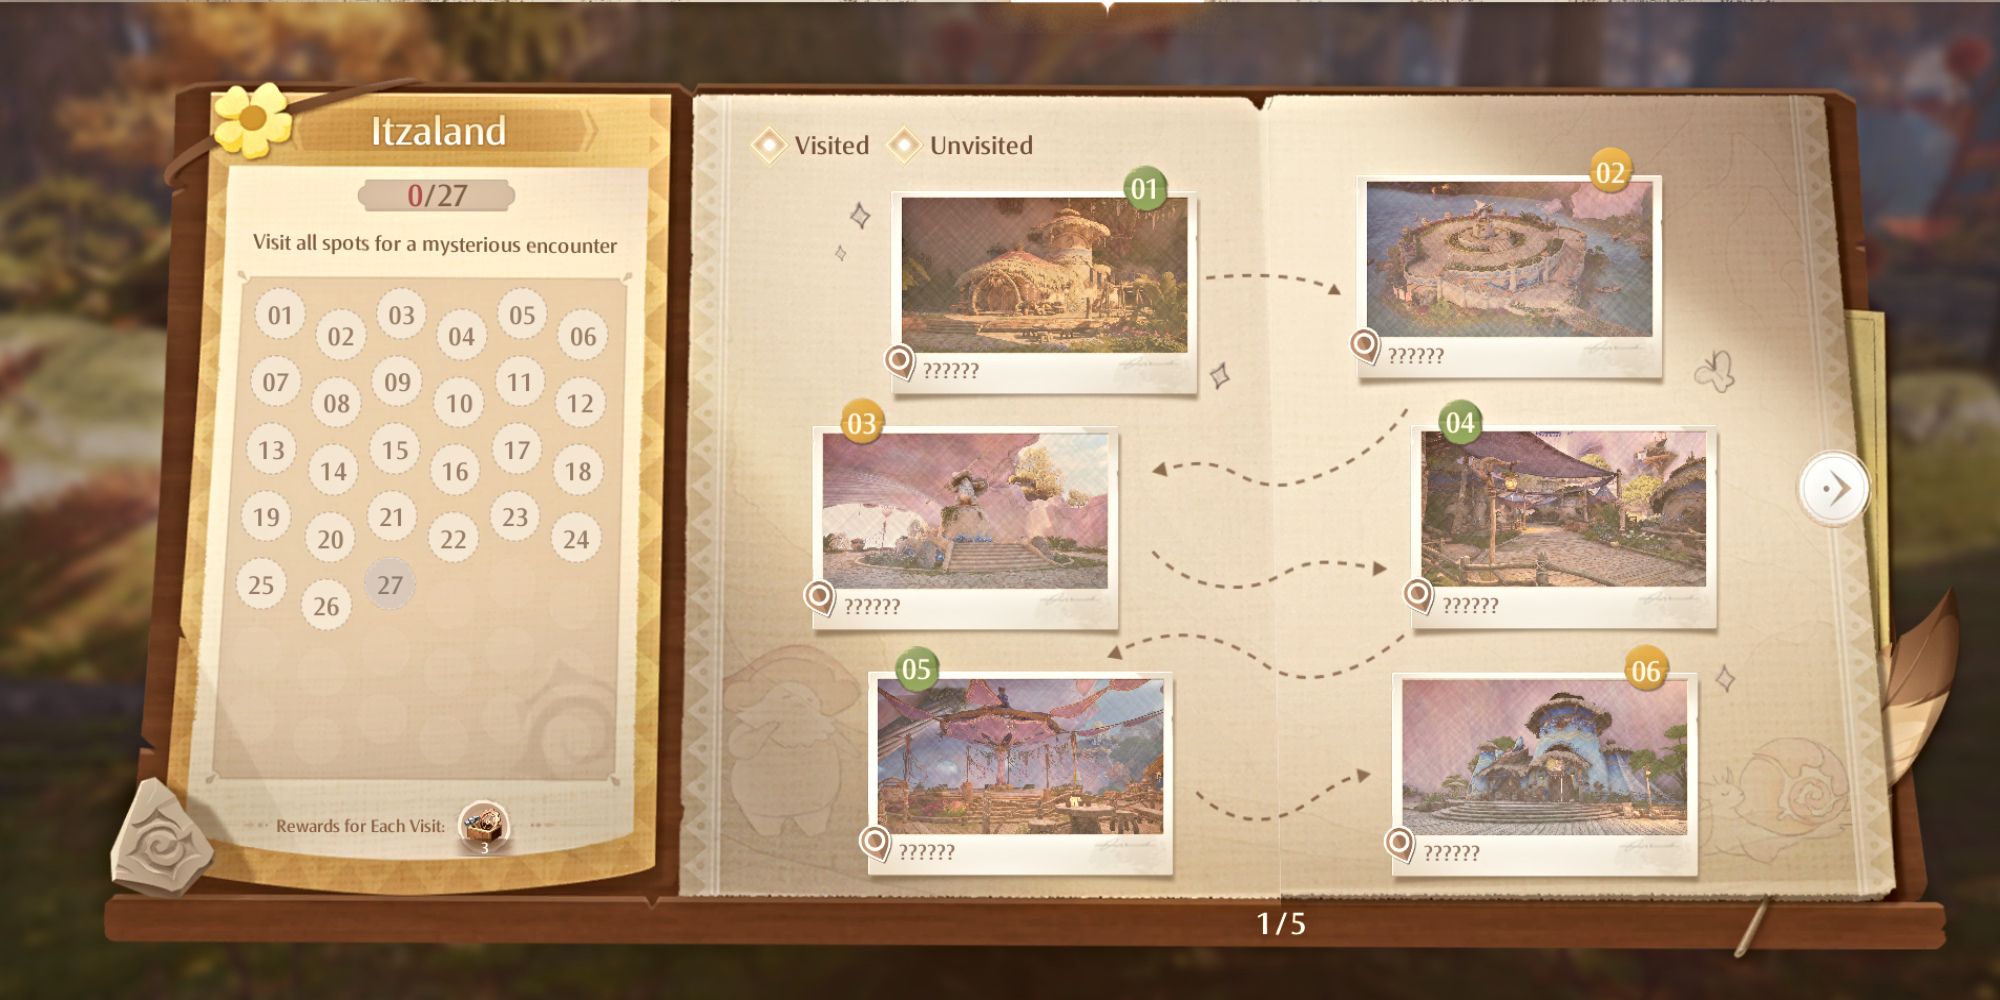
The Itzaland Expedition Handbook works much like the one in Wishfield. Your goal is to locate all the numbered locations using the visual clues given for each entry. You can always view the handbook and track your discoveries through the Photo Mode menu.
Whenever you photograph an Expedition Handbook location, be sure to tap the Upload button in the upper-right corner of your screen right away. This saves your photo to your handbook – if you don’t upload it before leaving, you’ll have to take the picture again.
Finishing these tasks gives you items to enhance Photo Mode, like new poses, lighting options, and filters.
All Itzaland Expedition Handbook Spots in Infinity Nikki (Locations)
The Itzaland chapter of Nikki’s expedition handbook currently features 26 locations, which are fairly well-distributed between the Elderwood Forest and the nearby city of Spira. While spaces 27 and beyond aren’t yet accessible after the Terra’s Call (2.0) update, more locations are expected to be added in a future update.
Expedition Stamp 1 – Home of the Saintess (Spira)
Okay, so if you want to snag this photo, head to the Home of the Saintess on the first floor in Spira – it’s on the right side if you’re looking at the map. The easiest way to get there is to warp to the 1F Transfer Station, then use your Sticky Claw to ride along the assembly line. Just follow it all the way across, and then drop down to the house below. The perfect spot for the photo is right outside the front door!
Expedition Stamp 2 – Hero’s Square (Spira)
To get this shot, quickly warp to the Hero’s Square warp spire. When you arrive, take a few steps back from the center of the plaza to widen your view. Then, open Photo Mode and tilt the camera upwards until the game’s prompt message appears on screen.
Expedition Stamp 3 – Shroomling Hero Statue (Spira)
You’ll find this spot just upstairs from where you were. Stand in front of the Shroomling Hero statue in the middle of the plaza, and tilt the camera upwards so the statue is visible in the picture.
Expedition Stamp 4 – Shroomling Market (Spira)
To get this photo, go to the Shroomling Market, which is located on the southeast side of Spira. A quick way to reach it is by teleporting to the Grace Dining Hall warp point—it’s actually near another location for expeditions—and then heading east, using a combination of running and floating, until you reach the market’s main level.
Expedition Stamp 5 – Roucoco Stage (Spira)
You’ll find this photo spot above the Shroomling Market, where the Shroomlings are dancing. It might be simpler to capture this picture before heading down to the other one. Just stand in front of the stage and the game will give you the photo prompt.
Expedition Stamp 6 – Grace Dining Hall (Spira)
To capture this photo, quickly travel to Grace Dining Hall using the warp point located south of the building. Stand a little ways from the entrance and adjust your camera angle until the game tells you you’ve found the right spot.
Expedition Stamp 7 – Dreamy Puff Boutique (Spira)
This location is easily reached from Grace Dining Hall. Walk west over the bridge, and you’ll see the shop directly in front of you. Stand near the entrance and raise your camera to capture the whole shop until you get a notification.
Expedition Stamp 8 – Dreamy Puff Stage (Spira)
This location is just a short walk from where you were before. Head north, past the shop, and you’ll find the stage nestled in a corner. It’s decorated with lots of plants and little Shroomlings that appear to be dancing. To get the whole stage in your picture, stand a few steps back.
Expedition Stamp 9 – Shiny Vault (Spira)
To get here, warp to the 1F Transfer Station and go around the main pillar to find the tall elevator. Take the elevator up to the next level, then turn right and follow the path upwards. Use Sticky Claw to reach the platform in front of you. The Shiny Vault is just around the corner – that’s where you should take the picture!
Expedition Stamp 10 – Shroomling Bathhouse (Spira)
Return the way you came from the Shiny Vault, then head uphill to the right until you see a tall building with several staircases. You’ll visit this location as part of the ‘Soft Prayers in the Wind’ quest (Chapter 3), so you can take the photo then if you prefer.
Expedition Stamp 11 – Spin Slide (Spira)
Okay, so you head up the stairs at the bathhouse, and then on the next level, you’ll see the spin slide at the pool – it’s just a little to the right. The best spot for a picture is definitely on the wooden walkway right in front of it! I always get a great shot there.
Expedition Stamp 12 – Shroomling Activity Center (Spira)
From the spin slide, turn right and take the elevator to the next floor. Then, walk straight ahead along the path and you’ll see the building. Pose a short distance from the stairs leading to the entrance.
Expedition Stamp 13 – Shroomling Wall Doodle (Spira)
Starting from the activity center, continue up the main path until you reach a large, painted mushroom sculpture at the hilltop. Stand near the paintings on the side of the sculpture to get the best view.
Expedition Stamp 14 – Sky Monarch Nest (Spira)
Okay, so for this photo, you gotta be pretty far into the game. You need to finish up all the main story stuff in Chapter 5 first, which unlocks the Sky Monarch bird and lets you fly up to the top of Spira. Once you’re up there at the Shelldome, the Sky Monarch’s nest is really close to where you land. Just head over to the nest and pose in front of it – that’s the spot for the picture!
Expedition Stamp 15 – Spearwatch Terrace (Spira)
Start at the Sky Monarch’s nest and follow the grassy path to the large spear. Once you reach it, stand on the grass nearby and move the camera around until you see the on-screen prompt.
Expedition Stamp 16 – Snail Clinic (Elderwood Forest)
Okay, so this screenshot starts the Elderwood Forest part of the game. The first thing you’ll want to do is head down to the Snail Clinic – thankfully, there’s a warp spire you can use to teleport right there! Once you arrive, just get into position and set up your pose right outside the clinic’s entrance.
Expedition Stamp 17 – Spira Waterfall (Elderwood Forest)
Okay, so I found this photo spot north of the Snail Clinic, right at the bottom of Spira Waterfall. You can’t miss the waterfall – it’s coming out of this huge pink shell on top of the cliff. There’s a little wooden pier there where you can stand to get the perfect shot. Just point your camera up, and the game will tell you when you’ve got it lined up!
Expedition Stamp 18 – Coliseum (Elderwood Forest)
To get this photo, travel west to the Coliseum. Instead of shooting inside the Coliseum, you’ll want to position yourself on the broken bridge just south of it. You can warp directly to the bridge using the Coliseum Broken Bridge warp spire, or use any nearby warp spire. Once you’re there, stand near the edge of the bridge and make sure the Coliseum’s main entrance is visible in the background of your shot.
Expedition Stamp 19 – Misty Forest (Elderwood Forest)
Head west, past the Coliseum, towards the Titan’s Graveyard. If you’ve already unlocked the warp spires there, use the one at the Graveyard to travel quickly. If not, follow the main path west until you see a large, pink tree shrouded in mist.
Expedition Stamp 20 – Shroomville (Elderwood Forest)
Okay, so this shot sends me straight to Shroomville, which is basically the central hangout spot for all the Shroomlings in Itzaland. If I’ve already unlocked the warp spire there, I can just teleport and this shot will drop me right at the entrance – super convenient!
Expedition Stamp 21 – Mothershroom Woods (Elderwood Forest)
Okay, so for this photo, you want to go east from Shroomville along the main path towards the pier overlooking the Mothershroom. Trust me, use your Gigantification power – it’s super helpful because otherwise you’ll just float away! Then, get your shot right at the edge of the pier. It’s a great spot!
Expedition Stamp 22 – Lumira’s Cabin (Elderwood Forest)
This photo spot is located at Lumira’s Cabin, on the southern edge of the Mothershroom Woods. If you’ve unlocked the warp spire, you can teleport there instantly. Otherwise, use your Gigantification ability to jump across the woods to the south side. Then, stand at the cabin’s entrance and tilt the camera upwards until you see the on-screen prompt.
Expedition Stamp 23 – Shell Island (Elderwood Forest)
To take this photo, walk west from Lumira’s Cabin along the same path until you see a small pier overlooking Shell Island. Walk out onto the pier, and then pose for the picture!
Expedition Stamp 24 – Shell Island Market (Elderwood Forest)
You can find this photo spot on Shell Island. The quickest way to get there is by using the warp spire run by the Itzaland Interim Stylist’s Guild, which is located near the island’s center. If that one’s busy, any of the other warp spires on Shell Island will also work. The spot is close to the market’s circular area, where you can also pick up the ‘Forced Perspective: Bottled City’ quest.
Expedition Stamp 25 – Crystal Beach (Elderwood Forest)
This photo was taken further south, on the beach close to the Behemoth Observation Site. You can easily walk straight to the beach without encountering any Behemoths, but if you’d prefer, the Sound of Leaves outfit will help you stay hidden. You won’t need to walk far onto the beach to trigger the prompt for the expedition photo.
Expedition Stamp 26 – Elderwood Wharf (Elderwood Forest)
You’ll find this photo spot in the southwestern corner of Elderwood Forest, by the water at Elderwood Wharf. If you’ve unlocked the warp spire there, you can teleport directly. Otherwise, use any warp spire in the northern Elderwood Shade to get closer. Once you arrive, position yourself near the beginning of the old pier with a view of the water.
Read More
- United Airlines can now kick passengers off flights and ban them for not using headphones
- Crimson Desert: Disconnected Truth Puzzle Guide
- All 9 Coalition Heroes In Invincible Season 4 & Their Powers
- The Boys Season 5 Spoilers: Every Major Character Death If the Show Follows the Comics
- Invincible Season 4 Episode 6 Release Date, Time, Where to Watch
- Mewgenics vinyl limited editions now available to pre-order
- Assassin’s Creed Shadows will get upgraded PSSR support on PS5 Pro with Title Update 1.1.9 launching April 7
- Grok’s ‘Ask’ feature no longer free as X moves it behind paywall
- Grey’s Anatomy Season 23 Confirmed for 2026-2027 Broadcast Season
- Crimson Desert Guide – How to Pay Fines, Bounties & Debt
2025-12-06 08:11