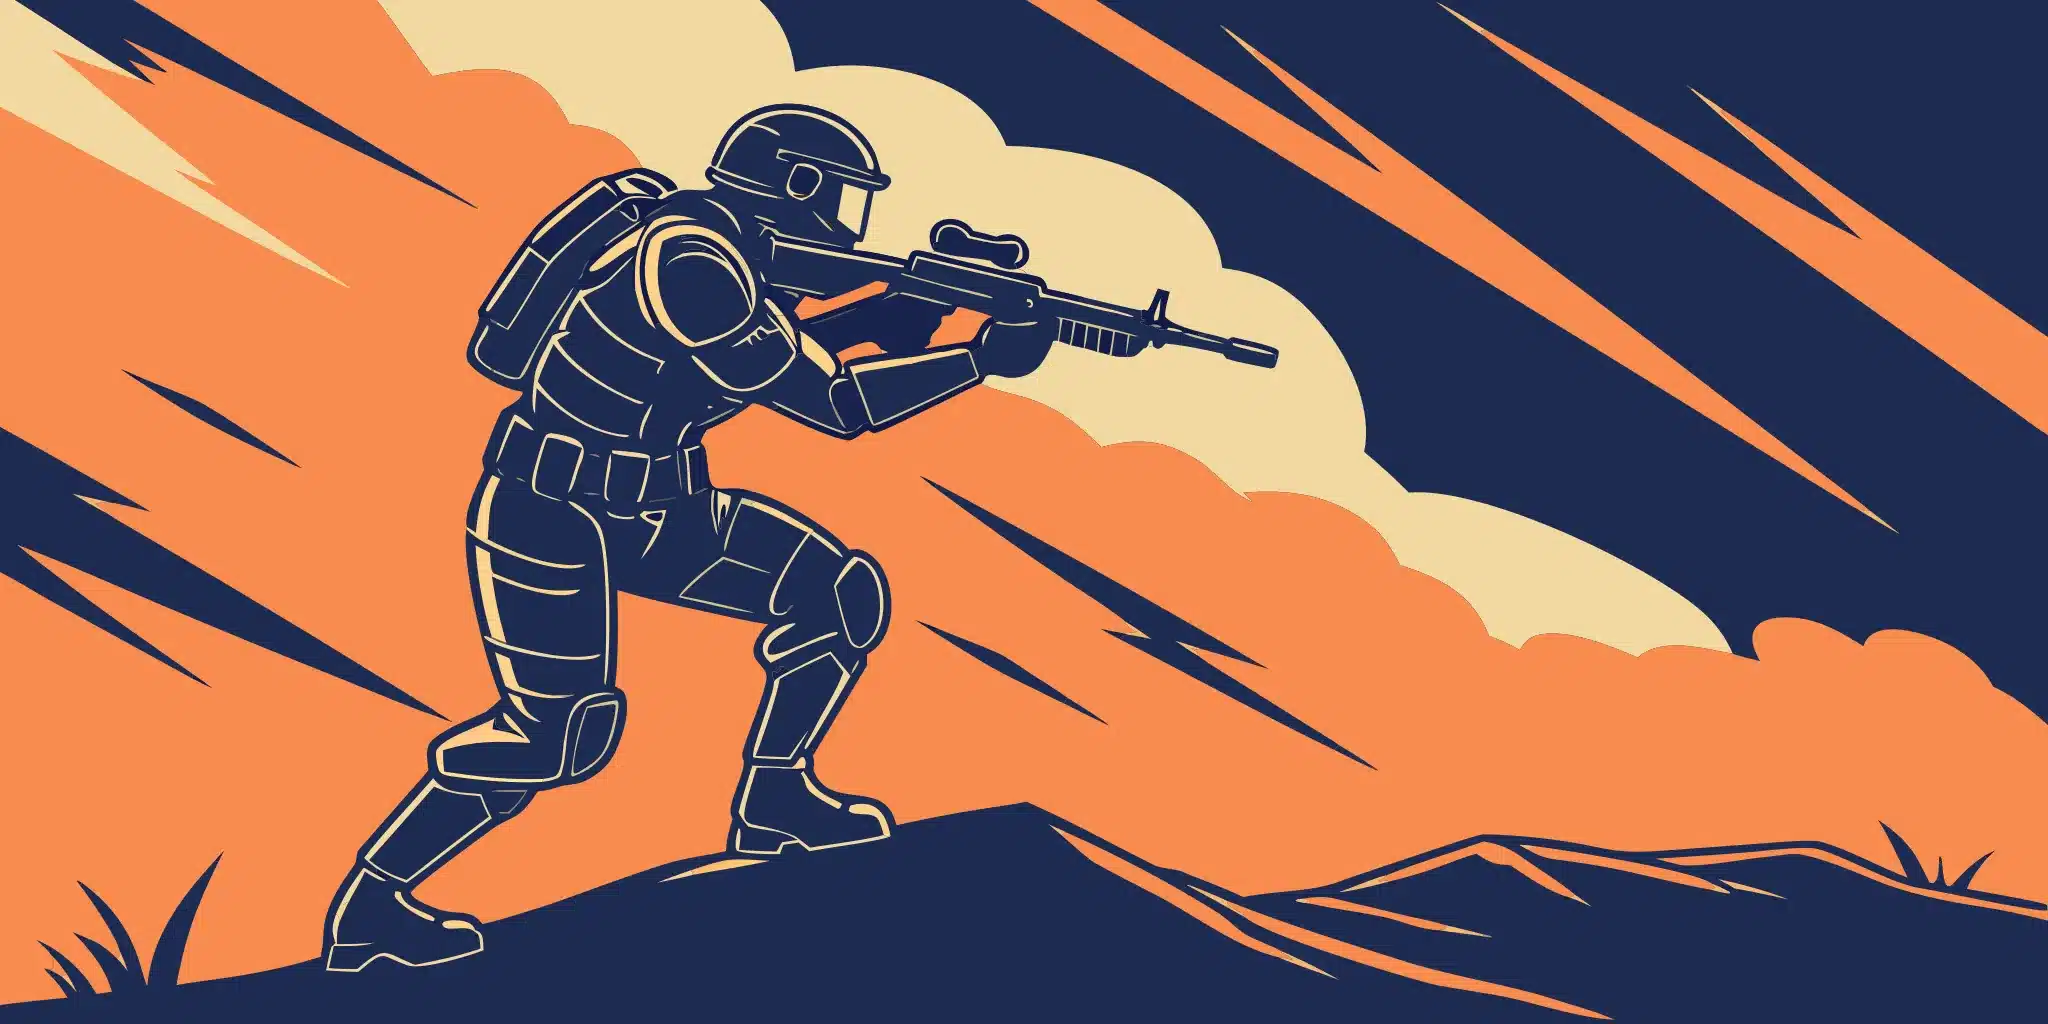
It’s a familiar feeling: you think you have the advantage in a fight, but still end up defeated. This can be incredibly frustrating, and often it’s not about your shooting skills. The real difference-maker is usually your equipment. The right attachments can dramatically improve a weapon’s performance, and the correct gadgets can help you turn the tables in a difficult situation. This guide will help you overcome those frustrating moments by providing essential loadouts to win more fights, defeat vehicles, and support your team, giving you everything you need to succeed.
Key Takeaways
- Think Squad-First, Not Kills-First: A truly effective loadout is built to serve a specific role. Coordinate with your team to ensure you have a mix of assault power, anti-vehicle support, and intel to counter any threat the enemy throws at you.
- One Loadout Can’t Win Every Fight: The key to consistent performance is adapting your gear to the situation. Be prepared to switch your weapons and gadgets based on the game mode, map, and the enemy’s strategy to maintain a tactical advantage.
- Master Attachments to Control Your Weapon: Instead of just copying a meta build, use attachments to solve problems. Focus on taming recoil, improving bullet velocity, and choosing the right optic to create a gun that feels stable and reliable in your hands.
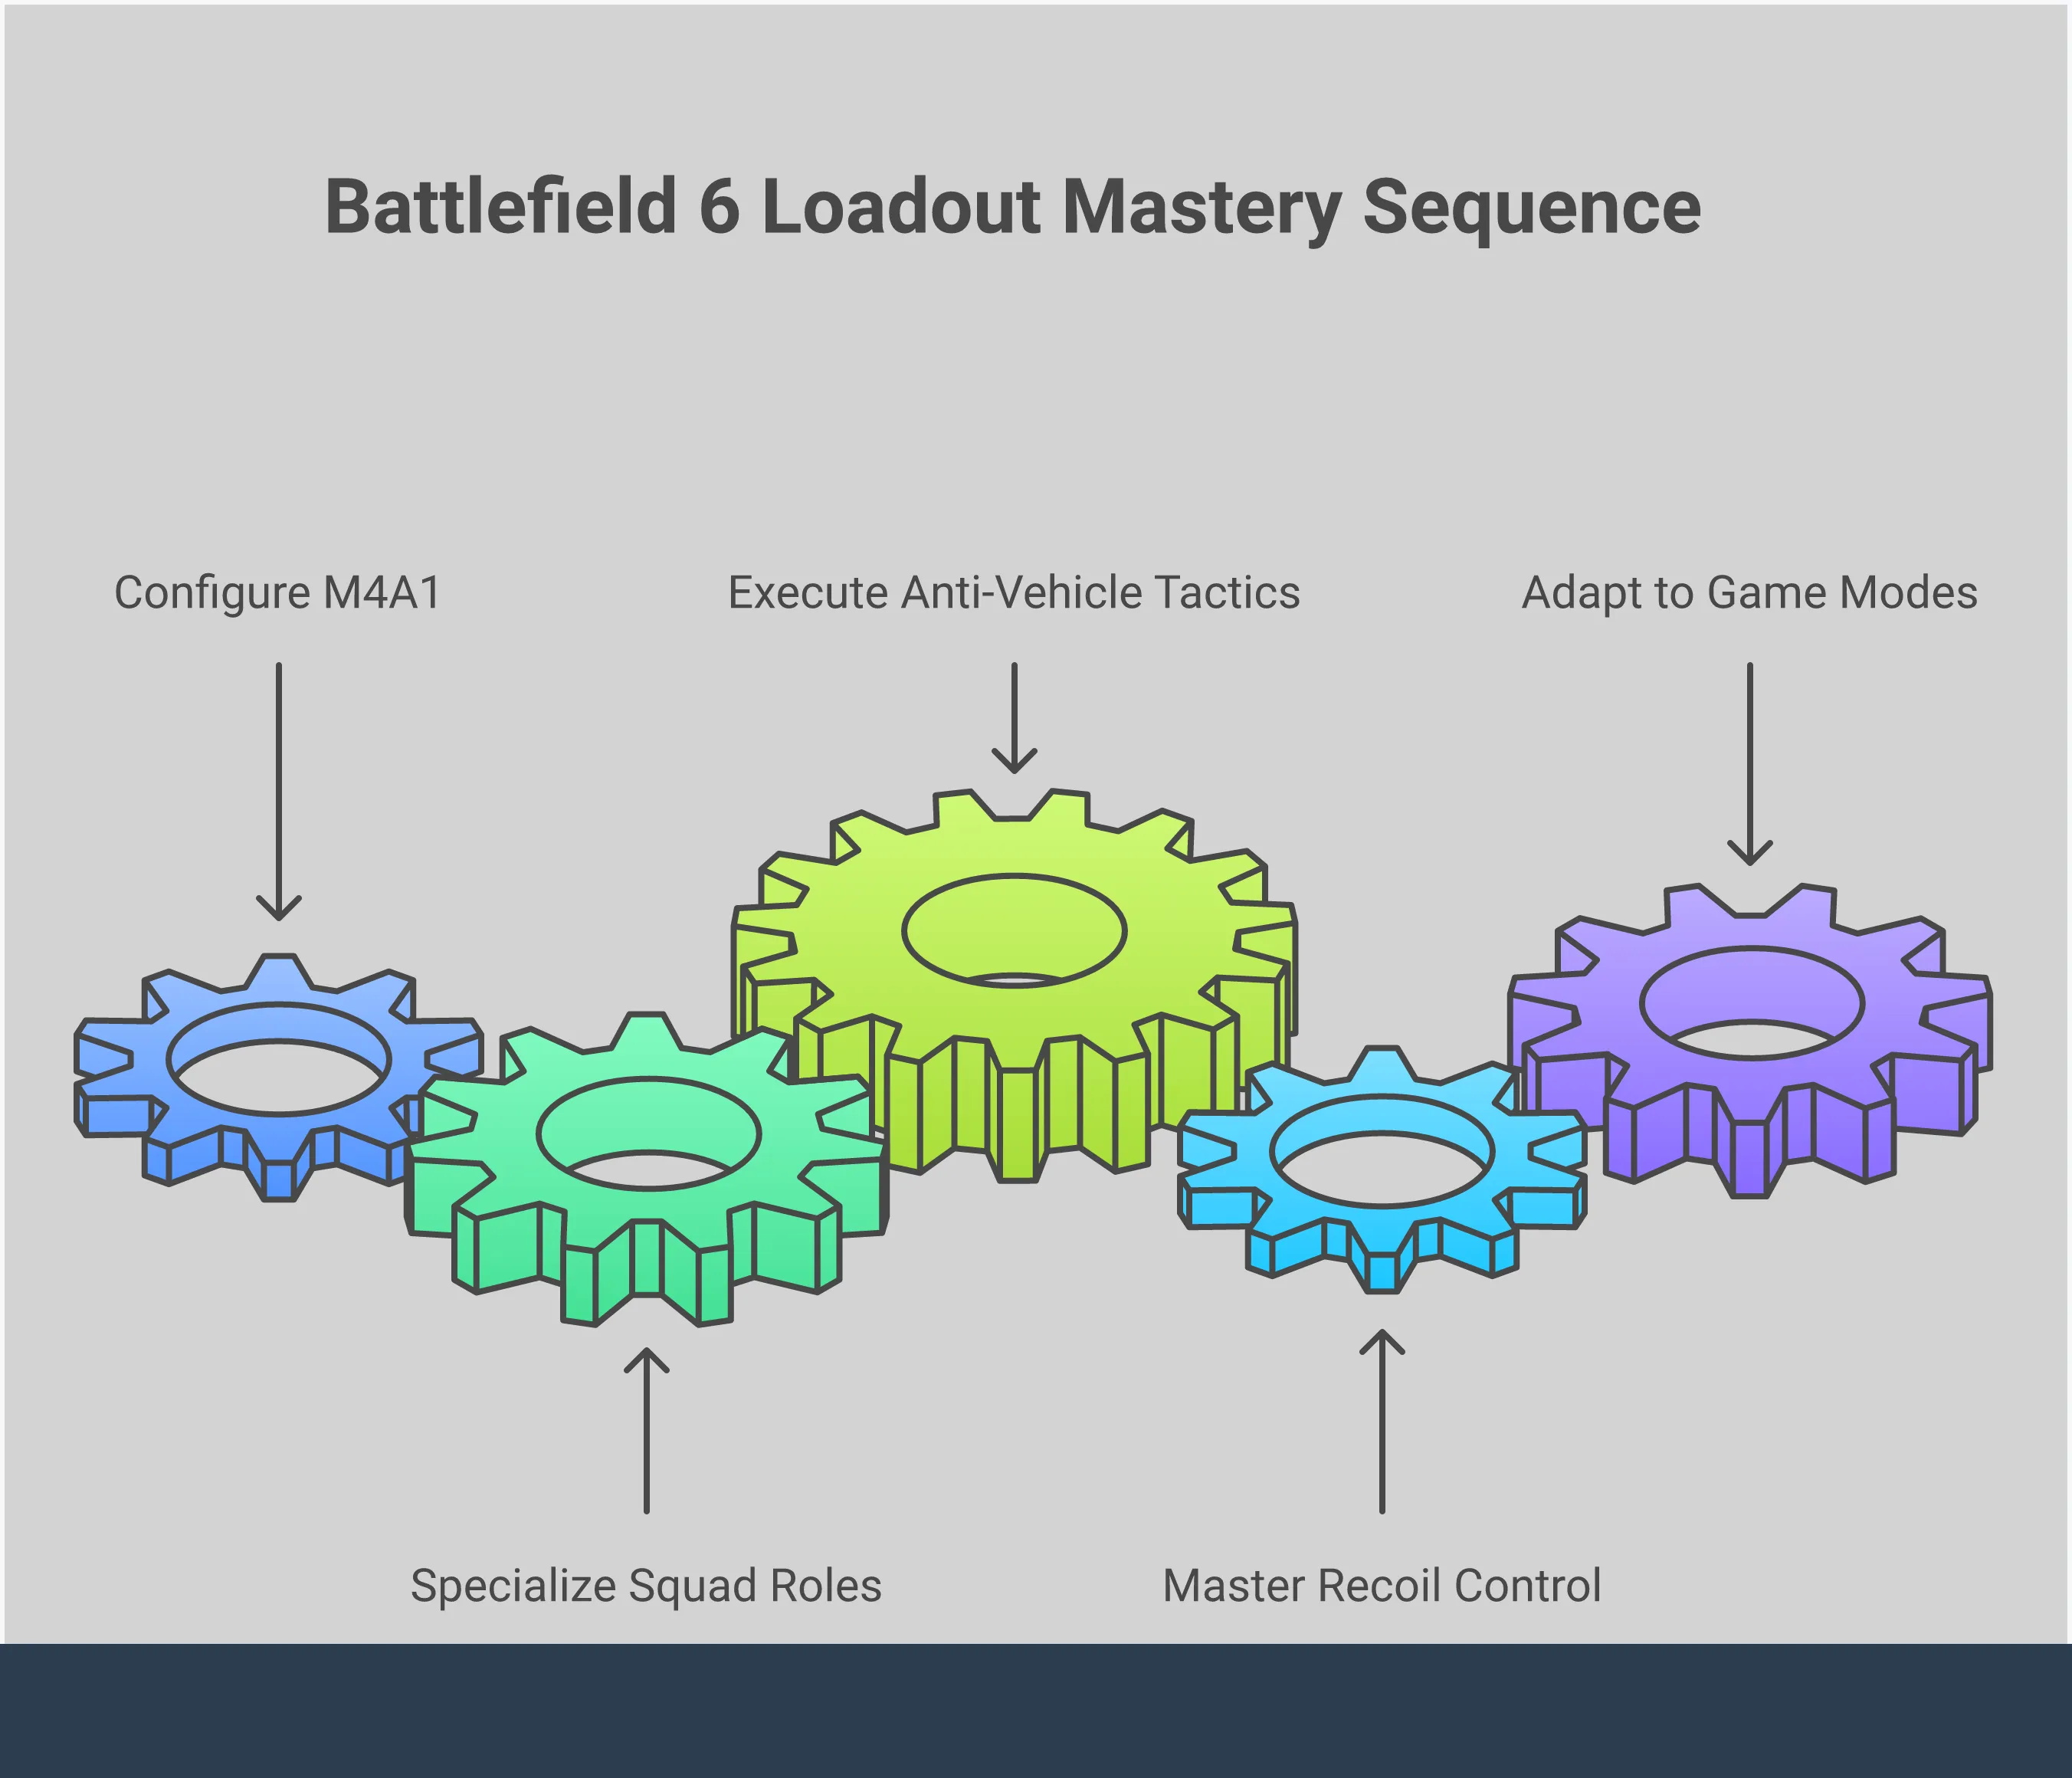
What Makes a Killer Battlefield 6 Loadout?
Let’s be clear: a great loadout isn’t just about choosing the weapon with the highest numbers. The best players aren’t just good at aiming; they carefully plan everything to achieve a specific goal. Consider your loadout as a complete system – your weapon, secondary weapon, equipment, and special abilities – all working together to make you effective in battle. It’s about combining everything so that it works better as a whole than if you just picked the best individual items.
Controlling weapon recoil is a key part of succeeding in Battlefield 6. The guns feel powerful, but you can’t just aim and fire accurately. To truly master them, you need to choose the right attachments to manage the kickback and match how you like to play. Staying up-to-date with the current ‘meta’ – which weapons and attachments are most effective – is important. It helps you create a strong loadout and also understand what your opponents are likely using, so you can build a setup to counter them.
Ultimately, the most effective gear setup works well with what your team is doing. While a team of only snipers might look impressive, they’ll likely lose the match. A great setup considers your job within the team. Are you leading the charge, providing healing, or focusing on destroying enemy vehicles? Choosing gear that helps you excel in your specific role makes you a more valuable player and strengthens the whole team. It’s the mix of your skill, smart gear choices, and teamwork that really makes a player stand out.
For the Aggressive Player: Top Assault Loadouts
If you love rushing into action and excel in intense combat, the Assault class is perfect for you. Your role is to lead the charge, break through enemy defenses, and create openings for your teammates. However, simply being aggressive isn’t enough – you need gear that matches your quick, dynamic playstyle. Choosing the right weapons, equipment, and modifications will transform you from a daring attacker into a truly dominant force.
Let’s look at some powerful weapon and equipment setups for players who prefer an aggressive, fast-paced playstyle. These builds focus on being adaptable, moving quickly, and hitting hard. They’re designed to help you excel in any situation – whether you’re fighting in close quarters or across open areas – and give you an edge over the competition, leading your team to win. We’ll cover the gear you need to stay ahead.
The Go-To M4A1 Build
If you’re looking for a dependable rifle that performs well in various combat scenarios, the M4A1 is an excellent choice. It’s a popular weapon for good reason, providing a great combination of power, precision, and ease of handling. Players who prefer an aggressive style should build it to quickly aim and win close-to-medium range fights. This means focusing on increasing bullet speed and making the weapon easier to control, leading to faster and more reliable kills.
Begin with a clear sight, like the Fusion Holo, for accurate aiming. Then, add a tactical compensator to maintain accuracy during rapid firing and an LWG Grip to control recoil. Finish by loading High-Power rounds to maximize the impact of each shot. This combination transforms the M4A1 into a highly precise weapon, giving you the edge in any engagement.
Choosing Your Secondary and Equipment
While your main weapon is key, skilled players understand that every piece of equipment is important. Your secondary weapon and gadgets can be lifesavers in tough situations and can turn a good move into a game-changer. If you run out of ammo with your main weapon, like an M4A1, you need a quick and reliable sidearm. The G57 is a great option, offering a fast firing rate to quickly finish off enemies who are already hurt.
If you’re an aggressive player, your gadgets should focus on breaking through defenses and causing disruption. C5 Explosives are essential for destroying vehicles or creating new routes. Smoke Grenades are also crucial – they provide cover when you’re moving across open spaces or need to help a teammate who’s under attack. Choosing the right gadgets and using them together effectively is what really sets top players apart.
How to Win in Close-Quarters Combat
If you play aggressively, you’ll often find yourself in close-range fights where quick reflexes are key. While the M4A1 is a good all-around weapon, a submachine gun (SMG) can really give you an advantage up close. If you want to excel in building fights, the PW5A3 is a great choice. It fires incredibly fast, does good damage, and with the right attachments, has almost no recoil, making it one of the best weapons for close-quarters combat.
If you really want a weapon that dominates in close quarters, here’s what I do: I slap on a short barrel to help me aim down sights super fast, then add a laser sight for perfect hip-fire. And honestly, an extended magazine is a must – it lets me take down a bunch of enemies without needing to reload mid-fight. With this setup, I can confidently rush into any room and handle whatever’s waiting for me.
Support Your Squad: Best Loadouts for Team Players
Being a support player means being the reliable teammate who keeps everyone else going. While others focus on attacking, you’re responsible for keeping the team alive, equipped, and in the fight. A skilled support player can really change a match by controlling how the battle unfolds and helping their team win. It’s not just about staying in the back—it’s about making smart, strategic plays that boost your whole team’s performance. Choosing gear that benefits the team is crucial, and just like building a great setup in Warzone, every item should have a clear purpose. Let’s explore how to become the foundation of a winning team.
Heavy Weapon Setups for Maximum Suppression
When using a heavy weapon, your main goal is to discourage the enemy from showing themselves. These weapons, usually light machine guns (LMGs), excel at keeping the enemy pinned down with continuous fire. This buys your team valuable time to move forward, go around the sides, or capture objectives. Choose LMGs that have large magazines and are relatively easy to control. You’re not aiming for pinpoint accuracy; you want to create an area the enemy avoids. Adding an extended magazine, a bipod for stability, and a low-zoom optic will make you incredibly effective at suppression.
Selecting the Right Medical and Utility Gadgets
The gadgets you choose are just as crucial as your weapon, especially if you’re playing a support role. Great support players know exactly what medical and utility items to bring. Your team will always need healing and ammo, so carrying Medical or Ammo Crates is usually the best option – they help everyone survive and fight longer. Don’t forget about other useful gadgets, either. Smoke Grenades can create cover for revives or pushes, and Claymores can guard your sides while you’re defending a point.
Strategies for Locking Down an Area
When defending a point, you’re the key to holding it down. To lock down an area, use a combination of constant fire and well-placed gadgets. Find a solid position with good cover that lets you see where the enemy is most likely to come from. Set up your bipod for stable fire and slow down their push. Place ammo and medical crates close by so your teammates can quickly resupply safely. Work with your squad to cover all angles and let each other know where enemies are. A well-coordinated support player can make a capture point extremely difficult to take, frustrating the enemy and helping your team win.
For the Vehicle Hunter: Top Engineer Loadouts
Few things are as satisfying as hitting a tank with a rocket and saving your team from enemy fire. As an Engineer, you’re the go-to person for dealing with armored vehicles – destroying the enemy’s while keeping your allies’ vehicles battle-ready. The most successful players aren’t necessarily the fastest shooters; they’re the ones who understand the game’s strategy and can use their tools effectively in any situation.
A skilled Engineer understands when to lead the charge with powerful weapons and when to support the team with repairs. If you enjoy directly influencing the battle with explosive firepower, this class is for you! Your equipment is your toolkit, and mastering when to use each tool is the key to becoming an exceptional Engineer. Let’s explore the best combinations to make you a terrifying opponent for enemy tanks and a valuable asset to your allies.
The Best Anti-Tank Weapon Combos
As an Engineer, one of your first important choices is selecting the best anti-tank weapon. Rocket launchers are great for quickly dealing a lot of damage, especially when surprising tanks up close. Guided missiles let you attack moving targets from farther away, but require you to stay exposed while aiming. The trick is to create different weapon setups depending on the map and what’s happening. If you’re in open areas with enemy helicopters, a guided missile is a good choice. But in close-quarters city fights, the sheer power of a rocket launcher is tough to overcome. Don’t forget to also equip a solid carbine or SMG to defend against nearby enemy soldiers.
Prioritizing Your Repairs
Everyone loves causing explosions, but a skilled Engineer knows that the repair tool is just as important. Keeping your team’s tanks and transports running smoothly is as vital as destroying enemy vehicles. A quick repair at the right moment can completely change a battle, letting your armored teammates capture objectives or get out of trouble. Just remember to repair safely: use the vehicle for cover, tell your driver you’re working on it so they don’t move, and always watch your surroundings. Being able to keep your team’s vehicles in fighting shape is key to a well-rounded squad and makes you a truly valuable player.
How to Counter Enemy Vehicles
Taking out a tank doesn’t always mean charging straight at it. Skilled players act like hunters, carefully planning and waiting for the right moment. Try to move around the enemy tank and hit its weaker sides or back for the most damage. Use the surroundings to your benefit – place mines where tanks are likely to drive, or set up C4 charges around corners. Working with your team is key; have them draw the tank’s fire while you aim for a clear shot. Mastering anti-vehicle weapons will help you eliminate any threat and create opportunities for your team to move forward.
Rule from Afar: Best Recon Loadouts
Being a successful Recon player isn’t just about getting long-range kills. It’s about controlling the game by providing key information, helping your team spot enemies, and taking out important targets before they can cause trouble. This class requires patience, knowing the map well, and thinking strategically. The most effective Recon players don’t necessarily have the fastest reflexes; they know how to use their abilities to give their team a significant edge.
Whether you like playing a classic sniper or a faster-moving marksman, the most important thing is to create a setup that helps your team and lets you fight well from afar. This means choosing gadgets that provide useful information and keep you ahead of the enemy, alongside your main weapon.
Perfecting Your Sniper Rifle Build
Being a great sniper isn’t just about aiming well. Top players master the game’s current strategies and create specific weapon setups for different maps. For very long-distance maps, a powerful bolt-action rifle with a strong scope and bipod is ideal. The bipod helps keep your aim steady for those tough, long-range shots. On maps where fights happen at medium distances, a DMR is a good choice. It fires faster, letting you help your team attack and defend yourself up close. Also, always use a suppressor to stay hidden from enemies on the map when you shoot.
Using Motion Sensors and Spotting Gear Effectively
What really sets apart a skilled Recon player is how they use their equipment. A Motion Sensor, placed strategically, can watch your sides and warn you if enemies are trying to get close. This information isn’t just helpful for you – it benefits your whole team. Many players have success combining a DMR with a Motion Sensor, letting them move quickly while constantly tracking enemy locations. This transforms you from a player working alone into a key source of information for your squad, making every attack safer and more effective. Never forget how powerful it is to know where the enemy is before they know you’re there.
Tactics for Moving Undetected
Your most important goal is to stay alive. A sniper who’s been eliminated can’t provide support or gather information. That’s why it’s crucial to constantly move after taking a few shots – even a small change of position can help. This ‘shoot and scoot’ method prevents enemies from figuring out where you are. Using a silencer is also key to remaining undetected. To become a truly skilled player, learn to master each specialist in Battlefield 6 and understand their unique skills. Certain specialists have abilities that make it easier and safer to change positions, letting you keep the pressure on enemies without getting stuck.
How Do You Balance Fun with a Competitive Edge?
Honestly, winning is great, but constantly trying to use the ‘best’ strategies can actually be stressful and take the fun out of the game. What looks good on paper doesn’t always feel right when you’re playing, and that can even make you perform worse. The trick is to find a balance – a setup that lets you play effectively and enjoy yourself. It’s all about creating a style that feels comfortable and natural for you, letting you truly own the game.
It’s true that top players usually know the best strategies and customize their gear for every situation, but you don’t need to copy them to win. Sometimes, the most rewarding moments come from using unexpected weapons or combining gadgets in creative ways. Focus on building a loadout that helps your team and lets you enjoy the game. When you’re comfortable and confident with your gear, you’ll play more naturally and often perform better than if you were forcing yourself to use a ‘superior’ weapon you don’t like.
Playing for Enjoyment, Not Just the Meta
It’s tempting to copy what professional players use, but remember that Battlefield lets you experiment and create your own style. The best weapon isn’t helpful if you don’t enjoy how it plays. Try out different guns, equipment, and modifications – you might find a unique combination that works really well for you. Perhaps you excel with a sniper rifle while others use submachine guns. Focusing on what you like and are good at will usually improve your game and make it more fun. Don’t hesitate to try something different and discover what truly makes the game enjoyable for you.
Adapting Loadouts to Your Skill Level
What works well for an experienced Battlefield player might be really difficult for someone new. Many powerful weapons have a lot of recoil, and some players find the weapons a bit hard to control. If you’re still learning how to manage recoil, focus on attachments that make your weapons more stable, even if it means sacrificing some damage. It’s perfectly fine to build a setup that’s easier to use! As you get better, you can try more challenging weapon combinations. Ultimately, you want to find weapons that suit your current skill level and help you improve over time.
Finding a Playstyle That Works for You
Do you like to charge into battle, or do you prefer to play more cautiously from the back lines? How you play should be the biggest influence on the weapons and attachments you choose. If you’re always moving quickly, avoid attachments that slow down how fast you can aim. But if you usually stay in one spot, speed isn’t as important. Think about your natural playstyle, and then find weapon setups that help you play even better. Your loadout should match how you think and act during a match, so make sure everything feels right for you.
Which Loadout Should You Pick for Each Game Mode?
What works well in one game might not work in another. This is because each game mode requires a different approach. A powerful setup for a large, chaotic mode like Conquest won’t be as effective in a smaller, more focused mode like Team Deathmatch. To consistently play your best, you need to adjust your equipment to fit the specific goal of each game.
Successful Battlefield players don’t just jump into the action – they take a moment to plan. Before the round starts, consider the map layout, what you’re trying to achieve, and what your team needs. Will you be attacking or defending? Is the match about controlling large areas with vehicles and flags, or is it a fast-paced fight to get the most kills? Knowing the answers to these questions will help you pick the best weapons and equipment. Let’s look at what works well in Battlefield 6’s main game modes so you can create a loadout that gives you an edge.
The Best Builds for Conquest
I love the Conquest mode because it’s just massive battles where you’re fighting over objectives all across the map. You really need to be able to adapt to anything, and the best teams always have a good mix of players. What I’ve found is that having one person focus on aggressively pushing forward as Assault, another taking out vehicles as Engineer, Support keeping everyone supplied with ammo and laying down fire, and Recon scouting ahead is a winning combo. But if I’m playing by myself, I usually go with an Assault class. I equip a solid, all-around assault rifle and try to be the one leading the charge and capturing those flags – it feels like the most effective way to contribute when you’re on your own.
Optimized Setups for Breakthrough
Okay, so Breakthrough is basically a tug-of-war between attackers and defenders. Honestly, it’s not always about who has the best aim. It’s more about building the right loadout and playing as a team. If I’m attacking, I need to be ready to push hard, so I’ll load up with smokes to give us cover and a fast-firing SMG or shotgun to clear out those objectives quickly. But when I’m defending, it’s all about holding strong. I like to use an LMG to keep the enemy pinned down, set up claymores to watch our flanks, and always have a repair tool handy to keep our defenses up. That’s how I become a real anchor for my team!
Go-To Configurations for Team Deathmatch
Okay, so when I jump into Team Deathmatch, I pretty much ignore everything except getting better at shooting. It’s all about raw gun skill and reacting quickly. Honestly, the guns in Battlefield 6 can be a little unpredictable, so I always load up on attachments that help me keep my shots on target. I usually go with a fast-firing assault rifle or SMG and make sure I’ve got attachments to cut down on recoil and let me aim down sights quickly. Since I’m not worried about capturing flags or messing with vehicles, I pick gadgets that keep me alive and in the action – things like med kits or extra ammo. It’s the same idea as building a great loadout in Warzone, really. Winning those one-on-one gunfights is everything!
How Do You Master Attachments for Better Control?
In Battlefield 6, your starting weapon is just the foundation. Attachments are what truly shape it into something special. Instead of searching for the absolute ‘best’ combination, focus on learning how each attachment changes the way your weapon performs. The aim is to build a gun that feels completely natural to use, whether you’re accurately shooting from a distance or quickly taking down enemies in close quarters.
The best Warzone players aren’t necessarily the quickest to react; they excel because they understand the current game dynamics and create custom weapon setups for different scenarios. By carefully adjusting three main aspects – how much a gun kicks (recoil), how much damage it deals, and the type of sights used – you can perfect any weapon to match your preferred playstyle and the map’s challenges. This level of detail gives you a real advantage in gunfights. Let’s explore how to optimize each of these features to create a truly powerful weapon.
Configurations for Minimum Recoil
Some guns in Battlefield 6 are tough to control at first. Getting them stable is key to hitting your targets consistently. The right attachments can really improve a weapon’s handling, turning a shaky gun into a precise one. When a gun fires quickly, does a lot of damage, and barely kicks, it quickly becomes a top-tier choice.
To help control your weapon, use attachments like compensators and muzzle brakes to lessen recoil – both when the gun jumps up and moves side to side. Underbarrel grips, whether vertical or angled, are also important for keeping your weapon steady while shooting. Don’t overlook the stock, as many are made to help absorb recoil. Try different combinations of these attachments at the firing range to find what works best for you. You want a setup that lets you maintain a tight grouping of shots on your target while holding down the trigger.
Optimizing for Bullet Velocity and Damage
After you’ve mastered controlling your weapon’s kick, the next step is to make each bullet count. Improving your bullet speed and effective range will make your shots more powerful and accurate, especially at longer distances. Faster bullets mean you’ll need to aim less ahead of moving targets and experience less bullet drop, making long-range shots easier to hit. Ultimately, this setup is about getting the most damage out of every shot for quicker takedowns.
Focus on finding barrels that make your bullets travel faster and hit harder over a greater distance. Also, different types of ammo can greatly increase bullet speed or deal extra damage to specific areas of an enemy. While these upgrades might make your weapon a little harder to control, the added power is usually worth it. A finely tuned weapon not only feels better to use, but it also helps you eliminate opponents faster and more reliably, which is crucial when the action heats up.
Choosing the Right Optic for Any Range
Your sights are how you see the battlefield, so picking the right one is key to hitting your targets. If you’re overwhelmed by all the attachments in Battlefield 6, starting with your sights is a good place to begin. The best choice depends on how close or far away you usually fight, and what feels most comfortable to you. There’s no single best option – it’s all about finding what works best for your playstyle.
When you’re fighting up close, a basic red dot sight that doesn’t block your view works best. For medium-range battles, a holographic sight or a 2x scope can give you a clearer picture without limiting how much you can see around you. If you’re sniping from far away, a scope that lets you change the zoom level is essential. The most important thing is to choose a sight that fits your weapon and how you like to play, so you have a setup that feels good and helps you win.
What Are the Best Strategies for Squad Coordination?
Battlefield is a team game, and going it alone usually leads to defeat. While quick reflexes are helpful, the most successful players aren’t necessarily the best shooters – they’re the ones who excel at teamwork. Truly effective squads operate as a single, coordinated unit, adapting their equipment to the situation, sharing information, and strategically controlling the battlefield. A well-organized squad can consistently outperform a group of individually skilled players, demonstrating that smart strategy is often more important than just fast reactions.
As a player, I’ve learned that truly great squad play isn’t just about being near each other – it’s a whole system! It comes down to three main things: making sure everyone has a good mix of gear, knowing exactly what role each person has, and moving around the map as a unit with a clear goal. When my squad gets those pieces right – the right equipment, a solid plan, and smart positioning – we feel unstoppable. That’s when a messy fight turns into something we control, and a likely loss suddenly becomes a win. Honestly, nailing these three things is the key to not just winning, but really owning every match. I’m excited to share exactly how to get your squad working like a well-oiled machine.
How to Balance Your Team’s Loadouts
Think of choosing equipment for your team like drafting players for a fantasy sports league – you need a well-rounded group. While a team of only snipers might be good at long-range combat, they’d struggle against tanks or close-quarters attacks. A balanced squad means you’ll be prepared for any situation.
Before each game, coordinate with your teammates to decide who will bring what equipment. Make sure you have a good balance of weapons and tools – some for fighting soldiers, some for destroying vehicles, ways to heal and restock supplies, and tools for scouting the enemy. Being prepared like this prevents surprises. If everyone focuses on their specific job – like one person taking out tanks and another healing – the whole team will work better and be ready for any challenge.
Communicating and Assigning Roles
A successful team relies on everyone knowing their specific role. The best setup usually includes one player focused on aggressive, close-quarters combat, one on vehicles, one on providing supplies and healing, and one on scouting and long-distance attacks. When roles are clear, players avoid stepping on each other’s toes and can work together seamlessly, ensuring the team pushes forward when needed and doesn’t waste time with conflicting actions.
Keep talking to your teammates using your microphone or the in-game ping system. Share important information like where enemies are, warn your Engineer about incoming tanks, or request a med pack from your Support player. When everyone has a specific role, your squad works together smoothly and keeps the enemy guessing.
Mastering Tactical Positioning as a Squad
A successful team doesn’t just rush around aimlessly. It’s about moving strategically and using the surroundings to win. Before the action begins, everyone should know the map well and identify important spots. For example, Recon players should head for high ground, Support players should cover chokepoints with their machine guns, and Assault players should plan routes to flank the enemy.
When entering a dangerous area, work as a team to cover each other. Don’t all go through the same opening – instead, have some players provide covering fire while others move in from a different angle. This divides the enemy’s focus and gives your team a significant advantage in a fight. It’s the difference between rushing in unprepared and launching a well-planned attack.
Gaining the Upper Hand: Advanced Tactics
While having a strong setup is important, winning really depends on your ability to react quickly and make smart decisions during a match. Top players aren’t just good at aiming; they’re skilled strategists who can understand what’s happening and adjust their tactics instantly. It’s not just about your weapon—it’s about understanding how the game unfolds, predicting what your opponents will do, and knowing when to change your approach. That’s how you go from simply playing to truly controlling a fight. Often, the difference between winning and losing comes down to outsmarting your opponents, not just outgunning them.
How to Counter Popular Loadouts
It’s easy to see why certain weapons and tools become popular – they simply work well. However, every dominant strategy has a weakness. The best players aren’t just aware of what everyone else is using, but they also create specific setups to counter it. For example, if the other team is full of snipers, don’t keep running into their sights. Instead, choose a class with smoke grenades to help your team move safely, and equip a fast-firing weapon like an SMG or assault rifle for close-quarters combat. If tanks are a problem, switch to an Engineer with explosives. Being able to adapt your equipment is always more effective than sticking to one unchanging setup.
Adapting to In-Game Changes on the Fly
Each Battlefield match changes as it goes on. What works well at the beginning might not work later, so you need to be flexible. Pay attention to how the battle is unfolding and adjust your weapons and tactics accordingly. If you’re getting beaten in long-range fights with a close-range weapon like an SMG, switch to a sniper or marksman rifle. If rockets aren’t effective against groups of enemies, grab a shotgun or LMG instead. Battlefield weapons can be difficult to control, so changing weapons might also mean changing how you play. If your weapon has a lot of recoil, avoid spraying bullets from far away – try short, controlled bursts or get closer to the action. Don’t hesitate to respawn and choose a weapon that’s better suited for the current situation.
Overcoming Common Competitive Hurdles
It’s common to get stuck in tough spots, like being trapped at the start or blocked in a narrow area. Usually, the answer isn’t about one person being a hero—it’s about working together as a team. While one player can’t solve everything, you can greatly improve your chances by choosing equipment that works well with your teammates’. Think about how your attachments affect your gameplay; for example, too many grips might make aiming less accurate when you’re on the move. Customize your gear to fit how you play, not just what you read online. When you combine good teamwork with personalized gear, you and your squad can overcome any challenge your opponents create.
Frequently Asked Questions
If you’re new to Battlefield, a great way to start is with the M4A1 assault rifle. It’s dependable and works well in almost any combat situation, letting you learn the maps and how the game plays. Also, equip a Medical Crate – being able to heal yourself and your team is always helpful! This combination gives you a good balance of firepower and support for your squad.
It’s tempting to just copy popular weapon setups you find online, and they can be helpful for understanding what’s strong right now. However, don’t feel like you have to use them! The most important thing is finding weapons and attachments that you enjoy and that feel comfortable for you. You’ll probably play better with something you’re confident with, even if it’s not considered ‘top tier,’ than with a powerful weapon you don’t like. Think of popular setups as suggestions, not strict rules.
Should you prioritize your main weapon or your gadgets? It’s best to see them as working together. A strong gun won’t save you from a tank, and a rocket launcher is no good if you can’t handle soldiers on foot. Top players pick gadgets that make up for their weapon’s shortcomings or help them get into a good fighting position. The best setups have a clear purpose for every item you choose.
How often should you switch your gear during a game? You should change it whenever the situation calls for it. Games are always changing, and what worked well at the beginning might not be useful later on. If you’re consistently losing fights or can’t deal with what the enemy is doing, don’t be afraid to switch to a different setup. Think of your different gear options as tools – choose the right one for the job.
It’s frustrating when your teammates don’t use microphones, but you can still work well together! Focus on watching what your squad is doing and adapting to their playstyles. If you notice your team is full of aggressive players, choose a role like Support or Engineer to provide essential backup. Use the in-game ping system to point out enemies and important locations, and always stay close to your team to offer support and use your equipment effectively.
Read More
- United Airlines can now kick passengers off flights and ban them for not using headphones
- Crimson Desert: Disconnected Truth Puzzle Guide
- All 9 Coalition Heroes In Invincible Season 4 & Their Powers
- The Boys Season 5 Spoilers: Every Major Character Death If the Show Follows the Comics
- Mewgenics vinyl limited editions now available to pre-order
- Invincible Season 4 Episode 6 Release Date, Time, Where to Watch
- Grok’s ‘Ask’ feature no longer free as X moves it behind paywall
- Assassin’s Creed Shadows will get upgraded PSSR support on PS5 Pro with Title Update 1.1.9 launching April 7
- Grey’s Anatomy Season 23 Confirmed for 2026-2027 Broadcast Season
- Nintendo Officially Rewrites Princess Peach After 41 Years
2025-11-13 14:37